Launching Cloudbreak on GCP
Before launching Cloudbreak on Google Cloud, review and meet the prerequisites. Next, import Cloudbreak image, launch a VM, SSH to the VM, and start Cloudbreak. Once Cloudbreak is running, log in to the Cloudbreak UI and create a Cloudbreak credential.
Meet the Prerequisites
Before launching Cloudbreak on GCP, you must meet the following prerequisites.
GCP Account
In order to launch Cloudbreak on GCP, you must log in to your GCP account. If you don't have an account, you can create one at https://console.cloud.google.com.
Once you log in to your GCP account, you must either create a project or use an existing project.
Service Account
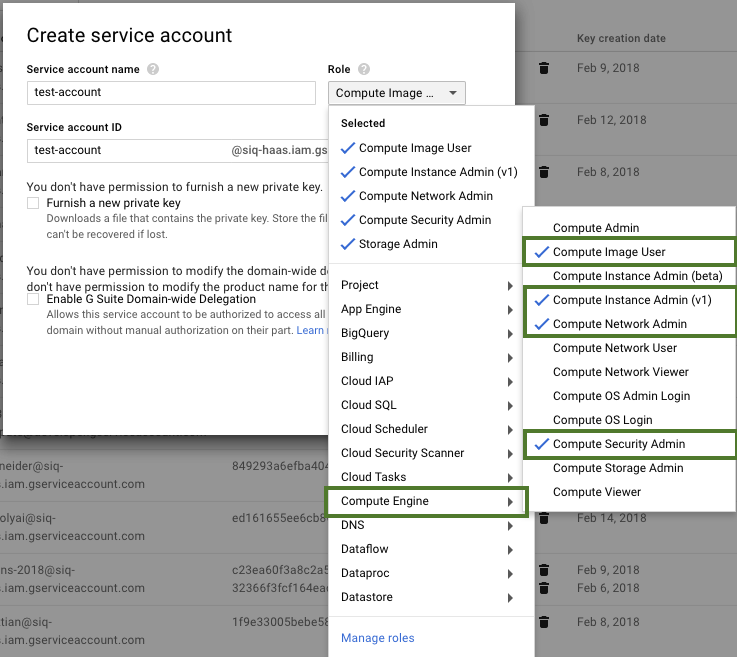
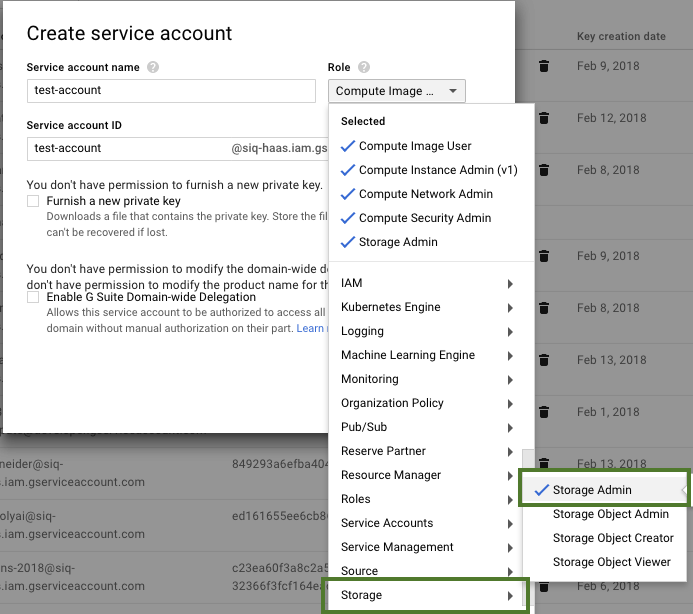
In order to launch clusters on GCP via Cloudbreak, you must have a Service Account that Cloudbreak can use to create resources. In addition, you must also have a P12 key associated with the account. The service account must have the following roles are enabled:
- Compute Engine > Compute Image User
- Compute Engine > Compute Instance Admin (v1)
- Compute Engine > Compute Network Admin
- Compute Engine > Compute Security Admin
- Storage > Storage Admin
A user with an "Owner" role can assign roles to new and existing service accounts from IAM & Admin > IAM, as presented in the following screenshots:
For more information on creating a Service Account and generating a P12 key, refer to GCP documentation.
Related Links
Service Account Credentials (External)
SSH Key Pair
Generate a new SSH key pair or use an existing SSH key pair. You will be required to provide it when launching the VM.
Region and Zone
Decide in which region and zone you would like to launch Cloudbreak. You can launch Cloudbreak and provision your clusters in all regions supported by GCP.
Clusters created via Cloudbreak can be in the same or different region as Cloudbreak; when you launch a cluster, you select the region in which to launch it.
Related Links
Regions and Zones (External)
VPC Network
When launching Cloudbreak, you will be required to select an existing network in which Cloudbreak can be placed. The following ports must be open on the security group: 22 (for access via SSH), 80 (for access via HTTP), and 443 (for access via HTTPS). You may use the default network as long as the aforementioned ports are open.
You can manage networks under Networking > VPC Networks. To edit ports, click on the network name and then click on Add firewall rules.
Launch the VM
Steps
-
Log in to Google Cloud Platform.
-
Open the Google Cloud Shell by clicking on the
 icon in the top-right corner:
 -
Import the Cloudbreak deployer image by executing the following command:
gcloud compute images create cloudbreak-deployer-250-2018-04-03 --source-uri gs://sequenceiqimage/cloudbreak-deployer-250-2018-04-03.tar.gz
-
In the GCP UI, from the Products and services menu, select Compute Engine > Images.
-
In the search bar, type the name of the Cloudbreak deployer image that you imported earlier.
-
Select the image and then click Create Instance:
-
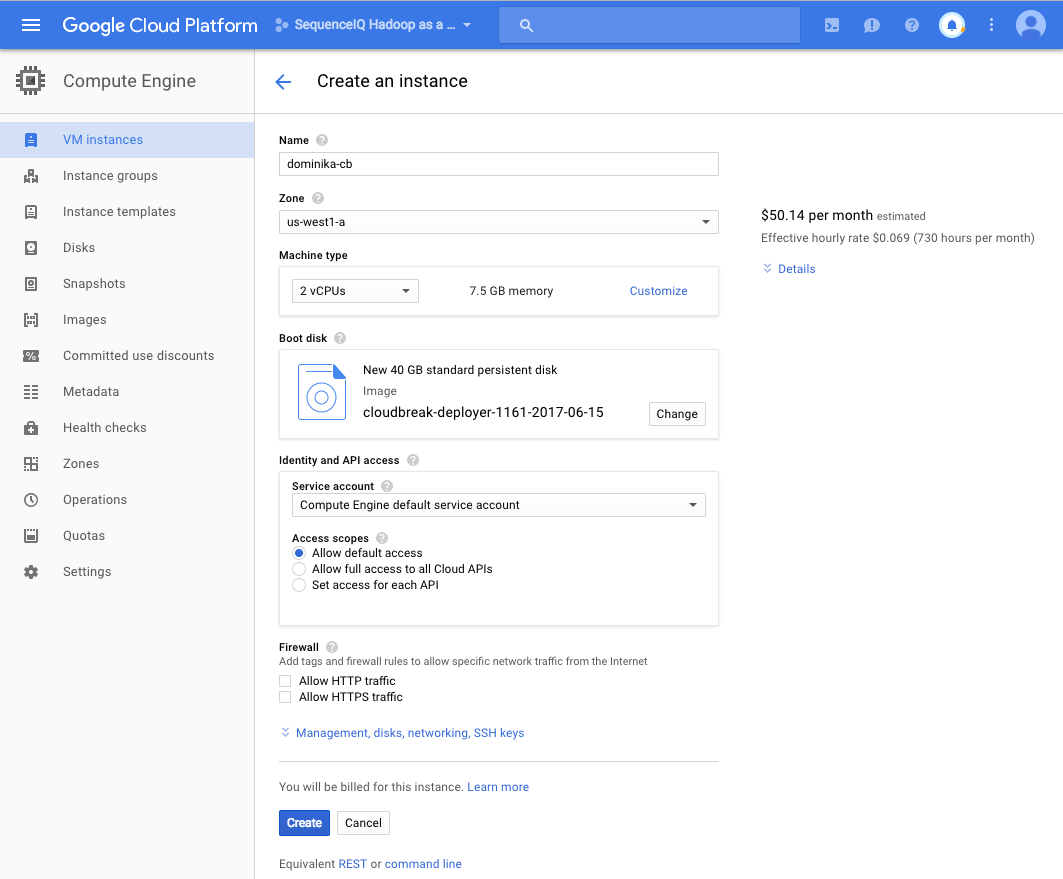
You will be redirected to VM instances > Create an instance form. Provide the following parameters for your VM:
Parameter Description Name Enter a name for the VM. Zone Select the zone in which to launch the VM. Machine type The minimum instance type suitable for Cloudbreak is n1-standard-4. The minimum requirements are 16GB RAM, 40GB disk, 4 cores. Boot disk Verify that the Cloudbreak deployer disk which you imported earlier is pre-selected. -
Click on Management, disks, networking, SSH keys to view the options.
-
Under Networking > Network interfaces, select the network in which you want to launch Cloudbreak.
-
Under SSH Keys, check Block project-wise SSH keys and paste your public SSH key.
-
Click Create.
SSH to the VM
Now that your VM is ready, access it via SSH:
- Use a private key matching the public key that you added to your project.
- The SSH user is called "cloudbreak".
- You can obtain the VM's IP address from Compute Engine > VM Instances, the External IP column.
On Mac OS X, you can SSH to the VM by running the following from the Terminal app: ssh -i "your-private-key.pem" cloudbreak@instance_IP where "your-private-key.pem" points to the location of your private key and "instance_IP" is the public IP address of the VM.
On Windows, you can use PuTTy.
Launch Cloudbreak Deployer
After accessing the VM via SSH, launch Cloudbreak deployer using the following steps.
Steps
-
Navigate to the cloudbreak-deployment directory:
cd /var/lib/cloudbreak-deployment/
This directory contains configuration files and the supporting binaries for Cloudbreak deployer.
-
Initialize your profile by creating a new file called
Profileand adding the following content:export UAA_DEFAULT_SECRET=MY-SECRET export UAA_DEFAULT_USER_PW=MY-PASSWORD export UAA_DEFAULT_USER_EMAIL=MY-EMAIL
For example:
export UAA_DEFAULT_SECRET=MySecret123
export UAA_DEFAULT_USER_PW=MySecurePassword123
export UAA_DEFAULT_USER_EMAIL=dbialek@hortonworks.com
You will need to provide the email and password when logging in to the Cloudbreak web UI and when using the Cloudbreak CLI. The secret will be used by Cloudbreak for authentication.
-
Start the Cloudbreak application by using the following command:
cbd start
This will start the Docker containers and initialize the application. The first time you start the Cloudbreak app, this also downloads of all the necessary docker images.
Once the
cbd starthas finished, it returns the "Uluwatu (Cloudbreak UI) url" which you can later paste in your browser and log in to Cloudbreak web UI.To check Cloudbreak deployer version and health, use:
cbd doctor
If you need to check Cloudbreak Application logs, use:
cbd logs cloudbreak
You should see a message like this in the log:
Started CloudbreakApplication in 36.823 seconds.Cloudbreak takes less than a minute to start. If you try to access the Cloudbreak UI before Cloudbreak started, you will get a "Bad Gateway" error or "Cannot connect to Cloudbreak" error.
Access Cloudbreak UI
Log in to the Cloudbreak UI using the following steps.
Steps
-
You can log into the Cloudbreak application at
https://IP_Address. For examplehttps://34.212.141.253. You can obtain the VM's IP address from Compute Engine > VM Instances, the External IP column. -
Confirm the security exception to proceed to the Cloudbreak web UI.
The first time you access Cloudbreak UI, Cloudbreak will automatically generate a self-signed certificate, due to which your browser will warn you about an untrusted connection and will ask you to confirm a security exception.
-
The login page is displayed:
-
Log in to the Cloudbreak web UI using the credential that you configured in your
Profilefile when launching Cloudbreak deployer:- The username is the
UAA_DEFAULT_USER_EMAIL - The password is the
UAA_DEFAULT_USER_PW
- The username is the
-
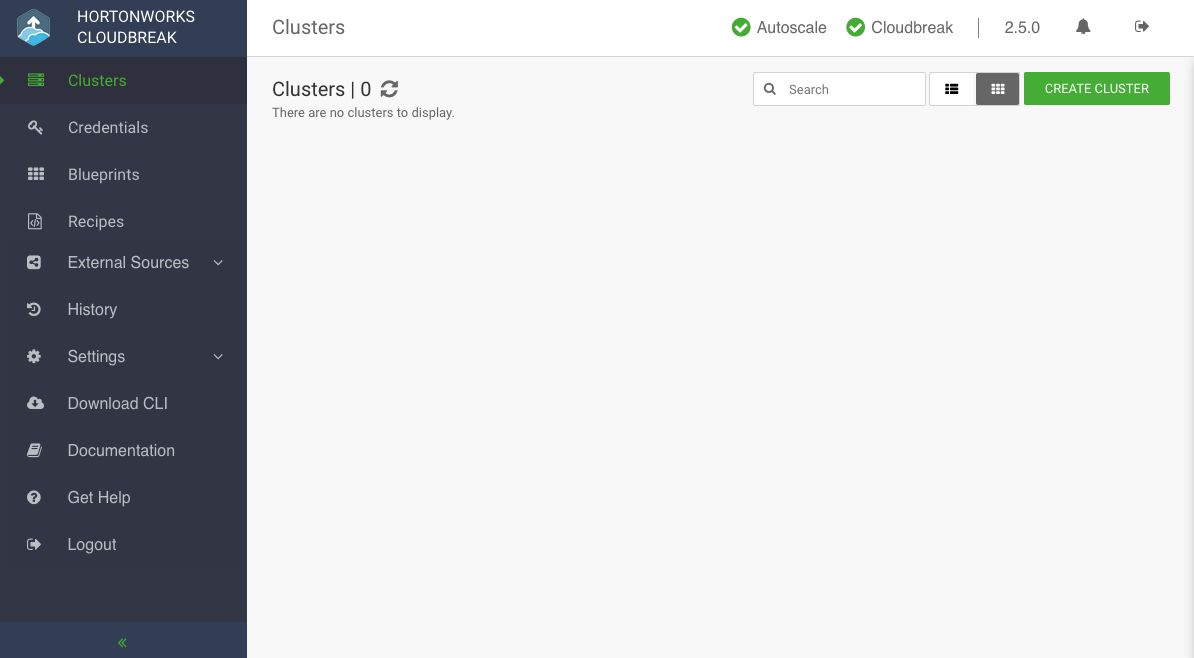
Upon a successful login, you are redirected to the dashboard:
Create Cloudbreak Credential
Cloudbreak works by connecting your GCP account through this credential, and then uses it to create resources on your behalf. Before you can start provisioning cluster using Cloudbreak, you must create a Cloudbreak credential.
Steps
-
In the Cloudbreak web UI, select Credentials from the navigation pane.
-
Click Create Credential.
-
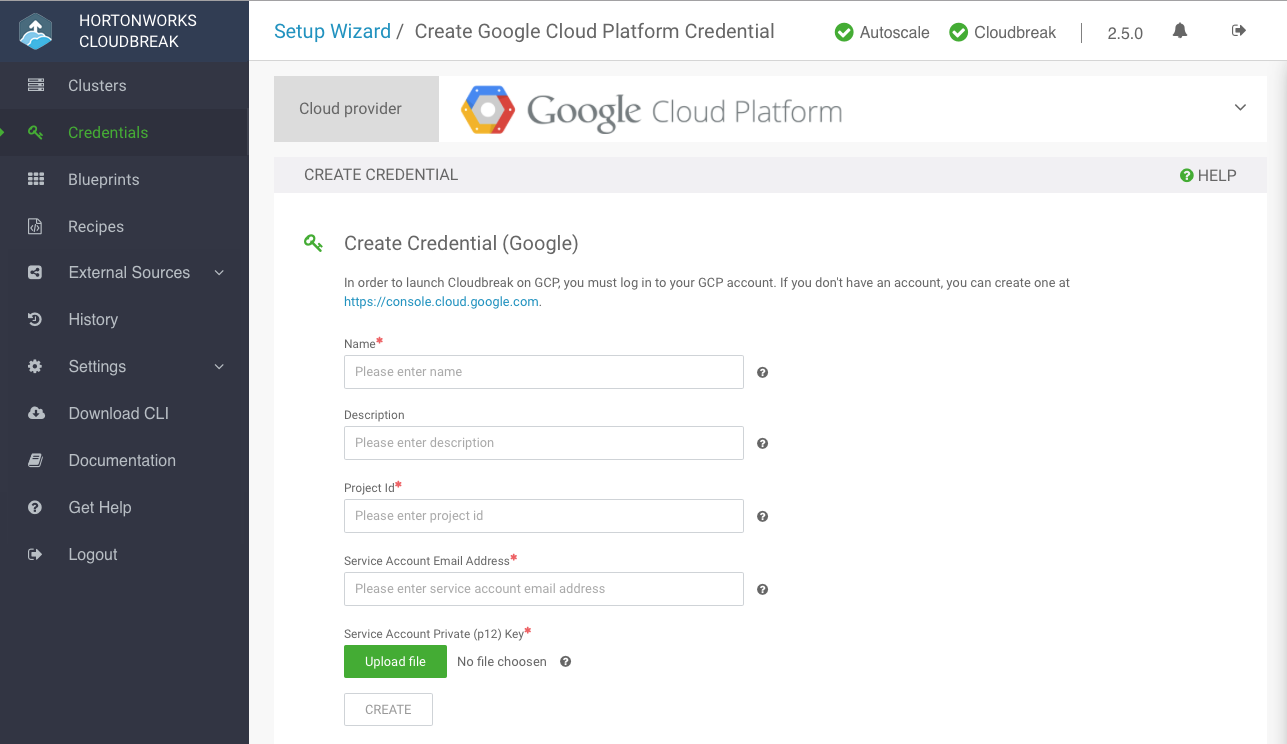
Under Cloud provider, select "Google Cloud Platform":
-
Provide the following information:
Parameter Description Name Enter a name for your credential. Description (Optional) Enter a description. Project Id Enter the project ID. You can obtain it from your GCP account by clicking on the name of your project at the top of the page and copying the ID. Service Account Email Address "Service account ID" value for your service account created in prerequisites. You can find it on GCP at IAM & Admin > Service accounts. Service Account Private (p12) Key Upload the P12 key that you created in the prerequisites when creating a service account. -
Click Create.
-
Your credential should now be displayed in the Credentials pane.
Congratulations! You have successfully launched Cloudbreak and created a Cloudbreak credential. Now you can use Cloudbreak to create clusters.
