Setting up a data lake
This feature is technical preview.
A data lake provides a way for you to centrally apply and enforce authentication, authorization, and audit policies across multiple ephemeral workload clusters. "Attaching" your workload cluster to the data lake instance allows the attached cluster workloads to access data and run in the security context provided by the data lake.
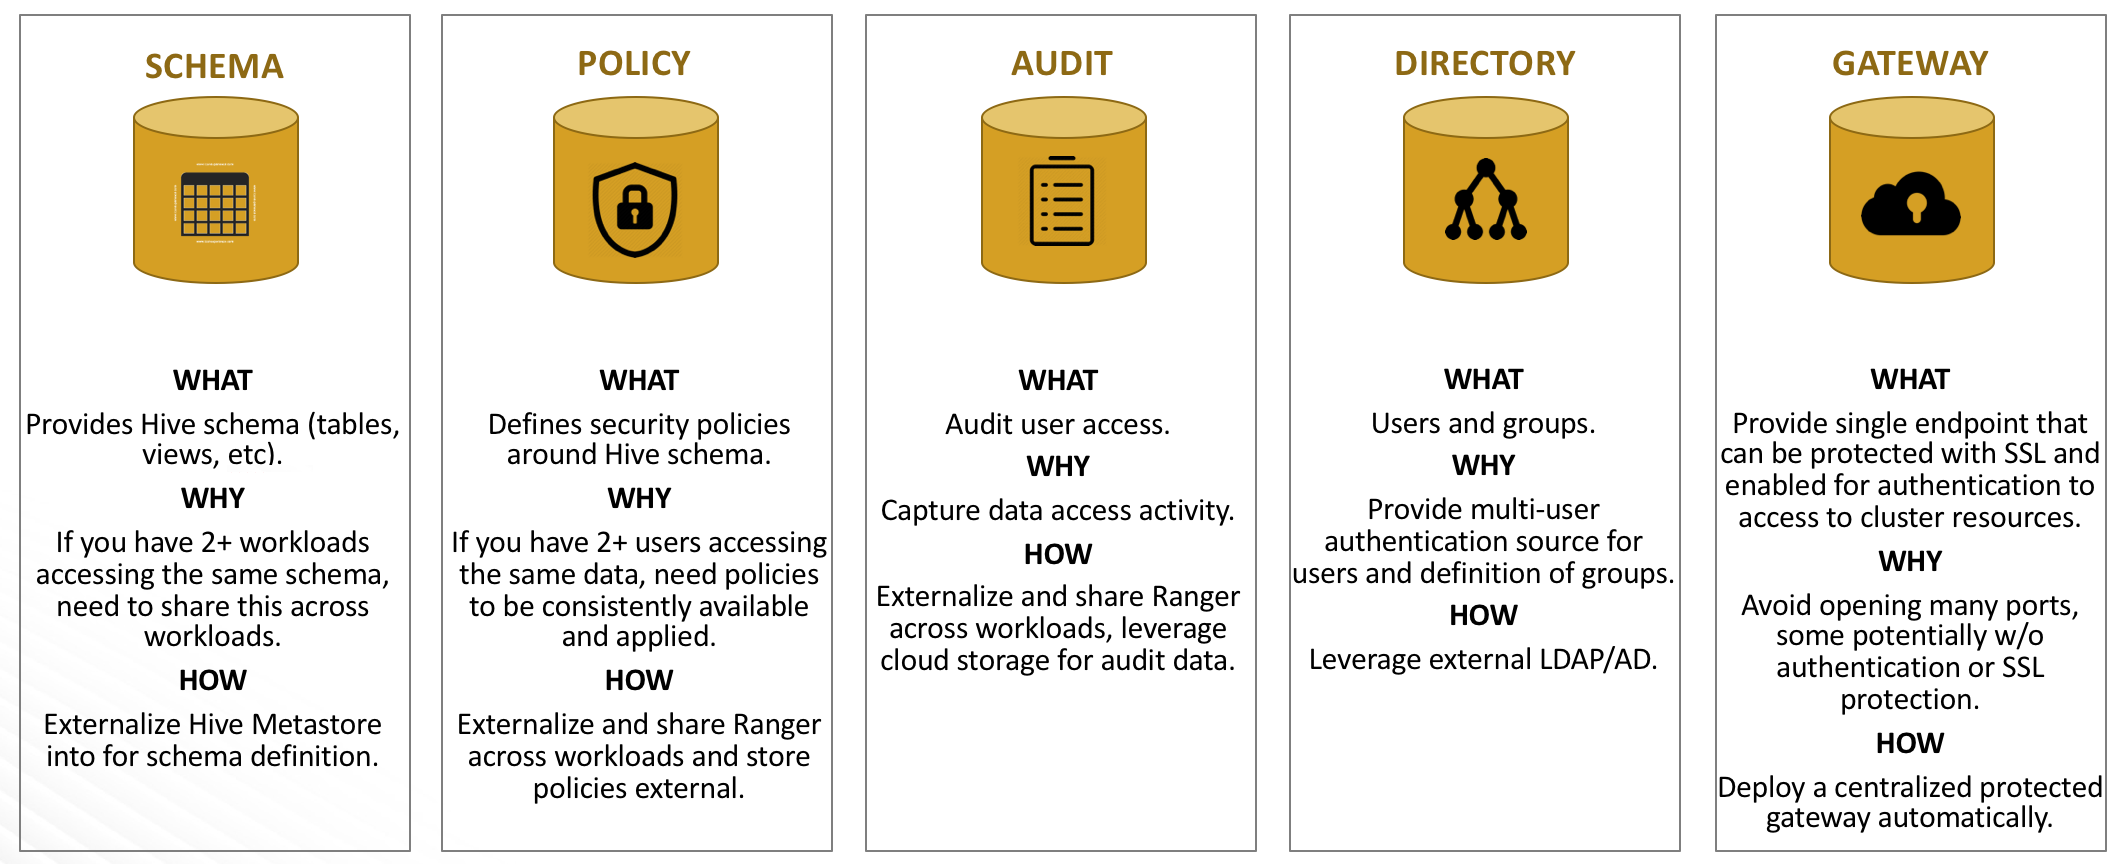
While workloads are temporary, the security policies around your data schema are long-running and shared for all workloads. As your workloads come and go, the data lake instance lives on, providing consistent and available security policy definitions that are available for current and future ephemeral workloads. All information related to schema (Hive), security policies (Ranger) and audit (Ranger) is stored on external locations (external databases and cloud storage).
This is illustrated in the following diagram:
Once you’ve created a data lake instance, you have an option to attach it to one or more ephemeral clusters. This allows you to apply the authentication, authorization, and audit across multiple workload clusters.
The following table explains basic data lake terminology:
| Term | Description |
|---|---|
| Data lake | Runs Ranger, which is used for configuring authorization. policies and is used for audit capture. Runs Hive Metastore, which is used for data schema. |
| Workload clusters | The clusters that get attached to the data lake to run workloads. This is where you run workloads such as Hive via JDBC. |
The following table explains the components of a data lake:
| Component | Technology | Description |
|---|---|---|
| Schema | Apache Hive | Provides Hive schema (tables, views, and so on). If you have two or more workloads accessing the same Hive data, you need to share schema across these workloads. |
| Policy | Apache Ranger | Defines security policies around Hive schema. If you have two or more users accessing the same data, you need security policies to be consistently available and enforced. |
| Audit | Apache Ranger | Audits user access and captures data access activity for the workloads. |
| Directory | LDAP/AD | Provides an authentication source for users and a definition of groups for authorization. |
| Gateway | Apache Knox | Supports a single workload endpoint that can be protected with SSL and enabled for authentication to access to resources. |
Overview of data lake setup
Setting up a data lake involves the following steps:
| Step | Where to perform |
|---|---|
Meet the prerequisites:
|
You must create these resources on your own, outside of Cloudbreak. You may use one database instance and create two databases. |
| Register the two databases and LDAP | In the Cloudbreak web UI > External Sources |
| Create a data lake | In the Cloudbreak web UI > Create cluster |
| Create clusters attached to the data lake | In the Cloudbreak web UI > Create cluster |
Prerequisites
You must perform the following prerequisites outside of Cloudbreak:
- Set up two external database instances, one for the HIVE component, and one for the RANGER component. For supported databases, refer to Using an external database.
- Create an LDAP instance and set up your users inside the LDAP.
- Prepare a cloud storage location for default Hive warehouse directory and Ranger audit logs.
In the steps that follow, you will be required to provide the information related to these external resources.
Register the databases and LDAP in the Cloudbreak web UI
Prior to creating a data lake, you must register the following resources in the Cloudbreak web UI:
Steps
-
Register each of your two RDS instances created as part of the prerequisites in the Cloudbreak web UI, under External Sources > Database Configurations. For instructions, refer Using an external database.
- When registering the database for Hive, select Type > Hive.
- When registering the database for Ranger, select Type > Ranger.
-
Register your LDAP (created as part of the prerequisites) in the Cloudbreak web UI, under External Sources > Authentication Configurations. For instructions, refer to Register an authentication source.
As an outcome of this step, you should have two external databases and one authentication source registered in the Cloudbreak web UI.
Create a data lake
Create a data lake by using the create cluster wizard. Among other information, make sure to provide the information listed in the steps below.
Steps
- Navigate to the advanced version of the create cluster wizard.
-
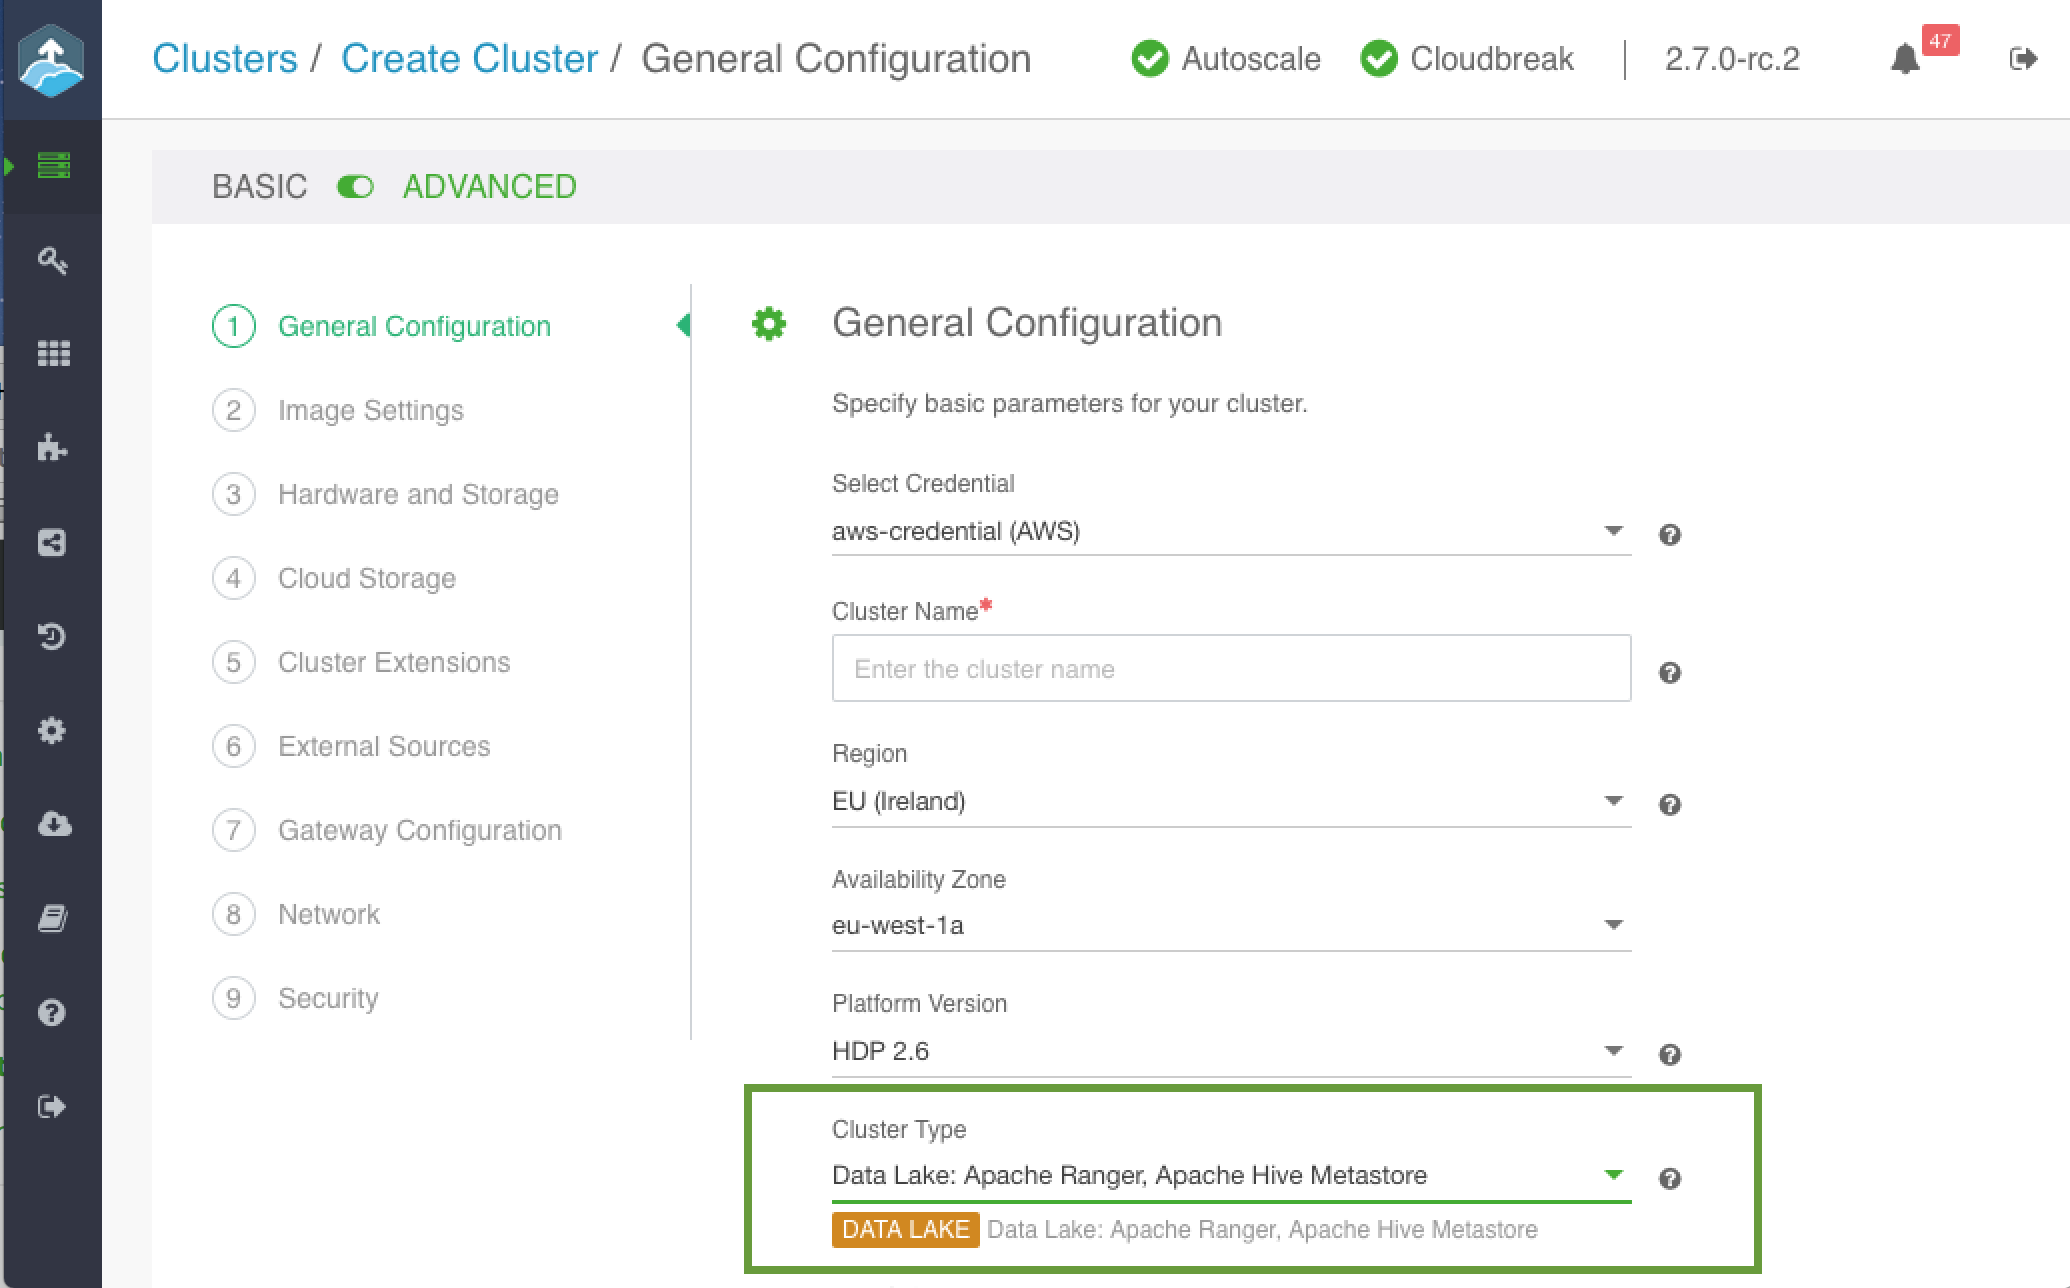
On the General Configuration page:
- Under Cluster Name, provide a name for your data lake.
- Under Cluster Type, choose the DATA LAKE blueprint:
-
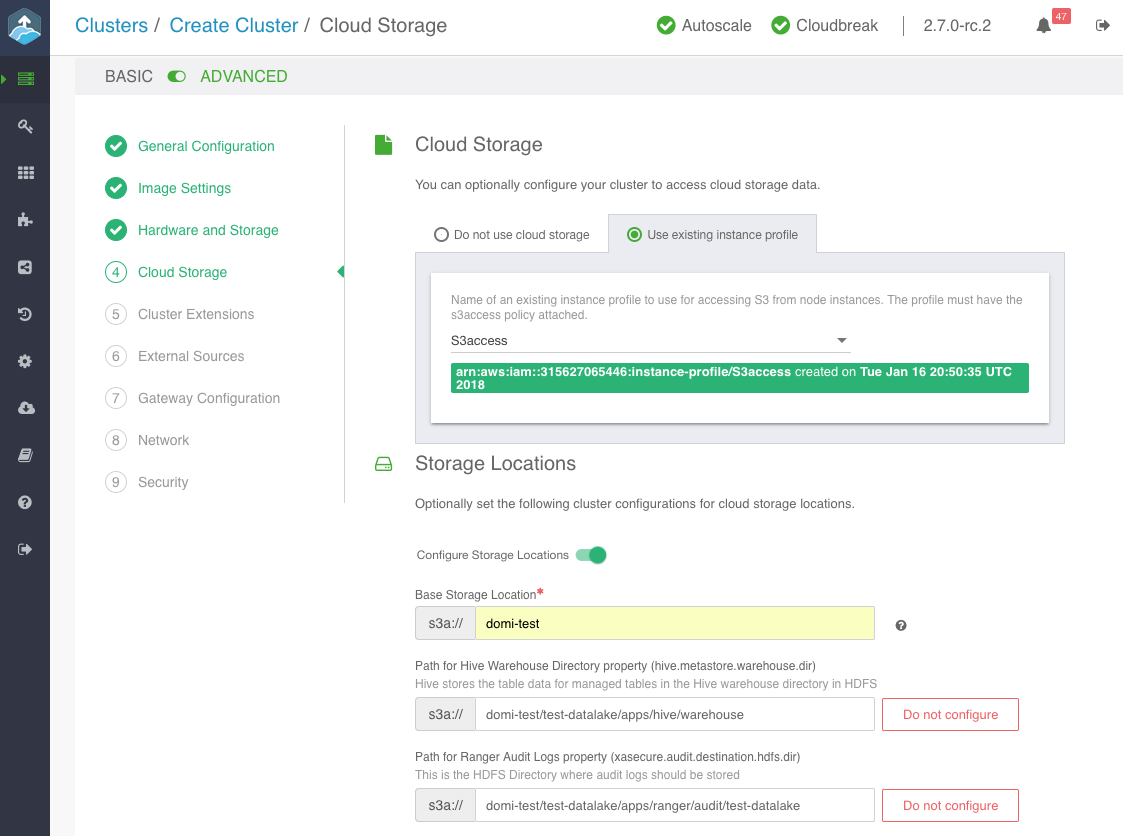
On the Cloud Storage page:
- Under Cloud Storage, configure access to cloud storage via the method available for your cloud provider.
- Under Storage Locations, provide an existing location within your cloud storage account that can be used for Hive warehouse directory and Ranger audit logs.
Note
The storage location must exist prior to data lake provisioning. If the storage location does not exist then Ranger is installed properly, but it may not work.
-
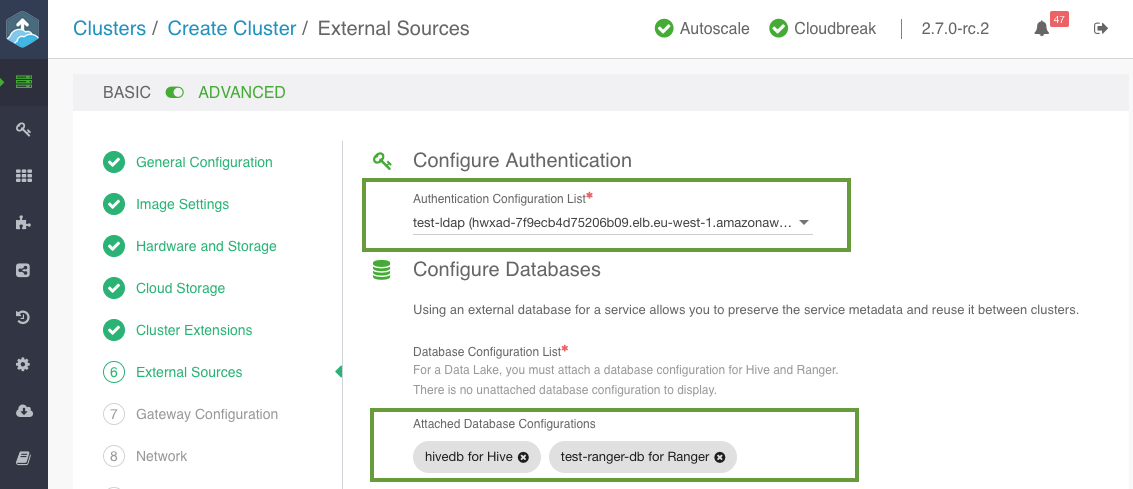
On the External Sources page, select the previously registered Ranger database, Hive database and LDAP:
-
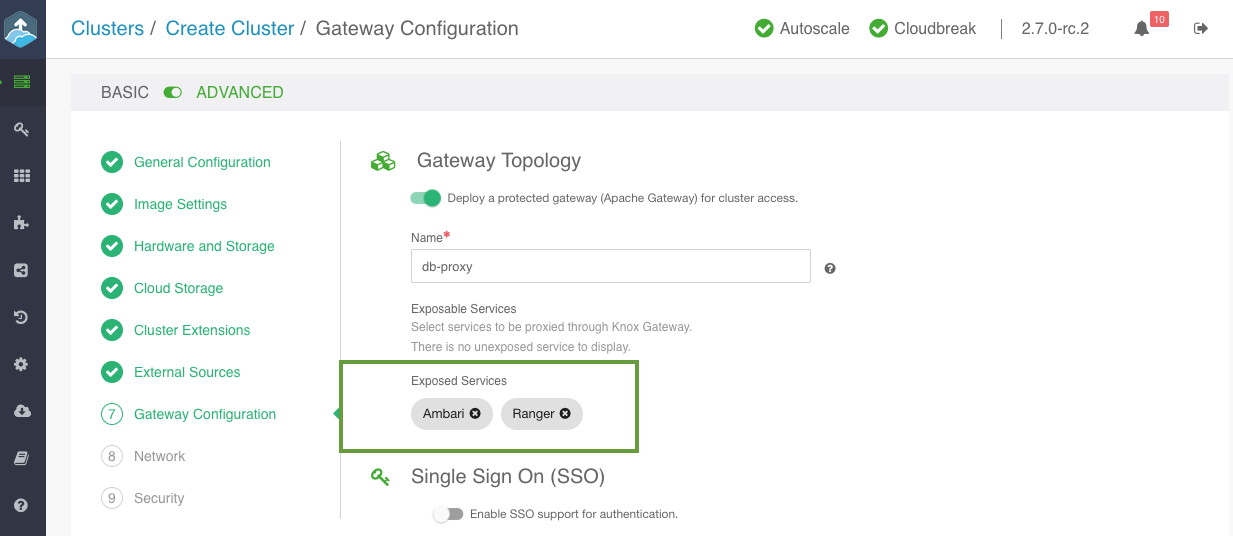
On the Gateway Configuration page, the gateway is enabled by default with Ambari exposed through the gateway. You should also enable Ranger by selecting the Ranger service and clicking Expose.
-
On the Security page:
- Under Password, provide a strong password for your cluster. For example “SomeRandomChars123!” is a strong password. A strong password is required for the default Ranger admin, which - among other cluster components like Ambari - will use this password.
- Select an SSH key.
-
Click CREATE CLUSTER to initiate data lake creation.
As an outcome of this step, you should have a running data lake.
Create attached HDP clusters
Once your data lake is running, you can start creating clusters attached to the data lake. Follow these general steps to create an cluster attached to a data lake.
In general, once you've selected the data lake that the cluster should be using, the cluster wizard should provide you with the cluster settings that should be used for the attached cluster.
Steps
-
In the Cloudbreak web UI, click on the cluster tile representing your data lake.
-
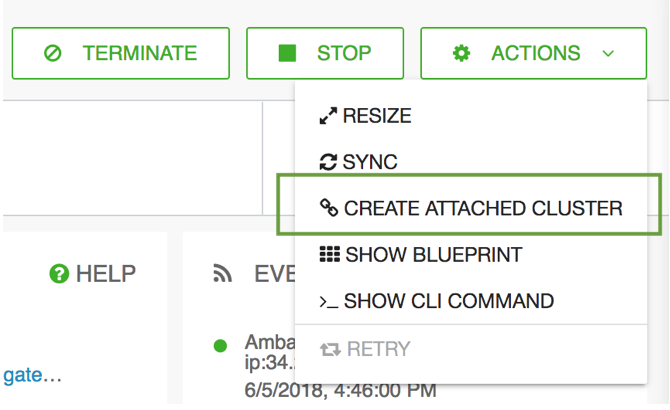
From the ACTIONS menu, select CREATE ATTACHED CLUSTER.
-
In general, the cluster wizard should provide you with the cluster settings that should be used for the attached cluster. Still, make sure to do the following:
- Under Region and Availability Zone, select the same location where your data lake is running.
- Select one of the three default blueprints.
- On the Cloud Storage page, enter the same cloud storage location that your data lake is using.
- On the External Sources page, the LDAP, and Ranger and Hive databases that you attached to the data lake should be attached to your cluster.
- On the Network page, select the same VPC and subnet where the data lake is running.
-
Click on CREATE CLUSTER to initiate cluster creation.
As an outcome of this step, you should have a running cluster attached to the data lake. Access your attached clusters and run your workloads as normal.

