Install DLM Engine service in Ambari
Follow these steps to install the DLM Engine in Ambari:
-
Launch Ambari in a browser and log in.
http://<ambari-server-host>:8080 Default credentials are: Username: admin Password: admin - Click Admin > Manage Ambari.
-
Click Versions, and then do the following on the
Versions page:
- Click the HDP version in the Name column.
- Change the Base URL path for the DLM service
to point to the local repository, for
example:
http://<your_webserver>/DLM/<OS>/<DLM version>
- Click the Ambari logo to return to the main Ambari page.
-
In the Ambari Services navigation pane, click Actions > Add Service.
The Add Service Wizard displays.
-
On the Choose Services page of the Wizard, select the
‘DLM-Engine’ service to install in Ambari, and then follow the on-screen
instructions.
Other required services are automatically selected.
-
When prompted to confirm addition of dependent services, give a positive
confirmation to all.
This adds other required services.
- On the Assign Masters page, you can choose the default settings.
-
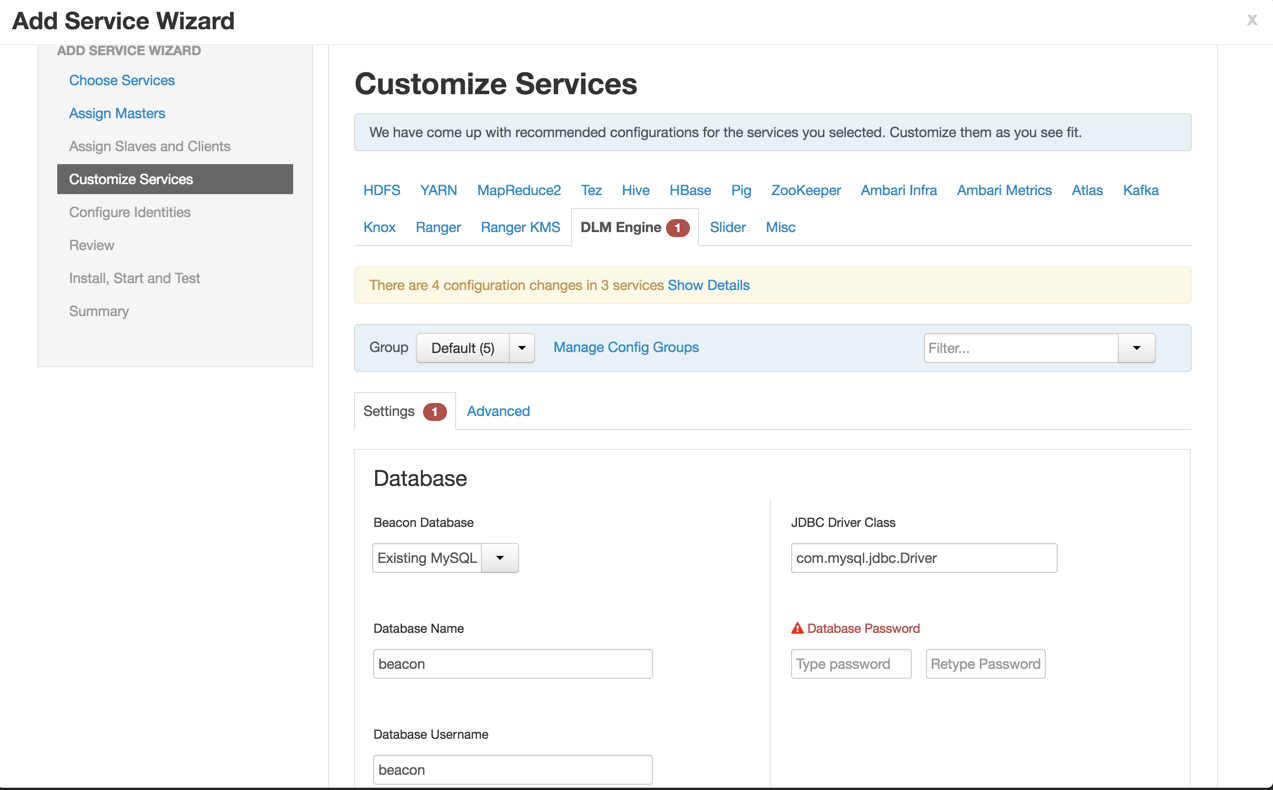
On the Customize Services page, fill out the required
DLM Engine configurations:
- Configure DB
Enter database name as beacon, database user, database password and database host in jdbc url from the database values setup previously.
 NoteIf you have migrated to HDP 3.x version and while adding DLM Engine service, you must enter the DLM Engine Database value and also verify the specific JDBC Driver Class in the Ambari UI.
The supported DLM Engine database values are:
-
New Derby
-
Existing MySQL / MariaDB
-
Existing PostgreSQL
 NoteNew Derby option can be used only while setting up the test environment and it must NOT be used for production setup or usage.If you are upgrading from a previous version of DLM Engine, make sure that your DLM Engine database settings are the same.
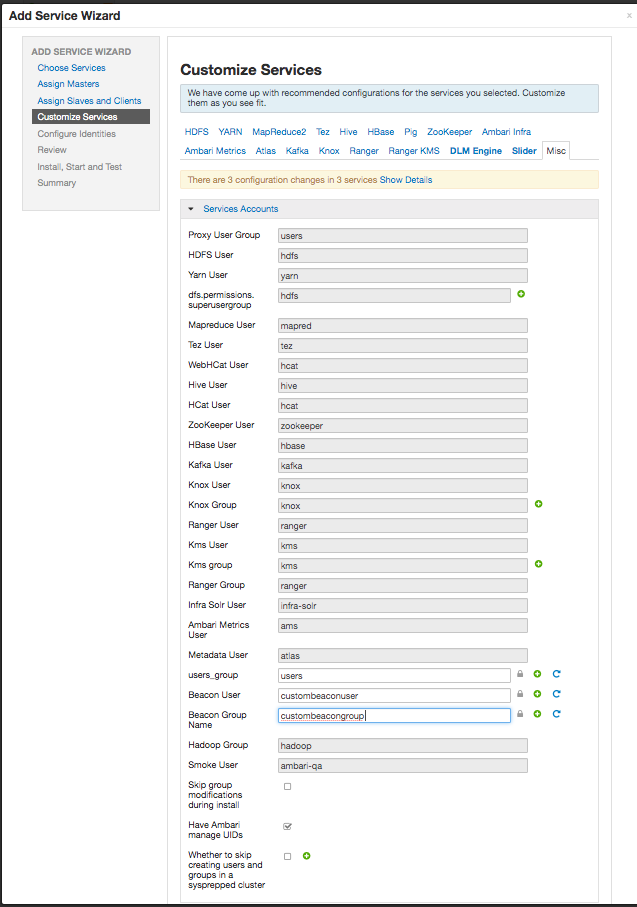
- When you modify or change the default Beacon service user or group name, click the Misc tab.

 NoteMake sure that the new user is added in the Ranger admin as well.
 - Configure DB

