

Adding Controller Settings for Reporting Tasks
To add a Controller Service for a reporting task, select Controller Settings from the Global Menu. This displays the NiFi Settings window.
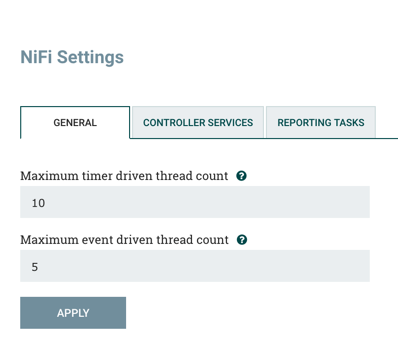
The NiFi Settings window has three tabs across the top: General, Controller Services, and Reporting Tasks. The General tab is for settings that pertain to general information about the NiFi instance. For example, here, the DFM can provide a unique name for the overall dataflow, as well as comments that describe the flow. Be aware that this information is visible to any other NiFi instance that connects remotely to this instance (using Remote Process Groups, a.k.a., Site-to-Site).
The General tab also provides settings for the overall maximum thread counts of the instance.
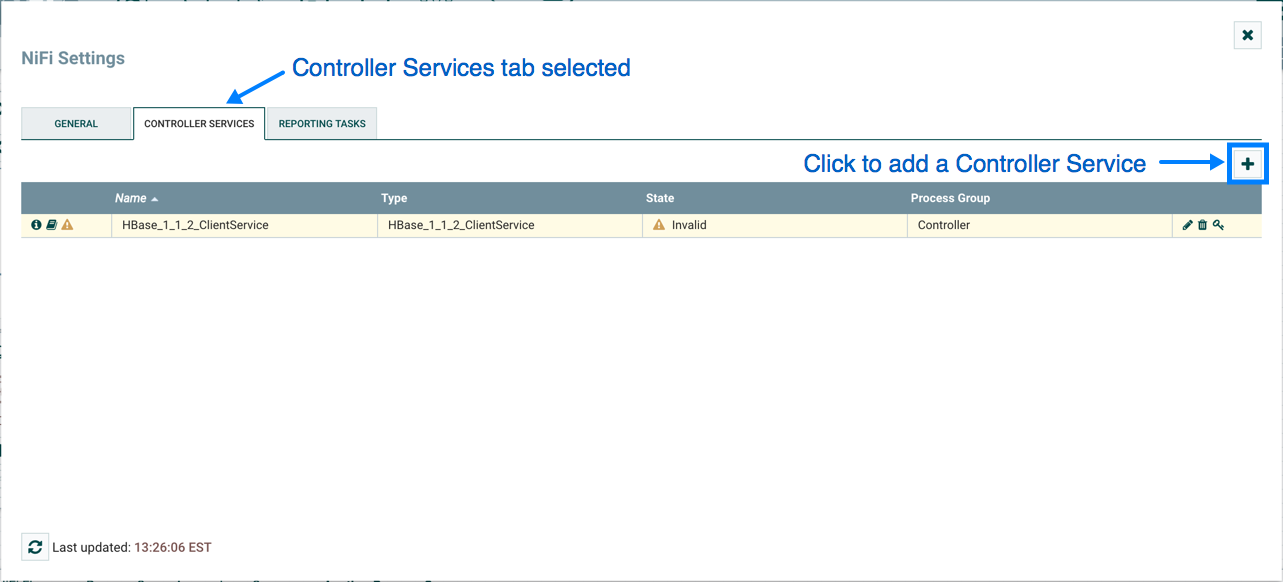
To the right of the General tab is the Controller Services tab. From this tab, the DFM may click the "+" button in the upper-right corner to create a new Controller Service.
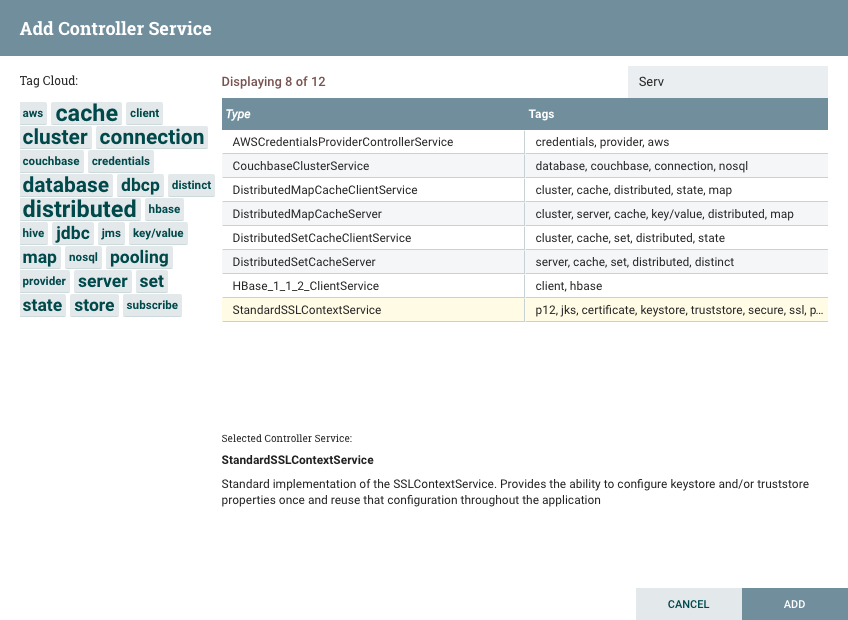
The Add Controller Service window opens. This window is similar to the Add Processor window. It provides a list of the available Controller Services on the right and a tag cloud, showing the most common category tags used for Controller Services, on the left. The DFM may click any tag in the tag cloud in order to narrow down the list of Controller Services to those that fit the categories desired. The DFM may also use the Filter field at the top of the window to search for the desired Controller Service. Upon selecting a Controller Service from the list, the DFM can see a description of the the service below. Select the desired controller service and click Add, or simply double-click the name of the service to add it.
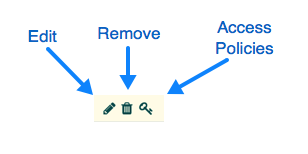
Once you have added a Controller Service, you can configure it by clicking the Edit button in the far-right column. Other buttons in this column include Remove and Access Policies.
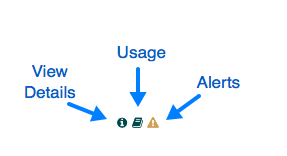
You can obtain information about Controller Services by clicking the Details, Usage, and Alerts buttons in the left-hand column.
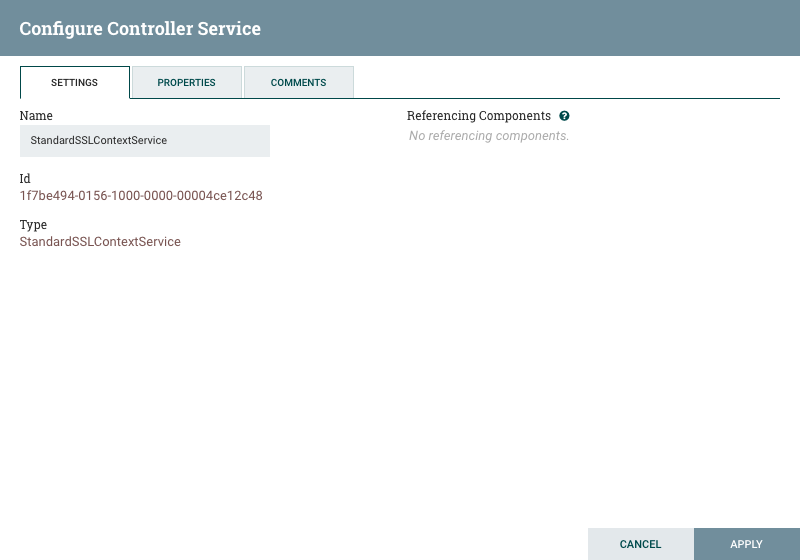
When the DFM clicks the Edit button, a Configure Controller Service window opens. It has three tabs: Settings, Properties, and Comments. This window is similar to the Configure Processor window. The Settings tab provides a place for the DFM to give the Controller Service a unique name (if desired). It also lists the UUID for the service and provides a list of other components (processors or other controller services) that reference the service.
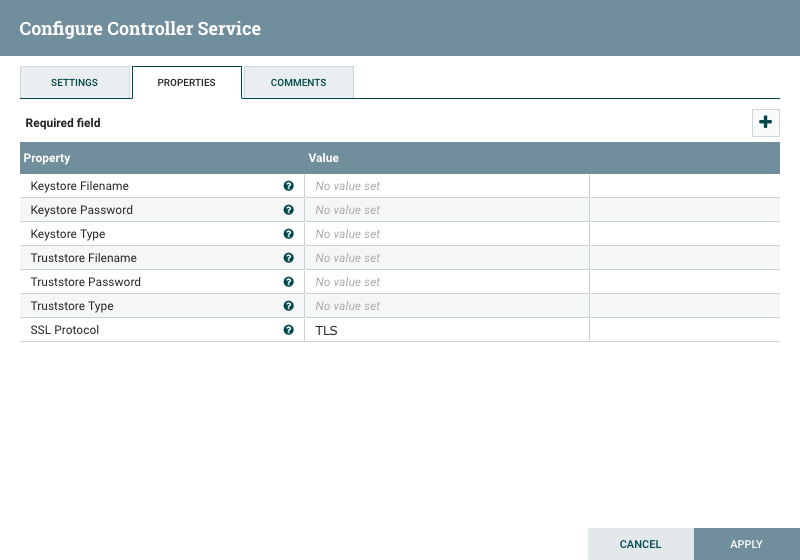
The Properties tab lists the various properties that apply to the particular controller service. As with configuring processors, the DFM may hover the over the question mark icons to see more information about each property.
The Comments tab is just an open-text field, where the DFM may include comments about the service. After configuring a Controller Service, click the Apply button to apply the configuration and close the window, or click the Cancel button to cancel the changes and close the window.
Note that after a Controller Service has been configured, it must be enabled in order to run. Do this using the Enable button in the far-right column of the Controller Services tab of the Controller Settings window. Then, in order to modify an existing/running controller service, the DFM needs to stop/disable it (as well as all referencing processors, reporting tasks, and controller services). Rather than having to hunt down each component that is referenced by that controller service, the DFM has the ability to stop/disable them when disabling the controller service in question. Likewise, when enabling a controller service, the DFM has the option to start/enable all referencing processors, reporting tasks, and controller services.