

Adding Components to the Canvas
The User Interface section above outlined the different segments of the UI and pointed out a Components Toolbar. This section looks at each of the Components in that toolbar:

 Processor: The Processor is the most
commonly used component, as it is responsible for data ingress, egress, routing, and
manipulating. There are many different types of Processors. In fact, this is a very common
Extension Point in NiFi, meaning that many vendors may implement their own Processors to
perform whatever functions are necessary for their use case. When a Processor is dragged
onto the canvas, the user is presented with a dialog to choose which type of Processor to
use:
Processor: The Processor is the most
commonly used component, as it is responsible for data ingress, egress, routing, and
manipulating. There are many different types of Processors. In fact, this is a very common
Extension Point in NiFi, meaning that many vendors may implement their own Processors to
perform whatever functions are necessary for their use case. When a Processor is dragged
onto the canvas, the user is presented with a dialog to choose which type of Processor to
use:
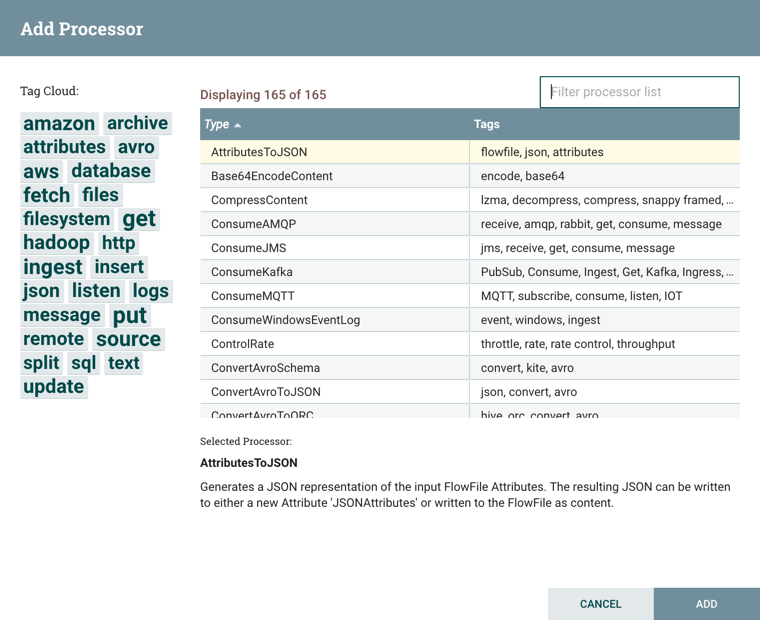
In the top-right corner, the user is able to filter the list based on the Processor Type
or the Tags associated with a Processor. Processor developers have the ability to add Tags
to their Processors. These tags are used in this dialog for filtering and are displayed on
the left-hand side in a Tag Cloud. The more Processors that exist with a particular Tag, the
larger the Tag appears in the Tag Cloud. Clicking a Tag in the Cloud will filter the
available Processors to only those that contain that Tag. If multiple Tags are selected,
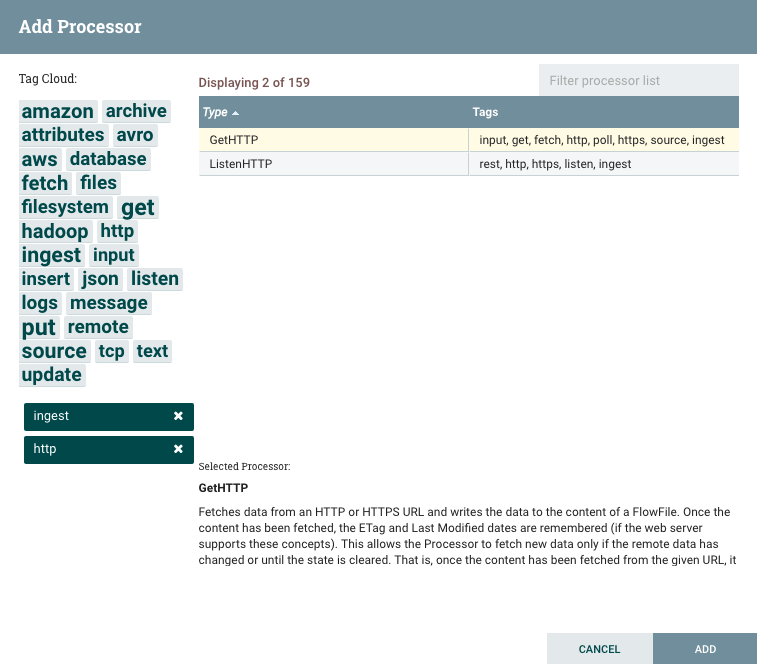
only those Processors that contain all of those Tags are shown. For example, if we want to
show only those Processors that allow us to ingest data via HTTP, we can select both the
http Tag and the ingest Tag:
Restricted components will be marked with a  icon next to their name. These are components that can be used to
execute arbitrary unsanitized code provided by the operator through the NiFi REST API/UI or
can be used to obtain or alter data on the NiFi host system using the NiFi OS credentials.
These components could be used by an otherwise authorized NiFi user to go beyond the
intended use of the application, escalate privilege, or could expose data about the
internals of the NiFi process or the host system. All of these capabilities should be
considered privileged, and admins should be aware of these capabilities and explicitly
enable them for a subset of trusted users.
icon next to their name. These are components that can be used to
execute arbitrary unsanitized code provided by the operator through the NiFi REST API/UI or
can be used to obtain or alter data on the NiFi host system using the NiFi OS credentials.
These components could be used by an otherwise authorized NiFi user to go beyond the
intended use of the application, escalate privilege, or could expose data about the
internals of the NiFi process or the host system. All of these capabilities should be
considered privileged, and admins should be aware of these capabilities and explicitly
enable them for a subset of trusted users.
Before a user is allowed to create and modify restricted components they must be granted access to restricted components. Refer to multi-tenant documentation.
Clicking the Add button or double-clicking on a Processor Type will
add the selected Processor to the canvas at the location that it was dropped.
|
For any component added to the canvas, it is possible to select it with the mouse and move it anywhere on the canvas. Also, it is possible to select multiple items at once by either holding down the Shift key and selecting each item or by holding down the Shift key and dragging a selection box around the desired components. |
Once you have dragged a Processor onto the canvas, you can interact with it by right-clicking on the Processor and selecting an option from the context menu. The options available to you from the context menu vary, depending on the privileges assigned to you.
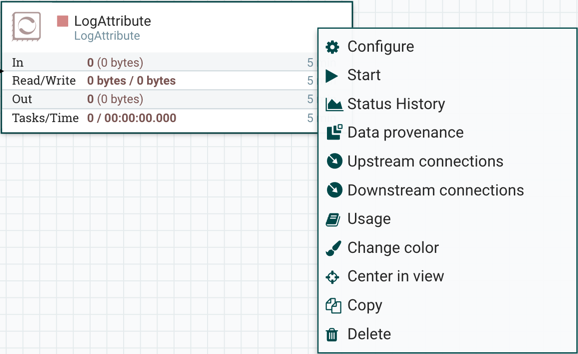
While the options available from the context menu vary, the following options are typically available when you have full privileges to work with a Processor:
Configure: This option allows the user to establish or change the configuration of the Processor (see Configuring a Processor).
Start or Stop: This option allows the user to start or stop a Processor; the option will be either Start or Stop, depending on the current state of the Processor.
Status History: This option opens a graphical representation of the Processor's statistical information over time.
Upstream connections: This option allows the user to see and "jump to" upstream connections that are coming into the Processor. This is particularly useful when processors connect into and out of other Process Groups.
Downstream connections: This option allows the user to see and "jump to" downstream connections that are going out of the Processor. This is particularly useful when processors connect into and out of other Process Groups.
Data provenance: This option displays the NiFi Data Provenance table, with information about data provenance events for the FlowFiles routed through that Processor (see Data Provenance).
Usage: This option takes the user to the Processor's usage documentation.
Change color: This option allows the user to change the color of the Processor, which can make the visual management of large flows easier.
Center in view: This option centers the view of the canvas on the given Processor.
Copy: This option places a copy of the selected Processor on the clipboard, so that it may be pasted elsewhere on the canvas by right-clicking on the canvas and selecting Paste. The Copy/Paste actions also may be done using the keystrokes Ctrl-C (Command-C) and Ctrl-V (Command-V).
Delete: This option allows the DFM to delete a Processor from the canvas.
 Input Port: Input Ports provide a
mechanism for transferring data into a Process Group. When an Input Port is dragged onto the
canvas, the DFM is prompted to name the Port. All Ports within a Process Group must have
unique names.
Input Port: Input Ports provide a
mechanism for transferring data into a Process Group. When an Input Port is dragged onto the
canvas, the DFM is prompted to name the Port. All Ports within a Process Group must have
unique names.
All components exist only within a Process Group. When a user initially navigates to the NiFi page, the user is placed in the Root Process Group. If the Input Port is dragged onto the Root Process Group, the Input Port provides a mechanism to receive data from remote instances of NiFi via Site-to-Site. In this case, the Input Port can be configured to restrict access to appropriate users, if NiFi is configured to run securely. For information on configuring NiFi to run securely, see the System Administrator's Guide.
 Output Port: Output Ports provide a
mechanism for transferring data from a Process Group to destinations outside of the Process
Group. When an Output Port is dragged onto the canvas, the DFM is prompted to name the Port.
All Ports within a Process Group must have unique names.
Output Port: Output Ports provide a
mechanism for transferring data from a Process Group to destinations outside of the Process
Group. When an Output Port is dragged onto the canvas, the DFM is prompted to name the Port.
All Ports within a Process Group must have unique names.
If the Output Port is dragged onto the Root Process Group, the Output Port provides a mechanism for sending data to remote instances of NiFi via Site-to-Site. In this case, the Port acts as a queue. As remote instances of NiFi pull data from the port, that data is removed from the queues of the incoming Connections. If NiFi is configured to run securely, the Output Port can be configured to restrict access to appropriate users. For information on configuring NiFi to run securely, see the System Administrator's Guide.
 Process Group: Process Groups can be
used to logically group a set of components so that the dataflow is easier to understand and
maintain. When a Process Group is dragged onto the canvas, the DFM is prompted to name the
Process Group. All Process Groups within the same parent group must have unique names. The
Process Group will then be nested within that parent group.
Process Group: Process Groups can be
used to logically group a set of components so that the dataflow is easier to understand and
maintain. When a Process Group is dragged onto the canvas, the DFM is prompted to name the
Process Group. All Process Groups within the same parent group must have unique names. The
Process Group will then be nested within that parent group.
Once you have dragged a Process Group onto the canvas, you can interact with it by right-clicking on the Process Group and selecting an option from context menu.The options available to you from the context menu vary, depending on the privileges assigned to you.
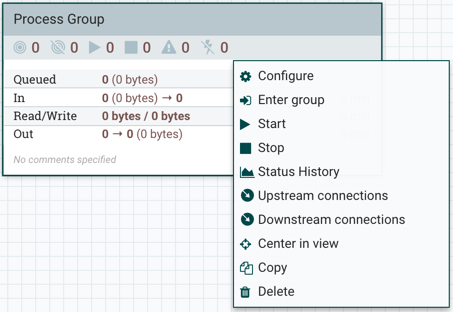
While the options available from the context menu vary, the following options are typically available when you have full privileges to work with the Process Group:
Configure: This option allows the user to establish or change the configuration of the Process Group.
Enter group: This option allows the user to enter the Process Group. It is also possible to double-click on the Process Group to enter it.
Start: This option allows the user to start a Process Group.
Stop: This option allows the user to stop a Process Group.
Status History: This option opens a graphical representation of the Process Group's statistical information over time.
Upstream connections: This option allows the user to see and "jump to" upstream connections that are coming into the Process Group.
Downstream connections: This option allows the user to see and "jump to" downstream connections that are going out of the Process Group.
Center in view: This option centers the view of the canvas on the given Process Group.
Copy: This option places a copy of the selected Process Group on the clipboard, so that it may be pasted elsewhere on the canvas by right-clicking on the canvas and selecting Paste. The Copy/Paste actions also may be done using the keystrokes Ctrl-C (Command-C) and Ctrl-V (Command-V).
Delete: This option allows the DFM to delete a Process Group.
 Remote Process Group: Remote Process
Groups appear and behave similar to Process Groups. However, the Remote Process Group (RPG)
references a remote instance of NiFi. When an RPG is dragged onto the canvas, rather than
being prompted for a name, the DFM is prompted for the URL of the remote NiFi instance. If
the remote NiFi is a clustered instance, the URL that should be used is the URL of any NiFi
instance in that cluster. When data is transferred to a clustered instance of NiFi via an
RPG, the RPG will first connect to the remote instance whose URL is configured to determine
which nodes are in the cluster and how busy each node is. This information is then used to
load balance the data that is pushed to each node. The remote instances are then
interrogated periodically to determine information about any nodes that are dropped from or
added to the cluster and to recalculate the load balancing based on each node's load.
For more information, see the section on Site-to-Site.
Remote Process Group: Remote Process
Groups appear and behave similar to Process Groups. However, the Remote Process Group (RPG)
references a remote instance of NiFi. When an RPG is dragged onto the canvas, rather than
being prompted for a name, the DFM is prompted for the URL of the remote NiFi instance. If
the remote NiFi is a clustered instance, the URL that should be used is the URL of any NiFi
instance in that cluster. When data is transferred to a clustered instance of NiFi via an
RPG, the RPG will first connect to the remote instance whose URL is configured to determine
which nodes are in the cluster and how busy each node is. This information is then used to
load balance the data that is pushed to each node. The remote instances are then
interrogated periodically to determine information about any nodes that are dropped from or
added to the cluster and to recalculate the load balancing based on each node's load.
For more information, see the section on Site-to-Site.
Once you have dragged a Remote Process Group onto the canvas, you can may interact with it by right-clicking on the Remote Process Group and selecting an option from context menu. The options available to you from the context menu vary, depending on the privileges assigned to you.
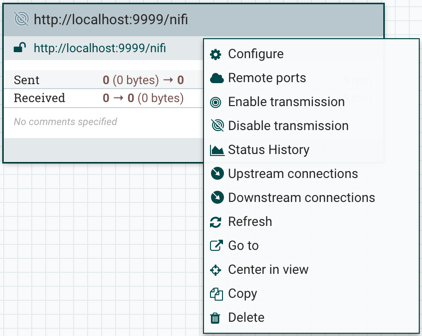
While the options available from the context menu vary, the following options are typically available when you have full privileges to work with the Remote Process Group:
Configure: This option allows the user to establish or change the configuration of the Remote Process Group.
Remote Ports: This option allows the user to see input ports and/or output ports that exist on the remote instance of NiFi that the Remote Process Group is connected to. Note that if the Site-to-Site configuration is secure, only the ports that the connecting NiFi has been given accessed to will be visible.
Enable transmission: Makes the transmission of data between NiFi instances active (see Remote Process Group Transmission).
Disable transmission: Disables the transmission of data between NiFi instances.
Status History: This option opens a graphical representation of the Remote Process Group's statistical information over time.
Upstream connections: This option allows the user to see and "jump to" upstream connections that are coming into the Remote Process Group.
Downstream connections: This option allows the user to see and "jump to" downstream connections that are going out of the Remote Process Group.
Refresh: This option refreshes the view of the status of the remote NiFi instance.
Go to: This option opens a view of the remote NiFi instance in a new tab of the browser. Note that if the Site-to-Site configuration is secure, the user must have access to the remote NiFi instance in order to view it.
Center in view: This option centers the view of the canvas on the given Remote Process Group.
Copy: This option places a copy of the selected Process Group on the clipboard, so that it may be pasted elsewhere on the canvas by right-clicking on the canvas and selecting Paste. The Copy/Paste actions also may be done using the keystrokes Ctrl-C (Command-C) and Ctrl-V (Command-V).
Delete: This option allows the DFM to delete a Remote Process Group from the canvas.
 Funnel: Funnels are used to combine the
data from many Connections into a single Connection. This has two advantages. First, if many
Connections are created with the same destination, the canvas can become cluttered if those
Connections have to span a large space. By funneling these Connections into a single
Connection, that single Connection can then be drawn to span that large space instead.
Secondly, Connections can be configured with FlowFile Prioritizers. Data from several
Connections can be funneled into a single Connection, providing the ability to Prioritize
all of the data on that one Connection, rather than prioritizing the data on each Connection
independently.
Funnel: Funnels are used to combine the
data from many Connections into a single Connection. This has two advantages. First, if many
Connections are created with the same destination, the canvas can become cluttered if those
Connections have to span a large space. By funneling these Connections into a single
Connection, that single Connection can then be drawn to span that large space instead.
Secondly, Connections can be configured with FlowFile Prioritizers. Data from several
Connections can be funneled into a single Connection, providing the ability to Prioritize
all of the data on that one Connection, rather than prioritizing the data on each Connection
independently.
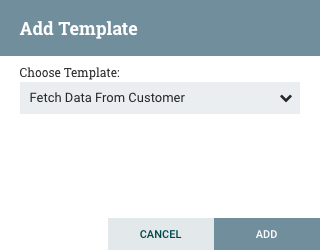
 Template: Templates can be created by
DFMs from sections of the flow, or they can be imported from other dataflows. These
Templates provide larger building blocks for creating a complex flow quickly. When the
Template is dragged onto the canvas, the DFM is provided a dialog to choose which Template
to add to the canvas:
Template: Templates can be created by
DFMs from sections of the flow, or they can be imported from other dataflows. These
Templates provide larger building blocks for creating a complex flow quickly. When the
Template is dragged onto the canvas, the DFM is provided a dialog to choose which Template
to add to the canvas:
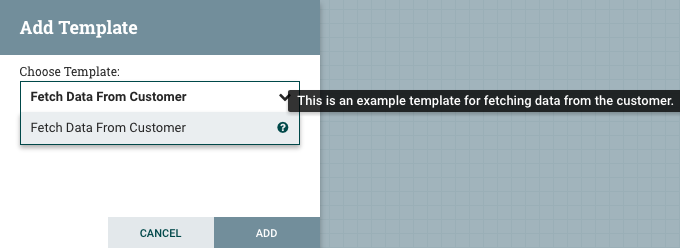
Clicking the drop-down box shows all available Templates. Any Template that was created with a description will show a question mark icon, indicating that there is more information. Hovering over the icon with the mouse will show this description:
 Label: Labels are used to provide
documentation to parts of a dataflow. When a Label is dropped onto the canvas, it is created
with a default size. The Label can then be resized by dragging the handle in the
bottom-right corner. The Label has no text when initially created. The text of the Label can
be added by right-clicking on the Label and choosing
Label: Labels are used to provide
documentation to parts of a dataflow. When a Label is dropped onto the canvas, it is created
with a default size. The Label can then be resized by dragging the handle in the
bottom-right corner. The Label has no text when initially created. The text of the Label can
be added by right-clicking on the Label and choosing Configure