Launching an EC2 Instance for Cloudera Director
On AWS, Cloudera Director requires a dedicated Amazon EC2 instance. The simplest approach is to create this instance in the same VPC and subnet where you want Cloudera Director to
create new instances for Cloudera Manager and your CDH clusters.
To create the instance, follow these steps:
- In the AWS Management Console, select EC2 from the Services navigation list box in the desired region.
- Click the Launch Instance button in the Create Instance section of the EC2 dashboard.
- Select the AMI for your Cloudera Director instance. Cloudera recommends that you choose from the Community AMIs list and the latest release of the desired supported distribution. See
Supported Software and Distributions.
- Select Community AMIs in the left pane.
- In the search box, type the desired operating system. For example, if you type rhel-7.3 HVM, the search results show the versions of RHEL v7.3 that
support HVM. Select the highest GA number to use the latest release of RHEL v7.3 supporting HVM.
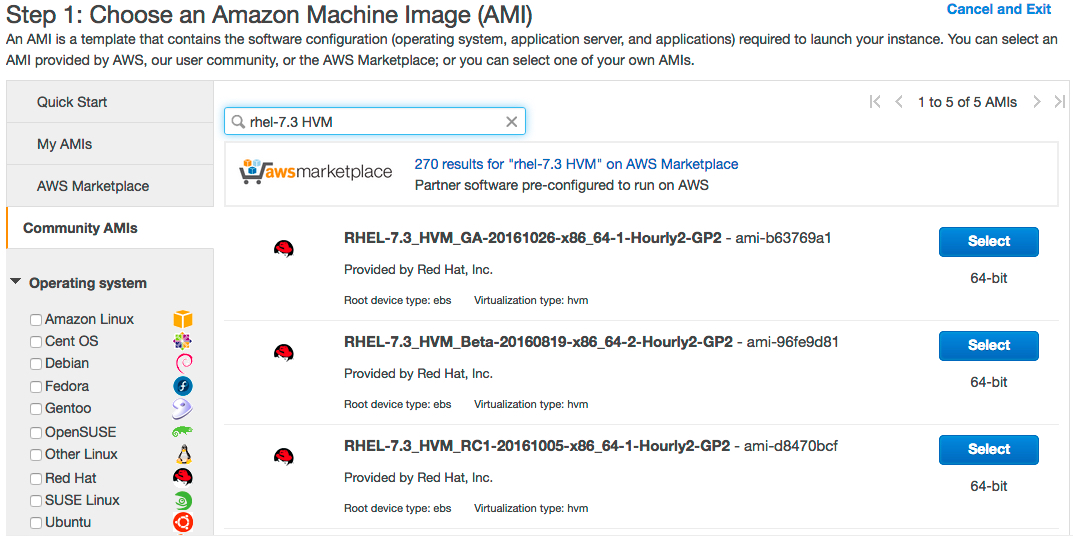
- Click Select for the AMI version you choose.
- Select the instance type for Cloudera Director. Cloudera recommends using c3.large or c4.large instances.
- Click Next: Configure Instance Details.
- Select the correct VPC and subnet.
- The cluster launcher requires Internet access; from the Auto-assign Public IP list box, select Enable.
- Use the default shutdown behavior, Stop.
- Click the Protect against accidental termination checkbox.
- (Optional) Click the IAM role drop-down list and select an IAM role.
- Click Next: Add Storage. Cloudera Director requires a minimum of 8 GB.
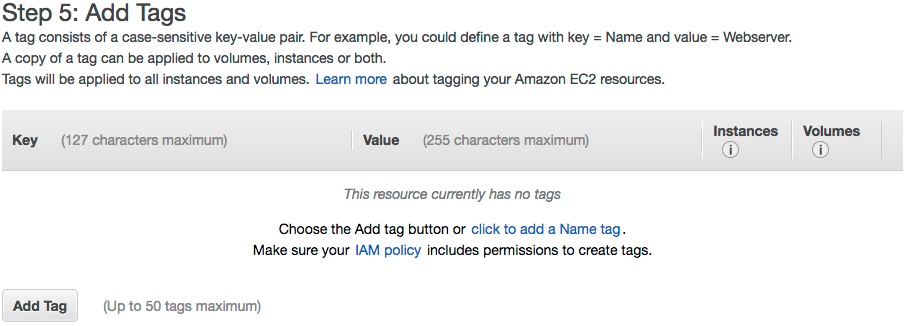
- Click Next: Add Tags. On the Add Tags page, click the Add Tag button. For the Name
key, enter a name for the instance in the Value field. Optionally, click Add Tag again to create an additional tags for the
instance (up to a maximum of 50 tags).
- Click Next: Configure Security Group.
- On the Configure Security Group page, create a new security group or add ports to an existing group. (If you have already created a security group
with the required ports for Cloudera Director, as described on the previous page Setting up the AWS Environment, you can
skip this step.)
- Select either Create a new security group or Select an existing security group. If you create a new group, enter a Security group name and Description. To edit an existing group, select the group you want to edit.
- Click the Type drop-down list, and select a protocol type. Type the port number in the Port Range field.
- For each additional port needed, click the Add Rule button. Then click the Type drop-down list, select a protocol
type, and type the port number in the Port Range field.
The following ports must be open for the Cloudera Director EC2 instance:
Type Protocol Port Range Source SSH (22) TCP (6) 22 <your ip address> ALL Traffic ALL ALL security_group_id
- Click Review and Launch. Scroll down to review the AMI details, instance type, and security group information, and then click Launch.
- At the prompt for a key pair:
- Select Choose an existing key pair and select the key pair you created in Preparing Your AWS EC2 Resources.
- Click the check box to acknowledge that you have access to the private key.
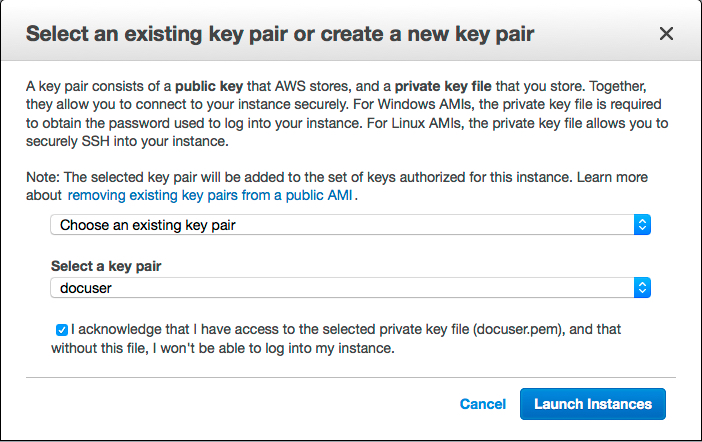
- Click Launch Instances.
- After the instance is created, note its public and private IP addresses.
You are now ready to install Cloudera Director server and client on the EC2 instance.