Installing and Upgrading the Sentry Service
This topic describes how to install and upgrade the Sentry service. If you are migrating from Sentry policy files to the database-backed Sentry service, see Migrating from Sentry Policy Files to the Sentry Service.
Adding the Sentry Service
Use one of the following sections to add/install the Sentry service:
Adding the Sentry Service Using Cloudera Manager
Minimum Required Role: Cluster Administrator (also provided by Full Administrator)
- On the Home page, click
 to the right of the cluster name and select Add a
Service. A list of service types display. You can add one type of service at a time.
to the right of the cluster name and select Add a
Service. A list of service types display. You can add one type of service at a time. - Select the Sentry service and click Continue.
- Select the radio button next to the services on which the new service should depend and click Continue.
- Customize the assignment of role instances to hosts. The wizard evaluates the hardware configurations of the hosts to determine the best hosts for each role. These assignments are
typically acceptable, but you can reassign role instances to hosts of your choosing, if desired.
Click a field below a role to display a dialog box containing a pageable list of hosts. If you click a field containing multiple hosts, you can also select All Hosts to assign the role to all hosts or Custom to display the pageable hosts dialog box.
The following shortcuts for specifying hostnames are supported:- Range of hostnames (without the domain portion)
Range Definition Matching Hosts 10.1.1.[1-4] 10.1.1.1, 10.1.1.2, 10.1.1.3, 10.1.1.4 host[1-3].company.com host1.company.com, host2.company.com, host3.company.com host[07-10].company.com host07.company.com, host08.company.com, host09.company.com, host10.company.com - IP addresses
- Rack name
Click the View By Host button for an overview of the role assignment by host ranges.
- Range of hostnames (without the domain portion)
- Configure database settings:
- Choose the database type:
- Leave the default setting of Use Embedded Database to have Cloudera Manager create and configure required databases. Make a note of the auto-generated
passwords.
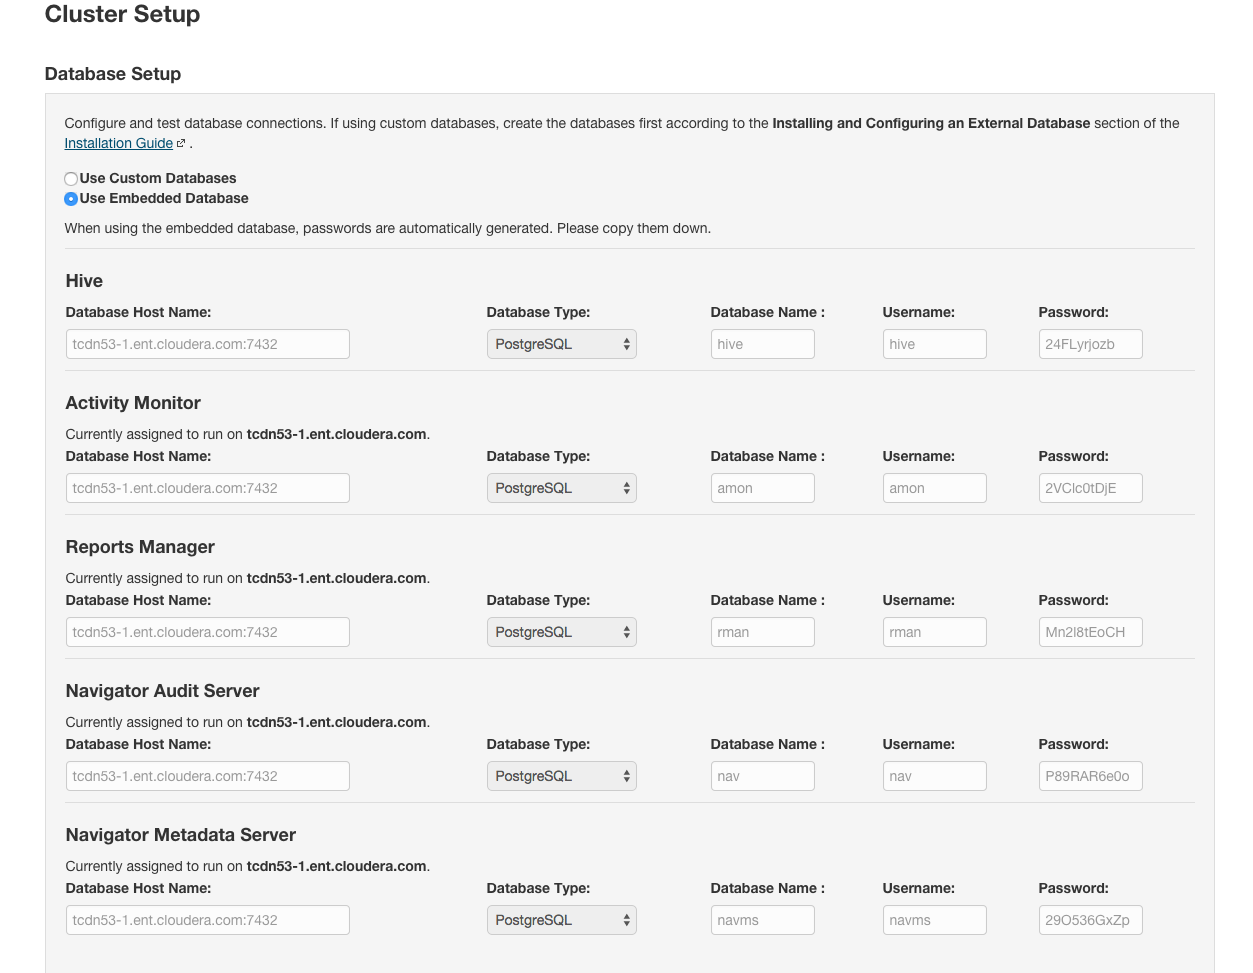
- Select Use Custom Databases to specify external databases.
- Enter the database host, database type, database name, username, and password for the database that you created when you set up the database.
- Leave the default setting of Use Embedded Database to have Cloudera Manager create and configure required databases. Make a note of the auto-generated
passwords.
- Click Test Connection to confirm that Cloudera Manager can communicate with the database using the information you have supplied. If the test succeeds in all cases, click Continue; otherwise check and correct the information you have provided for the database and then try the test again. (For some servers, if you are using the embedded database, you will see a message saying the database will be created at a later step in the installation process.) The Review Changes screen displays.
- Choose the database type:
- Click Continue to start the service.
- Click Continue then click Finish. You are returned to the Home page.
- Verify the new service is started properly by checking the health status for the new service. If the Health Status is Good, then the service started properly.
- To use the Sentry service, begin by enabling Hive and Impala for the service.
Installing Sentry Using the Command Line
| OS | Command |
|---|---|
| RHEL |
$ sudo yum install sentry |
| SLES |
$ sudo zypper install sentry |
| Ubuntu or Debian |
$ sudo apt-get update; $ sudo apt-get install sentry |
Starting the Sentry Service
- Set the SENTRY_HOME and HADOOP_HOME parameters.
- Create the Sentry database schema using the Sentry schematool. Sentry, by default, does not initialize the schema. The schematool is a built-in way for you to deploy the backend schema
required by the Sentry service. For example, the following command uses the schematool to initialize the schema for a MySQL database.
bin/sentry --command schema-tool --conffile <sentry-site.xml> --dbType mysql --initSchema
Alternatively, you can set the sentry.verify.schema.version configuration property to false. However, this is not recommended. - Start the Sentry service.
bin/sentry --command service --conffile <sentry-site.xml>
Upgrading the Sentry Service
Use one of the following sections to upgrade the Sentry service:
Upgrading the Sentry Service Using Cloudera Manager
If you have a cluster managed by Cloudera Manager, go to Upgrading CDH and Managed Services Using Cloudera Manager and follow the instructions depending on the version of CDH you are upgrading to. If you are upgrading from CDH 5.1, you will notice an extra step in the procedure to upgrade the Sentry database schema.
For command-line instructions, continue reading.
Upgrading the Sentry Service Using the Command Line
- Stop the Sentry service by identifying the PID of the Sentry Service and use the kill command to end the process:
ps -ef | grep sentry
kill -9 <PID>
Replace <PID> with the PID of the Sentry Service. - Remove the previous version of Sentry.
OS Command RHEL $ sudo yum remove sentry
SLES $ sudo zypper remove sentry
Ubuntu or Debian $ sudo apt-get remove sentry
- Install the new version of Sentry.
OS Command RHEL $ sudo yum install sentry
SLES $ sudo zypper install sentry
Ubuntu or Debian $ sudo apt-get update; $ sudo apt-get install sentry
- (From CDH 5.1 to CDH 5.x) Upgrade Sentry Database Schema
Use the Sentry schematool to upgrade the database schema as follows:
bin/sentry --command schema-tool --conffile <sentry-site.xml> --dbType <db-type> --upgradeSchema
Where <db-type> should be either mysql, postgres or oracle. - Start the Sentry Service
- Set the SENTRY_HOME and HADOOP_HOME parameters.
- Run the following command:
bin/sentry --command service --conffile <sentry-site.xml>
