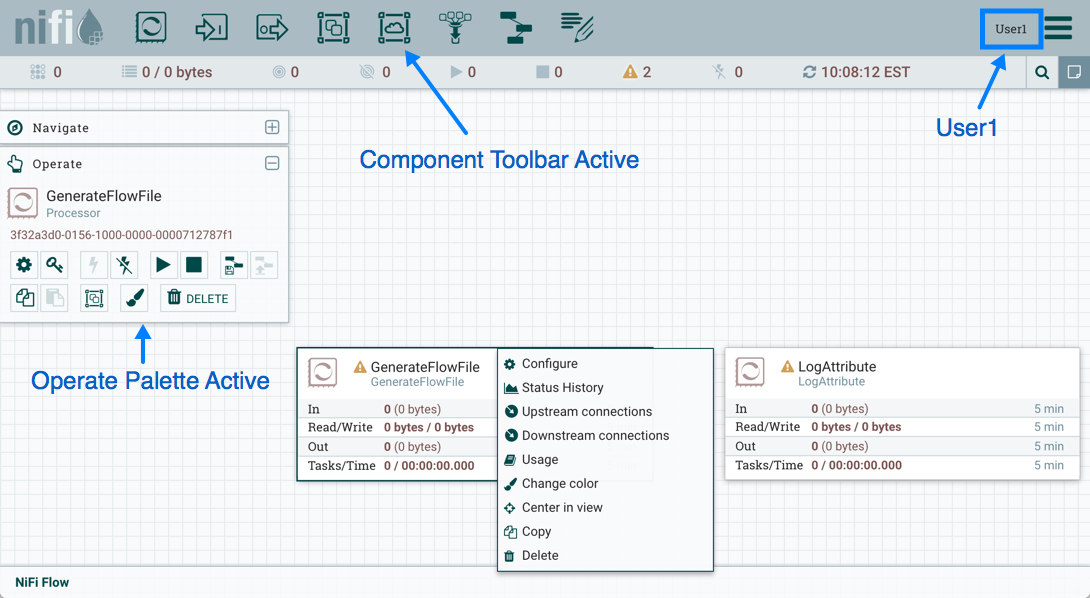
Moving a Processor
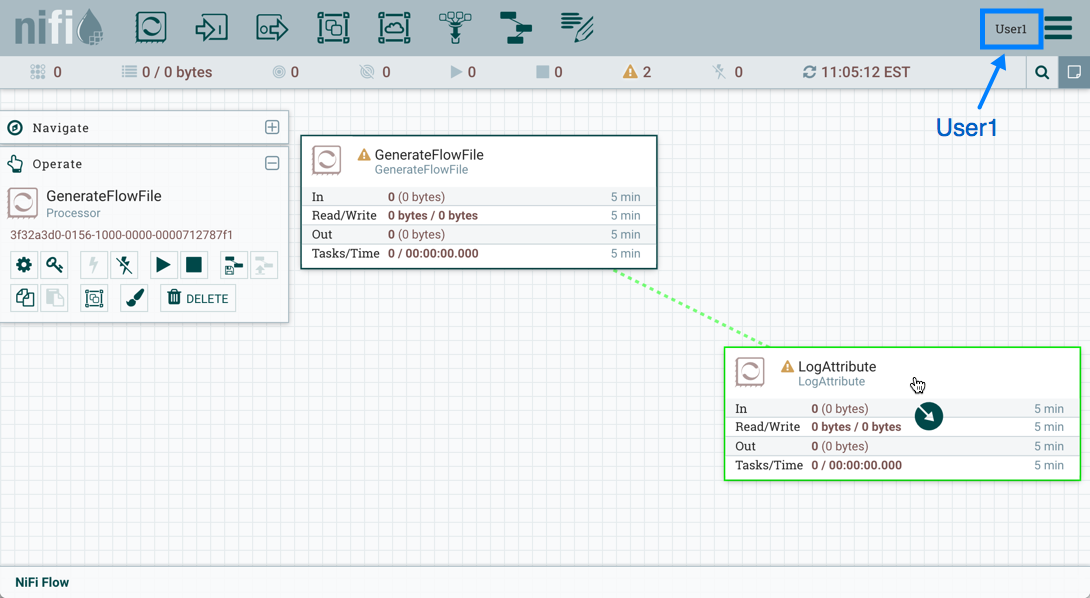
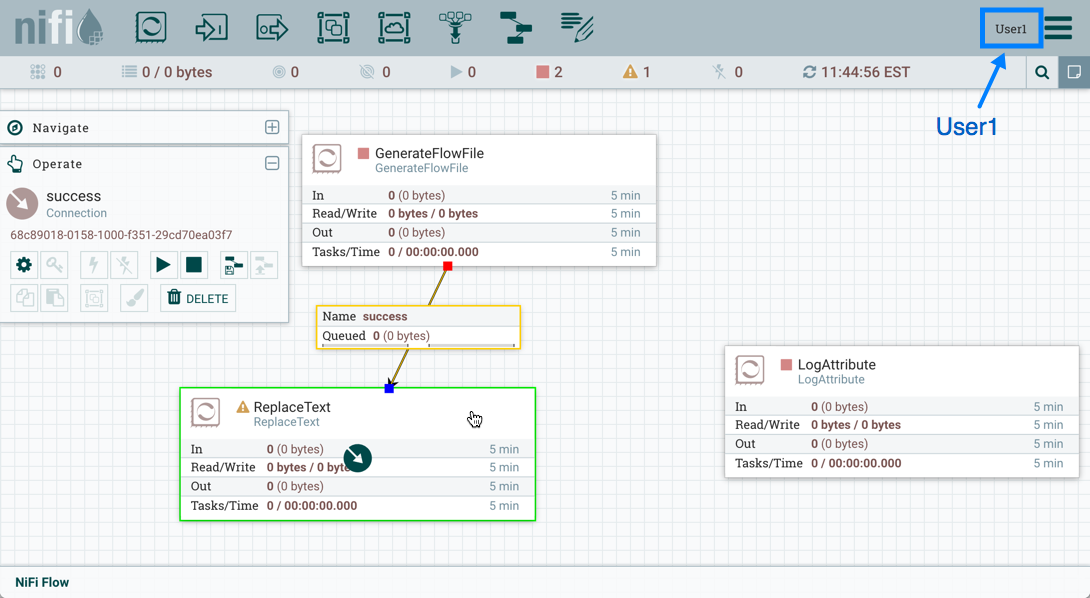
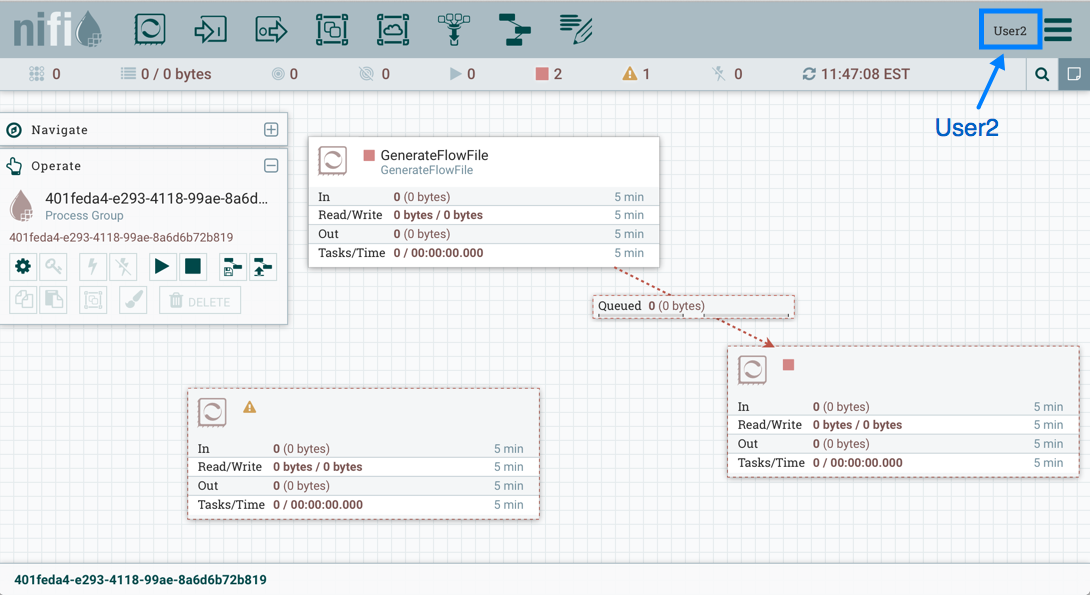
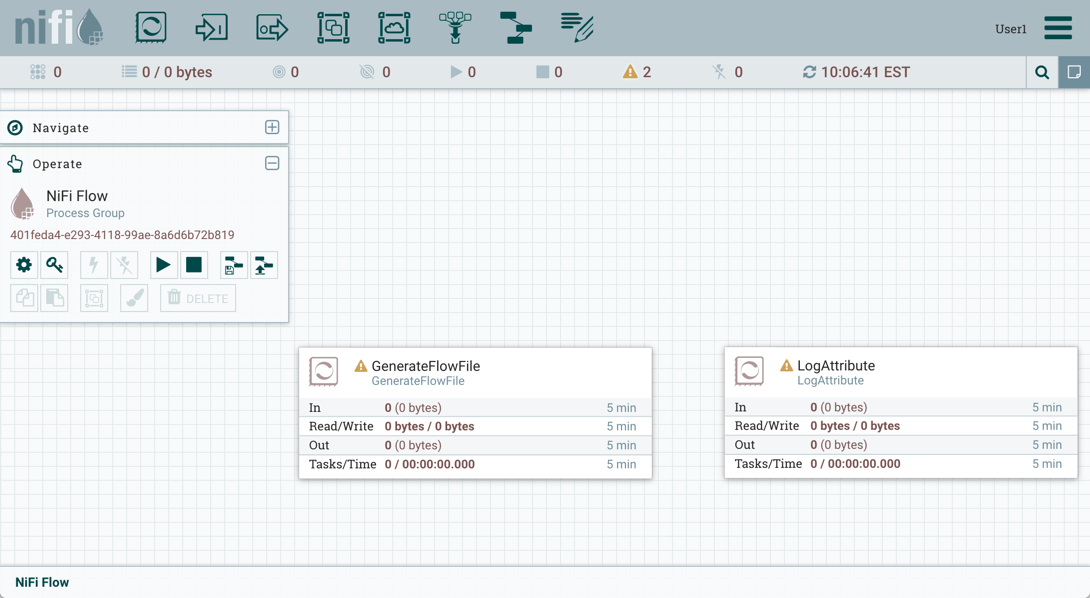
To allow User2 to move the GenerateFlowFile processor in the dataflow and only that processor, User1 performs the following steps:
-
Select the GenerateFlowFile processor so that it is highlighted.
-
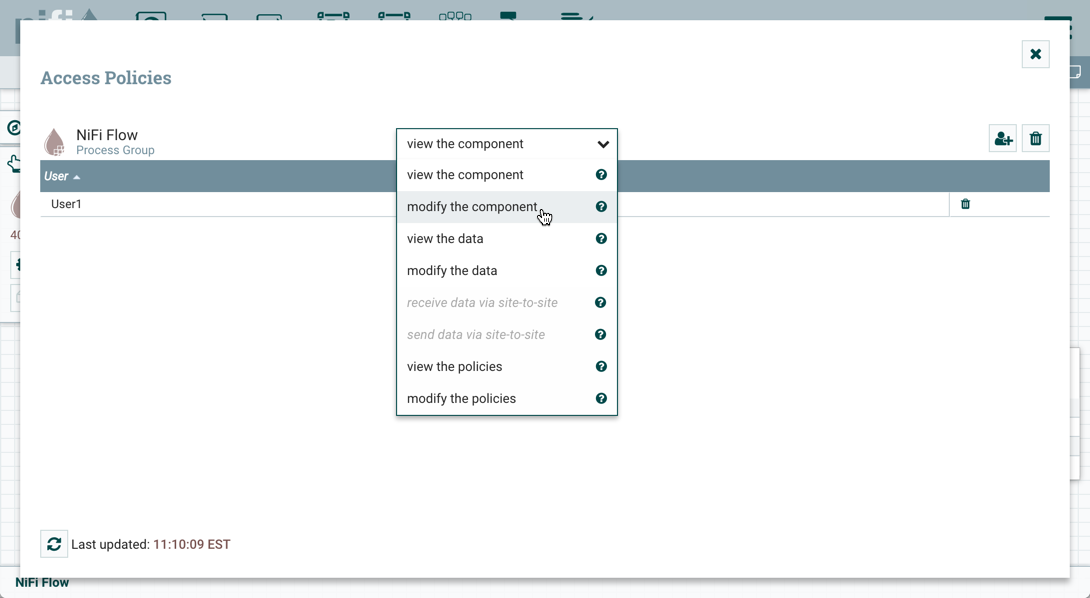
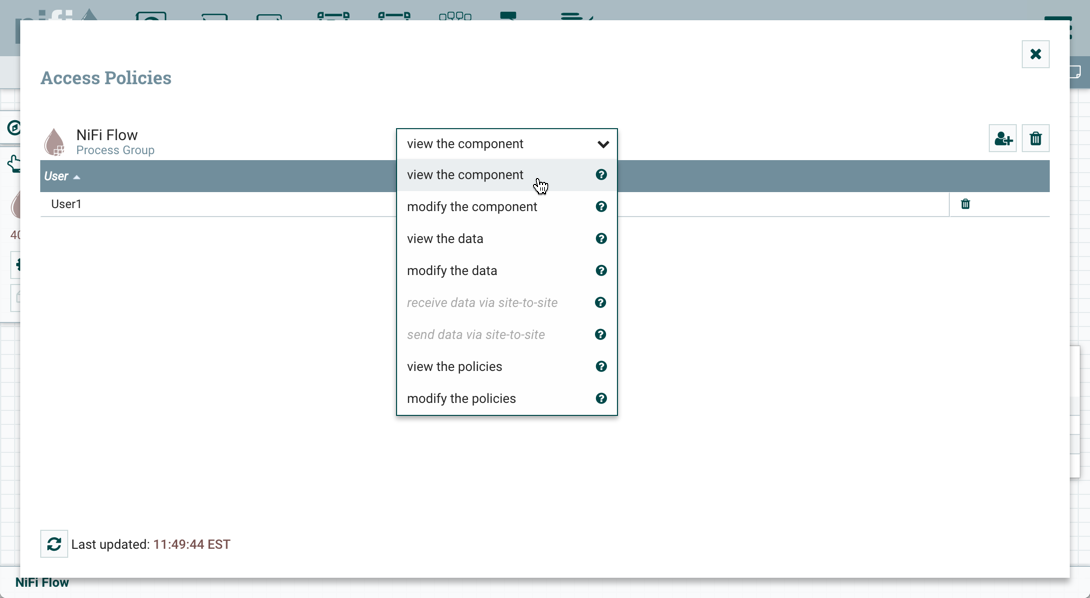
Select the Access Policies icon (
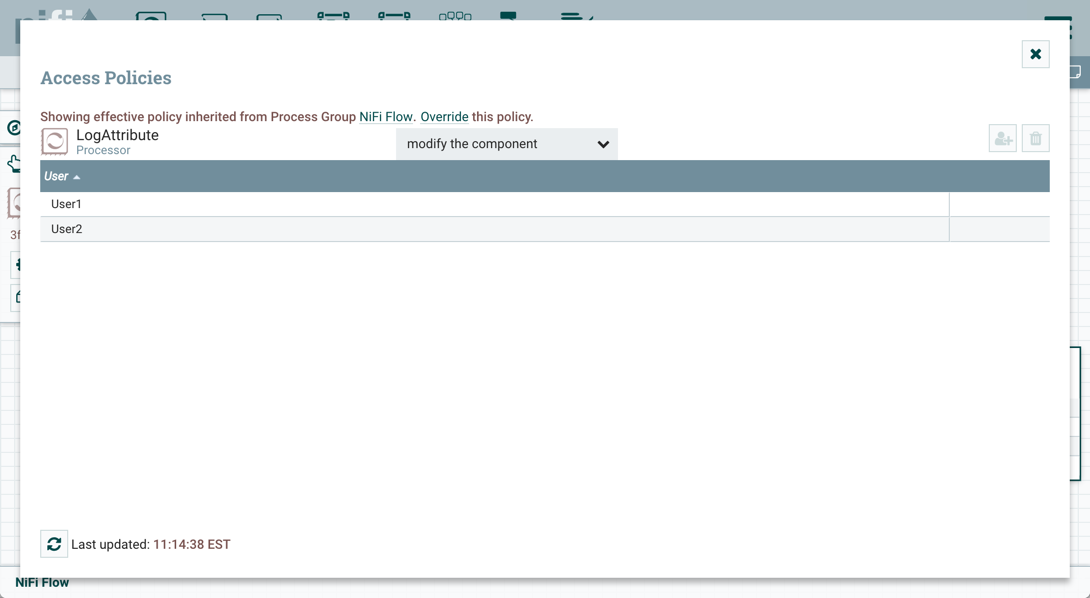
 ) from the Operate palette and the Access Policies dialog opens.
 -
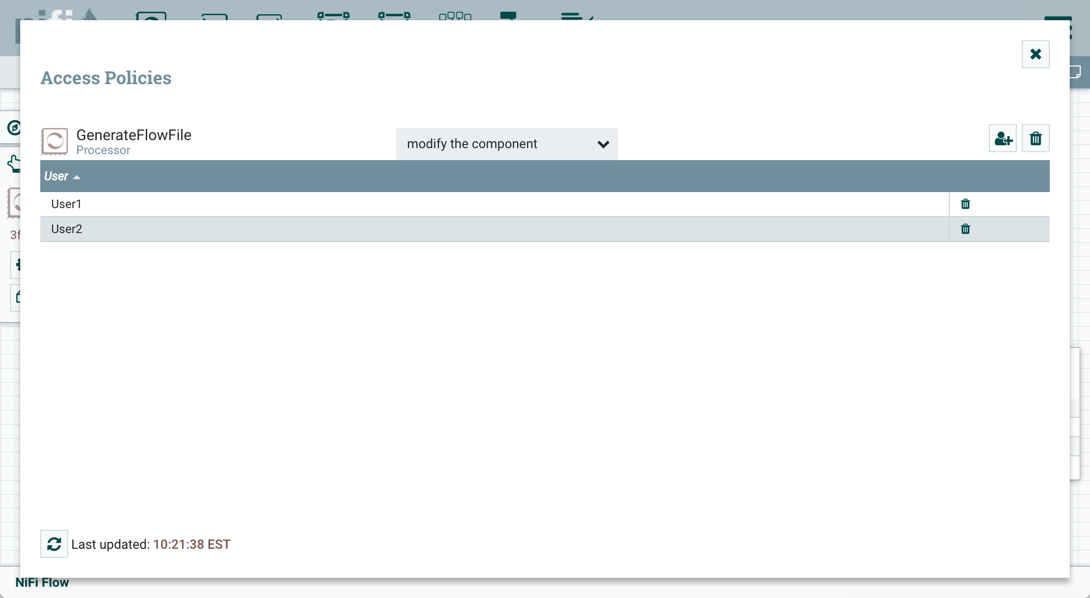
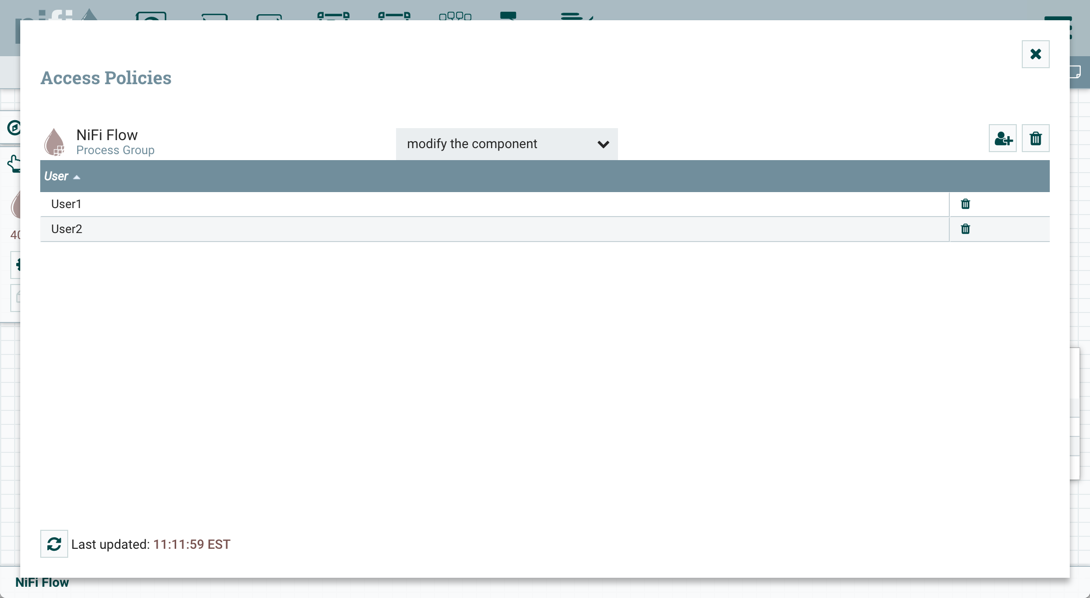
Select "modify the component" from the policy drop-down. The "modify the component" policy that currently exists on the processor (child) is the "modify the component" policy inherited from the root process group (parent) on which User1 has privileges.
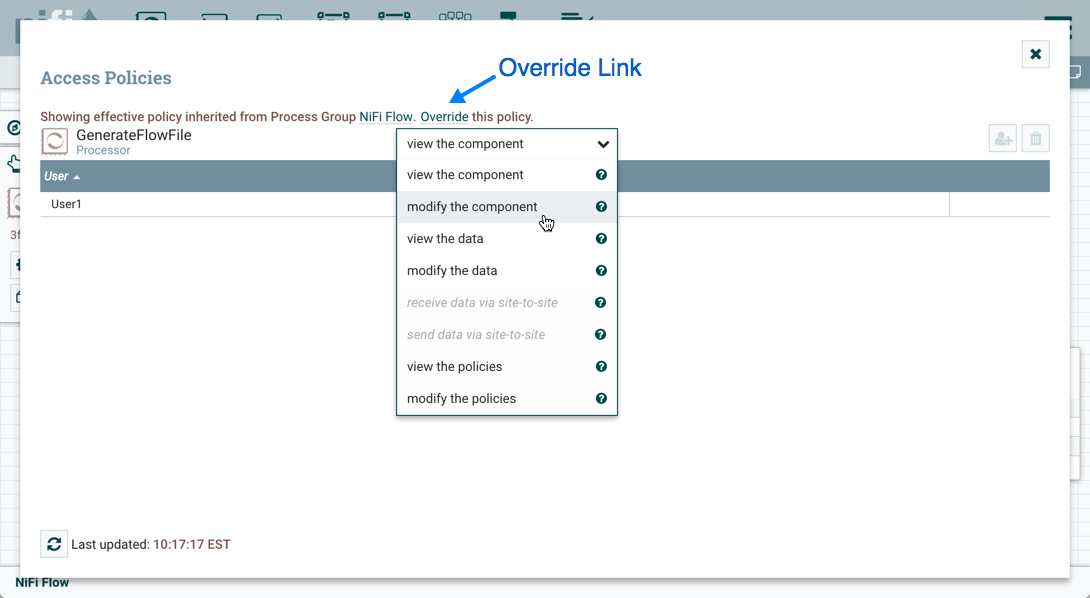
-
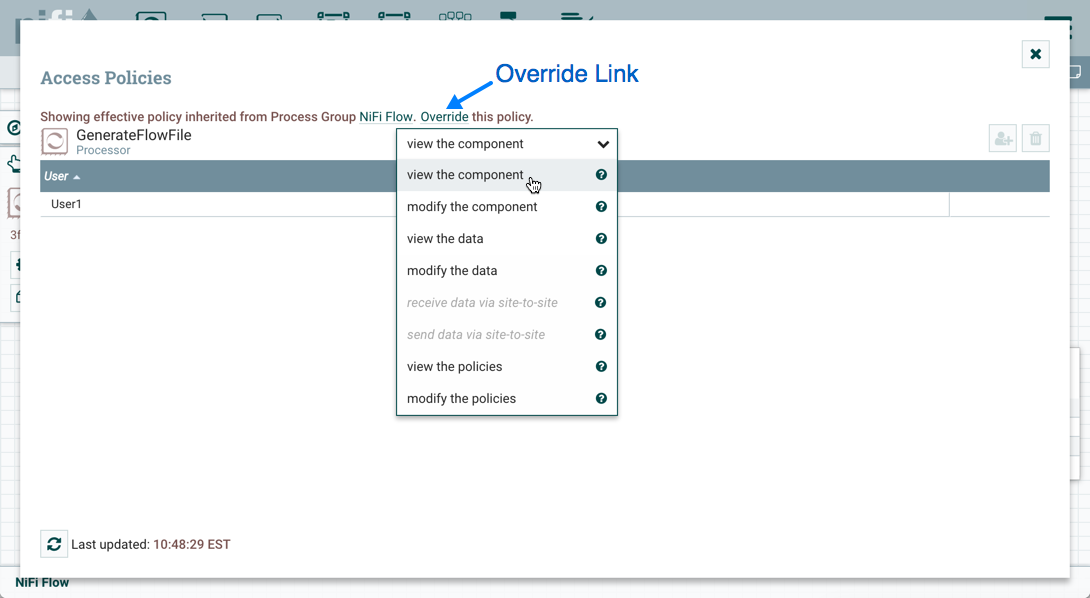
Select the Override link in the policy inheritance message. When creating the replacement policy, you are given a choice to override with a copy of the inherited policy or an empty policy. Select the Override button to create a copy.
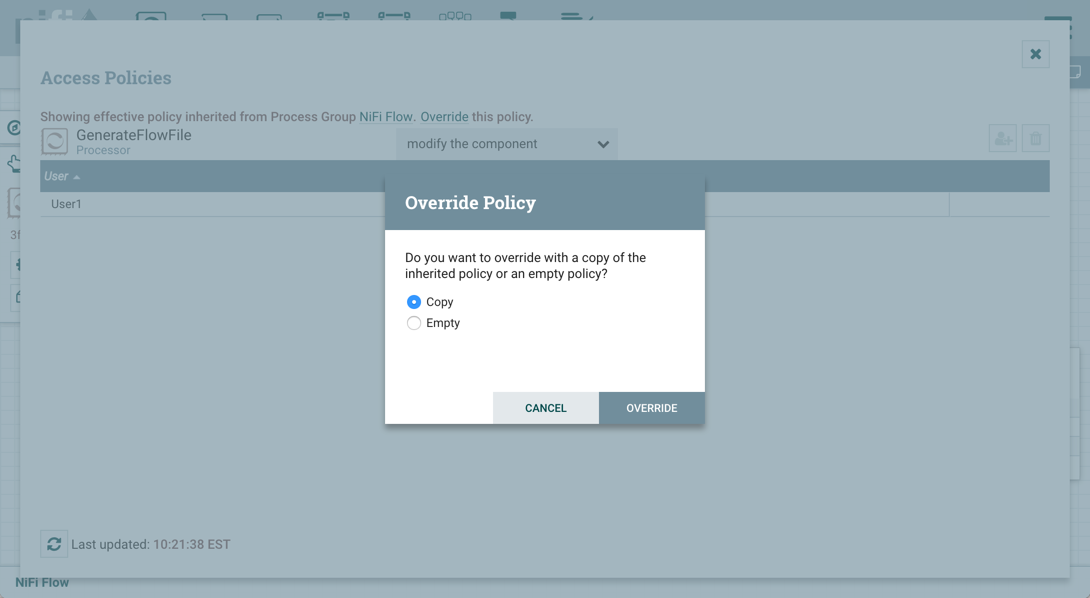
-
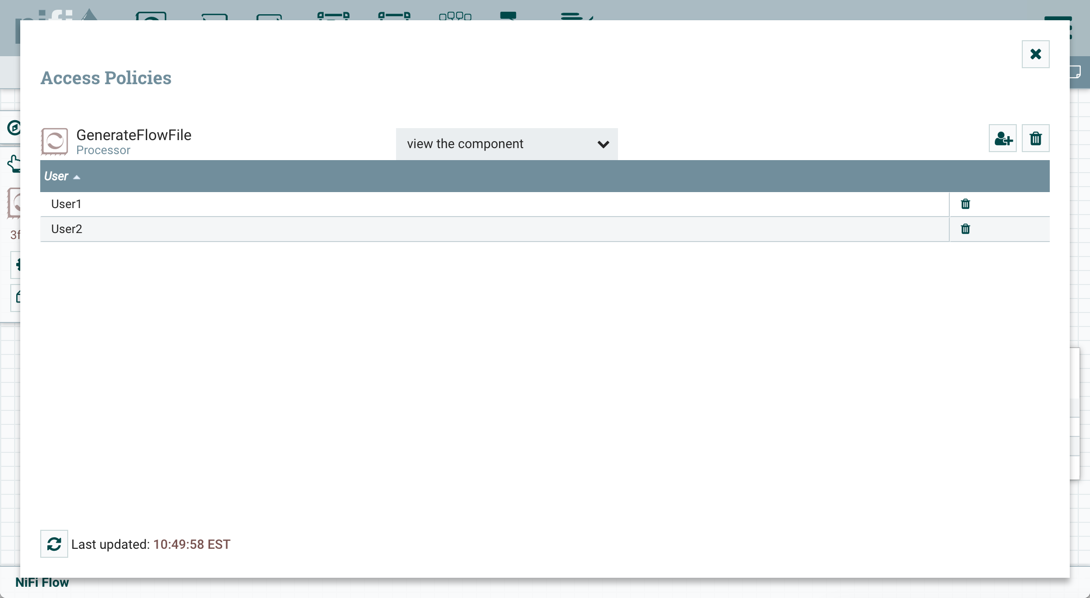
On the replacement policy that is created, select the Add User icon (
 ). Find or enter User2 in the User Identity
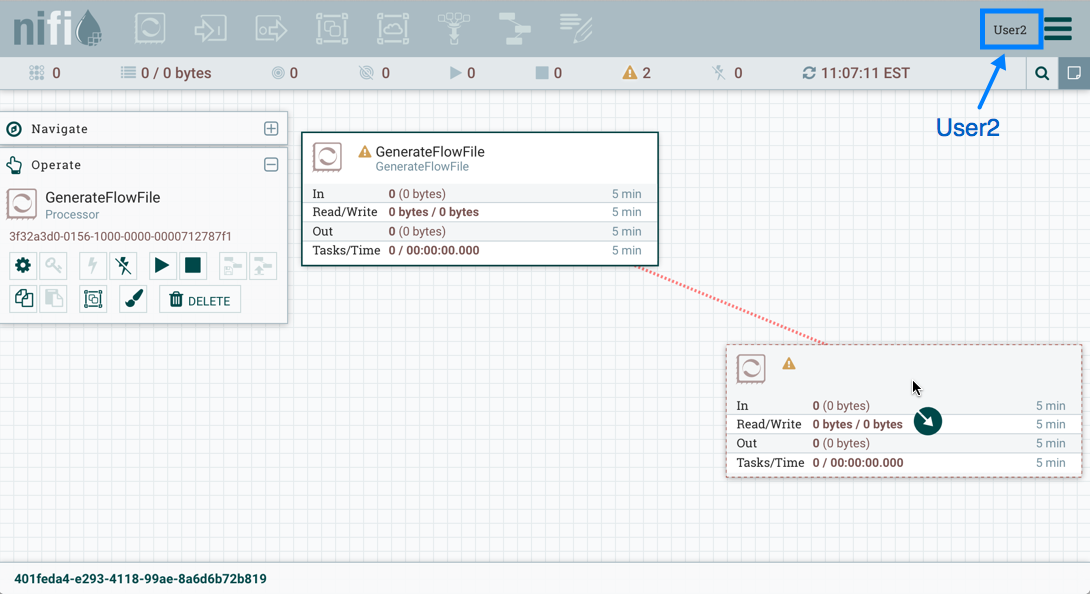
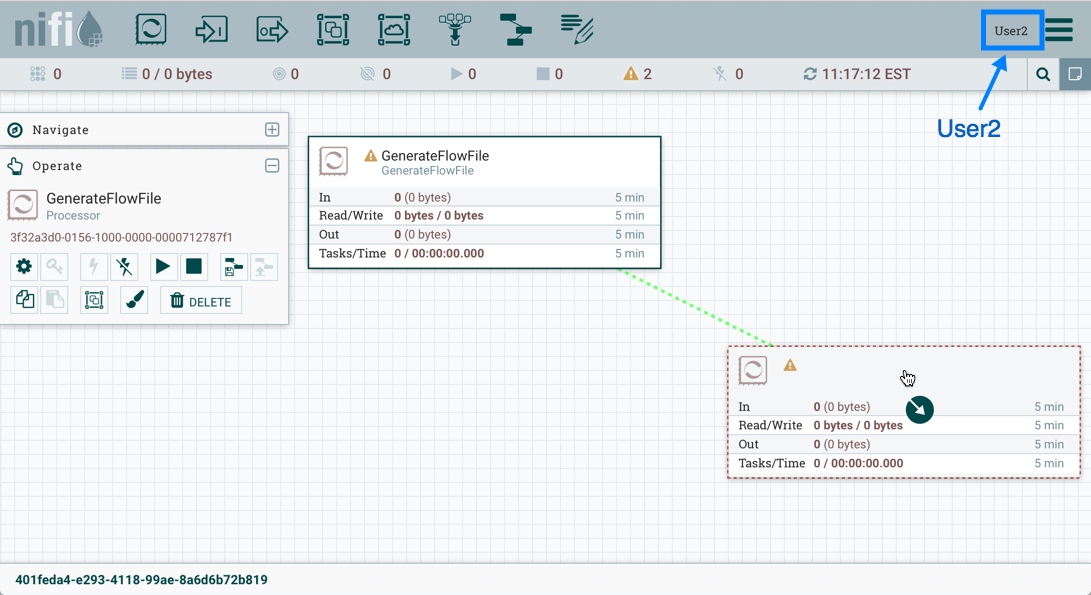
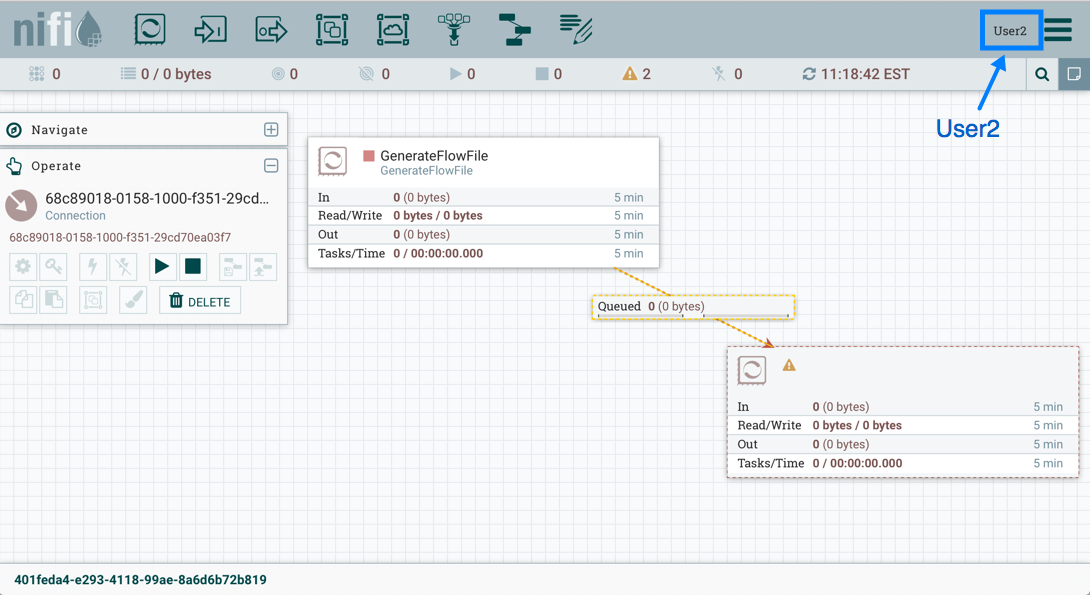
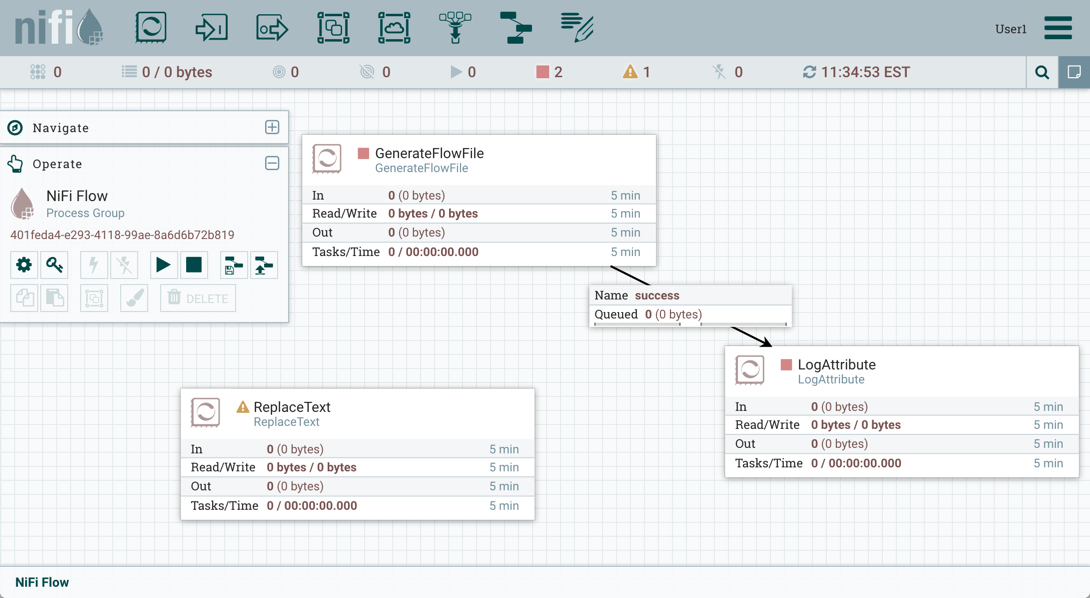
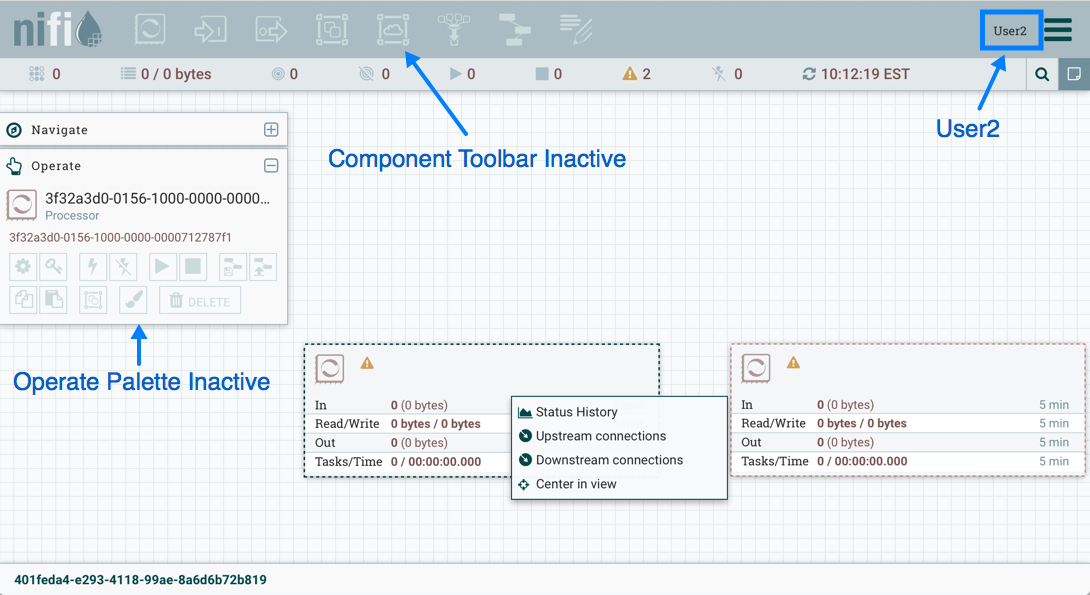
field and select OK. With these changes, User1 maintains the ability to move both
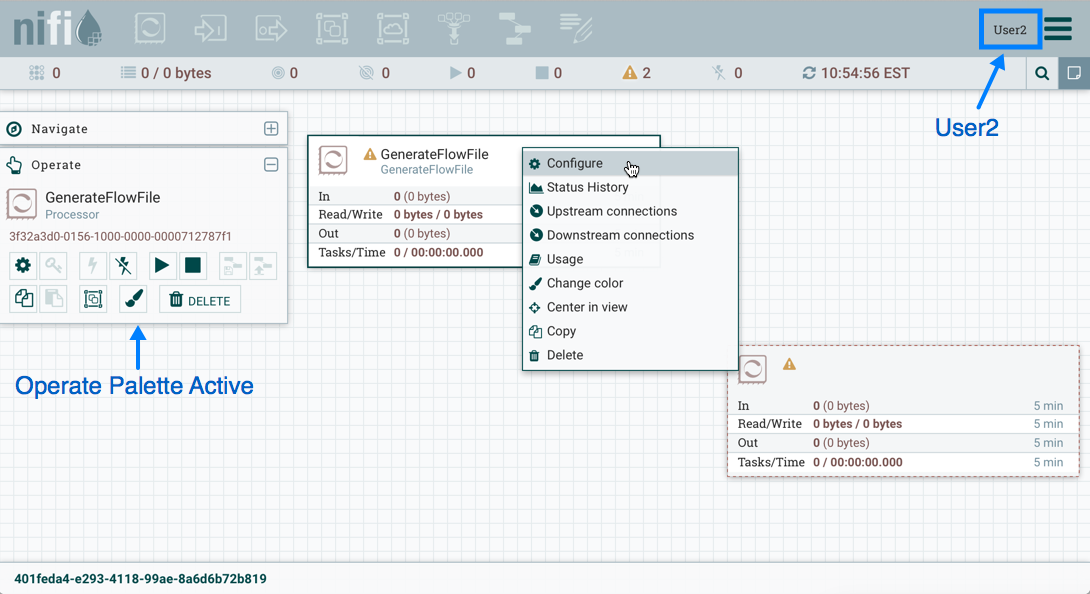
processors on the canvas. User2 can now move the GenerateFlowFile processor but
cannot move the LogAttribute processor.
). Find or enter User2 in the User Identity
field and select OK. With these changes, User1 maintains the ability to move both
processors on the canvas. User2 can now move the GenerateFlowFile processor but
cannot move the LogAttribute processor.