
Setting an Advanced Configuration Snippet for a Cluster
How to enter cluster configurations using Advanced Configuration Snippets
Minimum Required Role: Configurator (also provided by Cluster Administrator, Limited Cluster Administrator , and Full Administrator)
- Locate the property you want to configure.
(It contains the string Advanced Configuration Snippet
(Safety Valve).)There are two types of Advanced Configuration Snippets: XML, and Environment.
- XML Advanced Configuration Snippet
Use either the Snippet editor, or the XML editor:
- Snippet editor
Click
 to add a property. Enter the
property name, value, and optional description. To
indicate that the property value cannot be overridden by
another , select the Final
checkbox.
to add a property. Enter the
property name, value, and optional description. To
indicate that the property value cannot be overridden by
another , select the Final
checkbox.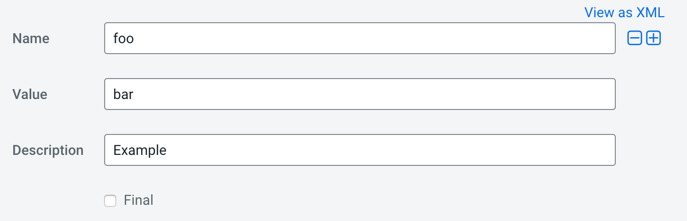
- XML EditorClick the View as XML link to view and edit the XML directly. Enter the property name, value, and optional description as XML elements. To indicate that the property value cannot be overridden, specify
<final>true</final>. For example:<property> <name>foo</name> <value>bar</value> <description>Example</description> </property>
To switch between the editor and text field, click the View Editor and View as XML links at the top right of the snippet row.
- Snippet editor
- Environment Advanced Configuration Snippet
Use either the Snippet editor, or the Text editor:
- Snippet editor
Click
to add a property and enter the
key name and value.
- Text EditorClick the Edit Text link to view and edit the text. Enter the property name and value as name/value pairs. For example:

To switch between the editor and text field, click the View Editor and View Text links at the top right of the snippet row.
- Snippet editor
- XML Advanced Configuration Snippet
