Adding Kafka as Data Provider

After installing Kafka as a service on your cluster, you can register Kafka as a Data Provider to use it as a Table in SQL Stream Builder (SSB).

  • Make sure that you have Kafka service on your cluster.
  • Make sure that you have the right permissions set in Ranger.
  1. Go to your cluster in Cloudera Manager.
  2. Click SQL Stream Builder from the list of services.
  3. Click SQLStreamBuilder Console.
    The Streaming SQL Console opens in a new window.
  4. Click Data Providers from the main menu.
  5. Click Register Kafka Provider.
    The Add Kafka Provider window appears.
  6. Add a Name to your Kafka provider.
  7. Add the broker host name(s) to Brokers.
    You need to copy the Kafka broker name(s) from Cloudera Manager.
    1. Go to your cluster in Cloudera Manager.
    2. Click Kafka from the list of services.
    3. Click Instances.
    4. Copy the hostname of the Kafka broker(s) you want to use.
    5. Go back to the Add Kafka Provider page.
    6. Paste the broker hostname to the Brokers field.
    7. Add the default Kafka port after the hostname(s).
      Example:
      docs-test-1.vpc.cloudera.com:9092, 
      docs-test-2.vpc.cloudera.com:9092
  8. Select the Connection Protocol.
    The connection protocol must be the same as it is configured for the Kafka cluster in Cloudera Manager.

    You can choose from the following protocols:

    1. Select Plaintext, and click Save Changes.
    2. Select SSL, and click Save Changes.
    3. Select SASL/SSL, and choose an SASL Mechanism.
      1. Select Kerberos, and provide the Kafka Truststore location. Click Save Changes.
      2. Select Plain, and provide the SASL username and password. Click Save Changes.
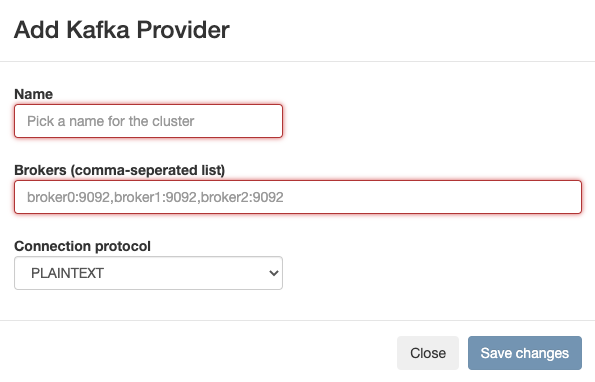
You have registered Kafka as a data provider to be able to add Kafka as a table in your SQL query. The already existing Kafka topics can be selected when adding Kafka as a table.