Configuring and Managing Extraction
Entities extracted from cluster services and the metadata that is applied to them supports Cloudera Navigator features, such as the ability to trace entities to their source in lineage diagrams, search for specific entities, and so on. Extraction is enabled for some services by default, while for other services, extraction must be specifically enabled. For example, extraction is enabled for Spark by default. Extraction consumes computing resources, such as memory and storage, so administrators may want to disable extraction for some services entirely, or configure more selective extraction for specific services.
In addition to configuring extraction for specific services, specific filters can be configured to blacklist specific HDFS paths to remove them from the extraction process which both speeds up the process and cuts down on indexing time, as well as the amount of storage consumed by the datadir. Filters can also be configured to blacklist or whitelist Amazon S3 buckets.
Continue reading:
Cloudera Manager Required Role: Navigator Administrator (or Full Administrator)
Enabling Hive Metadata Extraction in a Secure Cluster
- Hive Metastore Access Control and Proxy User Groups Override (Inherits from Hive Proxy User Groups when left empty (the default)
- Hive Proxy User Groups
- Log in to Cloudera Manager Admin Console.
- Select .
- Click the Configuration tab.
- Select Proxy for the Category filter.
- Add hue to the Hive Metastore Access Control and Proxy User Groups Override list if necessary:
- Click the plus icon to open an entry field to add a row to the property.
- Type hue in the entry field.
- Click Save Changes, and repeat the process to add the Hive Proxy User Groups property on the HDFS server:
- Select .
- Click the Configuration tab.
- Select Proxy for the Category filter.
- Add hue to the Hive Proxy User Groups list by adding a row and typing hue in the entry field.
- Click Save Changes.
- Restart the Hive service.
Disabling Spark Metadata Extraction
- Log in to Cloudera Manager Admin Console.
- Select .
- Click the Configuration tab.
- Select Cloudera Navigator for the Category filter. The state of the Enable Lineage Collection feature displays, as
in this example:
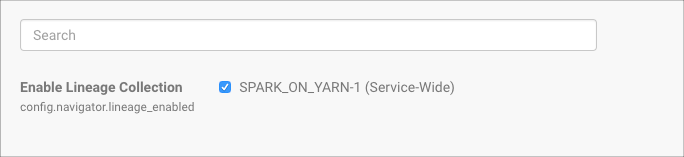
- To disable lineage collection, click the checked box.
Editing MapReduce Custom Metadata
You can associate metadata with arbitrary configuration parameters to MapReduce jobs and job executions. The configuration parameters to be extracted by Cloudera Navigator can be specified statically or dynamically.
- Log in to Cloudera Manager Admin Console.
- Select .
- Click the Configuration tab.
- Select Navigator Metadata Server for the Scope filter.
- Select Advanced for the Category filter.
- Scroll to find the Navigator Metadata Server Advanced Configuration Snippet for cloudera-navigator.properties.
- Specify values for the following properties:
- nav.user_defined_properties - A comma-separated list of user-defined property names.
- nav.tags - A comma-separated list of property names that serve as tags. The property nav.tags can point to multiple property names that serve as tags, but each of those property names can only specify a single tag.
- Click Save Changes.
- Click the Instances tab.
- Restart the role.
- In the MapReduce job configuration, set the value of the property names you specified in step 7.
- Specify one or more of the following properties in a job configuration:
- Job properties (type:OPERATION)
- nav.job.user_defined_properties - A comma-separated list of user-defined property names
- nav.job.tags - A comma-separated list of property names that serve as tags
- Job execution properties (type:OPERATION_EXECUTION)
- nav.jobexec.user_defined_properties - A comma-separated list of user-defined property names
- nav.jobexec.tags - A comma-separated list of property names that serve as tags
- Job properties (type:OPERATION)
- In the MapReduce job configuration, set the value of the property names you specified in step 1.
Setting Properties Dynamically
- Dynamically add the job_tag1 and job_tag2 properties:
conf.set("nav.job.tags", "job_tag1, job_tag2"); - Set the job_tag1 property to onetag:
conf.set("job_tag1", "onetag"); - Set the job_tag2 property to twotag:
conf.set("job_tag2", "twotag");
- Dynamically add the job_tag property:
conf.set("nav.jobexec.tags","job_exec_tag"); - Set the job_exec_tag property to atag:
conf.set("job_exec_tag", "atag");
- Dynamically add the user-defined key bar:
conf.set("nav.job.user_defined_properties", "key"); - Set the value of the user-defined key key to value:
conf.set("key", "value")
Enabling Inputs and Outputs to Display
The Cloudera Navigator console displays a Details page for selected entities. Details include an entity's type and can optionally include table inputs and operation inputs and outputs. The inputs and outputs are not displayed by default because rendering them can slow down the display. Enabling the display of inputs and outputs in the Details page requires changing the nav.ui.details_io_enabled on the Navigator Metadata Server to true, as follows:
- Log in to the Cloudera Manager Admin Console.
- Select .
- Click the Configuration tab.
- Select Navigator Metadata Server for the Scope filter.
- Select Advanced for the Category filter.
- In the Navigator Metadata Server Advanced Configuration Snippet (Safety Valve) for cloudera-navigator.properties, enter the following:
nav.ui.details_io_enabled=true
- Click Save Changes.
- Restart the Navigator Metadata Server role.
