How to Verify that HDFS ACLs are Synching with Sentry
If you want to verify that your HDFS ACLs are synching with Sentry, this article will show you how to see whether they are. This example will show you how to complete the following tasks:
- Create a role and grant the role to a group.
- Grant privileges to the role.
- Verify that Sentry privileges are synching with HDFS ACLs.
- Grant privileges on a URI and see that URI privileges do not sync with HDFS ACLs.
The example here will show you the work-flow, start to finish, of how to grant and revoke permissions, and verify that those permissions are synching with HDFS ACLs.
Alternatively, you can see the same example in this video:
Verify the Prerequisites
Before you start, verify that you have the following prerequisites:
- The Sentry and Hue services must be running on your cluster.
- And you'll need three users:
- Test user - The test user must belong to an LDAP or UNIX group that you can assign a role to. The test user in this example is stegosaurus and his group is triceratops.
- Sentry Admin user - This user will login to Hue to grant and revoke privileges. In this example, the Sentry Admin user is hive.
- HDFS user - A user that can run HDFS commands in the terminal. In this example, the HDFS user is hdfs.
Grant Privileges
This section will show you how to create a role and grant privileges to the role. If you already have a role with privileges on it, you can skip to the next section.
- In Cloudera Manager, open the Hue service.
- In the Hue service, click to open the Hue UI.
- Login to Hue as a Sentry Admin user. In this example, the Sentry Admin user is hive.
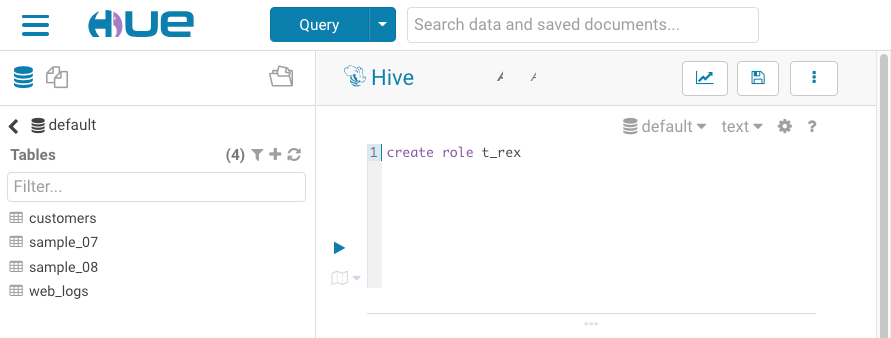
- In the Hue editor, create a role with the following command:
create role <role name>
The role in this example is t_rex, so we enteredcreate role t_rex
- Click the execute button to run the command.
- Next, grant the role to your group with the following command:
grant role <role name> to group <group name>
In this example, the group name is triceratops, so we enteredgrant role t_rex to group triceratops
- Finally, grant SELECT privileges to the to the role with the following command:
grant select on table <table name> to role <role name>
This example uses the customers table, so we enteredgrant select on table customers to role t_rex
Now we have a user that belongs to a group, the group has a role, and the role has select privileges on the customers table. The following image illustrates our current status:

Now it's time to move to the terminal to verify that our SELECT privileges have synched with HDFS.
View HDFS Permissions in the Terminal
In this section, we'll SSH into the cluster and view HDFS permissions on the table.
- In the terminal, SSH into your cluster.
- Next, run kinit with a user that is authorized to run HDFS commands. The HDFS user for this example is hdfs, so we ran kinit hdfs.
- To view the permissions on the object, run the following command:
hdfs dfs -getfacl <ojbect path>
The command returns a list of permissions on the table. Your group should be listed there.
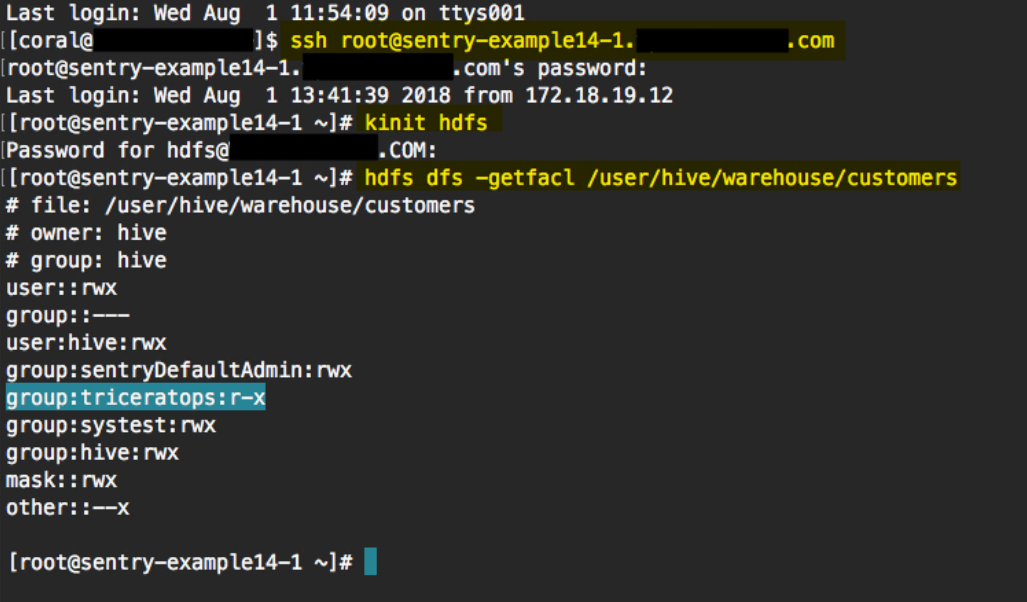
In this example, we ran this command to view the permissions on the customers table:hdfs dfs -getfacl /user/hive/warehouse/customers
The following image shows the commands we ran in the terminal, highlighted in yellow. In the output of the last command, the triceratops group is listed with read permissions on the customers table.
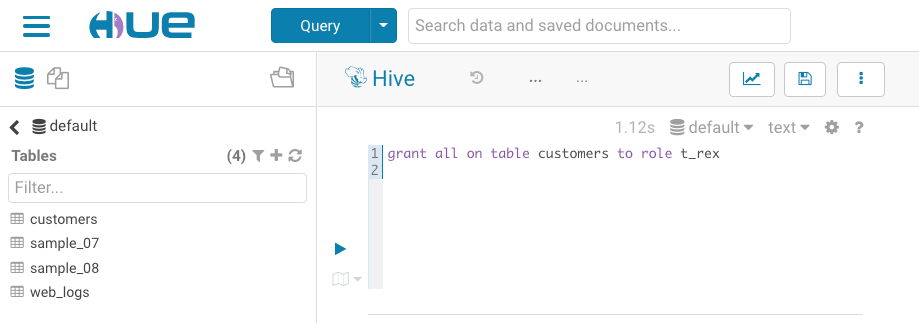
- You can go back to Hue to change the permissions for the your role and run the same command in the terminal to see how the permissions have changed. For example, you can give your role
ALL permissions with the following command:
grant all on table <table name> to role <role name>
For example:grant all on table customers to role t_rex
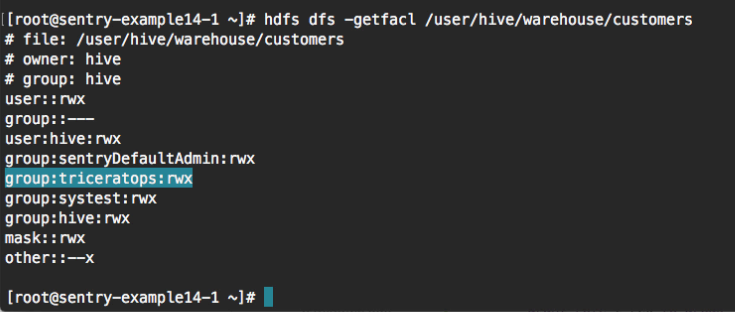
- And when you go back to the terminal and run the same command, you can see that the group has write permissions on the customers table, as in the image
below:
URIs Don't Sync With HDFS ACLs
Finally, you can grant permissions to a URI in Hue and see that it is not applied as an ACL in HDFS.
- First, in Hue remove all permissions from your role. Enter the following command:
revoke all on table <table name> from role <role name>
- You can run the same command in the terminal to verify that the group does not have any permissions on the table.
- Then, grant permissions to the role on the URI with the following command:
grant all on uri '<object path>' to role <role name>
For this example, we entered this command:grant all on uri 'user/hive/warehouse/customers' to role t_rex
- And if you run the same command in the terminal, you'll see that the group is still not listed as having permissions because URIs do not sync with HDFS ACLs. For more information about granting privileges on URIs, see Granting Privileges on URIs.
