Using Cloudera Data Science Workbench, you can create any function within a script and
deploy it to a REST API. In a machine learning project, this will typically be a predict
function that will accept an input and return a prediction based on the model's
parameters.
For the purpose of this quick start demo we are going to
create a very simple function that adds two numbers and deploy it as a model that returns
the sum of the numbers. This function will accept two numbers in JSON format as input and
return the sum.
Create a new project. Note that models are always created within the
context of a project.
Click Open Workbench and launch a new Python
3 session.
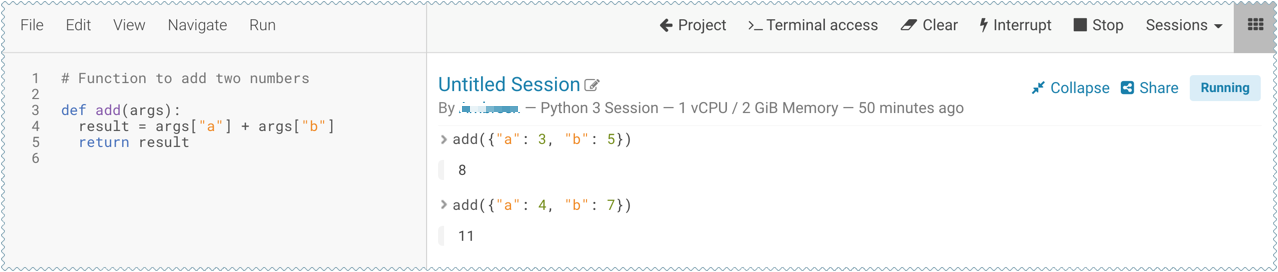
Create a new file within the project called add_numbers.py. This is the file where we define the function that will
be called when the model is run. For example:
add_numbers.py
def add(args):
  result = args["a"] + args["b"]
  return result
Before deploying the model, test it by running the add_numbers.py script, and
then calling the add function directly from the interactive
workbench session. For example:
add({"a": 3, "b": 5})
Deploy the add function to a REST endpoint.
Go to the project Overview page.
Click Models > New Model.
Give the model a Name and Description.
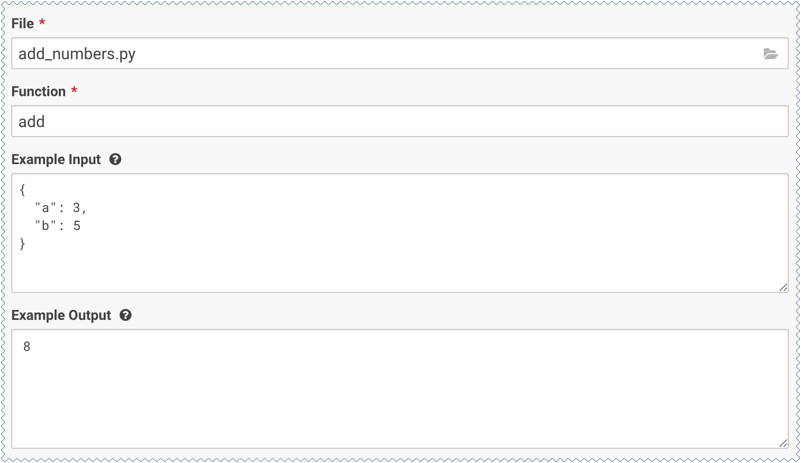
Enter details about the model that you want to build. In this case:
File: add_numbers.py
Function: add
Example Input: {"a": 3, "b": 5}
Example Output: 8
Select the resources needed to run this model, including any replicas for
load balancing.
Click Deploy Model.
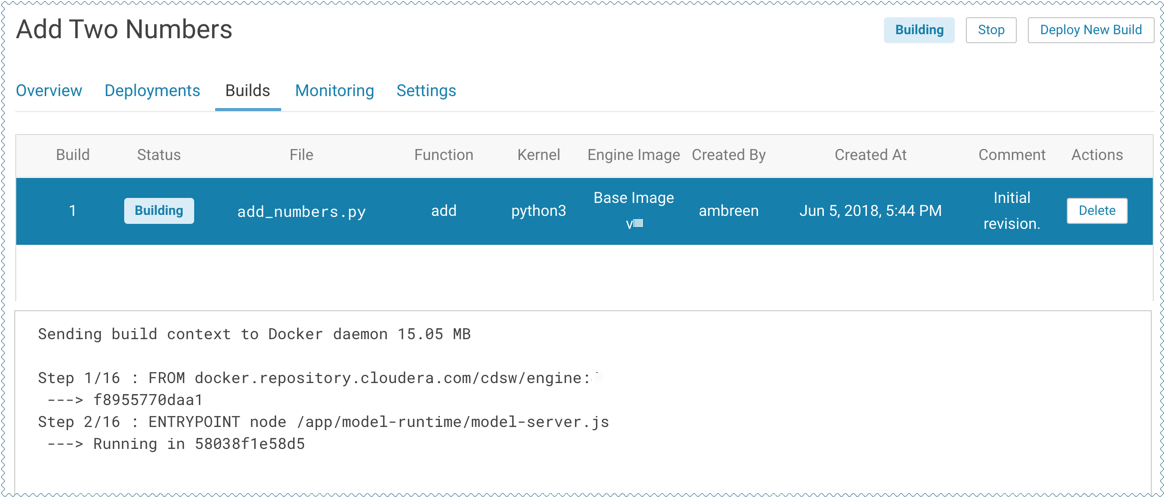
Click on the model to go to its Overview page. Click
Builds to track realtime progress as the model is built and
deployed. This process essentially creates a Docker container where the model will
live and serve requests.
Once the model has been deployed, go back to the model Overview page and use the
Test Model widget to make sure the model works as expected.
If you entered example input when creating the model, the Input field will be
pre-populated with those values. Click Test. The result
returned includes the output response from the model, as well as the ID of the
replica that served the request.
Model response times depend largely on your model code. That is, how long it takes
the model function to perform the computation needed to return a prediction. It is
worth noting that model replicas can only process one request at a time. Concurrent
requests will be queued until the model can process them.