After registering a Kafka data provider, you can use the Add table wizard in
Streaming SQL Console to create a Kafka table.
- Make sure that you have registered Kafka as a Data Provider.
- Make sure that you have created topics in Kafka.
- Make sure there is generated data in the Kafka topic.
- Make sure that you have the right permissions set in Ranger.
-
Navigate to the Streaming SQL Console.
-
Go to your cluster in Cloudera Manager.
-
Select SQL Stream Builder from the list of services.
-
Click SQLStreamBuilder Console.
The Streaming SQL Console opens in a new window.
-
Select Console from the left- side menu.
-
Go to the Tables tab.
-
Select .
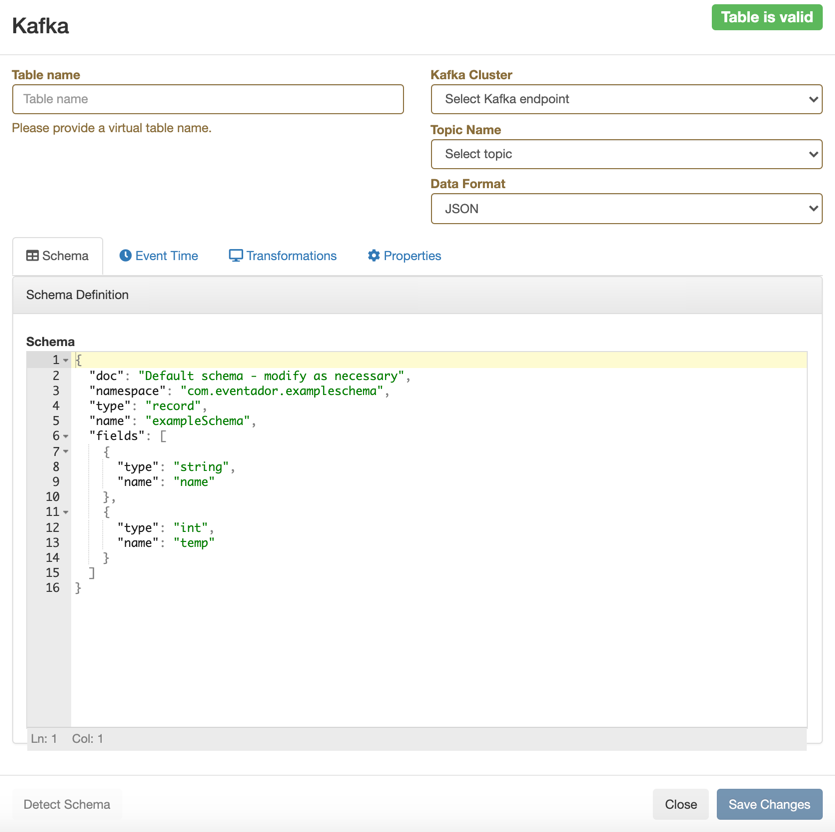
The Kafka Table window appears.
-
Provide a Name for the Table.
-
Select a registered Kafka provider as Kafka
cluster.
-
Select a Kafka topic from the list.
-
Select the Data format.
- You can select JSON as data format.
- You can select AVRO as data format.
-
Determine the Schema for the Kafka table.
-
Add a customized schema to the Schema Definition
field.
-
Click Detect Schema to read a sample of the JSON
messages and automatically infer the schema.
-
Customize your Kafka Table with the following options:
-
Configure the Event Time if you do not want to
use the Kafka Timestamps.
- Unselect the checkbox of Use Kafka
Timestamps.
- Provide the name of the Input Timestamp
Column.
- Add a name for the Event Time
Column.
- Add a value to the Watermark
Seconds.
-
Configure an Input Transform, add the code using the
Transformations tab.
-
Configure any Kafka properties required using the Properties tab.
For more information about how to configure the Kafka table, see the
Configuring Kafka tables section.
-
Select Save Changes.
The Kafka Table is ready to be used for the SQL job either
at the FROM or at the INSERT INTO statements.

