Embedded PostgreSQL Database
Continue reading:
Installing and Starting the Embedded PostgreSQL Database
This procedure should be used only when creating a demonstration or proof-of-concept deployment. It is not recommended for production.
If you are using Installation Path B - Manual Installation Using Cloudera Manager
Packages and you want to use an embedded PostgreSQL database for the Cloudera Management Server, use this procedure to install and start the database:
- Install the embedded PostgreSQL database packages:
OS Command Red Hat-compatible, if you have a yum repo configured $ sudo yum install cloudera-manager-server-db-2
Red Hat-compatible, if you're transferring RPMs manually sudo yum --nogpgcheck localinstall cloudera-manager-server-db-2.noarch.rpm
SLES $ sudo zypper install cloudera-manager-server-db-2
Ubuntu or Debian $ sudo apt-get install cloudera-manager-server-db-2
- Start the PostgreSQL database:
$ sudo service cloudera-scm-server-db start
Stopping the Embedded PostgreSQL Database
- Stop the services that have a dependency on the Hive metastore (Hue, Impala, and Hive) in the following order:
- Stop the Hue and Impala services.
- Stop the Hive service.
- Stop the Cloudera Management Service.
- Stop the Cloudera Manager Server.
- Stop the Cloudera Manager Server database:
sudo service cloudera-scm-server-db stop
Changing Embedded PostgreSQL Database Passwords
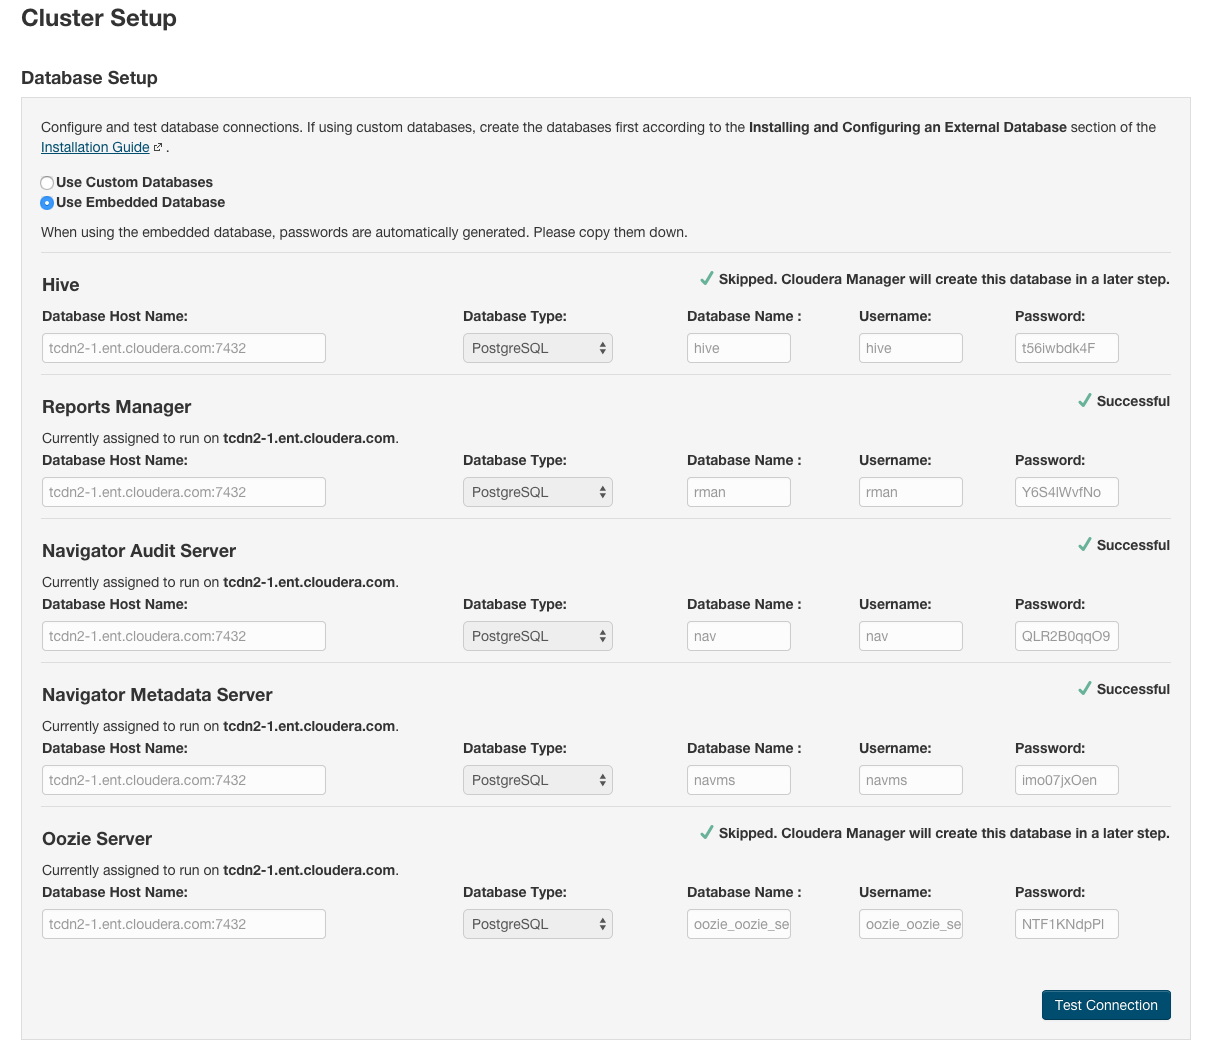
The embedded PostgreSQL database has generated user accounts and passwords. You can see the generated accounts and passwords during the installation process and you should record them at
that time. For example:

To find information about the PostgreSQL database account that the Cloudera Manager Server uses, read the /etc/cloudera-scm-server/db.properties file:
# cat /etc/cloudera-scm-server/db.properties

Auto-generated by scm_prepare_database.sh
#
Sat Oct 1 12:19:15 PDT 201
#
com.cloudera.cmf.db.type=postgresql
com.cloudera.cmf.db.host=localhost:7432
com.cloudera.cmf.db.name=scm
com.cloudera.cmf.db.user=scm
com.cloudera.cmf.db.password=TXqEESuhj5
To change a password associated with an embedded PostgreSQL database account:
- Obtain the root password from the /var/lib/cloudera-scm-server-db/data/generated_password.txt file:
# cat /var/lib/cloudera-scm-server-db/data/generated_password.txt

MnPwGeWaip

The password above was generated by /usr/share/cmf/bin/initialize_embedded_db.sh (part of the cloudera-scm-server-db package)
and is the password for the user 'cloudera-scm' for the database in the current directory.

Generated at Fri Jun 29 16:25:43 PDT 2012.
- On the host on which the Cloudera Manager Server is running, log into PostgreSQL as the root user:
psql -U cloudera-scm -p 7432 -h localhost -d postgres
Password for user cloudera-scm: MnPwGeWaip
psql (8.4.18)
Type "help" for help.

postgres=#
- Determine the database and owner names:
postgres=# \l List of databases Name | Owner | Encoding | Collation | Ctype | Access privileges -----------+--------------+----------+------------+------------+----------------------------------- amon | amon | UTF8 | en_US.UTF8 | en_US.UTF8 | hive | hive | UTF8 | en_US.UTF8 | en_US.UTF8 | nav | nav | UTF8 | en_US.UTF8 | en_US.UTF8 | navms | navms | UTF8 | en_US.UTF8 | en_US.UTF8 | postgres | cloudera-scm | UTF8 | en_US.UTF8 | en_US.UTF8 | rman | rman | UTF8 | en_US.UTF8 | en_US.UTF8 | scm | scm | UTF8 | en_US.UTF8 | en_US.UTF8 | template0 | cloudera-scm | UTF8 | en_US.UTF8 | en_US.UTF8 | =c/"cloudera-scm" : "cloudera-scm"=CTc/"cloudera-scm" template1 | cloudera-scm | UTF8 | en_US.UTF8 | en_US.UTF8 | =c/"cloudera-scm" : "cloudera-scm"=CTc/"cloudera-scm" (9 rows) - Set the password for an owner using the \password command. For example, to set the password for the amon owner, do the following:
postgres=# \password amon
Enter new password:
Enter it again:
- Configure the role with the new password:
- In the Cloudera Manager Admin Console, select .
- Click the Configuration tab.
- In the Scope section, select the role where you are configuring the database.
- Select category.
- Set the Role Name Database Password property.
- Click Save Changes to commit the changes.