
Creating your first dataflow
You can create an automated dataflow using the Cloudera Edge Management (CEM) UI. Simply drag components from the toolbar to the canvas, configure the components to meet specific needs, and connect the components together.
Perform the following steps to create a simple and your first dataflow:
- Click the Design icon (
 ) to navigate to the Flow
Designer.The
) to navigate to the Flow
Designer.TheOpen Flowscreen appears, as shown in the following image: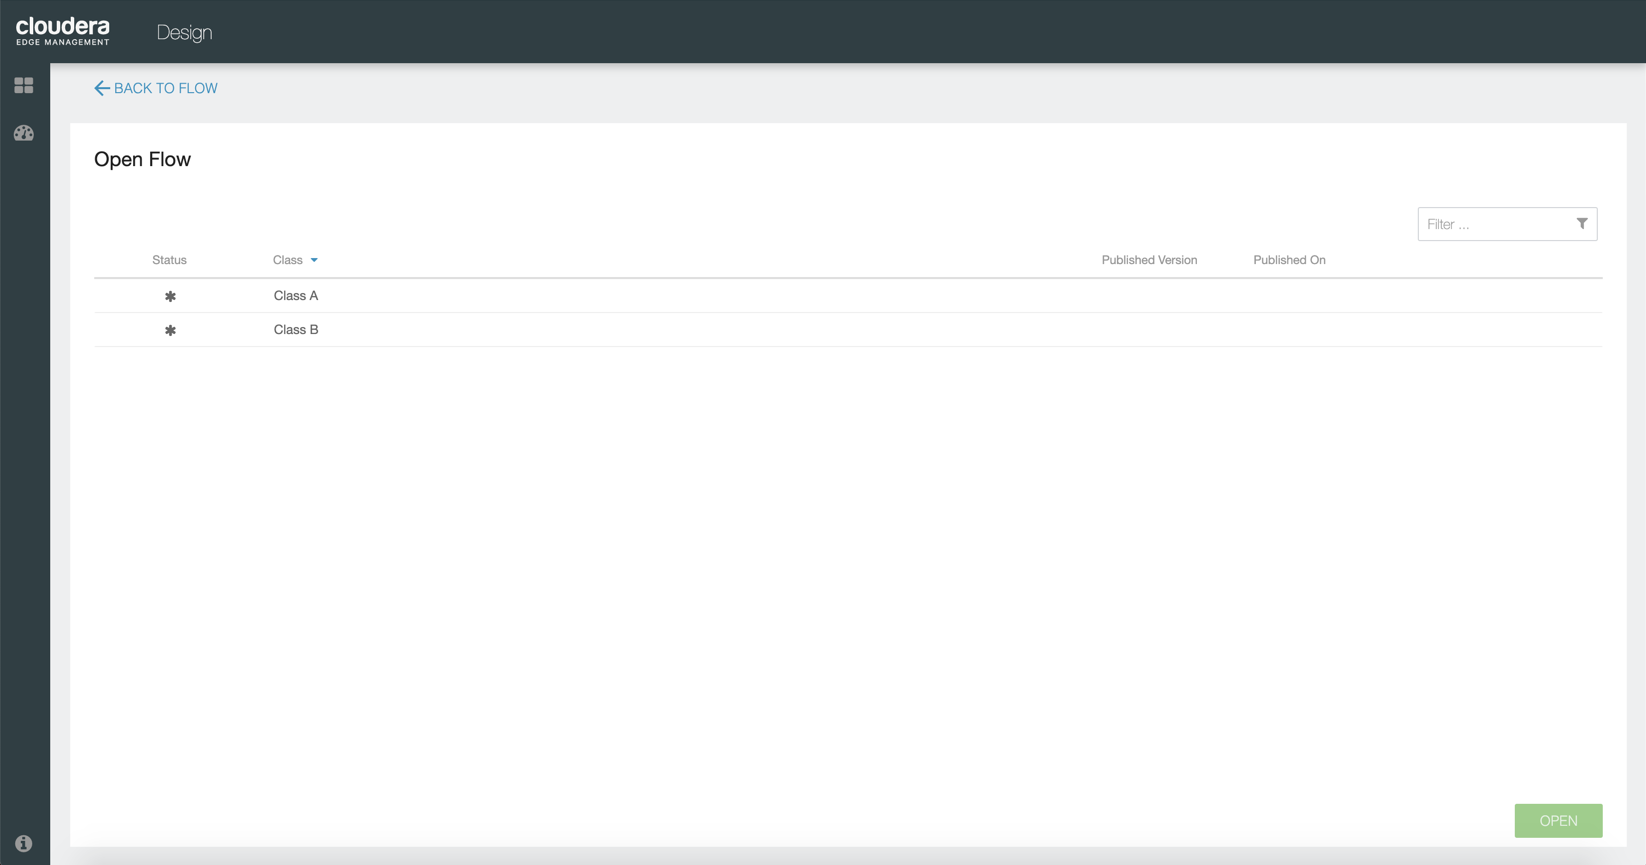
- Select the class you want to create the dataflow in and click
OPEN.
For example, select Class A.
TheDesignscreen appears, as shown in the following image:
- Drag the PROCESSOR option onto the canvas.The
Add
       Processor
dialog appears, as shown in the following image: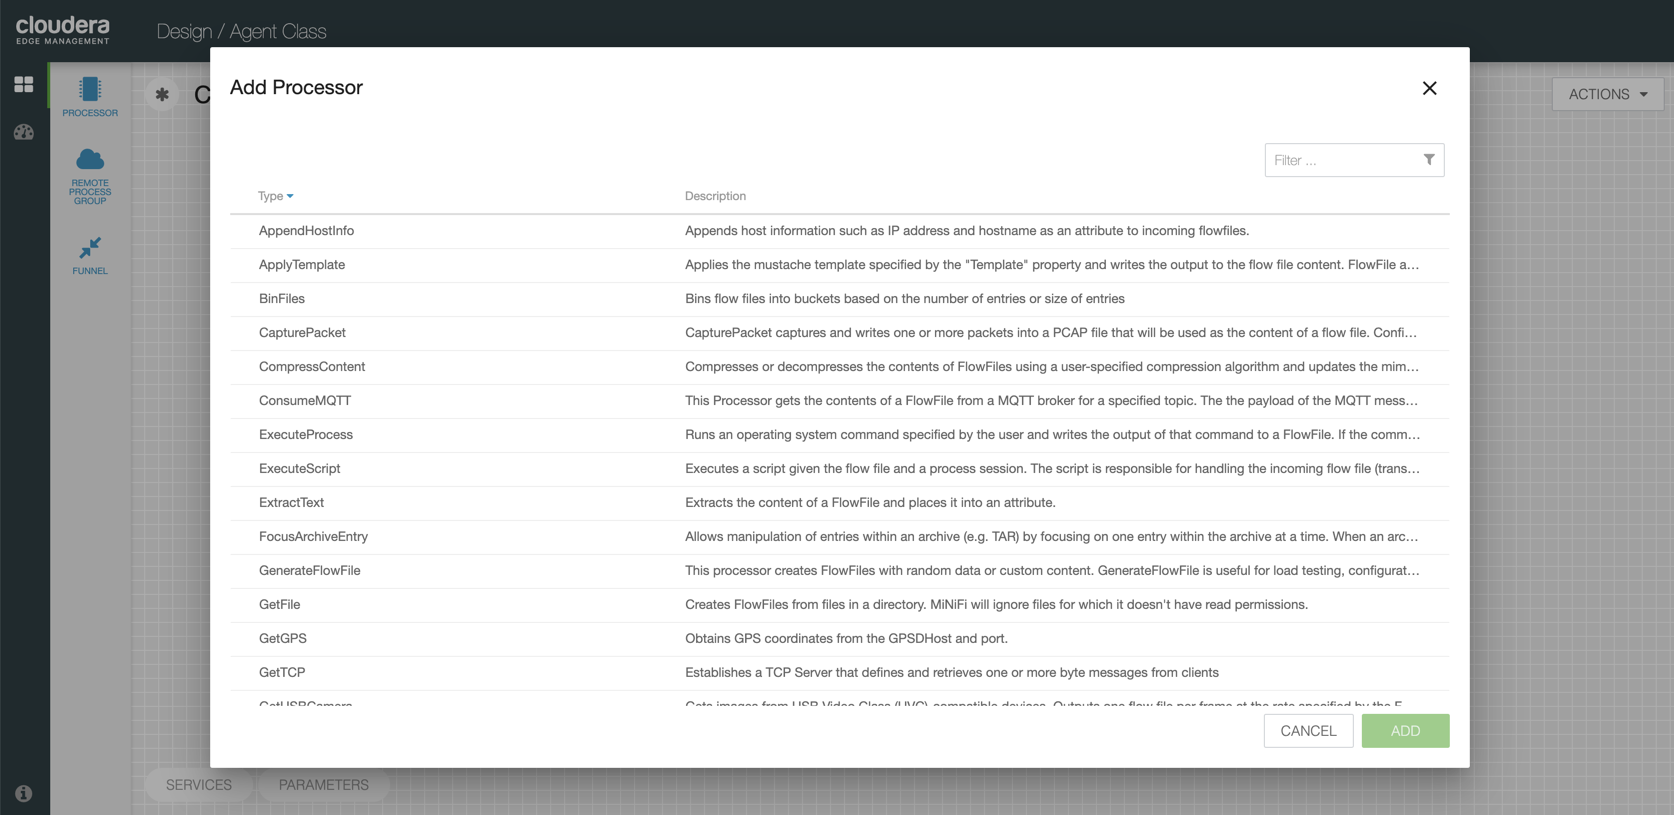
- Select a processor and click the ADD button to add the selected
processor to the canvas at the location that it was dropped.
Alternatively, you can double-click on a processor type to add it to the canvas.
For example, add
GenerateFlowFileprocessor. - Double-click on the processor, or right-click on the processor and select
Configure from the context menu to configure the processor
properties.The
Configurationdialog appears, as shown in the following image: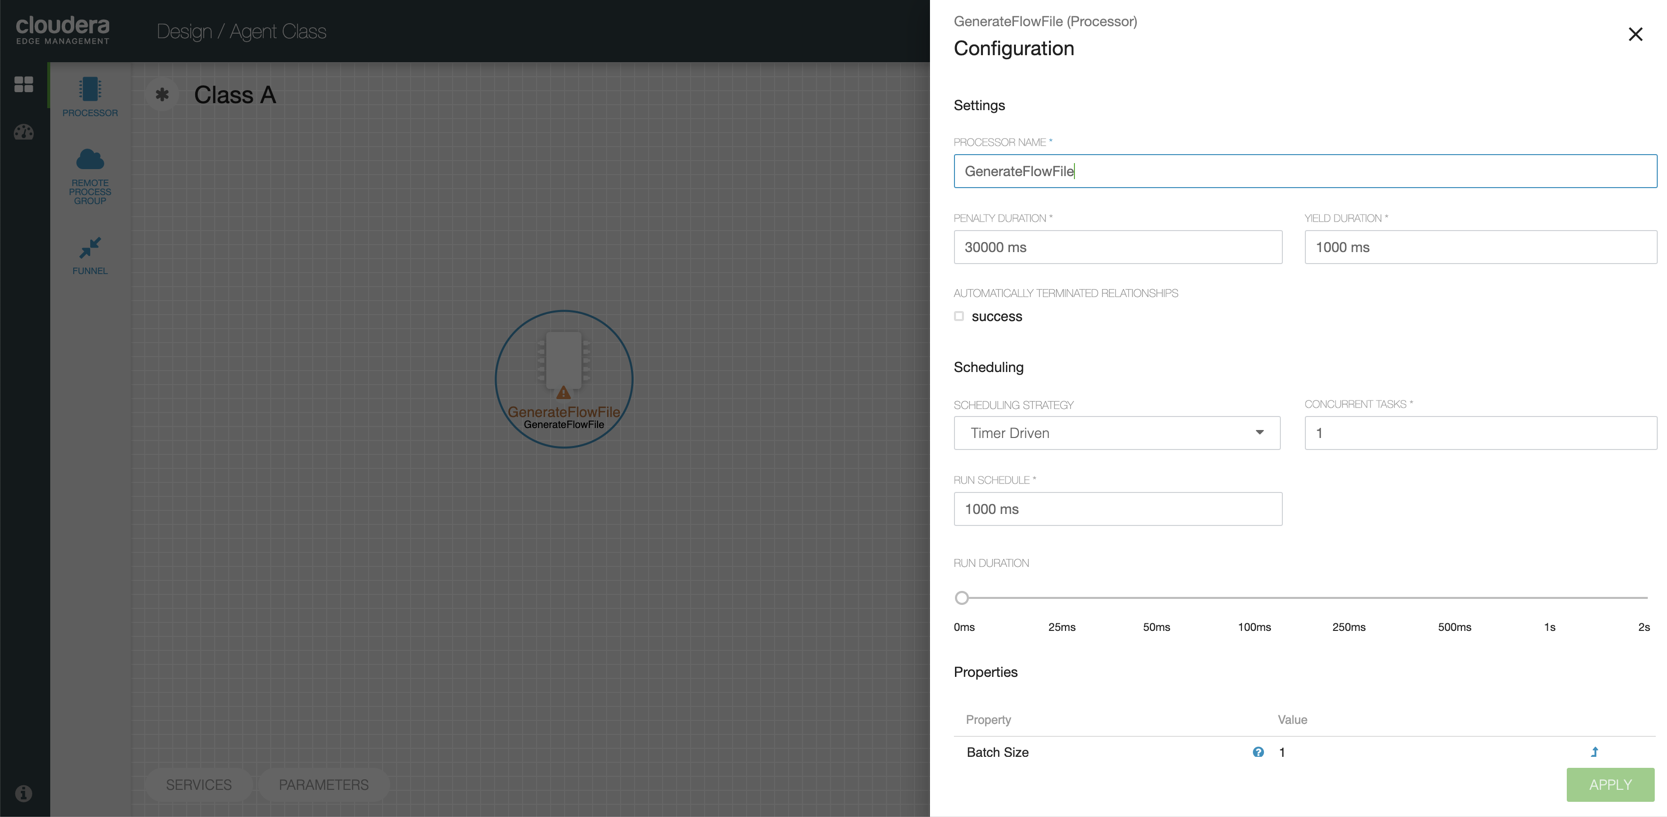
- Configure the processor properties, and click the APPLY button to apply the changes.
- Follow steps 3-6 to add another processor and configure the processor properties.
For example, add
LogAttributeprocessor. - To connect the processors, hover the mouse over the
GenerateFlowFileprocessor.An arrow appears as shown in the following image: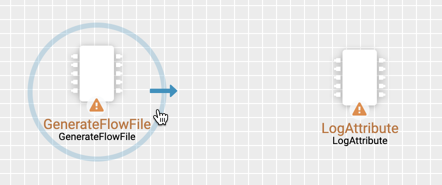
- Drag the arrow from the
GenerateFlowFileprocessor to theLogAttributeprocessor until theLogAttributeprocessor is highlighted, and then release the mouse.ACreate Connectiondialog appears as shown in the following image: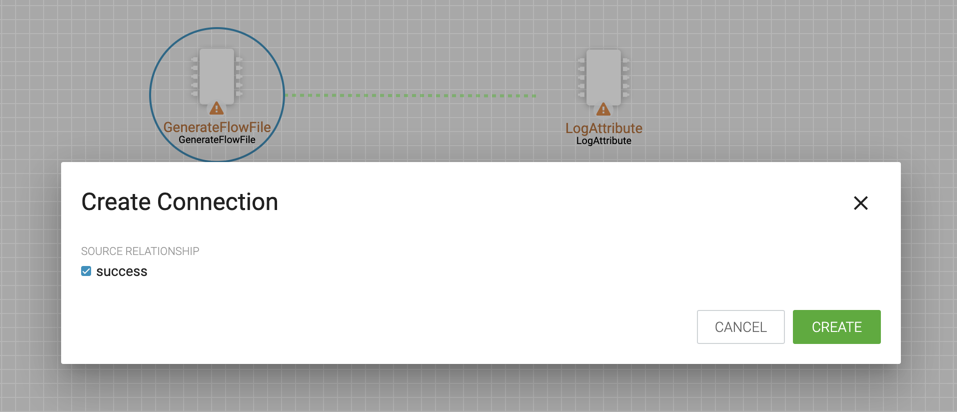
- Select CREATE to create the connection.
- To change the configuration of a connection, right-click on the connection and select the
Configure option, or double-click on the connection.The
Configurationdialog opens as shown in the following image: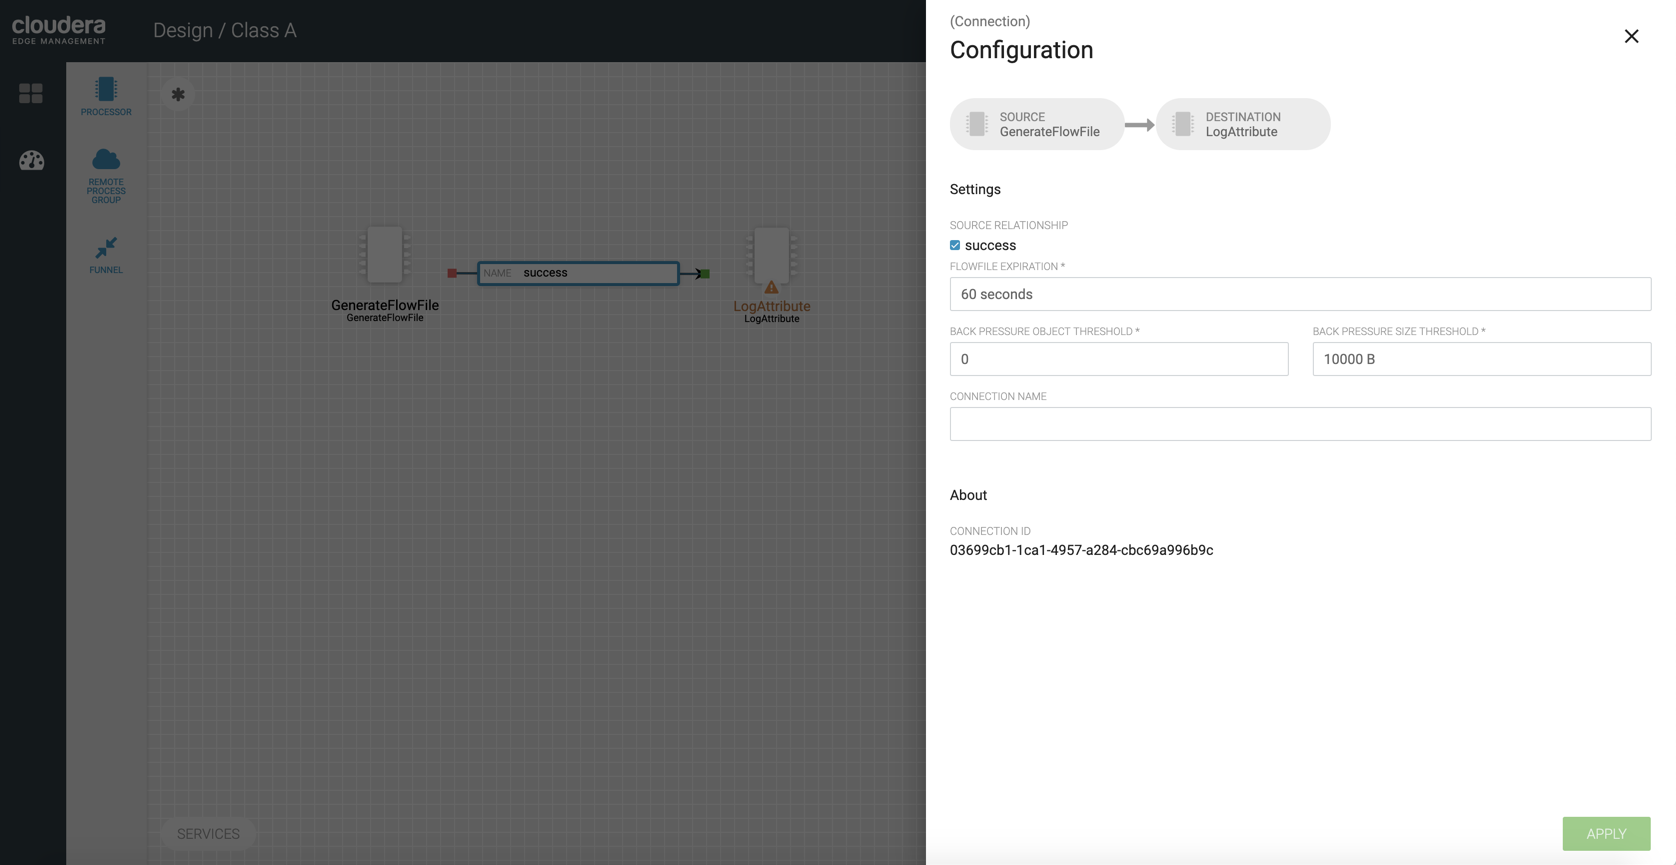
- Configure the connection properties and click the APPLY button to apply the changes.
- To publish a dataflow and make it available to all agents associated with its class, select
Publish from the ACTIONS drop-down menu on the
canvas.The
Publish Flowdialog appears as shown in the following image: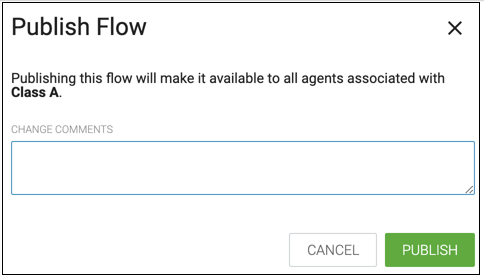
- Enter comments if desired, and click PUBLISH.
For more information on the above actions, see Building a DataFlow.
