Adding Kafka as Data Sources

After installing Kafka as a service on your cluster, you can register the Kafka as a data source to use it as a Virtual Table in SQL Stream Builder (SSB).

  • Make sure that you have Kafka service on your cluster.
  • Make sure that you have the right permissions set in Ranger.
  • In case you want to use Schema Registry, make sure that you have Schema service on your cluster.
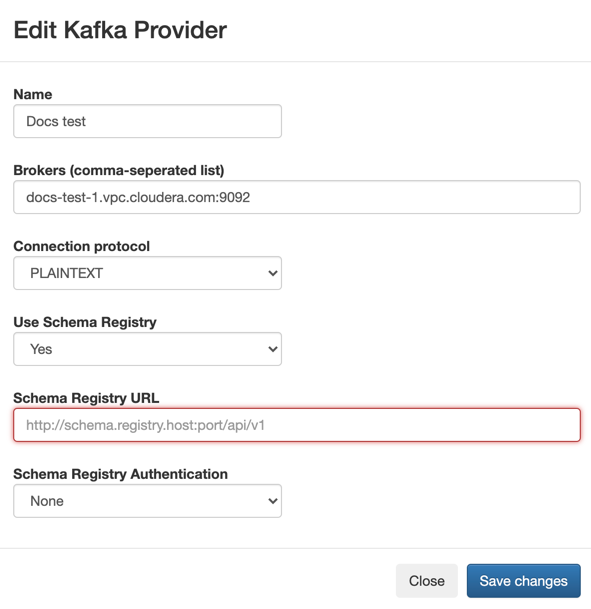
  • In case you want to use Schema Registry, make sure to add a schema before registering Kafka as a data source.
  1. Go to your cluster in Cloudera Manager.
  2. Click on SQL Stream Builder from the list of Services.
  3. Click on SQLStreamBuilder Console.
    The Streaming SQL Console opens up in a new window.
  4. Click on Data Sources from the main menu.
  5. Click on Register Kafka Provider.
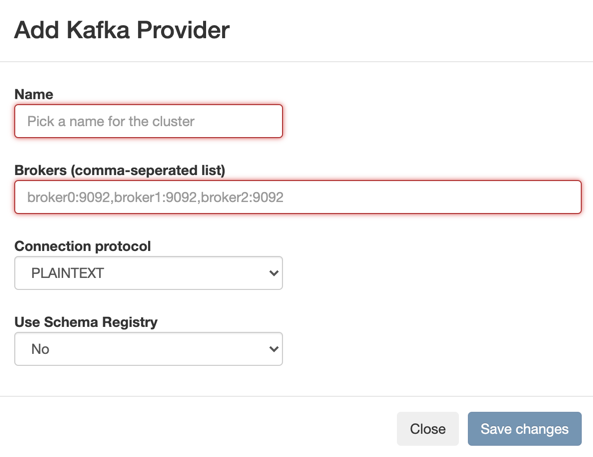
    The Add Kafka Provider window appears.
  6. Add a Name to your Kafka source.
  7. Add the broker host name(s) to Brokers.
    You need to copy the Kafka broker name(s) from Cloudera Manager.
    1. Go to your cluster in Cloudera Manager.
    2. Click on Kafka from the list of Services.
    3. Click on Instances.
    4. Copy the Hostname of the Kafka broker(s) you want to use.
    5. Go back to the Add Kafka Provider page.
    6. Paste the broker hostname to the Brokers field.
    7. Add the default Kafka port after the hostname(s).
      Example:
      docs-test-1.vpc.cloudera.com:9092, 
      docs-test-2.vpc.cloudera.com:9092
  8. Select the Connection protocol.
  9. Select if you want to use Schema Registry.
    1. If you select No, click on Save Changes.
      Kafka is registered as a data source, and listed under Kafka Providers on the Data Sources page.
    2. If you select Yes, the configurations of Schema Registry appear.
    3. Add the Schema Registry URL.
      1. Go to your cluster in Cloudera Manager.
      2. Select Schema Registry from the list of services.
      3. Click on Instances.
      4. Copy the Hostname of Schema Registry.
      5. Add the default prt of Schema Registry after the hostname.
        Example:
        http://<schemaregistry-url>:7788/api/v1
    4. Select the Authentication method for Schema Registry.
      1. If you select None, click on Save Changes.

        The registered Kafka data source is connected to Schema Registry.

      2. If you select Basic, you need to provide the authentication username and password. After providing the information, click Save Changes.
      3. If you select SSL, you need to provide the Trustore location and password. After providing the information, click Save Changes.
You have registered Kafka as a data source. You are able to select the registered Kafka as a virtual table source or sink.