Getting started with Kafka Connect
Get started with Kafka Connect in Cloudera Streaming Community Edition.
Kafka Connect is a tool for streaming data between Apache Kafka and other systems in a reliable and scalable fashion. Kafka Connect makes it simple to quickly define connectors that move large collections of data into and out of Kafka. Source connectors can ingest entire databases or collect metrics from all your application servers into Kafka topics, making the data available for stream processing with low latency. Sink connectors can deliver data from Kafka topics into secondary storage and query systems or into batch systems for offline analysis.
Cloudera Streaming Community Edition includes many different connectors. The majority of these are developed by Cloudera, but publicly available connectors are included as well. Each connector covers a specific use case for streaming data. Connectors are deployed, managed, and monitored using Streams Messaging Manager.
The following tutorial walks you through a simple use case where data is moved from a Kafka topic into a PostgreSQL database using the JDBC Sink connector, which is one of the Cloudera-developed connectors shipped with Cloudera Streaming Community Edition.
Before you begin
docker ps. For
example:docker ps -a --format '{{.ID}}\t{{.Names}}' --filter "name=kafka.(\d)" --filter "name=postgres"The Kafka container will either be called csce-kafka-1 or
csce_kafka_1.
The PostgreSQL container will either be called csce-postgresql-1 or
csce_postgresql_1.
Creating a database and table in PostgreSQL
In order to stream data using the JDBC Sink connector, a destination is required for that data. In this tutorial, the database and table is created using the PostgreSQL instance already deployed in Cloudera Streaming Community Edition.
Creating a topic and producing messages
Before you can deploy the JDBC Sink connector, you need a Kafka topic with some messages that you can use. The connector connects to this topic and streams the data from the topic into the PostgreSQL database. The topic will be created using Streams Messaging Manager. Message production is done using the Kafka console producer.
- Click
 (Topics) in the navigation sidebar.
 -
Using the Streams Messaging Manager UI, verify that the messages were
produced.
-
Click
 (Profile) and go to Data
Explorer.
If message production was successful, you should see the messages produced on the UI.
(Profile) and go to Data
Explorer.
If message production was successful, you should see the messages produced on the UI.
-
Click
Deploying the connector
After both the topic and database is set up, it's time to deploy the JDBC Sink connector using the Streams Messaging Manager UI.
-
Click
 (Connect) on the navigation sidebar of the Streams Messaging Manager UI.
- Click +New Connector.Clicking +New Connector opens the Select A Template page. This page contains all connectors available for deployment in the form of selectable cards.
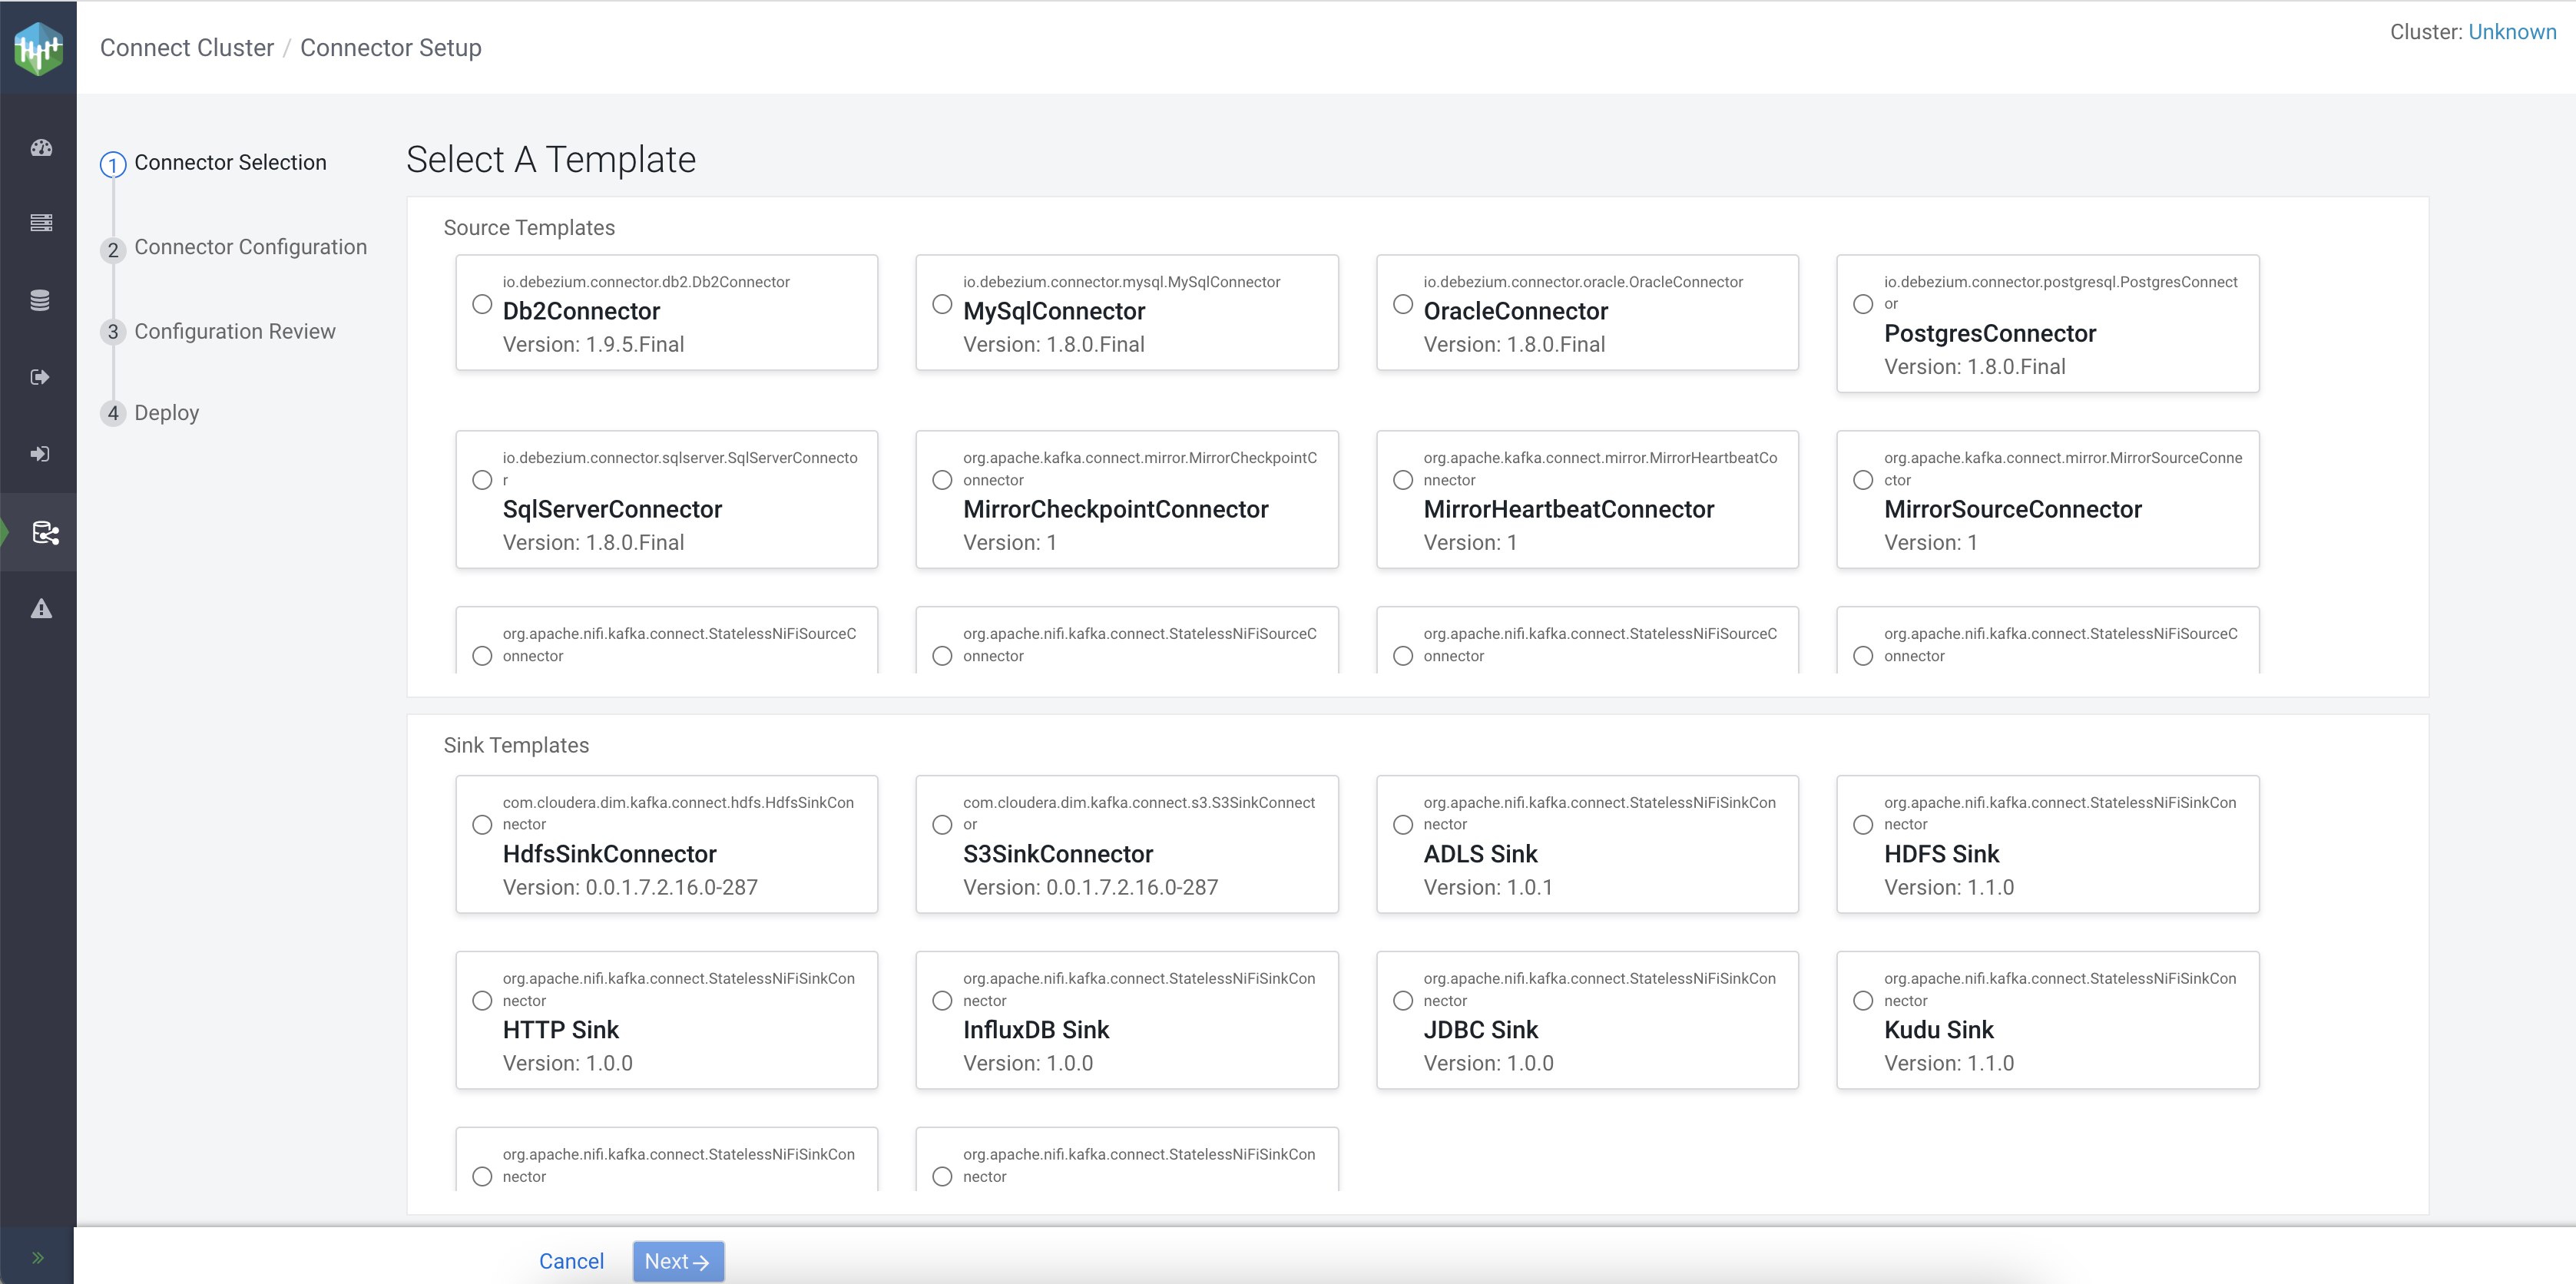
- Navigate to the Sink templates section and select
JDBC Sink.After a connector is selected, you are presented with the Connector Configuration page.
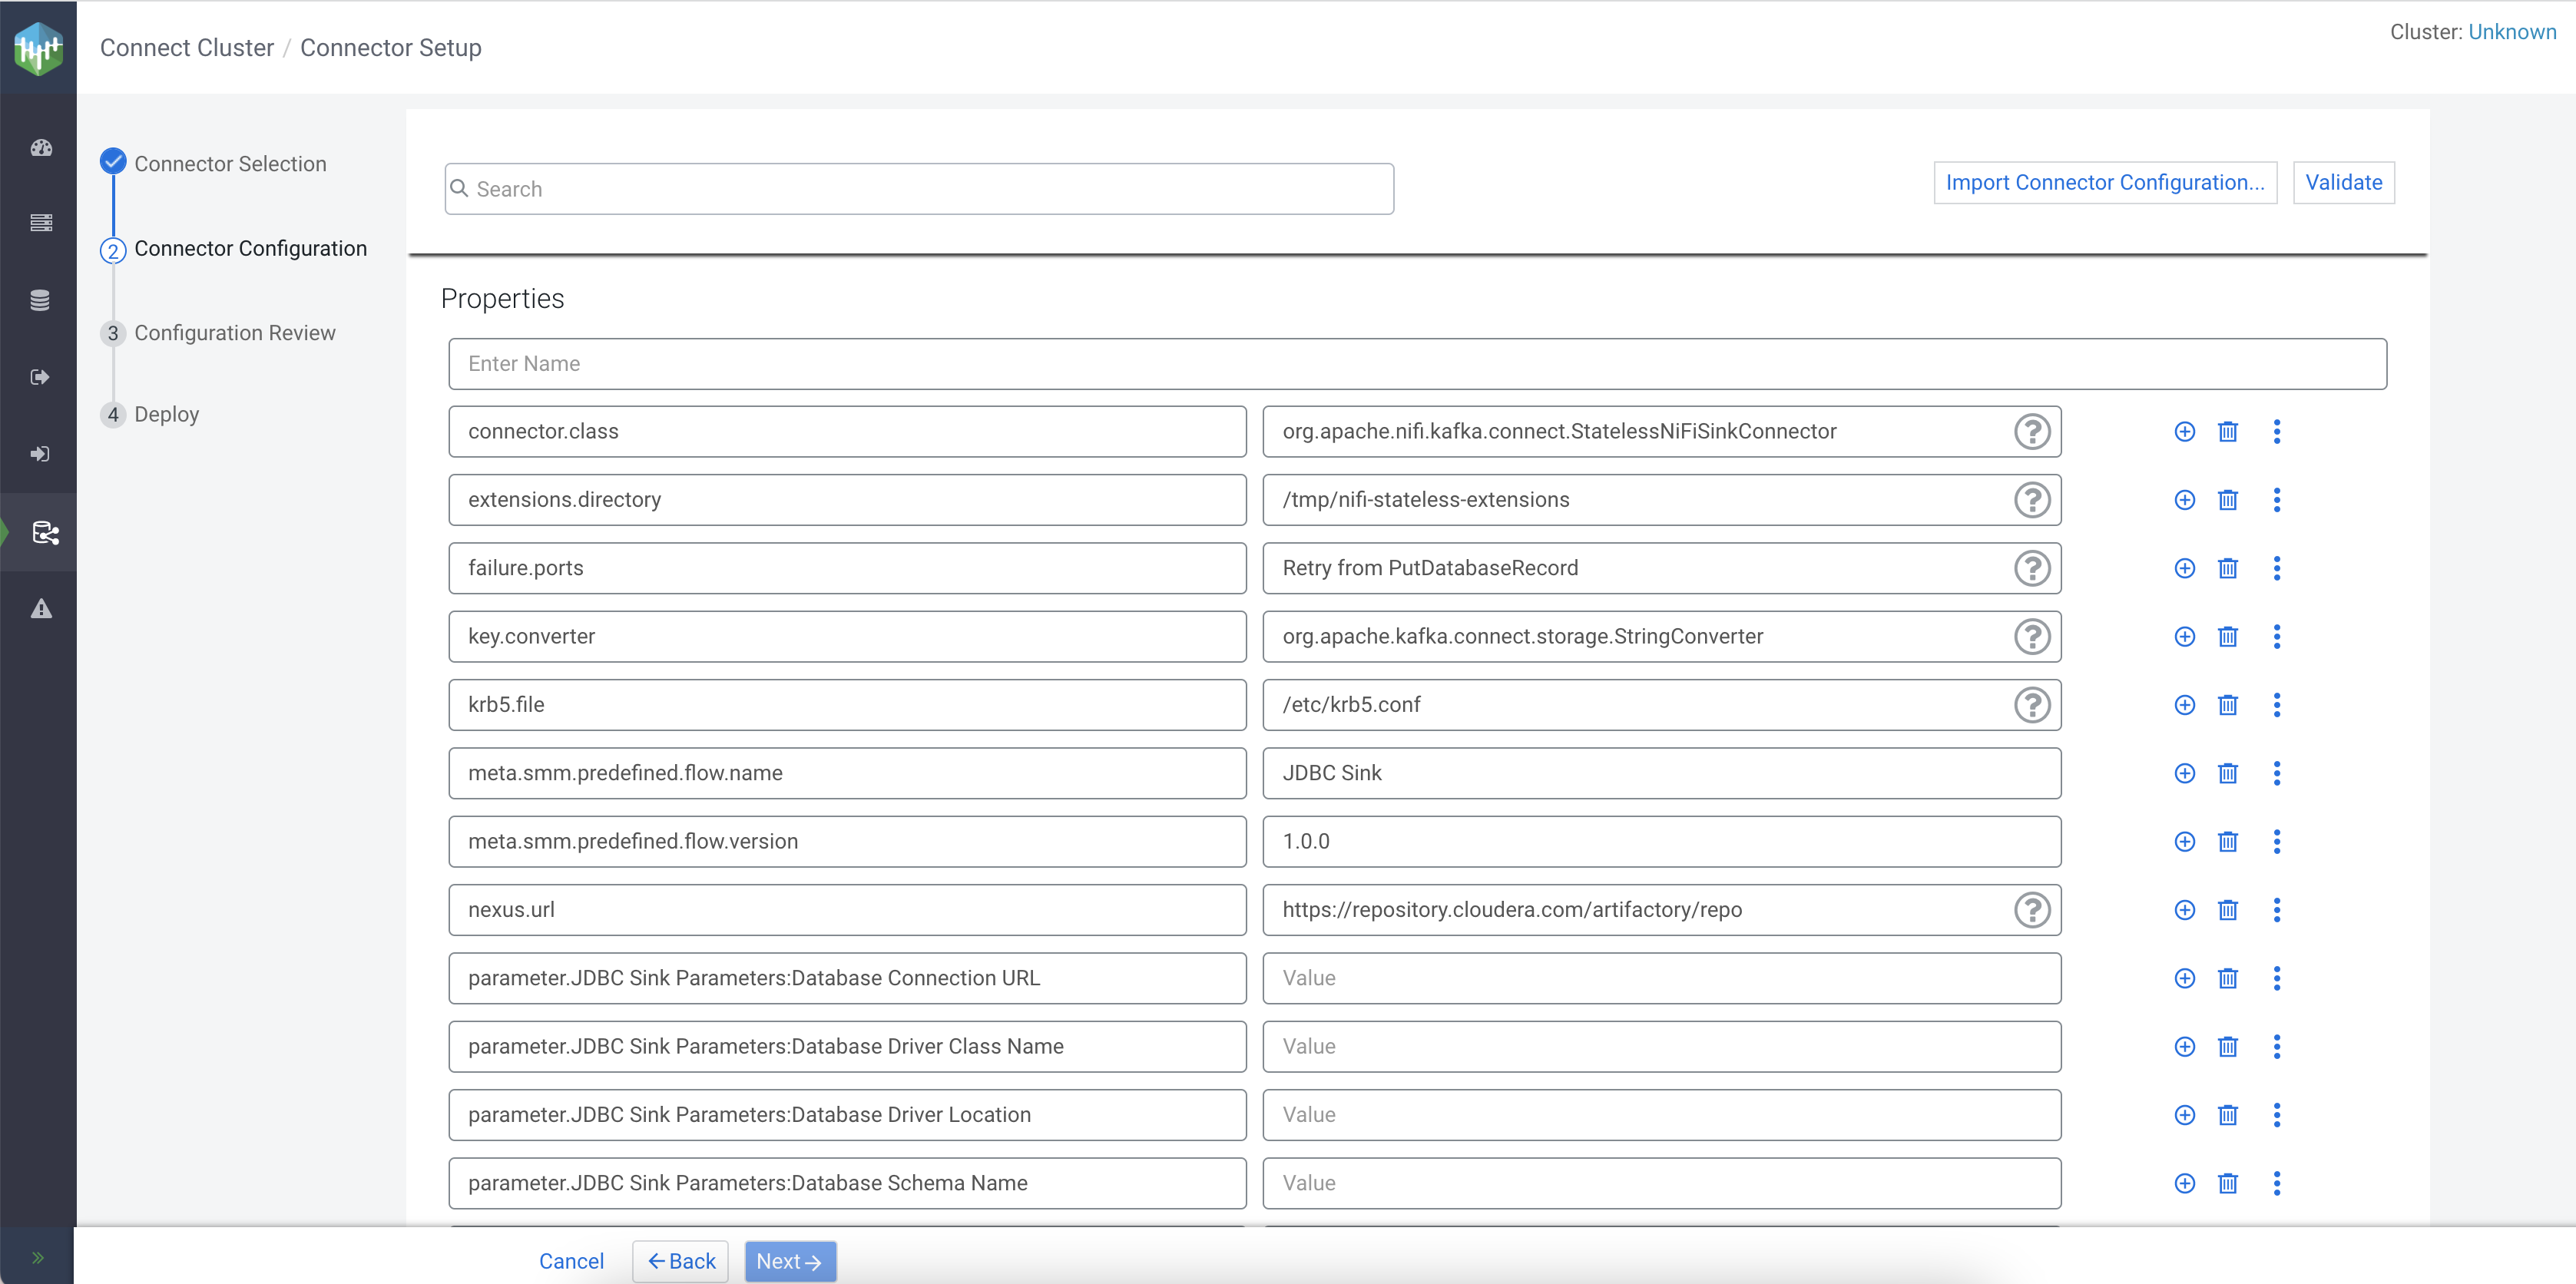
Most connectors are shipped with a default configuration template to ease configuration. If a template is available for a specific connector, the property keys and values are automatically populated when you select the connector. The properties and values included in the templates depend on the selected connector.
In addition, the page has various features and options that are designed to help you with configuration. For example, hovering over
 (Help), found next to some property values,
displays information about that property. For more information on what each UI option
and icon does, see Monitoring Kafka Connect Using Streams Messaging Manager in the Related Information
section at the bottom of this page.
(Help), found next to some property values,
displays information about that property. For more information on what each UI option
and icon does, see Monitoring Kafka Connect Using Streams Messaging Manager in the Related Information
section at the bottom of this page.
Monitoring and managing the connector
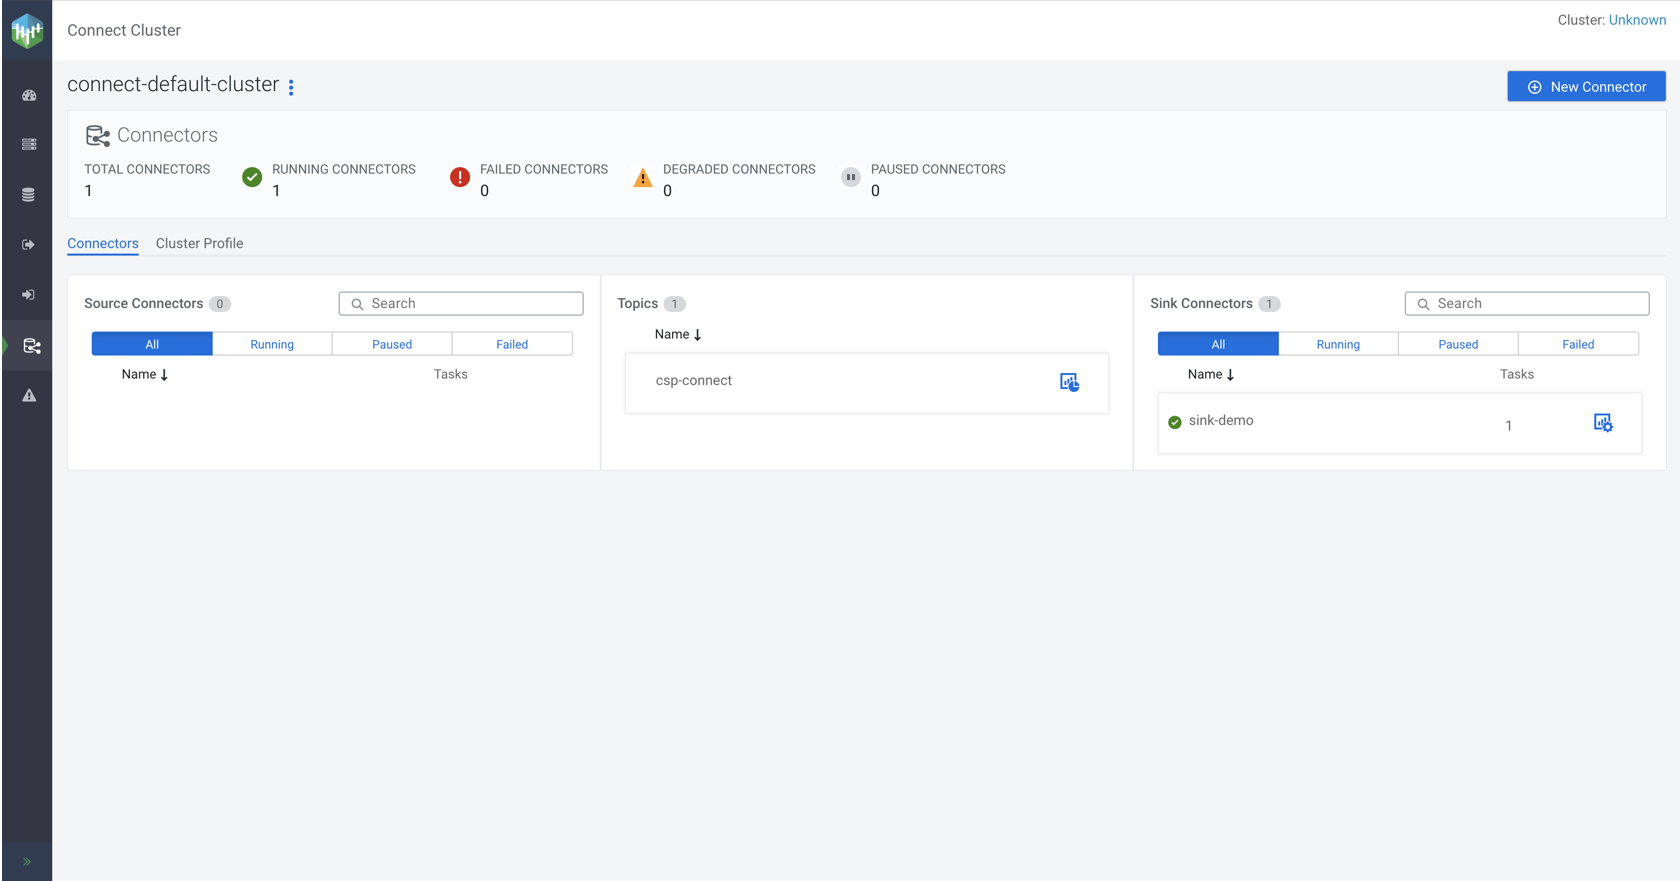
Once the connector is deployed, you can monitor its activity using the Streams Messaging Manager UI.
-
In the Streams Messaging Manager UI click
(Connect) on the navigation sidebar.
Clicking on opens the Connect Cluster page with the
Connectors tab open. This page provides a high level overview and
metrics of all your connectors as well as the connect cluster.
- Click
 (Connector Profile) next to the connector’s
name.The Connector Profile page enables you to monitor details of the connector and its tasks as well as its configuration. The page consists of two tabs Connector Profile and Connector Settings. The following points give a quick introduction of the UI and its features. Feel free to experiment and explore.
(Connector Profile) next to the connector’s
name.The Connector Profile page enables you to monitor details of the connector and its tasks as well as its configuration. The page consists of two tabs Connector Profile and Connector Settings. The following points give a quick introduction of the UI and its features. Feel free to experiment and explore.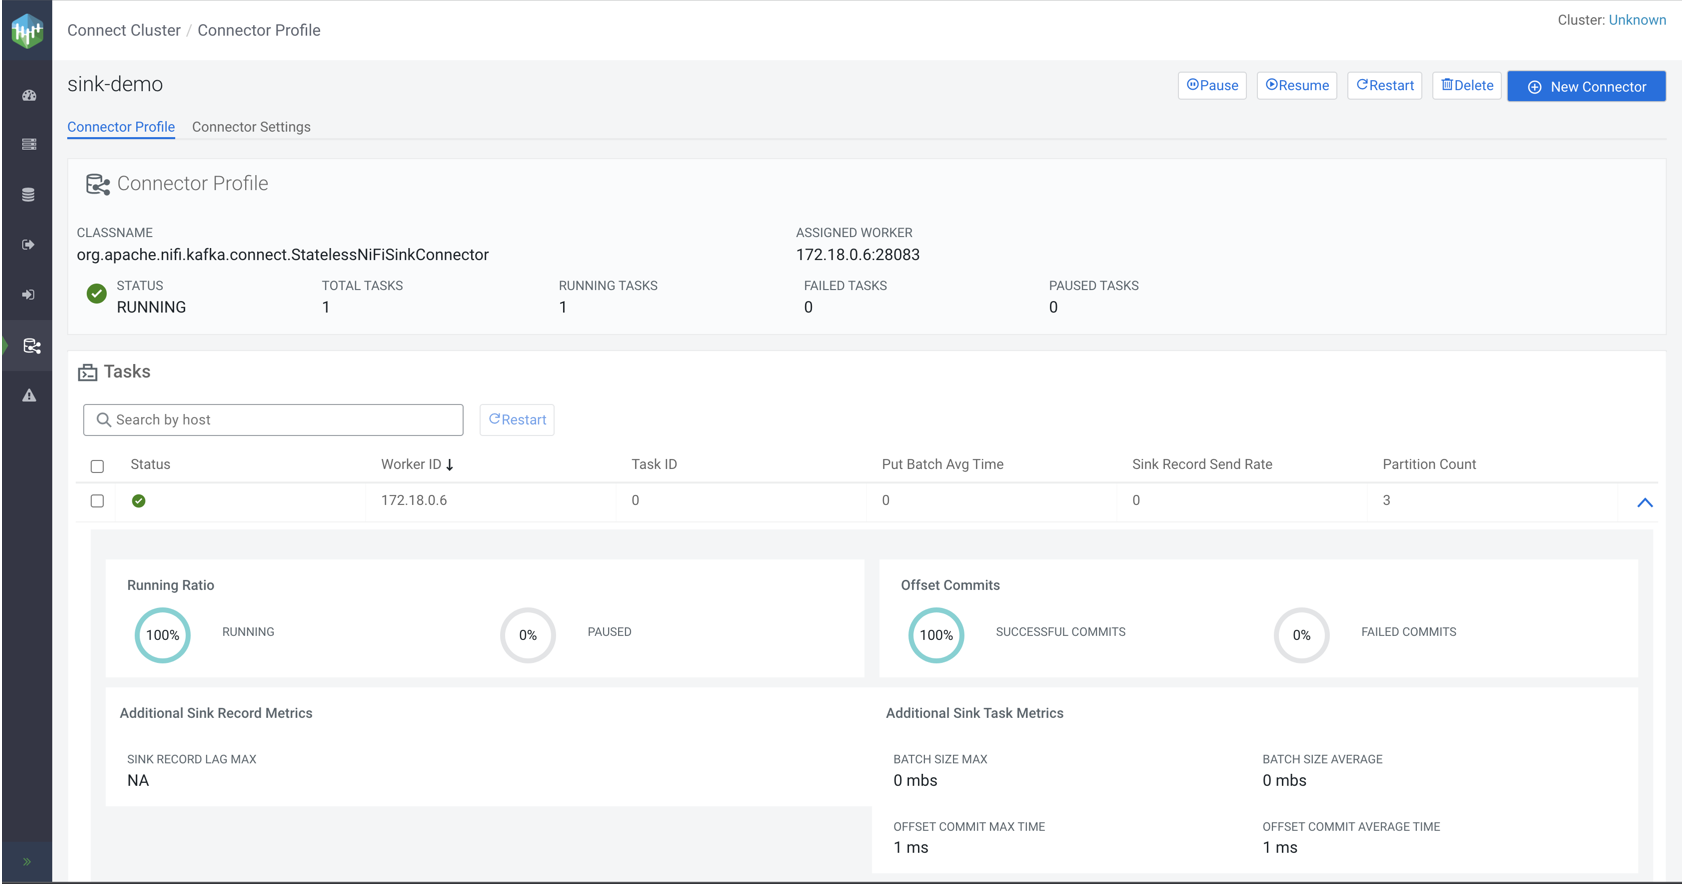
- The Connector Profile section provides you with details regarding the Classname, Assigned Worker, Status, Total Tasks, Running Tasks, Failed Tasks, and Paused Tasks.
- Using the buttons in the top right-hand corner you can pause, resume, restart, or delete the connector.
- In the Tasks section, you can view and monitor
Status, Worker ID, Task
ID, and various other details regarding connector tasks. Clicking
 next to a task displays detailed information and
metrics about the selected task. In addition to viewing status and metrics, the
Tasks section also allows you to restart a particular task.
This can be done by selecting the task you want to restart and then clicking the
Restart option found within the
Tasks section.
next to a task displays detailed information and
metrics about the selected task. In addition to viewing status and metrics, the
Tasks section also allows you to restart a particular task.
This can be done by selecting the task you want to restart and then clicking the
Restart option found within the
Tasks section.
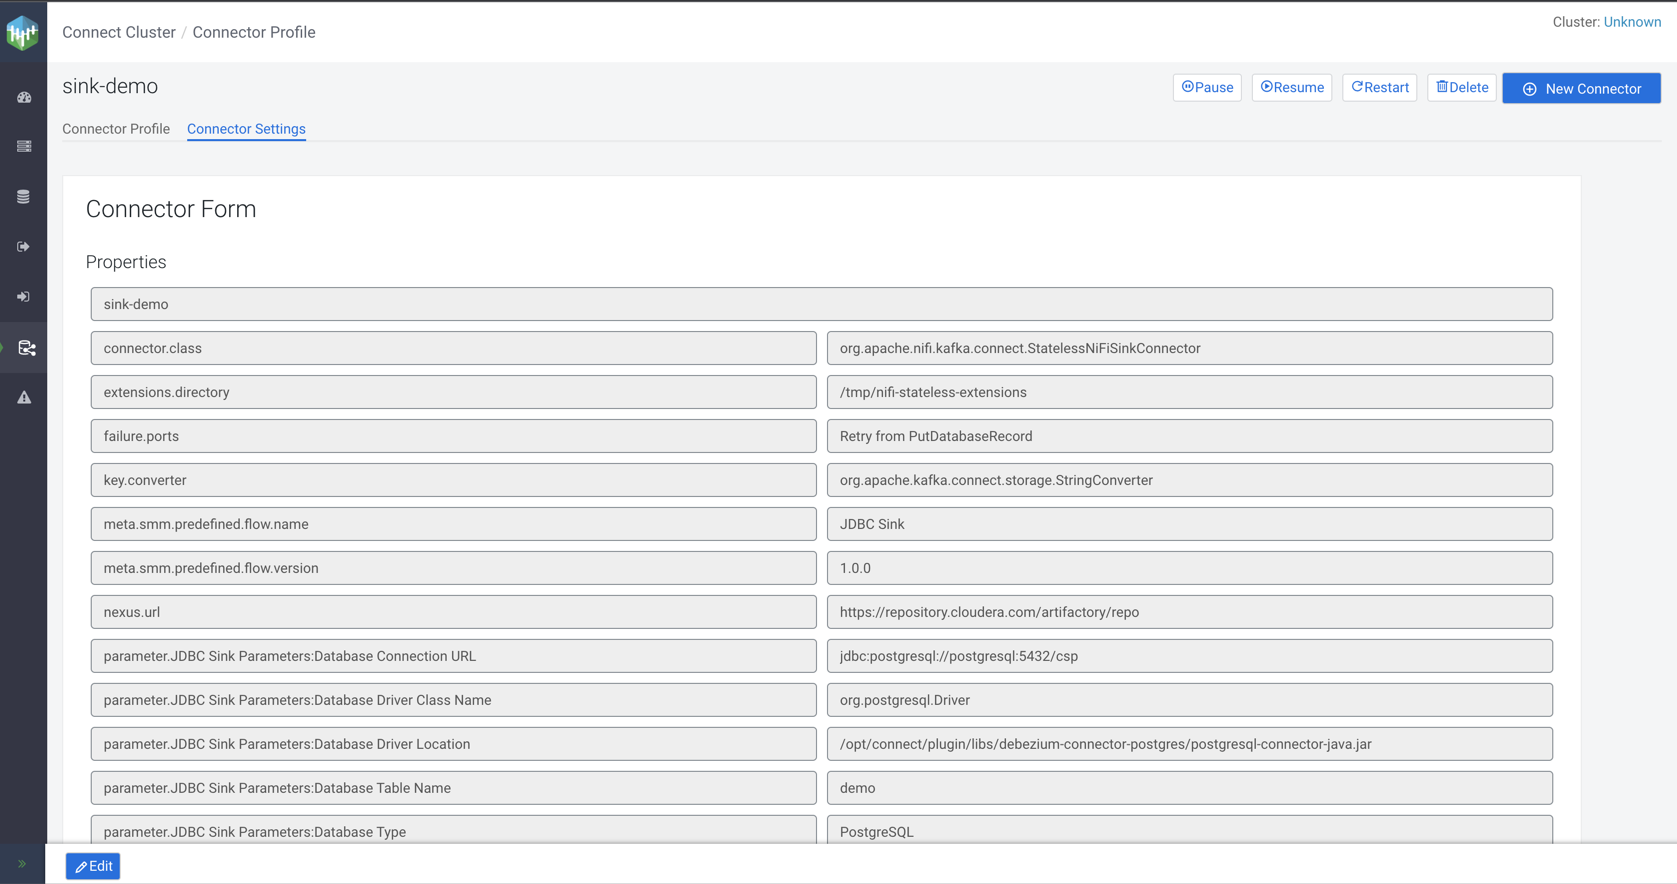
- The Connector Settings tab enables you to view and edit the configuration of the connector.
- Clicking Edit in the bottom left-hand corner allows you to reconfigure the connector.
- Using the buttons in the top right-hand corner you can pause, resume, restart, or delete the connector.