Connecting to Hive Virtual Warehouses from Tableau

This topic describes how to connect to Tableau with Hive Virtual Warehouses on Cloudera Data Warehouse (CDW) service.

Required role: DWUser

Before you can use Tableau with Hive Virtual Warehouses, you must have created a Database Catalog that is populated with data. You have the option to populate your Database Catalog with sample data when you create it. You must also create a Hive Virtual Warehouse, which is configured to connect to the Database Catalog that is populated with data.

  1. Download the latest version of the Hive ODBC driver from Cloudera Downloads page.
  2. Install the driver on the local host where you intend to use Tableau Desktop.
  3. Log in to the CDP web interface and navigate to the Data Warehouse service.
  4. Go to the Virtual Warehouses tab, locate the Hive Virtual Warehouse you want to connect to, and select Copy JDBC URL from . This copies the JDBC URL to your system's clipboard.
  5. Paste the copied JDBC URL into a text file. It should look similar to the following:
    jdbc:hive2://<your-virtual-warehouse>.<your-environment>.<dwx.company.com>/default;transportMode=http;httpPath=cliservice;ssl=true;retries=3
  6. From the text file where you just pasted the URL, copy the host name from the JDBC URL to your system's clipboard. For example, the host name in the URL is:
    <your-virtual-warehouse>.<your-environment>.<dwx.company.com>
  7. Start Tableau and navigate to Connect > Moreā€¦ > Cloudera Hadoop:


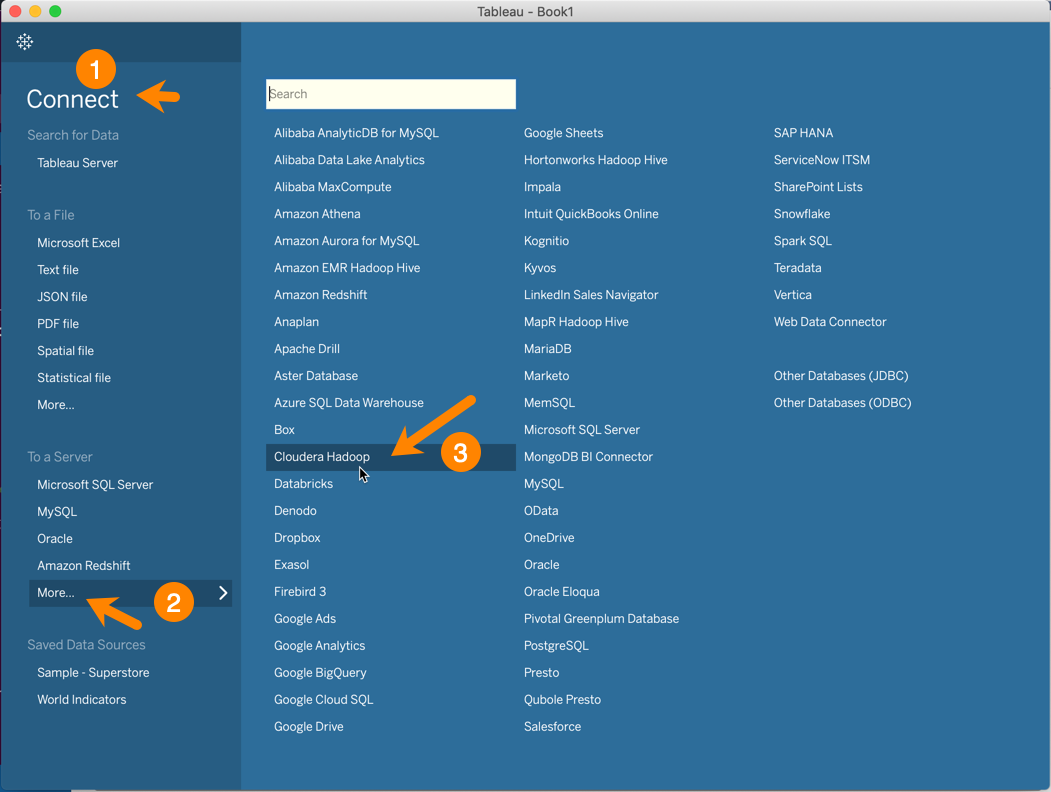
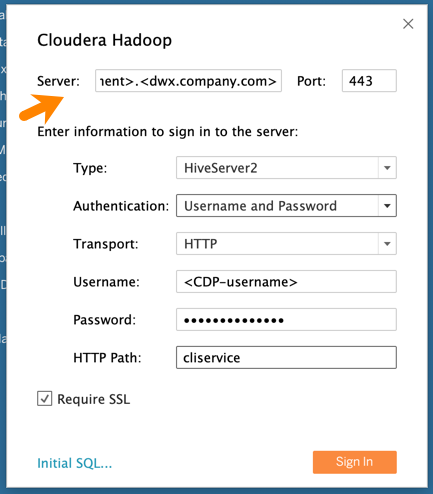
    This launches the Cloudera Hadoop dialog box.

  8. In the Tableau Cloudera Hadoop dialog box, paste the host name you copied to your clipboard in Step 7 into the Server field:


  9. Then in the Tableau Cloudera Hadoop dialog box, set the following other options:
    • Port: 443
    • Type: HiveServer2
    • Authentication: Username and Password
    • Transport: HTTP
    • Username: Username you use to connect to the CDP Data Warehouse service.
    • Password: Password you use to connect to the CDP Data Warehouse service.
    • HTTP Path: cliservice
    • Require SSL: Make sure this is checked.
  10. Click Sign In.