How to Populate the Hue Database
Not every action in the Hue UI touches the Hue database (embedded or custom). This page explains how to populate the database with user account information, Hive queries, and Oozie workflows. This is useful when testing the migration of a database.
- Add New User
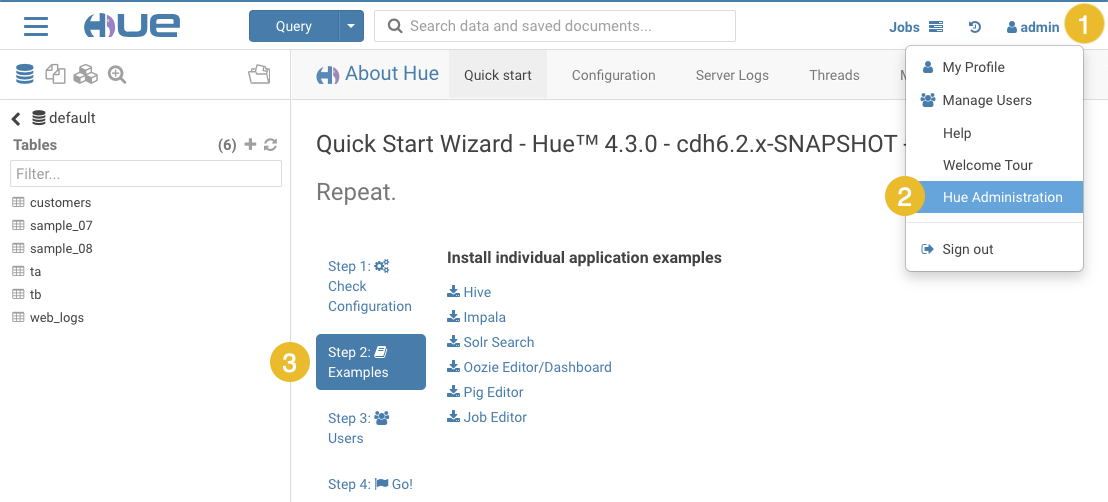
- Log on to Hue as the administrator.
- Click the Administration drop-down menu and select Manage Users.
- In the Hue Users page, click Add user and specify the following:
- Type the Username.
- Type the user's password in the New Password text box.
- Re-type the user's password.
- Select the Create home directory check box if you want a home directory created for the user.
- Click Next.
- Specify the user's First name, Last name, Email address, and the Groups that the user is a member of.
- Click Next.
- Specify whether the user is Active and if you want to grant the user Superuser status.
- Click Add user.
- Log out as the administrator and log in as the new user you just created.
- Save Hive Query
-
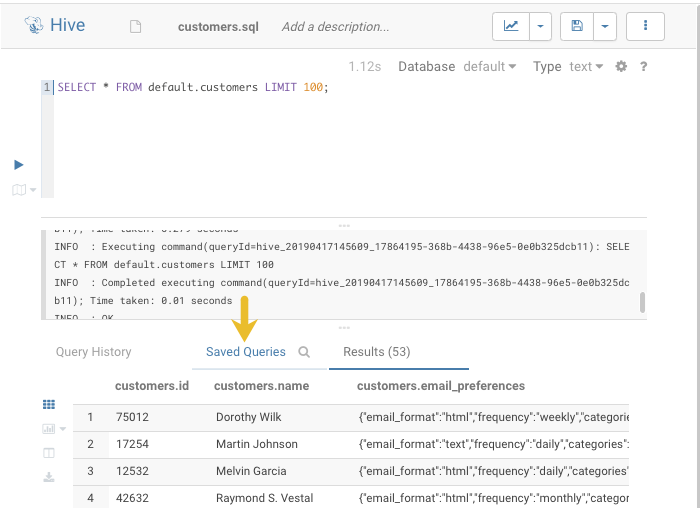
In the top right corner of the page, select :
- Click download
 Hive to install sample databases.
 - In the left panel, click the default database and the customers sample table.
- Click to load the Hive SQL editor.
- Drag the customers table onto the Hive editor and select SELECT FROM ... to automatically generate a SELECT query in the editor.
- Run the query by placing your cursor in the editor and pressing CTRL + Enter, or by clicking the Run icon
 .
. - Save the query as customers.sql by clicking the Save icon
 .
. -
View the query on the Saved Queries tab in the Hive editor:
-
- Save Oozie Workflow
- Go to Oozie by selecting, .
-
Click the Edit icon in the upper right corner of the Oozie Editor page:

- Click My Workflow to rename it and click the check mark
 to save it. In this example, we name it Customers WorkflowYou can add a description in the
same way if you want to.
to save it. In this example, we name it Customers WorkflowYou can add a description in the
same way if you want to. - Drag the action icon for a saved Hive query
 to the field Drop your action here.
 - Select a saved query from the drop-down list and click Add. In this example, we choose customers.sql.
- Save the workflow by clicking the Save icon at the top of the
page.
- Submit the workflow by clicking the Run icon
 and then
clicking Submit. You should see the workflow progress bar change to green, which indicates the workflow ran successfully.
and then
clicking Submit. You should see the workflow progress bar change to green, which indicates the workflow ran successfully. - View the saved workflow by clicking the Workflows tab at the top of the page.
