solrctl Reference
The solrctl utility is a wrapper shell script included with Cloudera Search for managing collections, instance directories, configs, Apache Sentry permissions, and more.
For some examples of common tasks using solrctl, see Example solrctl Usage.
Make sure that the host on which you are running the solrctl utility has either a Gateway or Solr Server role assigned.
In general, if an operation succeeds, solrctl exits silently with a success exit code. If an error occurs, solrctl prints a diagnostics message combined with a failure exit code. solrctl supports specifying a log4j.properties file by setting the LOG4J_PROPS environment variable. By default, the LOG4J_PROPS setting specifies the log4j.properties in the Solr configuration directory (for example, /etc/solr/conf/log4j.properties). Many solrctl commands redirect stderr to /dev/null, so Cloudera recommends that your log4j properties file specify a location other than stderr for log output.
You can run solrctl on any host that is configured as part of the SolrCloud deployment (the Solr service in Cloudera Manager environments) . To run any solrctl command on a host outside of SolrCloud deployment, ensure that SolrCloud hosts are reachable and provide --zk and --solr command line options.
If you are using solrctl to manage your deployment in an environment that requires Kerberos authentication, you must have a valid Kerberos ticket, which you can get using kinit.
For collection configuration, users have the option of interacting directly with ZooKeeper using the instancedir option or using the Solr ConfigSets API using the config option. For more information, see Managing Configuration Using Configs or Instance Directories.
Syntax
The general solrctl command syntax is:
solrctl [options] command [command-arg] [command [command-arg]] ...
Each element and its possible values are described in the following sections.
Options
- --solr <solr_uri>: Directs solrctl to a SolrCloud web API available at the specified URI. This option is required for hosts running outside of SolrCloud. A sample URI might be: http://search01.example.com:8983/solr.
- --zk <zk_ensemble>: Directs solrctl to a particular ZooKeeper quorum. This option is required for hosts running outside of SolrCloud. For example: zk01.example.com:2181,zk02.example.com:2181,zk03.example.com:2181/solr. Output from solrctl commands that use the --zk option is sent to /dev/null, so no results are displayed.
- --jaas /path/to/jaas.conf: Used to identify a JAAS configuration that specifies the principal with permissions to modify Solr metadata. The principal is typically solr@EXAMPLE.COM. In Kerberos-enabled environments where ZooKeeper ACLs protect Solr metadata, you must use this parameter when modifying metadata.
- --help: Prints help.
- --quiet: Suppresses most solrctl messages.
- --debug: Prints errors to stdout.
- --trace: Prints the executed commands to stdout.
Commands
The solrctl commands init, instancedir, config, collection, cluster, and sentry affect the entire SolrCloud deployment and only need to be run once per required operation.
The solrctl core command affects a single SolrCloud host.
- init [--force]: The init command, which initializes the overall state of the SolrCloud deployment, must be run before starting solr-server daemons for the first time. Use this command cautiously because it erases all SolrCloud deployment state information from ZooKeeper, including all configuration files. It does not delete collections. After successful initialization, you cannot recover any previous state.
-
instancedir [--generate <path> [-schemaless]]
            [--create <name> <path>]
            [--update <name> <path>]
            [--get <name> <path>]
            [--delete <name>]
            [--list]
Manipulates instance directories. The following options are supported:
- --generate <path>: Generates an instance directory template on the local
filesystem at <path>. The configuration files are located in the conf subdirectory under <path>.
- -schemaless: Generates a schemaless instance directory template. For more information on schemaless support, see Schemaless Mode Overview and Best Practices.
- --create <name> <path>: Uploads a copy of the instance directory from <path> on the local filesystem to ZooKeeper. If an instance directory with the specified <name> already exists, this command fails. Use --update to modify existing instance directories.
- --update <name> <path>: Overwrites an existing instance directory in ZooKeeper using the specified files on the local filesystem. This command is analogous to first running --delete <name> followed by --create <name> <path>.
- --get <name> <path>: Downloads the specified instance directory from ZooKeeper to the specified path on the local filesystem. You can then edit the configuration and then re-upload it using --update.
- --delete <name>: Deletes the specified instance directory from ZooKeeper.
- --list: Lists existing instance directories, including configs created by the solrctl config command.
- --generate <path>: Generates an instance directory template on the local
filesystem at <path>. The configuration files are located in the conf subdirectory under <path>.
-
config [--create <name> <baseConfig> [-p <name>=<value>]...]
       [--delete name]
Manipulates configs. The following options are supported:
- --create name <baseConfig> [-p <name>=<value>: Creates a new config based on an existing config. The config is created with the specified <name>, using <baseConfig> as the template. For more information about config templates, see Config Templates. The -p name=value option verrides a <baseConfig> setting. The only config property that you can override is immutable, so the possible options are -p immutable=true and -p immutable=false. If you are copying an immutable config, such as a template, use -p immutable=false to make sure that you can edit the new config.
- --delete name: Deletes the specified config. You cannot delete an immutable config without accessing ZooKeeper directly as the solr super user.
-
collection [--create <name> -s <numShards>
                          [-a]
                          [-c <configName>]
                          [-r <replicationFactor>]
                          [-m <maxShardsPerHost>]
                          [-n <createHostSet>]]
           [--delete <name>]
           [--reload <name>]
           [--stat <name>]
           [--deletedocs <name>]
           [--list]
           [--create-snapshot <snapshotName> -c <collectionName>]
           [--delete-snapshot <snapshotName> -c <collectionName>]
           [--list-snapshots <collectionName>]
           [--describe-snapshot <snapshotName> -c <collectionName>]
           [--prepare-snapshot-export <snapshotName> -c <collectionName> -d <destDir> [-p <fsPathPrefix>]]
           [--export-snapshot <snapshotName> [-s <sourceDir>] [-c <collectionName>] -d <destDir>]
           [--restore name  -b <backupName> -l <backupLocation> -i <requestId>
                            [-a]
                            [-c <configName>]
                            [-r <replicationFactor>]
                            [-m <maxShardsPerNode>]]
           [--request-status <requestId>]
Manipulates collections. The following options are supported:
- --create <name> -s <numShards> [-a] [-c
<configName>] [-r <replicationFactor>] [-m <maxShardsPerHost>] [-n
<hostList>]]: Creates a new collection with <numShards> shards.
The -a option enables automatic addition of replicas (autoAddReplicas=true) if machines hosting existing shards become unavailable.
The collection uses the specified <configName> for its configuration set, and the specified <replicationFactor> controls the number of replicas for the collection. Keep in mind that this replication factor is on top of the HDFS replication factor.
The maximum shards per host is determined by <maxShardsPerHost>, and you can specify specific hosts for the collection in the <hostList>.
The only required parameters are <name> and -s <numShards>. If -c <configName> is not provided, it is assumed to be the same as the name of the collection.
- --delete <name>: Deletes a collection.
- --reload <name>: Reloads a collection.
- --stat <name>: Outputs SolrCloud specific run-time information for a collection.
- --deletedocs <name>: Purges all indexed documents from a collection.
- --list: Lists all collections.
- The snapshot-related commands are covered in detail in Backing Up and Restoring Cloudera Search.
- --create <name> -s <numShards> [-a] [-c
<configName>] [-r <replicationFactor>] [-m <maxShardsPerHost>] [-n
<hostList>]]: Creates a new collection with <numShards> shards.
-
core [--create <name> [-p <name>=<value>]...]
     [--reload <name>]
     [--unload <name>]
     [--status <name>]
Manipulates cores. The following options are supported:
- --create <name> [-p <name>=<value>]: Creates a new core. The core is configured using <name>=<value> pairs. For more information about configuration options, see Solr documentation.
- --reload <name>: Reloads a core.
- --unload <name>: Unloads a core.
- --status <name>: Prints status of a core.
-
cluster [--get-solrxml <file>]
        [--put-solrxml <file>]
        [--set-property <name> <value>]
        [--remove-property <name>]
        [--get-clusterstate <file>]
Manages cluster configuration. The following options are supported:
- --get-solrxml <file>: Downloads the cluster configuration file solr.xml from ZooKeeper to the local system.
- --put-solrxml <file>: Uploads the specified file to ZooKeeper as the cluster configuration file solr.xml.
- [--set-property <name> <value>]: Sets property names and values.
Typically used in a deployment that is not managed by Cloudera Manager. For example, to configure a cluster to use TLS/SSL:
solrctl cluster --set-property urlScheme https
- [--remove-property <name>]: Removes the specified property.
- [--get-clusterstate <file>]: Downloads the clusterstate.json file from ZooKeeper
to the local system.
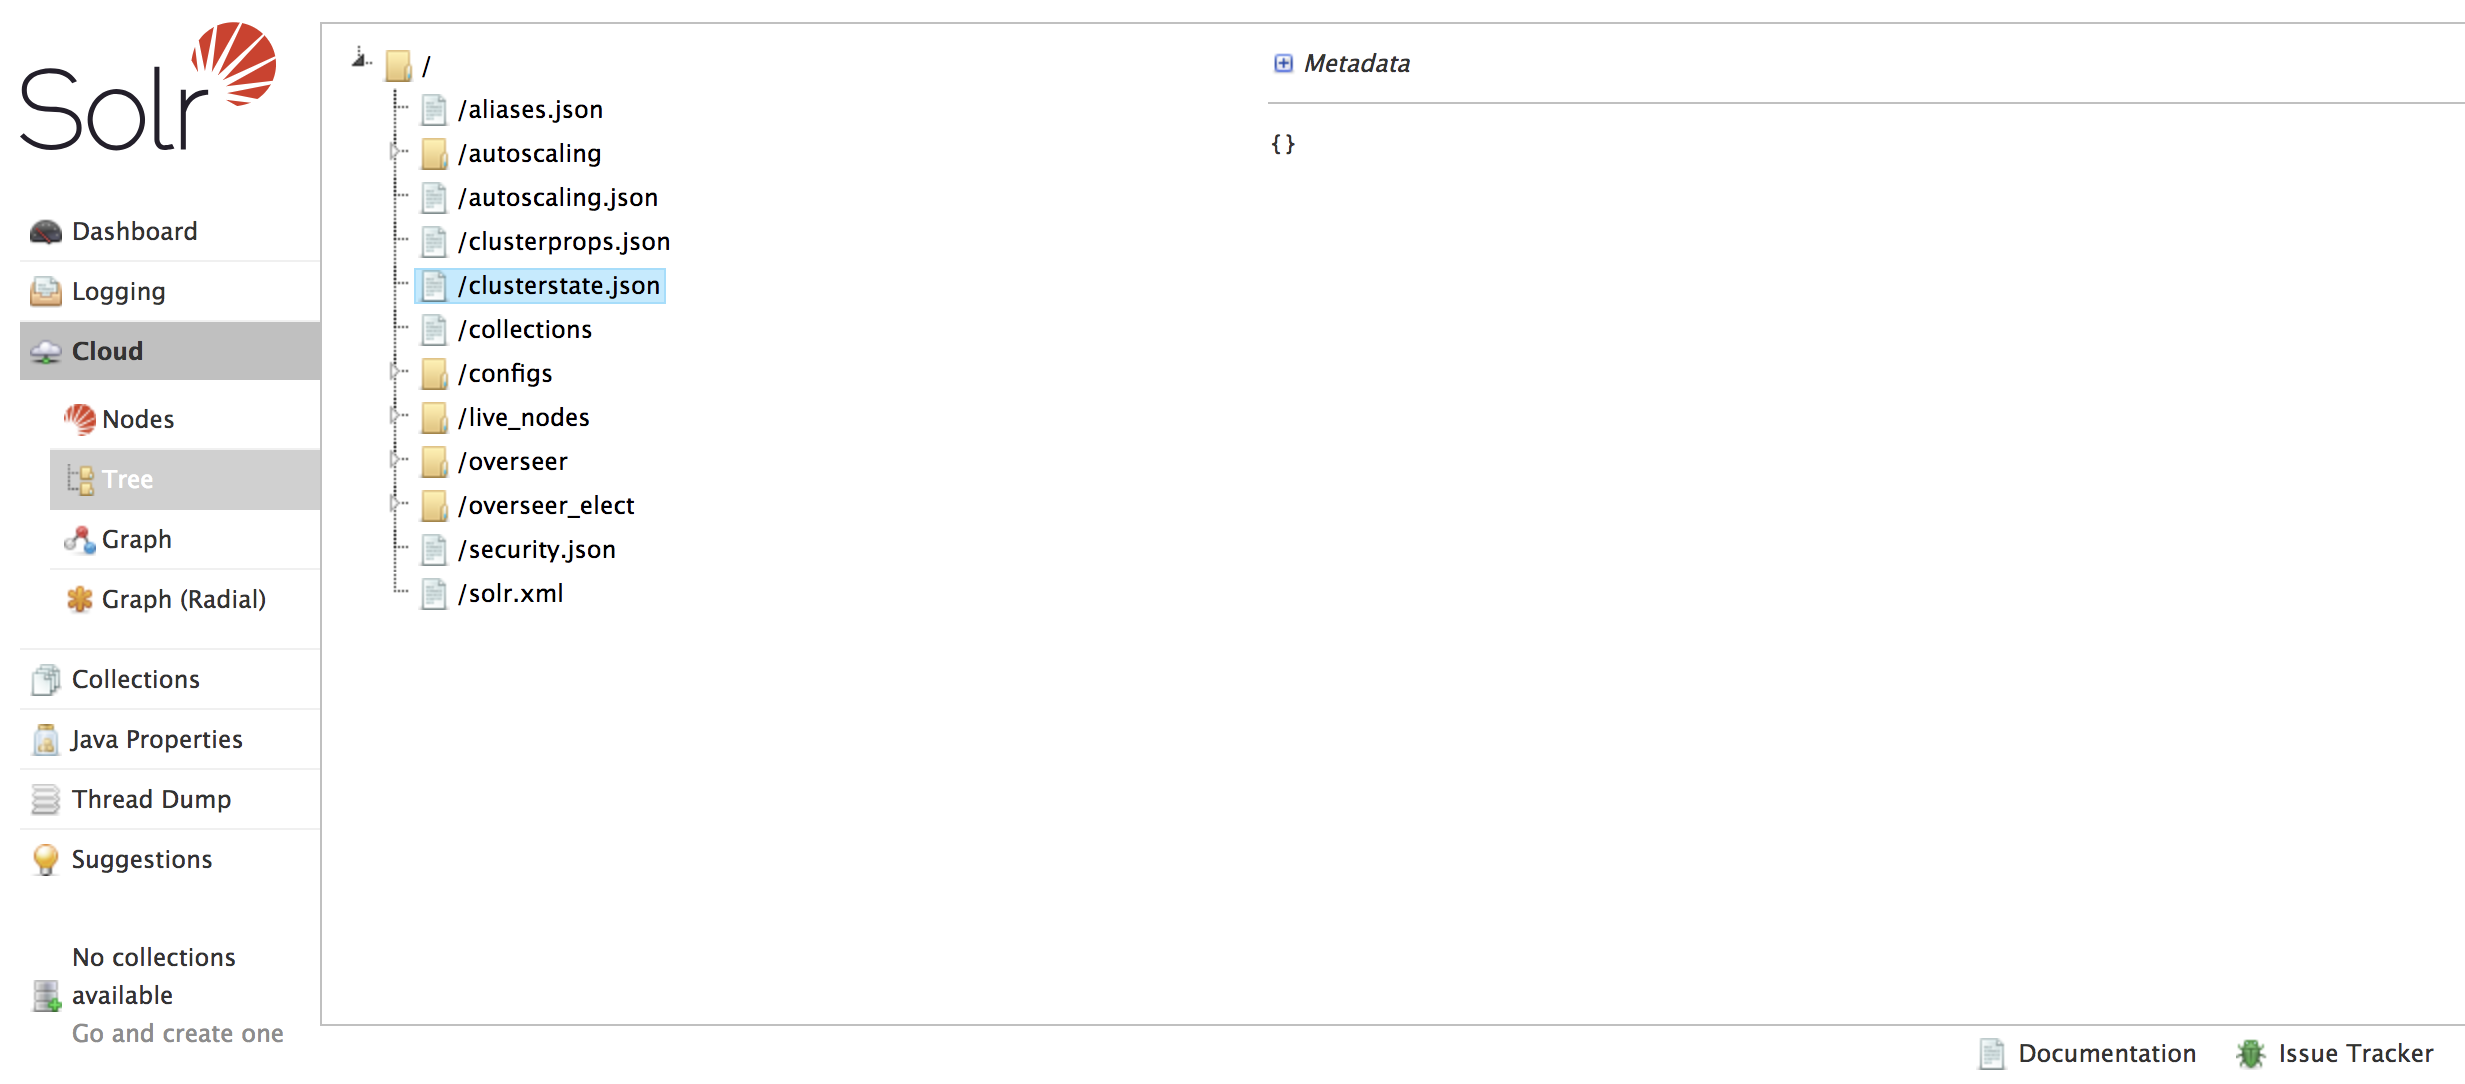
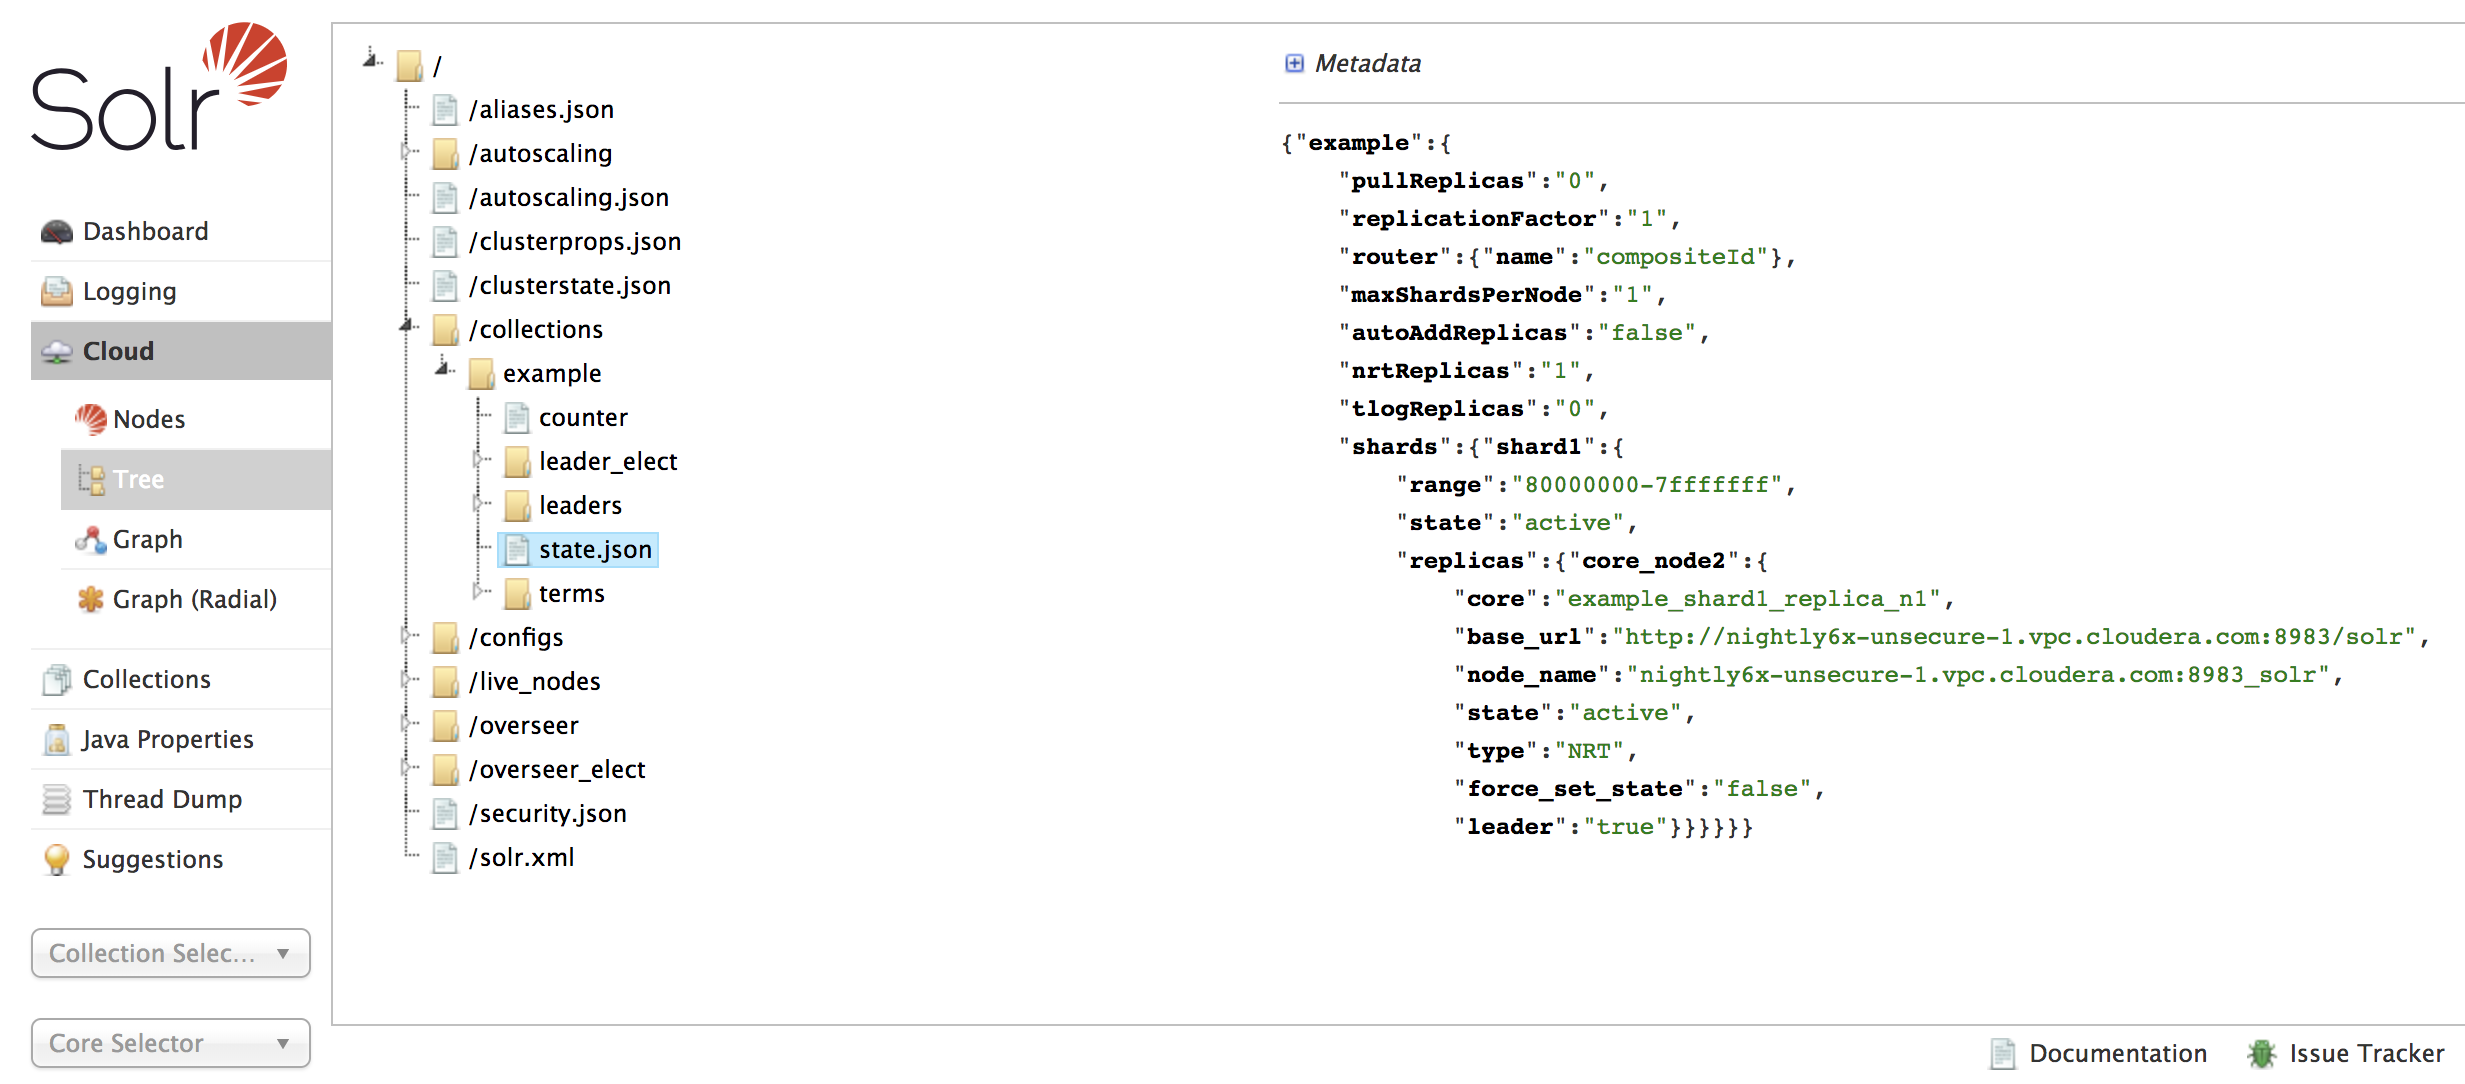
There are three ways to access a collection’s state.json file in CDH 6.
Using the Solr Administration User Interface:- Open the Solr Administration User Interface.
- Click , and expand /collections.
- Open the collection of your choice.
- Select the state.json file. The contents of the file are displayed on the right.
Using Solr’s ZooKeeper CLI:- Run the zkcli.sh script as follows:
/usr/lib/solr/bin/zkcli.sh -zkhost zk01.example.com:2181 -cmd getfile /solr/collections/example/state.json ./state_examplecollection.json
- Replace zk01.example.com with the hostname of your ZooKeeper server.
- Replace example with the name of your collection.
- Replace ./ with the path where you want to save the file.
- Replace examplecollection with the name you want to use for the saved file.
The state.json file is downloaded from ZooKeeper to the local filesystem.
- Run cat state_examplecollection.json to display the contents of the state.json file.
Sample output would be similar to the following.
{"example":{
            "pullReplicas":"0",
            "replicationFactor":"1",
            "router":{"name":"compositeId"},
            "maxShardsPerNode":"1",
            "autoAddReplicas":"false",
            "nrtReplicas":"1",
            "tlogReplicas":"0",
            "shards":{"shard1":{
                "range":"80000000-7fffffff",
                "state":"active",
                "replicas":{"core_node2":{
                "dataDir":"hdfs://solr01.com:8020/solr/example/core_node2/data/",
                "base_url":"http://solr01.com.com:8983/solr",
                "node_name":"solr01.com.com:8983_solr",
                "type":"NRT",
                "force_set_state":"false",
                "ulogDir":"hdfs://solr01.com.com:8020/solr/example/core_node2/data/tlog",
                "core":"example_shard1_replica_n1",
                "shared_storage":"true",
                "state":"active",
                "leader":"true"}}}}}}[root@solr01 ~]#
Using Solr API:- Run the curl command and retrieve a json file that contains the status of every collection:
$ curl --negotiate -u : 'http://solr01.com:8983/solr/admin/collections?action=CLUSTERSTATUS'
-
sentry [--create-role <role>]
       [--drop-role <role>]
       [--add-role-group <role> <group>]
       [--delete-role-group <role> <group>]
       [--list-roles [-g <group>]]
       [--grant-privilege <role> <privilege>]
       [--revoke-privilege <role> <privilege>]
       [--list-privileges <role>]
       [--convert-policy-file <file> [-dry-run]]
Manages Sentry configuration. The following options are supported:
- [--create-role <role>]: Creates a new Sentry role using the specified name.
- [--drop-role <role>]: Deletes the specified Sentry role.
- [--add-role-group <role> <group>]: Assigns an existing Sentry role to the specified group.
- [--delete-role-group <role> <group>]: Removes the specified role from the specified group.
- [--list-roles [-g group]]: Lists all roles. Optionally, lists all roles assigned to the specified group when -g <group> is used.
- [--grant-privilege <role> <privilege>]: Grants the specified privilege to the specified role. For information on privilege syntax, see Using Roles and Privileges with Sentry.
- [--revoke-privilege <role> <privilege>]: Revokes the specified privilege from the specified role.
- [--list-privileges <role>]: Lists all privileges granted to the specified role.
- [--convert-policy-file <file> [-dry-run]]: Converts the specified policy file
to permissions in the Sentry service. This command adds roles, assigns roles to group, and grants permissions. For CDH versions 5.12 and higher, the Solr Gateway
role includes HDFS configuration files to facilitate Sentry integration. Because of this, the <file> path must be specified as
file:///path/to/file, or else the solrctl sentry command attempts to locate the file in HDFS.
The file-based model allows case-sensitive role names. During conversion, all roles and groups are converted to lower case.
- If a policy-file conversion will change the case of roles or groups, a warning is presented. Policy conversion can proceed, but if you have enabled document-level security and use role names as your tokens, you must re-index using the new lower case role names after conversion is complete.
- If a policy-file conversion will change the case of roles or groups, creating a name collision, an error occurs and conversion cannot occur. In such a case, you must eliminate the collisions before proceeding. For example, you could rename or delete the roles or groups that cause a collision.
The -dry-run option runs the process of converting the policy file, but sends the results to stdout without applying the changes. This can be used for quick turnaround when debugging failures.
After converting the policy file to permissions in the Sentry service, make sure to enable Sentry for Solr, as described in Migrating from Sentry Policy Files to the Sentry Service.
