
Creating a new Dynamic Configuration
In Cloudera Manager, using the YARN Queue Manager UI you can create new Dynamic Configurations that will be used by the Dynamic Queue Scheduling feature.
Enable the Dynamic Queue Scheduling feature. For more information, see Enabling Dynamic Queue Scheduling.
-
Configure Queues.
Edit child queues by clicking the three vertical dots next to the parent queue's name and select Edit Child Queue.
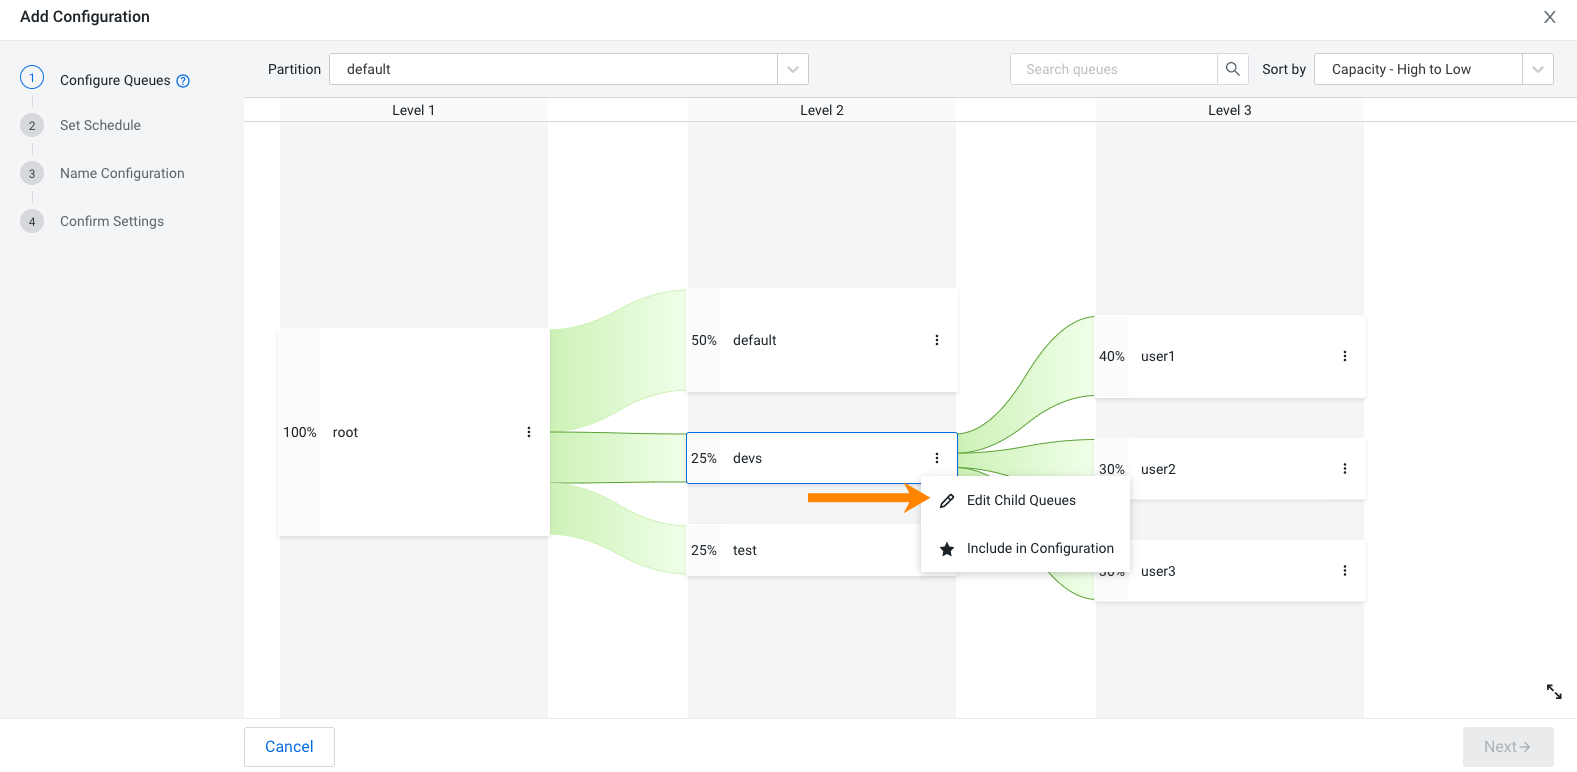
After you edit the child queues, they are included in the Dynamic Configuration which is indicated by a blue background. If one queue is included in the configuration at a certain level, all other queues on that level are also included.
A blue asterisk next to the queue’s name indicates that you have changed the properties of that queue to create the Dynamic Configuration.
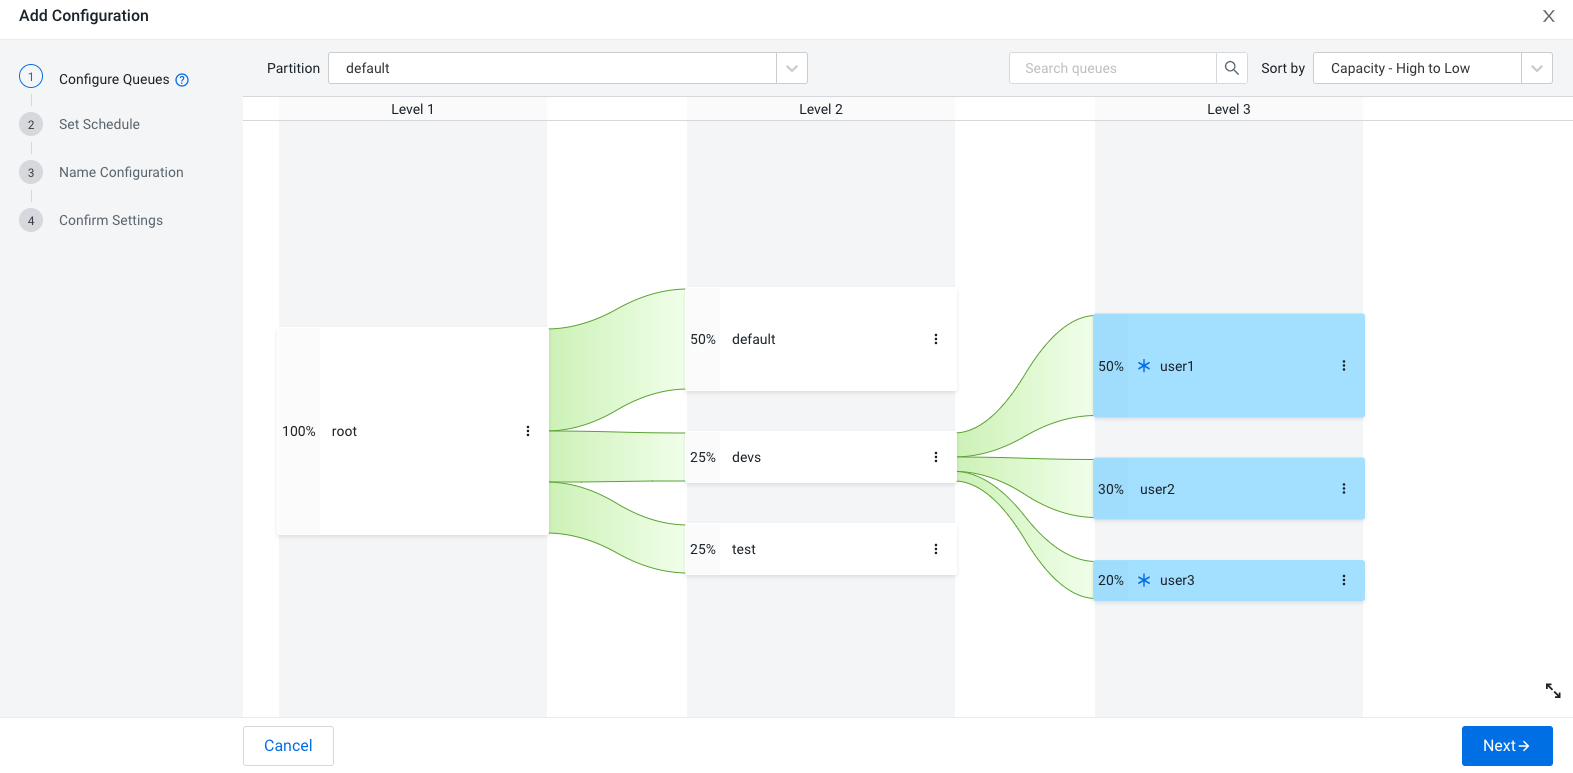
In this example the user1 and user3 queue’s capacity properties were changed from 40% to 50% and from 30% to 20% respectively. The user2 queue has the same setting as it had in the configuration that is the base of the Dynamic Configuration that is currently being created.
-
Set a Schedule.
Set up a schedule to control how frequently the Dynamic Configuration will be applied. You can set it on an hourly, daily, weekly, or monthly basis but you cannot combine them. For example, you cannot set both a monthly and an hourly schedule for the same scheduling rule. The default schedule is the schedule you configured for the last Dynamic Configuration you created.

Table 1. Dynamic Configuration scheduling options Level Available settings Hourly Set how often the Dynamic Configuration should be applied in minutes.
For example, if you set every 45 minutes, Dynamic Configuration will be applied every 45 minutes.
Daily Set how often the Dynamic Configuration should be applied in hours or select a start time.
For example if you set every 5 hours, Dynamic Configuration will be applied at 0 minutes past the hours, every 5 hours.
If you set the start time to 17.00, Dynamic Configuration will be applied every day at 05.00 PM (17:00).
Weekly Set how often the Dynamic Configuration should be applied in days or select all week days (everyday from Monday to Friday). Then provide a start time.
For example if you set every 2 days and set the start time to 17.00, the configuration will be applied at 05.00 PM (17:00), every 2 days.
Monthly Select the applicable days (any days in any combination from Monday to Sunday) and provide a start time when to apply the Dynamic Configuration.
For example, if you select Monday and set the start time to 17.00, the Dynamic Configuration will be applied at 05.00 PM (17:00), on every Monday.
