Follow these steps to set up your individual parameter contexts and add the relevant
parameters to them.
Create a parameter context for the common Kafka settings:
Select Parameter Contexts from the top-right
Global menu in the NiFi UI.
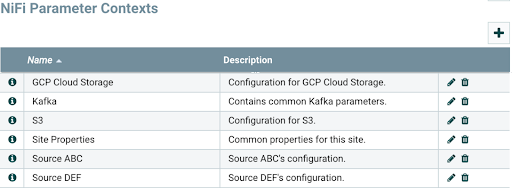
The NiFi Parameter Contexts dialog opens.
Click the (+) button in the top-right corner of the
NiFi Parameter Contexts dialog to add a new parameter context.
Add a name for your parameter context on the SETTINGS tab.
In this example the name is Kafka.
Switch to the PARAMETERS tab.
Click the (+) button to add the parameters you need for
configuring your data flow.
Provide a name and a value in the Add Parameter dialog. You can
also add a description of the parameter, if you want to.
In this example, the following parameters are added:
Name: Kafka Brokers / Value: localhost:9092
Name: Kafka Group ID / Value: MyGroup
Click APPLY to save the parameter context.
Create the remaining parameter contexts by repeating sub-steps a to g
outlined in Step 1, using the following names and values:
Parameter context
Parameter name
Parameter value
GCP Cloud Storage
GCP Project ID
my-project
GCP Bucket
my-bucket
S3
S3 Bucket
my-bucket
S3 Region
us-west-2
Site Properties
Site Identifier
1234
Site Data Manager
MyDM
Source ABC
Kafka Topic
source-abc-topic
Source DEF
Kafka Topic
source-def-topic
You are ready with the individual parameter contexts that you will
use to create your inheritance hierarchy. Your parameter contexts should look like this: