Creating Kafka tables using wizard

After registering a Kafka data source, you can use the Kafka table wizard in Streaming SQL Console to create a Kafka table.

You can query your streaming data using Kafka tables in SQL Stream Builder (SSB). You have the option to use the Kafka service in your environment, or connect to an external Kafka service. When creating Kafka tables you can use the Add Kafka wizard, the predefined templates or you can directly add a custom CREATE TABLE statement with the required properties in the SQL window.

You can also create Kafka tables using one of the Kafka templates. For more information, see the Kafka connectors and Using connectors with templates sections.

  • Make sure that you have registered Kafka as a Data Source.
  • Make sure that you have created topics in Kafka.
  • Make sure there is generated data in the Kafka topic.
  • Make sure that you have the right permissions set in Ranger.
  1. Navigate to the Streaming SQL Console.
    1. Navigate to Management Console > Environments, and select the environment where you have created your cluster.
    2. Select the Streaming Analytics cluster from the list of Data Hub clusters.
    3. Select Streaming SQL Console from the list of services.
      The Streaming SQL Console opens in a new window.
  2. Open a project from the Projects page of Streaming SQL Console.
    1. Select an already existing project from the list by clicking the Open button or Switch button.
    2. Create a new project by clicking the New Project button.
    3. Import a project by clicking the Import button.
    You are redirected to the Explorer view of the project.
  3. Click next to Virtual Tables.
  4. Click New Kafka Table.
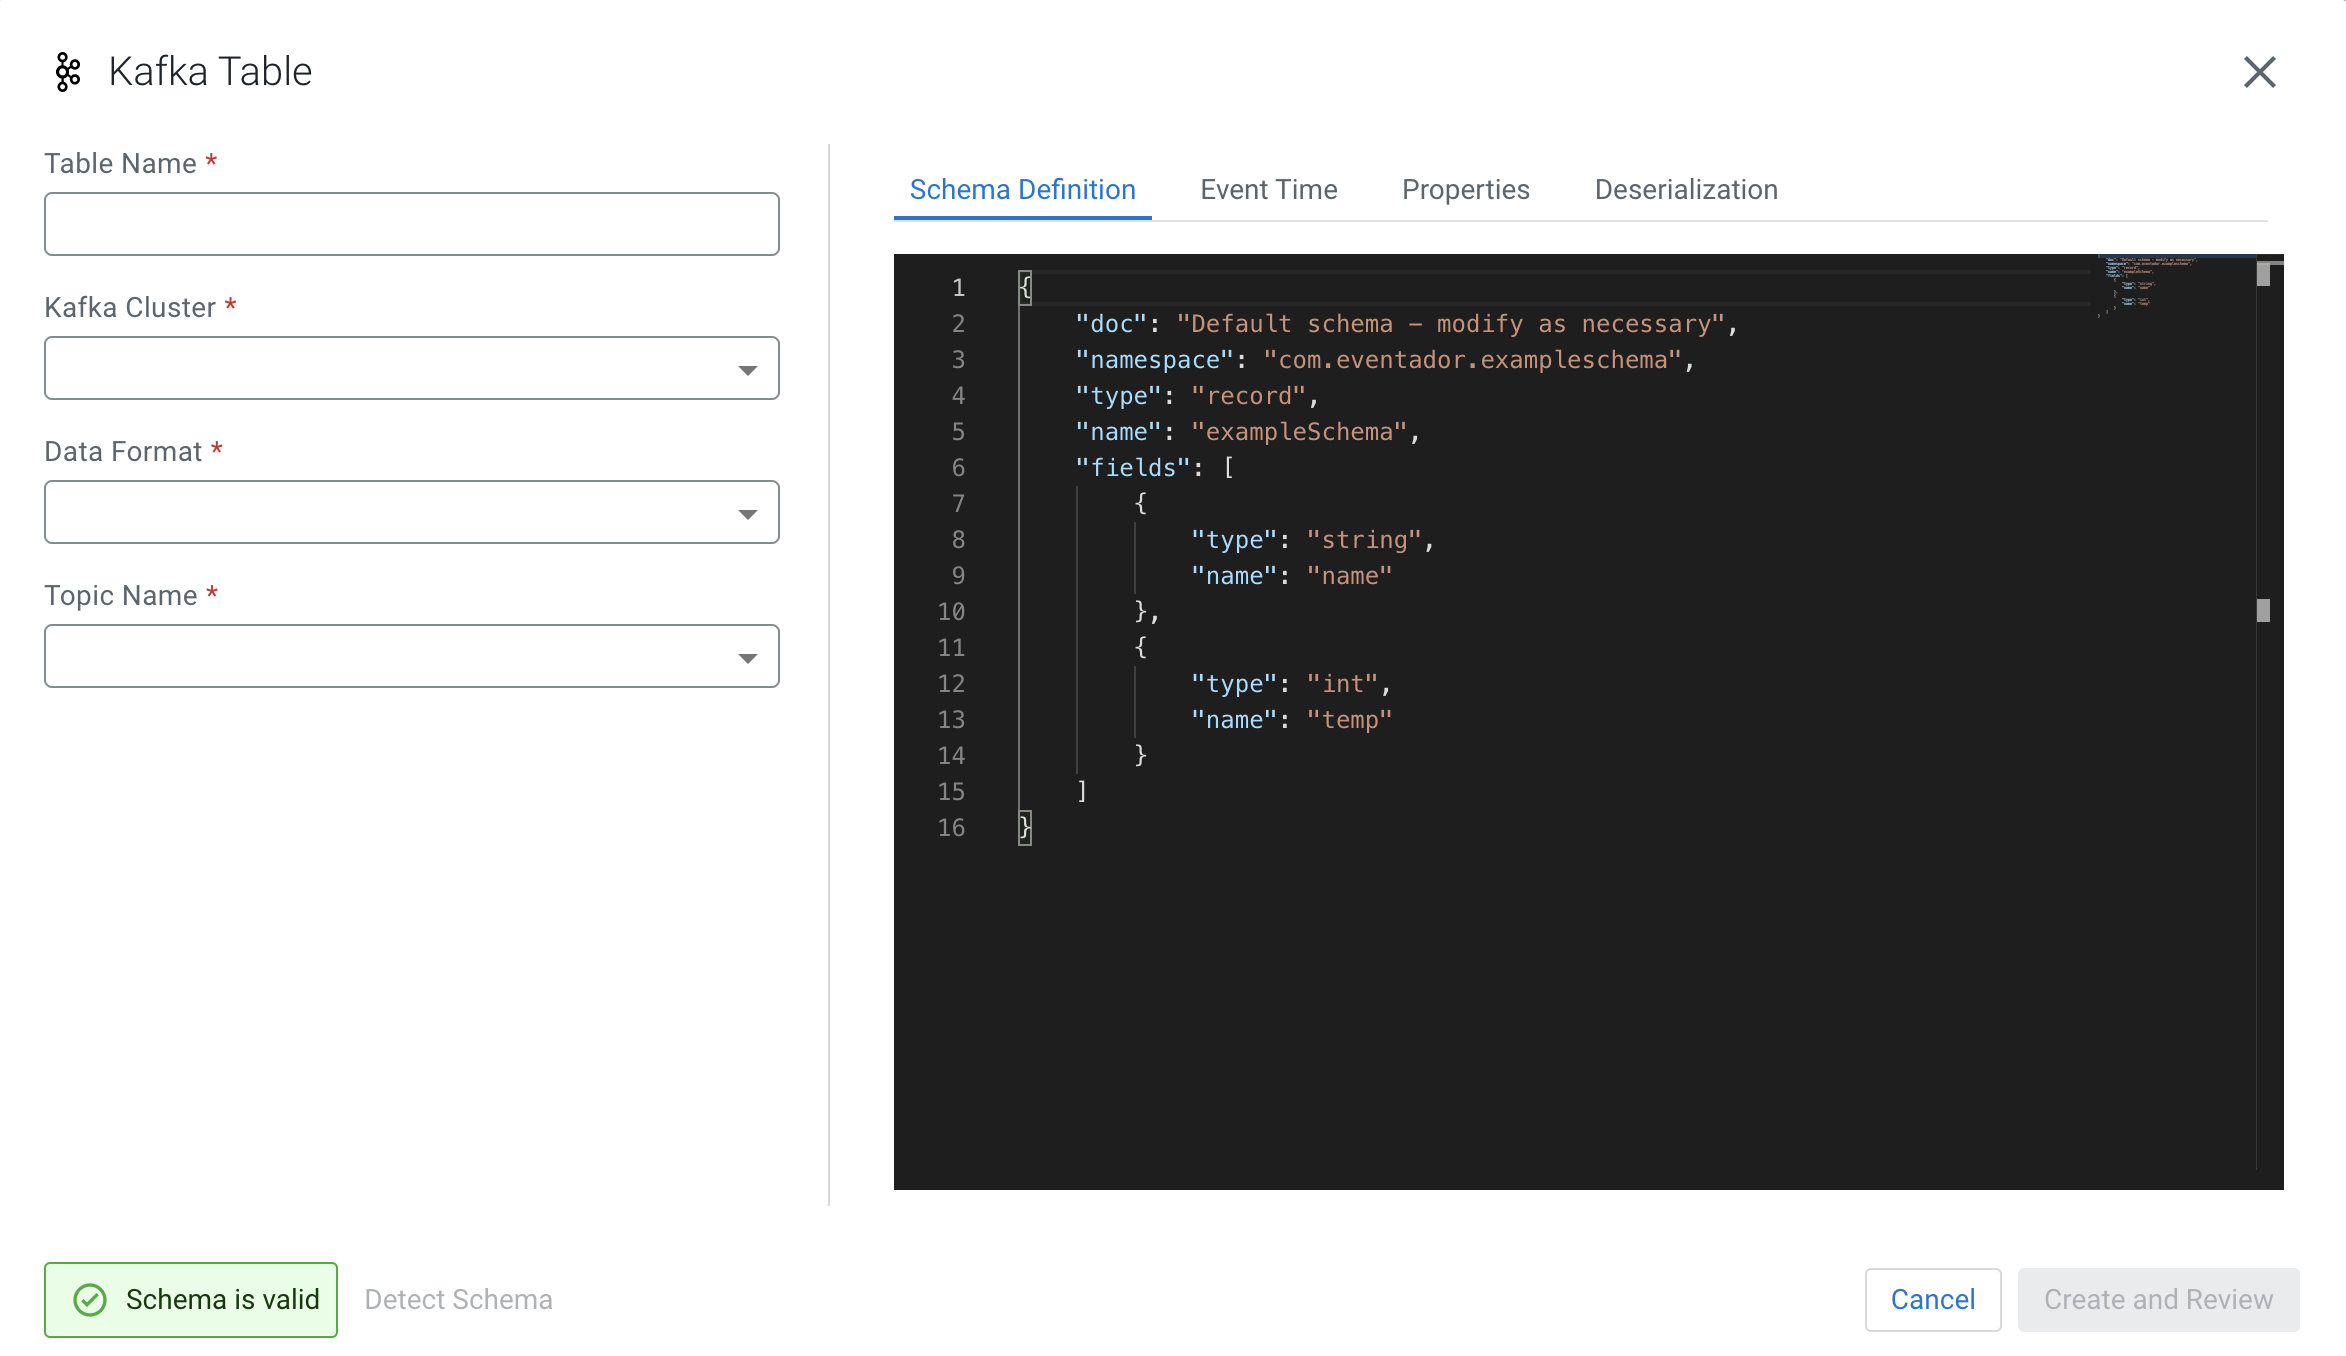
    The Kafka Table window appears.
  5. Provide a Table Name.
  6. Select a registered Kafka provider as Kafka cluster.
  7. Select the Data format.
    • You can select JSON as data format.
    • You can select AVRO as data format.
  8. Select a Kafka topic from the list.
  9. Add a customized schema to Schema Definition or click Detect Schema to read a sample of the JSON messages, and automatically infer the schema.
  10. Customize your Kafka Table with the following options:
    1. Configure the Event Time if you do not want to use the default Kafka Timestamps.
    2. Configure an Input Transform on the Data Transformations tab.
    3. Configure any Kafka properties required on the Properties tab.
    4. Select a policy for deserialization errors on the Deserialization tab.
    For more information about how to configure the Kafka table, see the Configuring Kafka tables section.
  11. Click Create and Review.
The Kafka Table is ready to be used for the SQL job either at the FROM or at the INSERT INTO statements.