If you have not defined workload views you have an option to generate default views
by selecting a set of criteria.
Describes how to generate the Cloudera Observability default views.
Verify that you are logged in to the Cloudera Observability web UI and that you
selected an environment from the AnalyticsEnvironments page.
Log in to Cloudera in a supported
browser.
The Cloudera web interface landing
page opens.
From the Your Enterprise Data Cloud landing
page, select the Observability tile.
The Cloudera Observability landing page opens to the main navigation
panel.
From the Cloudera ObservabilityEnvironments page, select the environment required
for analysis.
The Environment navigation panel opens.
Depending on the environment selected, verify that the Cluster
Summary page is displayed for the environment's cluster required
as a workload view.
To display the Cluster
Summary page for a Data Hub, Virtual
Cluster, and Virtual Warehouse
environment type, do one of the following:
From the Environment panel, expand the service's category and depending
on the service, locate and select the Data Hub's cluster,
Virtual Cluster, or Virtual
Warehouse that is required for analysis.
In the Data Services table, drill-down through the service links to
locate and select the Data Hub's cluster, Virtual Cluster, or
Virtual Warehouse that is required for
analysis.
Select the Workloads tab.
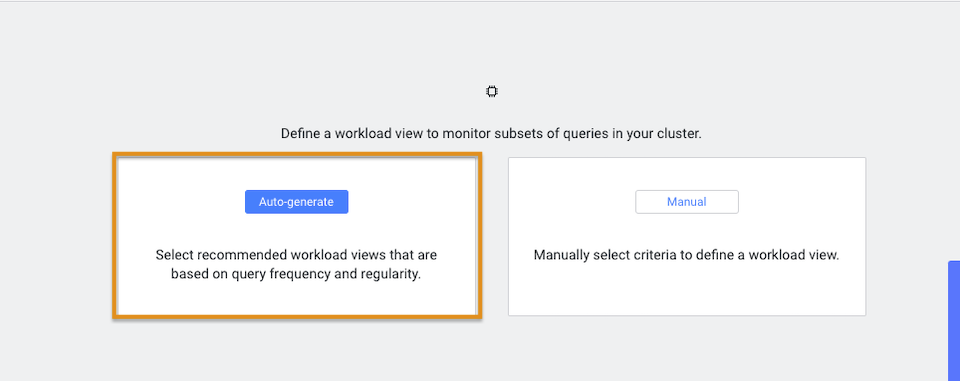
In the Workloads page, click Auto-generate:
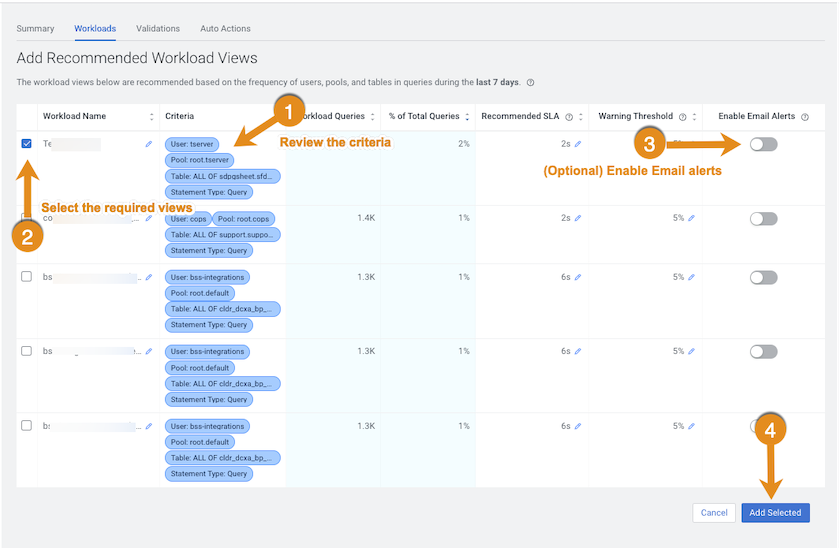
From the Criteria column, examine the criteria that is
used for each workload view, select the required workload view or views, and
then click Add Selected:
The workload views you selected are saved and displayed on the Workloads
page.
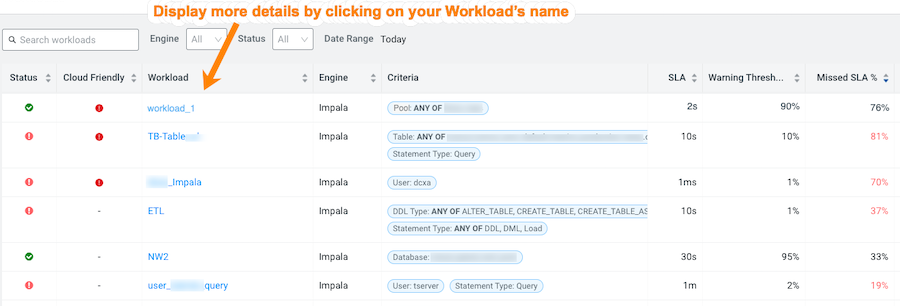
To verify your workload views, on the Workloads page, locate the workload view
you added. When verified, click the workload to view its details:
Optional: To view more information about the workload, open its Summary page by clicking
the name of the workload view in the Workload column,
which displays the view's details as chart widgets that you can use to further
analyze the results.
Optional: To create a new view do the following:
Verify that the Cluster Summary page is displayed
for the environment's cluster required as a workload view.
To display the
Cluster Summary page for a Data Hub,
Virtual Cluster, and Virtual
Warehouse environment type, do one of the following:
From the Environment panel, expand the service's category and
depending on the service, locate and select the Data Hub's cluster,
Virtual Cluster, or
Virtual Warehouse that is required
for analysis.
In the Data Services table, drill-down through the service links
to locate and select the Data Hub's cluster,
Virtual Cluster, or
Virtual Warehouse that is required
for analysis.
Select the Workloads tab.
From the Define New menu in the Workloads page,
select one of the following:
To create a new manual view, select Manual
Definition, in the Criteria
Definition widget define a set of criteria for
the view, and then click Save.
To automatically generate a new view, select
Auto-generate Definition.
The Workloads page reopens and your workload view appears in the
Workload column.
Workload Views cannot be edited directly. If you require changes to an existing
Workload View do the following:
In the Workloads page, locate the Workload View that requires
changes.
From its Action list, select Clone.
In the Criteria Definition widget make the
changes you require, and then click Save.
The Workloads page reopens and your workload view appears in the
Workload column.
Locate the Workload View that required changes and from its Action
list, select Delete and then in the Confirm
message, confirm its deletion by clicking
OK.