You can create tables in Data Explorer by importing CSV
files stored in ABFS. Data Explorer automatically detects the
schema and the column types, thus helping you to create tables without using the CREATE
TABLE syntax.
The
maximum file size supported is three gigabytes.
(Non-RAZ deployment) Only Data Explorer Superusers can
access ADLS Gen2 containers and import files to create tables. To create tables by
importing files from ADLS, you must assign and authorize use of a specific bucket on
ADLS Gen2 containers for your environment. The bucket then appears like a home
directory on the Data Explorer web interface.
-
In the Cloudera Data Warehouse service
Overview page, select the Virtual Warehouse in which
you want to create the table, click the options menu in the upper right corner
and click
Data Explorer (Hue).
-
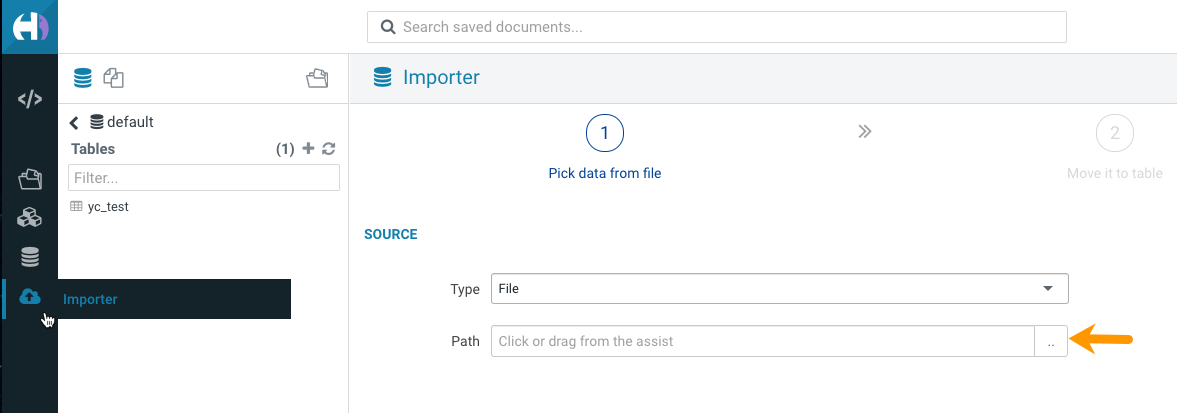
From the left assist panel, click on Importer.
-
On the Importer screen, click .. at the end of the
Path field:
Choose a file pop-up is displayed.
-
(Non-RAZ deployment) Type
abfs://[***CONTAINER-NAME***] in the
address text box and press enter.
The ABFS containers created under the Azure storage account are
displayed.
You can narrow down the list of results using the search option.
If the file is present on your computer, then you can upload it to ABFS by
clicking Upload a file.
-
Select the CSV file that you want to import into Data Explorer.
Data Explorer displays the preview of the table
along with the format.
Data Explorer automatically detects the field
separator, record separator, and the quote character from the CSV file. If you
want to override a specific setting, then you can change it by selecting a
different value from the drop-down menu.
-
Click Next.
On this page, you can set the table destination, partitions, and change the
column data types.
-
Verify the settings and click Submit to create the
table.
The CREATE TABLE query is triggered.
Data Explorer displays the logs and opens the
Table Browser from which you can view the newly created
table when the operation completes successfully.