Creating a Git repository in Cloudera Data Engineering
Git repositories allow teams to collaborate, manage project artifacts, and promote applications from lower to higher environments. Cloudera currently supports Git providers such as GitHub, GitLab, and Bitbucket. Learn how to use Cloudera Data Engineering with version control service.
Supported version
control service providers: Cloudera currently supports the following version control
service providers:
- GitHub
- GitLab
- Bitbucket
cde credential create --type basic --username myuser --name
          my-credential
The command above prompts you for a password where you can
either provide your Personal Access Token (PAT) or provide a password for your Git
repository account, for example, Github.
- Limitations
- When you create a Git repository in Cloudera Data Engineering, consider the
following limitations:
- Repository creation delay: Currently, during the repository creation, a prolonged loading screen is displayed due to a synchronous sync call.
- Incorrect sync status: The sync status shown is
active, even if the synchronization is still in progress. Git hash and file updates for large repositories are delayed even after async successfulmessage. - Search scope limitation: The current repository search is not recursive and it only operates within the current folder.
- Size limitations
-
- The maximum size for an individual file is 100MB, which is enforced by GitHub.
- Cloudera recommends the following:
- Store up to 1000 files in a folder.
- Store a maximum of 10 000 files in a repository.
- Keep the total repository size below 1GB.
-
Click Create Repository. The Create A
Repository dialog box displays. Enter the following fields for the
repository:
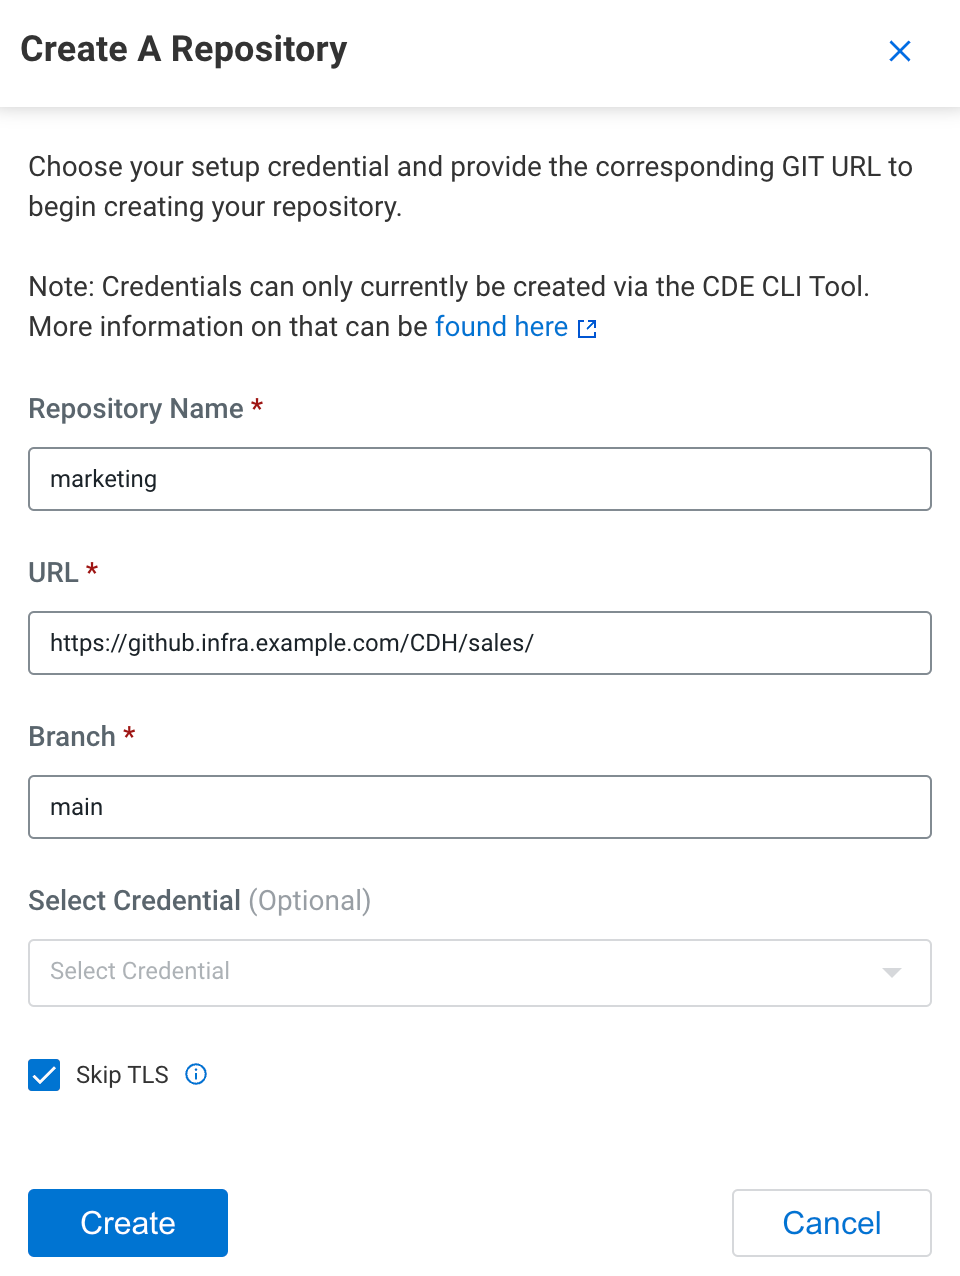
- Repository Name - Enter a name for the repository.
- URL - Enter the repository URL (https only).
- Branch - Enter the name of the git branch.
- Select a credential from the Select Credential drop-down list. The credentials can be created using the Cloudera Data Engineering CLI.
- Select Skip TLS. Select this option if the server uses a self-signed CA certificate that Cloudera Data Engineering does not trust. This allows Cloudera Data Engineering to skip the security check and clone the repository.