Enabling a Cloudera Data Engineering service
Before you can use the Cloudera Data Engineering service, you must enable it on each environment that you want to use Cloudera Data Engineering on.
Make sure that you have a working environment for which you want to enable the Cloudera Data Engineering service. For more information about environments, see Environments.
- In the Cloudera console, click the Data Engineering tile. The Cloudera Data Engineering Home page displays.
- Click Administration in the left navigation menu. The Administration page displays.
- In the Services column, click the plus icon at the top to enable Cloudera Data Engineering for an environment.
- Type the name of the service that you want to enable Cloudera Data Engineering for.
-
Select the Environment from the drop-down menu.
After you select the Environment, you can view the Cloudera Runtime version, the supported Apache Airflow runtime component version, and the Spark runtime component version on the Service creation and details pages.
The following screenshot illustrates enabling a Service, where you can view the supported runtime component versions.
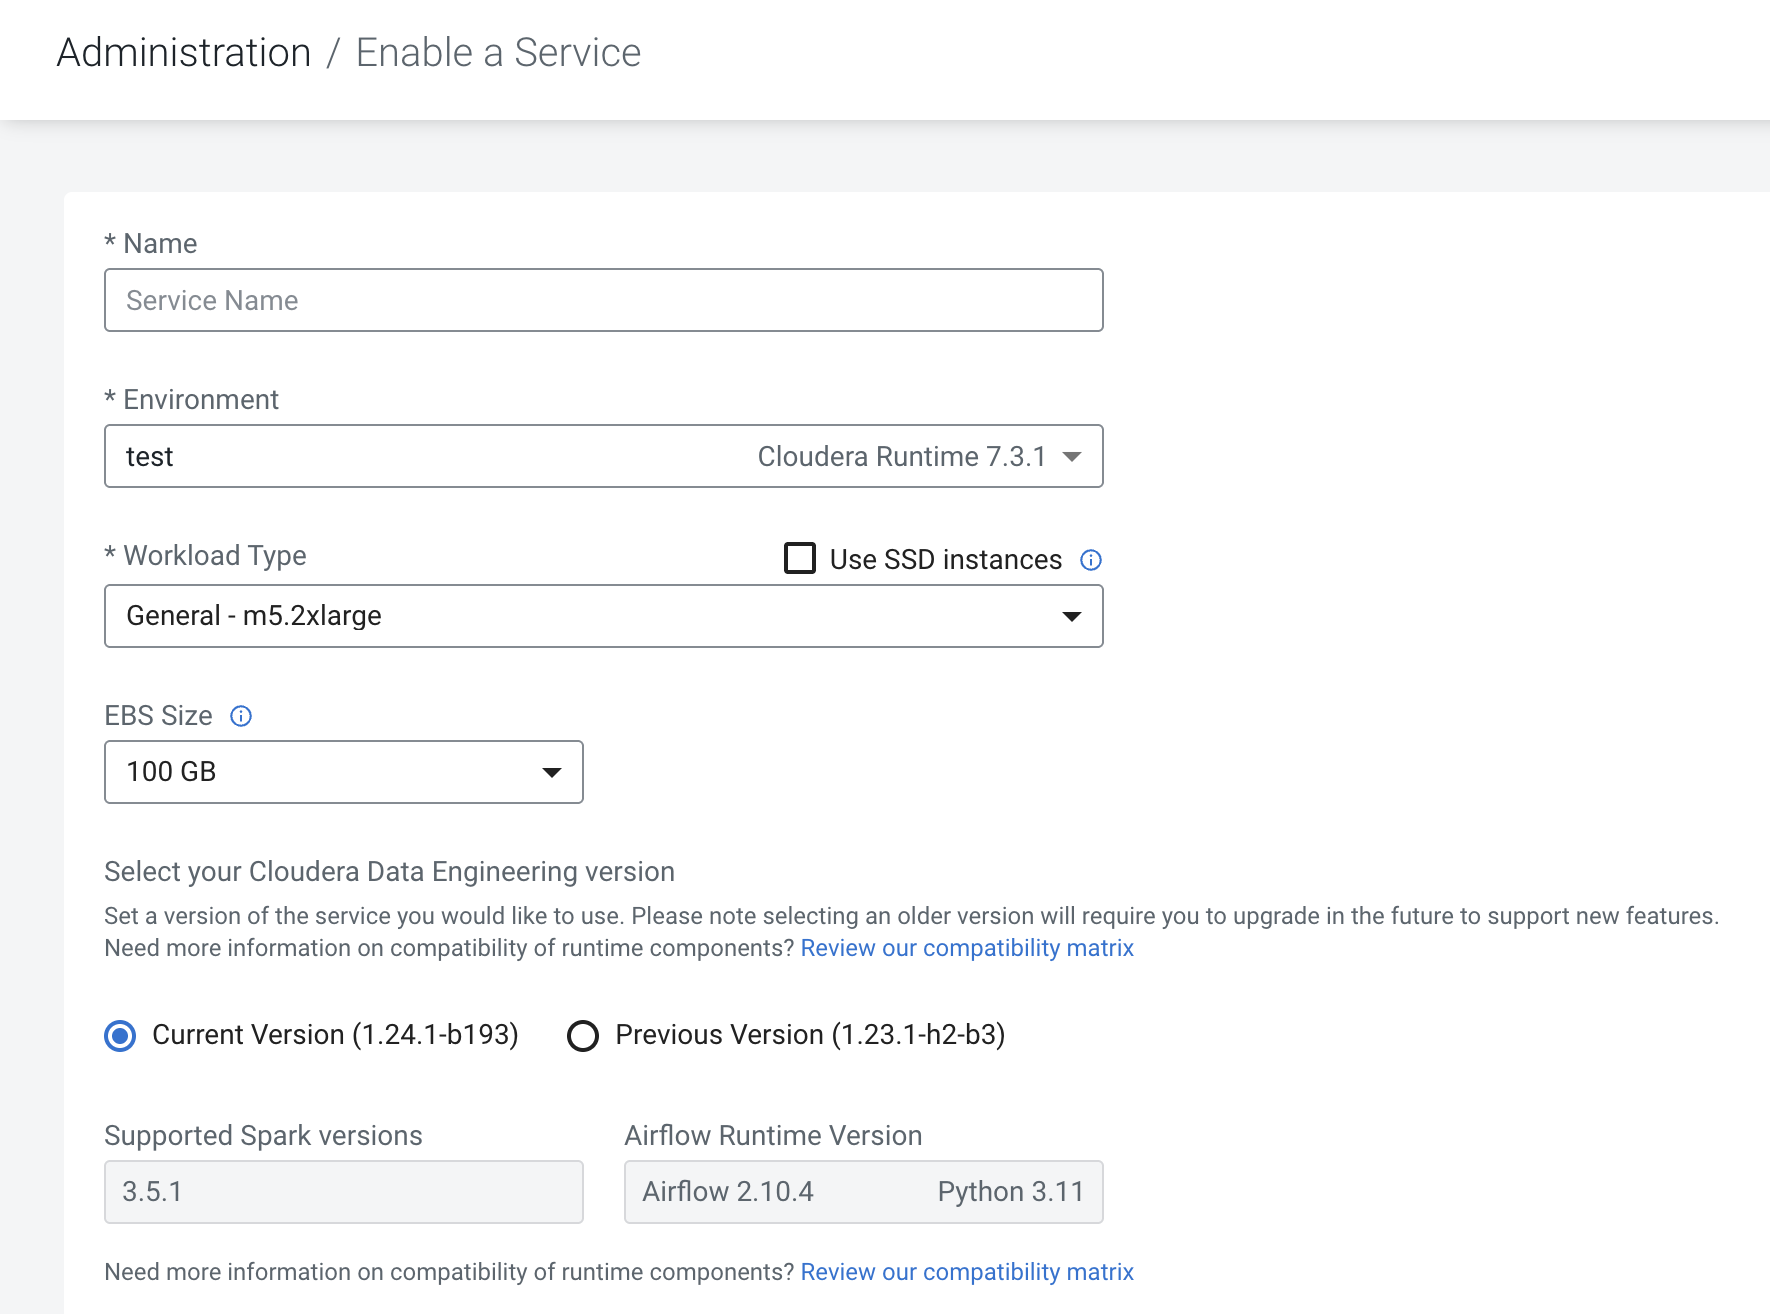
- Select the Workload Type.The workload type corresponds to the instance size that will be deployed to run your submitted Spark jobs. When you select a type, the corresponding cloud provider instance size is displayed in the Summary section to the right.
- If you want to use SSD storage, check the box labeled Use SSD instances. In this configuration, SSD storage is used for the workload filesystem, such as the Spark local directory. If your workload requires more space than is available in the instance storage, select a larger instance type with sufficient local storage or select an instance type without SSD, and then configure the EBS volume size.
-
Set the Auto-Scale Range under the Capacity &
Costs section:
The range you set here creates an auto scaling group with the specified minimum and maximum number of instances that can be used. The Cloudera Data Engineering service launches and shuts down instances as needed within this range. The instance size is determined by the Workload Type you selected.
You can use Reserved Instances (RIs) in your account to save cost. Reserved Instances are not physical instances, but a billing discount that is applied to the use of On-Demand Instances in your account. To benefit from the billing discount, the On-Demand Instances in your account must match certain attributes. For more information, see the AWS documentation on Reserved Instances. If you want to use RIs, you must also specify an instance family for them.
For Azure: Set the On-demand Instances range. This option displays for Core (Tier 1) cluster types during service creation. After the service and cluster is created, you can edit the service and set the All purpose On-demand Instances range under the Capacity & Costs section.For AWS: After the service and clusters are created, you can set the All purpose On-demand Instances range and the All purpose Spot Instances range under the Capacity & Costs section. This option displays for the All-purpose (Tier 2) cluster types.For a Cloudera Data Engineering service, the value range of the
Autoscaling Rangeparameter is0to250nodes. - If you want to use spot instances, check the box labeled
Use Spot instances and select a range of spot
instances to request. This creates another auto scaling group of spot
instances. Spot instances are requested with similar CPU and memory
profiles as the instances selected for the Workload
Type. For more information, see Cloudera Data Engineering Spot
Instances.
- Optional: Enable a private network (preview feature). This feature ensures that the Cloudera Data Engineering service is deployed with a secure network setup based on the cloud provider such as Microsoft Azure or Amazon Web Services (AWS). For more information see the links below on how to configure this feature as there are prerequisites needed before you see the Enable Private Network option in the Cloudera Data Engineering user interface under Network & Storage.
-
If you create the service in an AWS environment using a non-transparent proxy, you find
a Proxy CIDR Source Ranges field. You are only required to enter
the proxy CIDR ranges for the proxy instances if you registered your proxies using host
names, as the Cloudera Control Plane has no way to resolve those to IPs. If your proxy
instances were registered using IP addresses, you can leave this field blank.
For example, if you have a load balanced proxy with static IPs running on 10.80.199.105 and 10.80.200.45, add "10.80.199.105/32" and "10.80.200.45/32". If your proxy instances are dynamic (behind a load balancer or virtual IP) then you would enter a wider range, e.g.: "10.80.200.0/24".
-
If you want to create a load balancing endpoint in a public subnet, check the box
labeled Enable Public Loadbalancer. If you leave this unchecked,
the load balancing endpoint will be created in a private subnet, and you will need to
configure access manually in your cloud account.
-
Specify a comma-separated list of CIDRs in API server Authorized IP
Ranges that can access the Kubernetes master API server.
You may specify a comma-separated list of CIDRs that can access the Kubernetes master API server.Make sure that the provided IP addresses do not overlap with the following ranges:
- 0.0.0.0 - 0.255.255.255
- 10.0.0.0 - 10.255.255.255
- 100.64.0.0 - 100.127.255.255
- 127.0.0.0 - 127.255.255.255
- 169.254.0.0 - 169.254.255.255s
- 172.16.0.0 - 172.31.255.255
- 192.0.0.0 - 192.0.0.255
- 192.0.2.0 - 192.0.2.255
- 192.88.99.0 - 192.88.99.255
- 192.168.0.0 - 192.168.255.255
- 198.18.0.0 - 198.19.255.255
- 198.51.100.0 - 198.51.100.255
- 203.0.113.0 - 203.0.113.255
- 224.0.0.0 - 239.255.255.255
- 240.0.0.0 - 255.255.255.254
- 255.255.255.255
- Specify a comma-separated list of client IP ranges in Load Balancer Source Ranges that should be allowed to access the load balancer.
- Specify which subnets to use for the Kubernetes worker nodes. Select from available Subnets in the drop-down list.
- Specify which subnets to use for the Load balancer. Select from available Subnets in the drop-down list.
- Optional: Check the box labeled Enable Observability Analytics if you want diagnostic information about jobs and query execution sent to Cloudera Observability. This helps optimize troubleshooting.
- Check the box labeled Enable Workload Analytics to automatically send diagnostic information from job execution to Cloudera Workload Manager.
-
Optionally add Tags as needed. Tags are applied to the cloud
provider resources associated with the Cloudera Data Engineering service (including virtual clusters created in
that service). For more information about tags, see the cloud provider
documentation:
- Amazon AWS
- Tagging AWS resources
- Default Virtual Cluster selection is enabled by default to create a default virtual cluster after enabling a Cloudera Data Engineering service. This will help you get a jump start to create your jobs easily, without having to wait to create a Cloudera Data Engineering virtual cluster as mentioned in Creating virtual clusters, making the onboarding smoother. You can turn this toggle off if you do not wish to use a default virtual cluster.
- Click Enable.