Configuring external IDE Spark Connect sessions
Learn about how to configure a Spark Connect Session with Cloudera Data Engineering.
Before you create a Spark Connect Session, perform the following steps:
- Enable a Cloudera Data Engineering service .
- Create a Cloudera Data Engineering Virtual cluster. You must select All Purpose (Tier 2) in the Virtual Cluster option and Spark 3.5.1 as the Spark version.
-
Perform the following steps on each user's machine:
-
Create the ~/.cde/config.yaml configuration file
and add the vcluster-endpoint and
cdp-endpoint parameters.
This allows the client machine to identify a virtual cluster.
Figure 1. Getting the Cloudera endpoint URL from the Cloudera console URL 
For more information, see vcluster-endpoint and cdp-endpoint.
For example,cdp-endpoint: https://console.cdp.apps.example.com credentials-file: /Users/user1/.cde/credentials vcluster-endpoint: https://ffws6v27.cde-c9b822vr.apps.example.com/dex/api/v1
-
Create the ~/.cde/config.yaml configuration file
and add the vcluster-endpoint and
cdp-endpoint parameters.
-
Create a Spark Connect Session using the UI or the CLI.
- Using the UI: Create a new session as described in Creating
Sessions in Cloudera Data Engineering and select
Spark Connect (Tech Preview) from the
Type drop-down list as the session type.
Figure 2. Create Session window with Spark Connect selected as session type 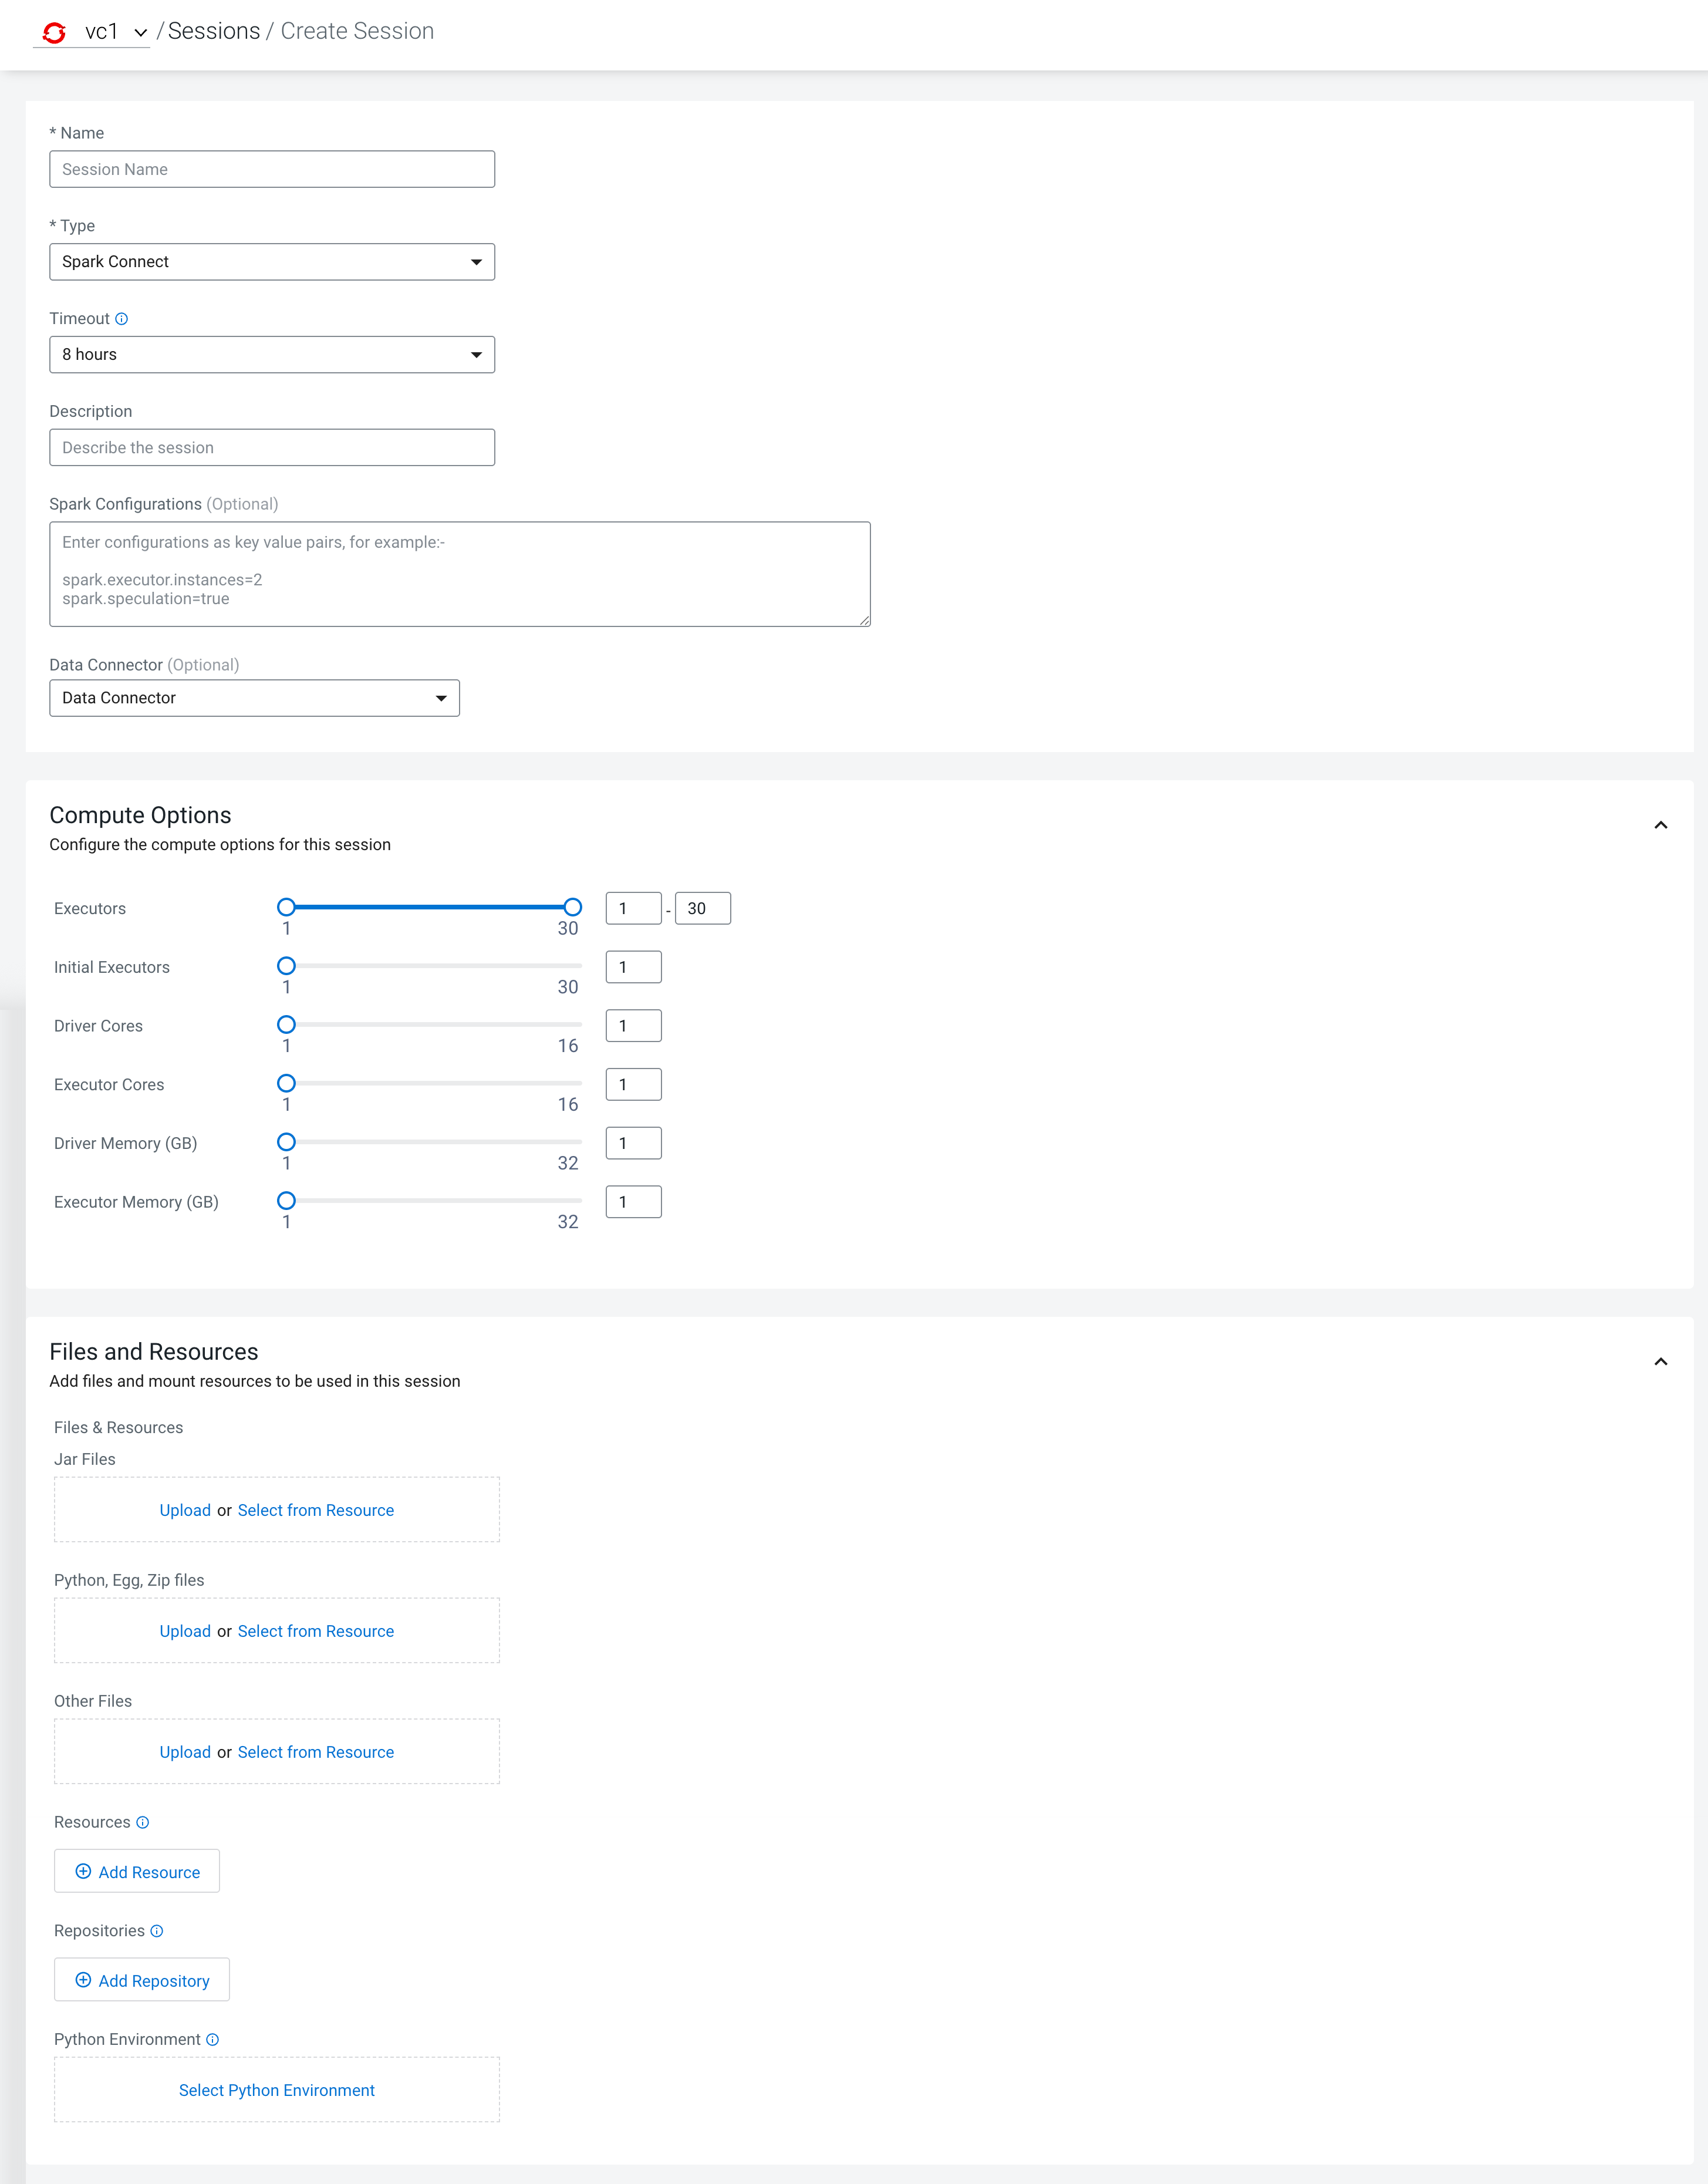
- Using the
CLI: Create a Spark Connect Session by running the following
command:
cde session create --name [***SPARK-SESSION-NAME***] --type spark-connect
- Using the UI: Create a new session as described in Creating
Sessions in Cloudera Data Engineering and select
Spark Connect (Tech Preview) from the
Type drop-down list as the session type.
-
Go to the Connect tab and download the required Cloudera Data Engineering files based on the programming language you
want to use to connect.
Figure 3. Connect with Spark Connect tab steps 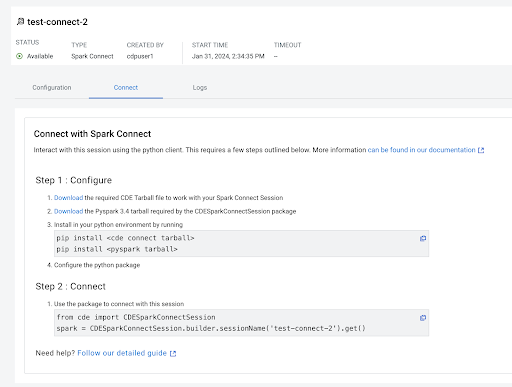
- Python:
- Download the required Cloudera Data Engineering TAR file and PySpark TAR file.
- Create a new Python virtual environment or use your existing one,
activate it, and install the TAR
files.
python3 -m venv cdeconnect
. cdeconnect/bin/activate

pip install [***CDECONNECT TARBALL***]
pip install [***PYSPARK TARBALL***]
- Java or Scala:
- Download the required Cloudera Data Engineering JVM JAR file. Alternatively, add the JAR file as a Maven dependency in your application pom.xml file using the Cloudera repository.
- Include the Cloudera Data Engineering Connect Client JVM
JAR file in your application classpath.
Following is an example command for a Java or Scala JVM application:
java --add-opens=java.base/java.nio=ALL-UNNAMED -cp [***PATH-TO-THE-DOWNLOADED-JAR-FILE***] com.cloudera.cde.SparkConnectExample session1
- Python:
