Configuring multiple YARN queues for autoscaling
Manual steps are required to configure multiple YARN queues for load-based autoscaling.
-
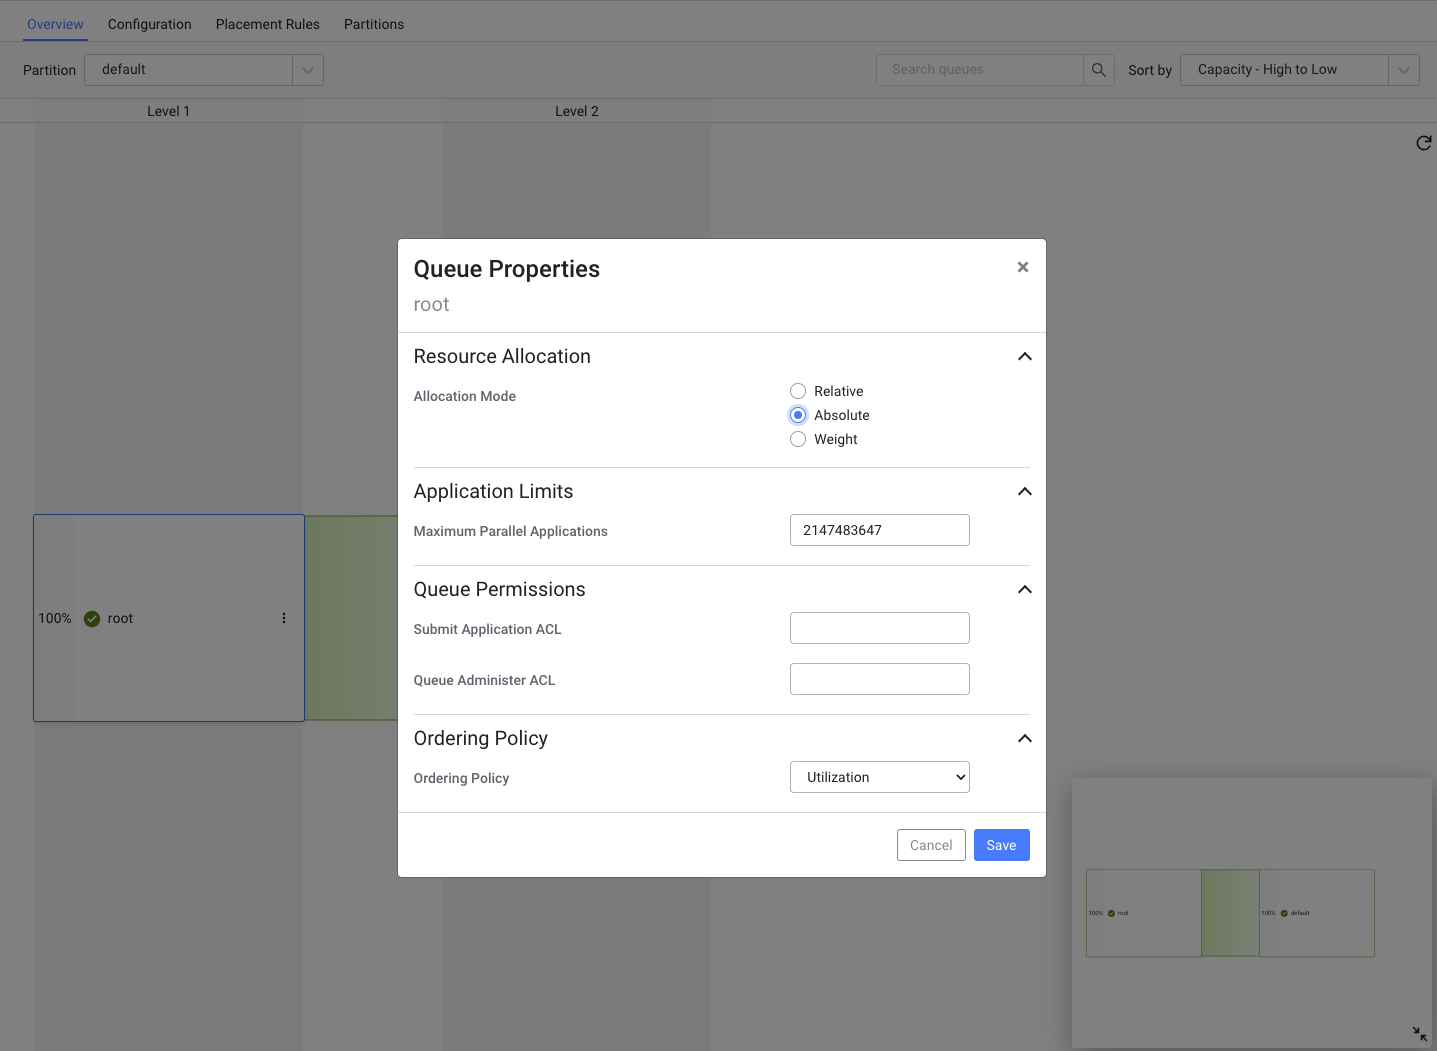
Ensure that the queue configuration uses absolute values instead of percentages:
- In the Queue Properties dialog box, select
Absolute under Resource Allocation mode and click
Save.
- In the Queue Properties dialog box, select
Absolute under Resource Allocation mode and click
Save.
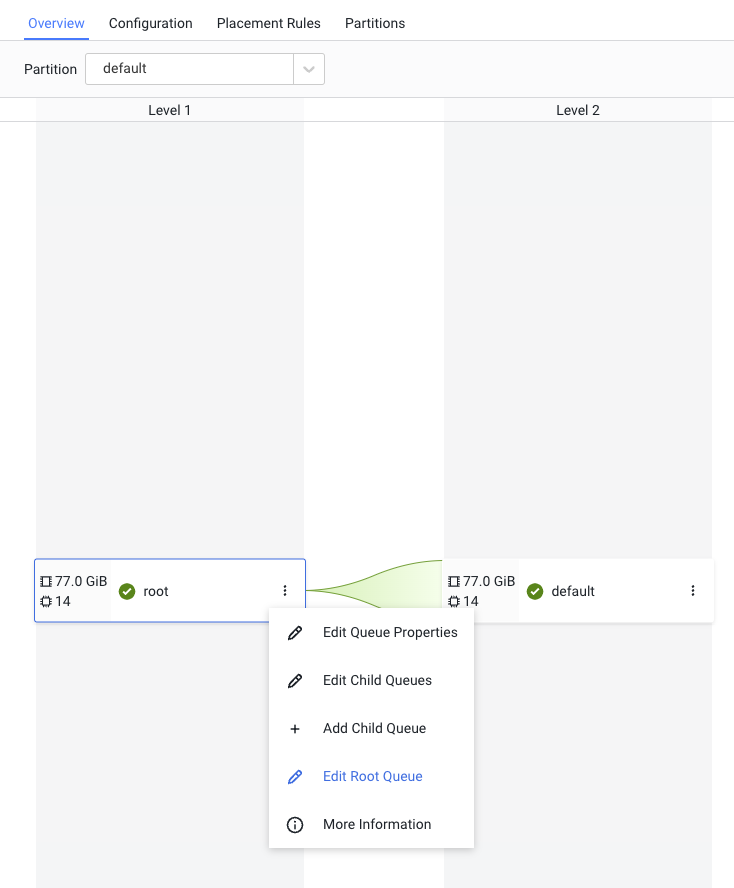
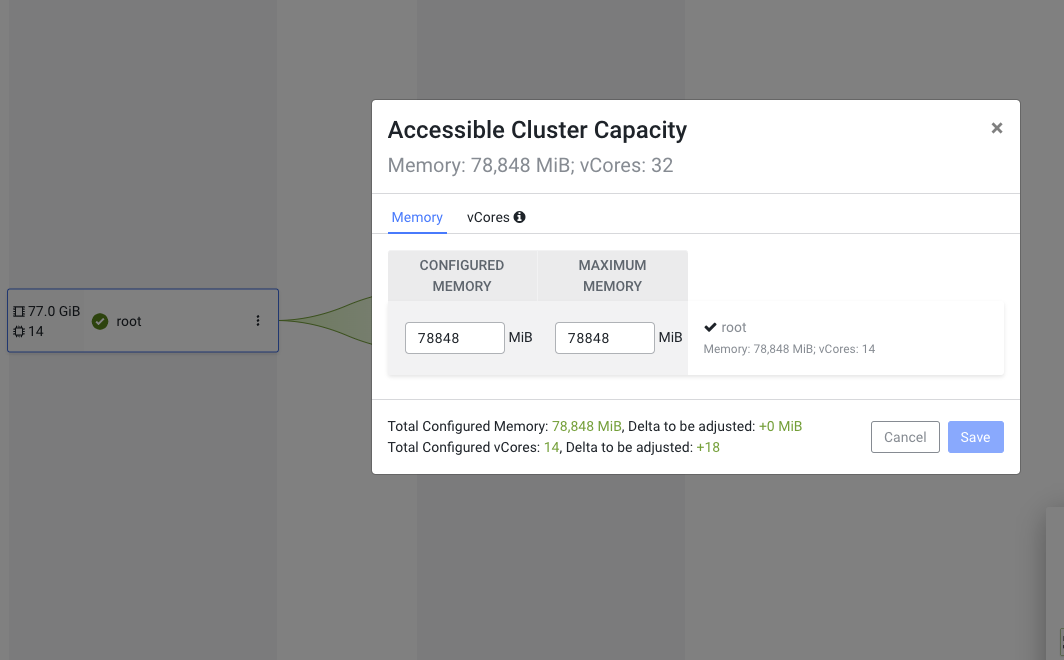
- Configure the queues:
- In the Queue Manager UI, click on the three vertical dots on the root,
select Edit Root Queue and set the ‘Configured Memory’ and
‘Maximum Memory’ to the sum total memory of the maximum number of
nodes that was set in the target field of Autoscale
Policy parameters. Optionally, do the same for the CPUs.
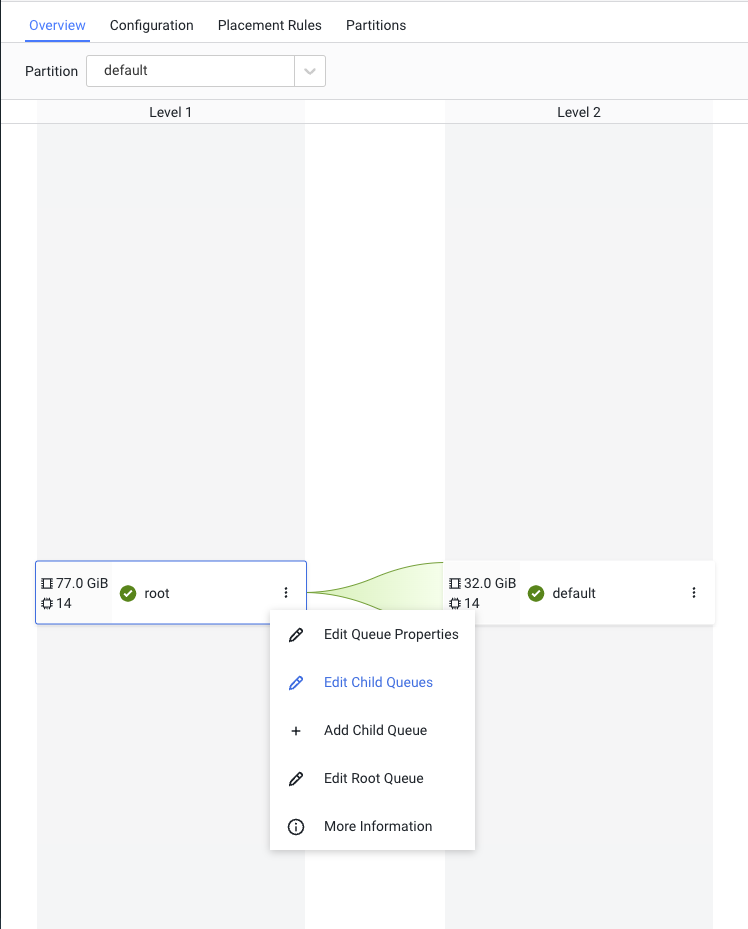
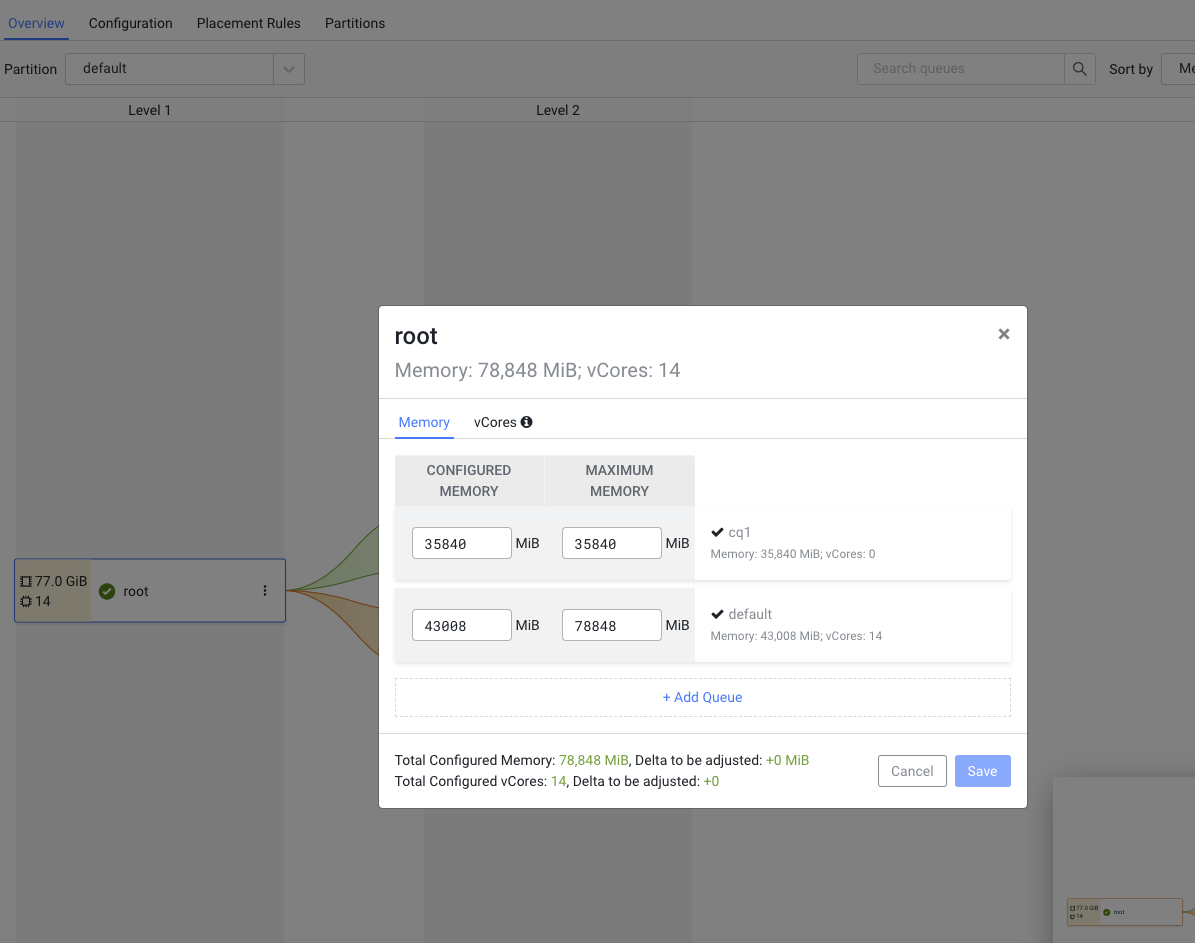
- Edit the Child Queues as needed, and configure the resource allocation. In
the example below, a new queue called `cq1` is added, which has a configured memory
allocation, and maximum memory allocation of 35GB. The `default` queue has a
configured memory allocation of 42GB, and a maximum memory allocation of 77GB.
- Jobs submitted to cq1 queue can cause the cluster to autoscale so that 35GB is available to the cq1 queue (within the cluster max of 77GB).
- Jobs submitted to the default queue can cause the cluster to autoscale so that 77GB is available to the default queue (which is the cluster max in this case).
- In the Queue Manager UI, click on the three vertical dots on the root,
select Edit Root Queue and set the ‘Configured Memory’ and
‘Maximum Memory’ to the sum total memory of the maximum number of
nodes that was set in the target field of Autoscale
Policy parameters. Optionally, do the same for the CPUs.