If the Ozone S3 gateway is configured with TLS (HTTPs), you must import the CA
certificate to Java truststore. This is because the CA certificate that is used to set up TLS is
not available in the default Java truststore; however, the hadoop-aws connector library only
trusts the built-in Java truststore certificates.
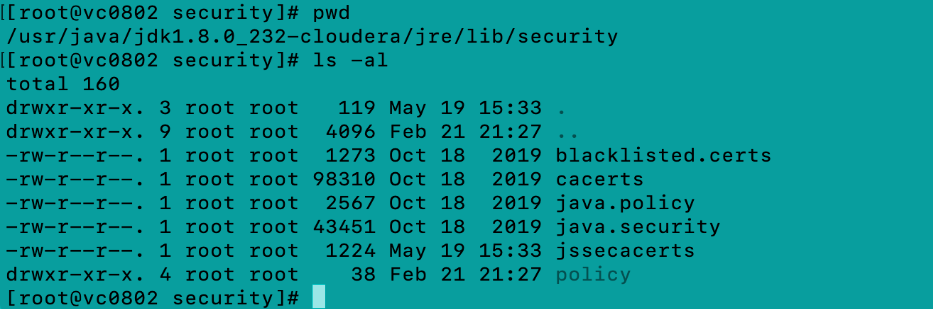
To override the default Java truststore, create a truststore named jssecacerts in the
same directory ($JAVA_HOME/jre/lib/security/jssecacerts) on all cluster nodes where the user
intends to run jobs or shell commands against Ozone S3. You can find the Ozone S3 gateway
truststore location from the ozone-site.xml file which is normally located in the
/etc/ozone/conf.cloudera.OZONE-1 directory. From the ozone-site.xml file, you can find
ssl.client.truststore.location and ssl.client.truststore.password.
List entries in the store
/usr/java/default/bin/keytool -list -v -keystore
          <<ssl.client.truststore.location>>
From the command output, you can find out the srcalias value which is shown as
“Alias name”. In this example, the “Alias name” is cmrootca-0. Import the CA certificate
(In this example, the certificate is imported to jssecacerts truststore).
/usr/java/default/bin/keytool -importkeystore -destkeystore
$JAVA_HOME/jre/lib/security/jssecacerts -srckeystore
<<ssl.client.truststore.location>> -srcalias <<alias>>
Enter the destination password as “changeit” and the source password as it is configured in
the cluster.
Ozone S3 currently does not support Etags and versioning because the
configuration related to them needs to be disabled when using S3A filesystem with Ozone
S3. You can either pass the Ozone S3 configurations from the command line or store them
in the cluster-wide safety valve in the core-site.xml file.
Obtain awsAccessKey and awsSecret using the ozone s3 getsecret command
ozone s3 getsecret --om-service-id=<<ozone service id>>
Ozone S3 properties need to be either passed in from command line or stored as cluster-wide
Safety Valve in core-site.xml file. To do this is, add the Safety Valve to core-site.xml
through HDFS configuration from Cloudera Manager.
In the configurations, replace <<accessKey>> and <<secret>> with
awsAccessKey and awsSecret obtained using the Ozone S3 getsecret command accordingly and
<<Ozone S3 endpoint URL>> with Ozone S3 gateway URL from the cluster.
If you do not store the Ozone S3 properties as cluster-wide Safety Valve in core-site.xml file,
you can pass the following in from command line: