Deploying Cloudera Migration Assistant with parcel
Learn more about how to deploy Cloudera Migration Assistant with a parcel in Cloudera Manager.
-
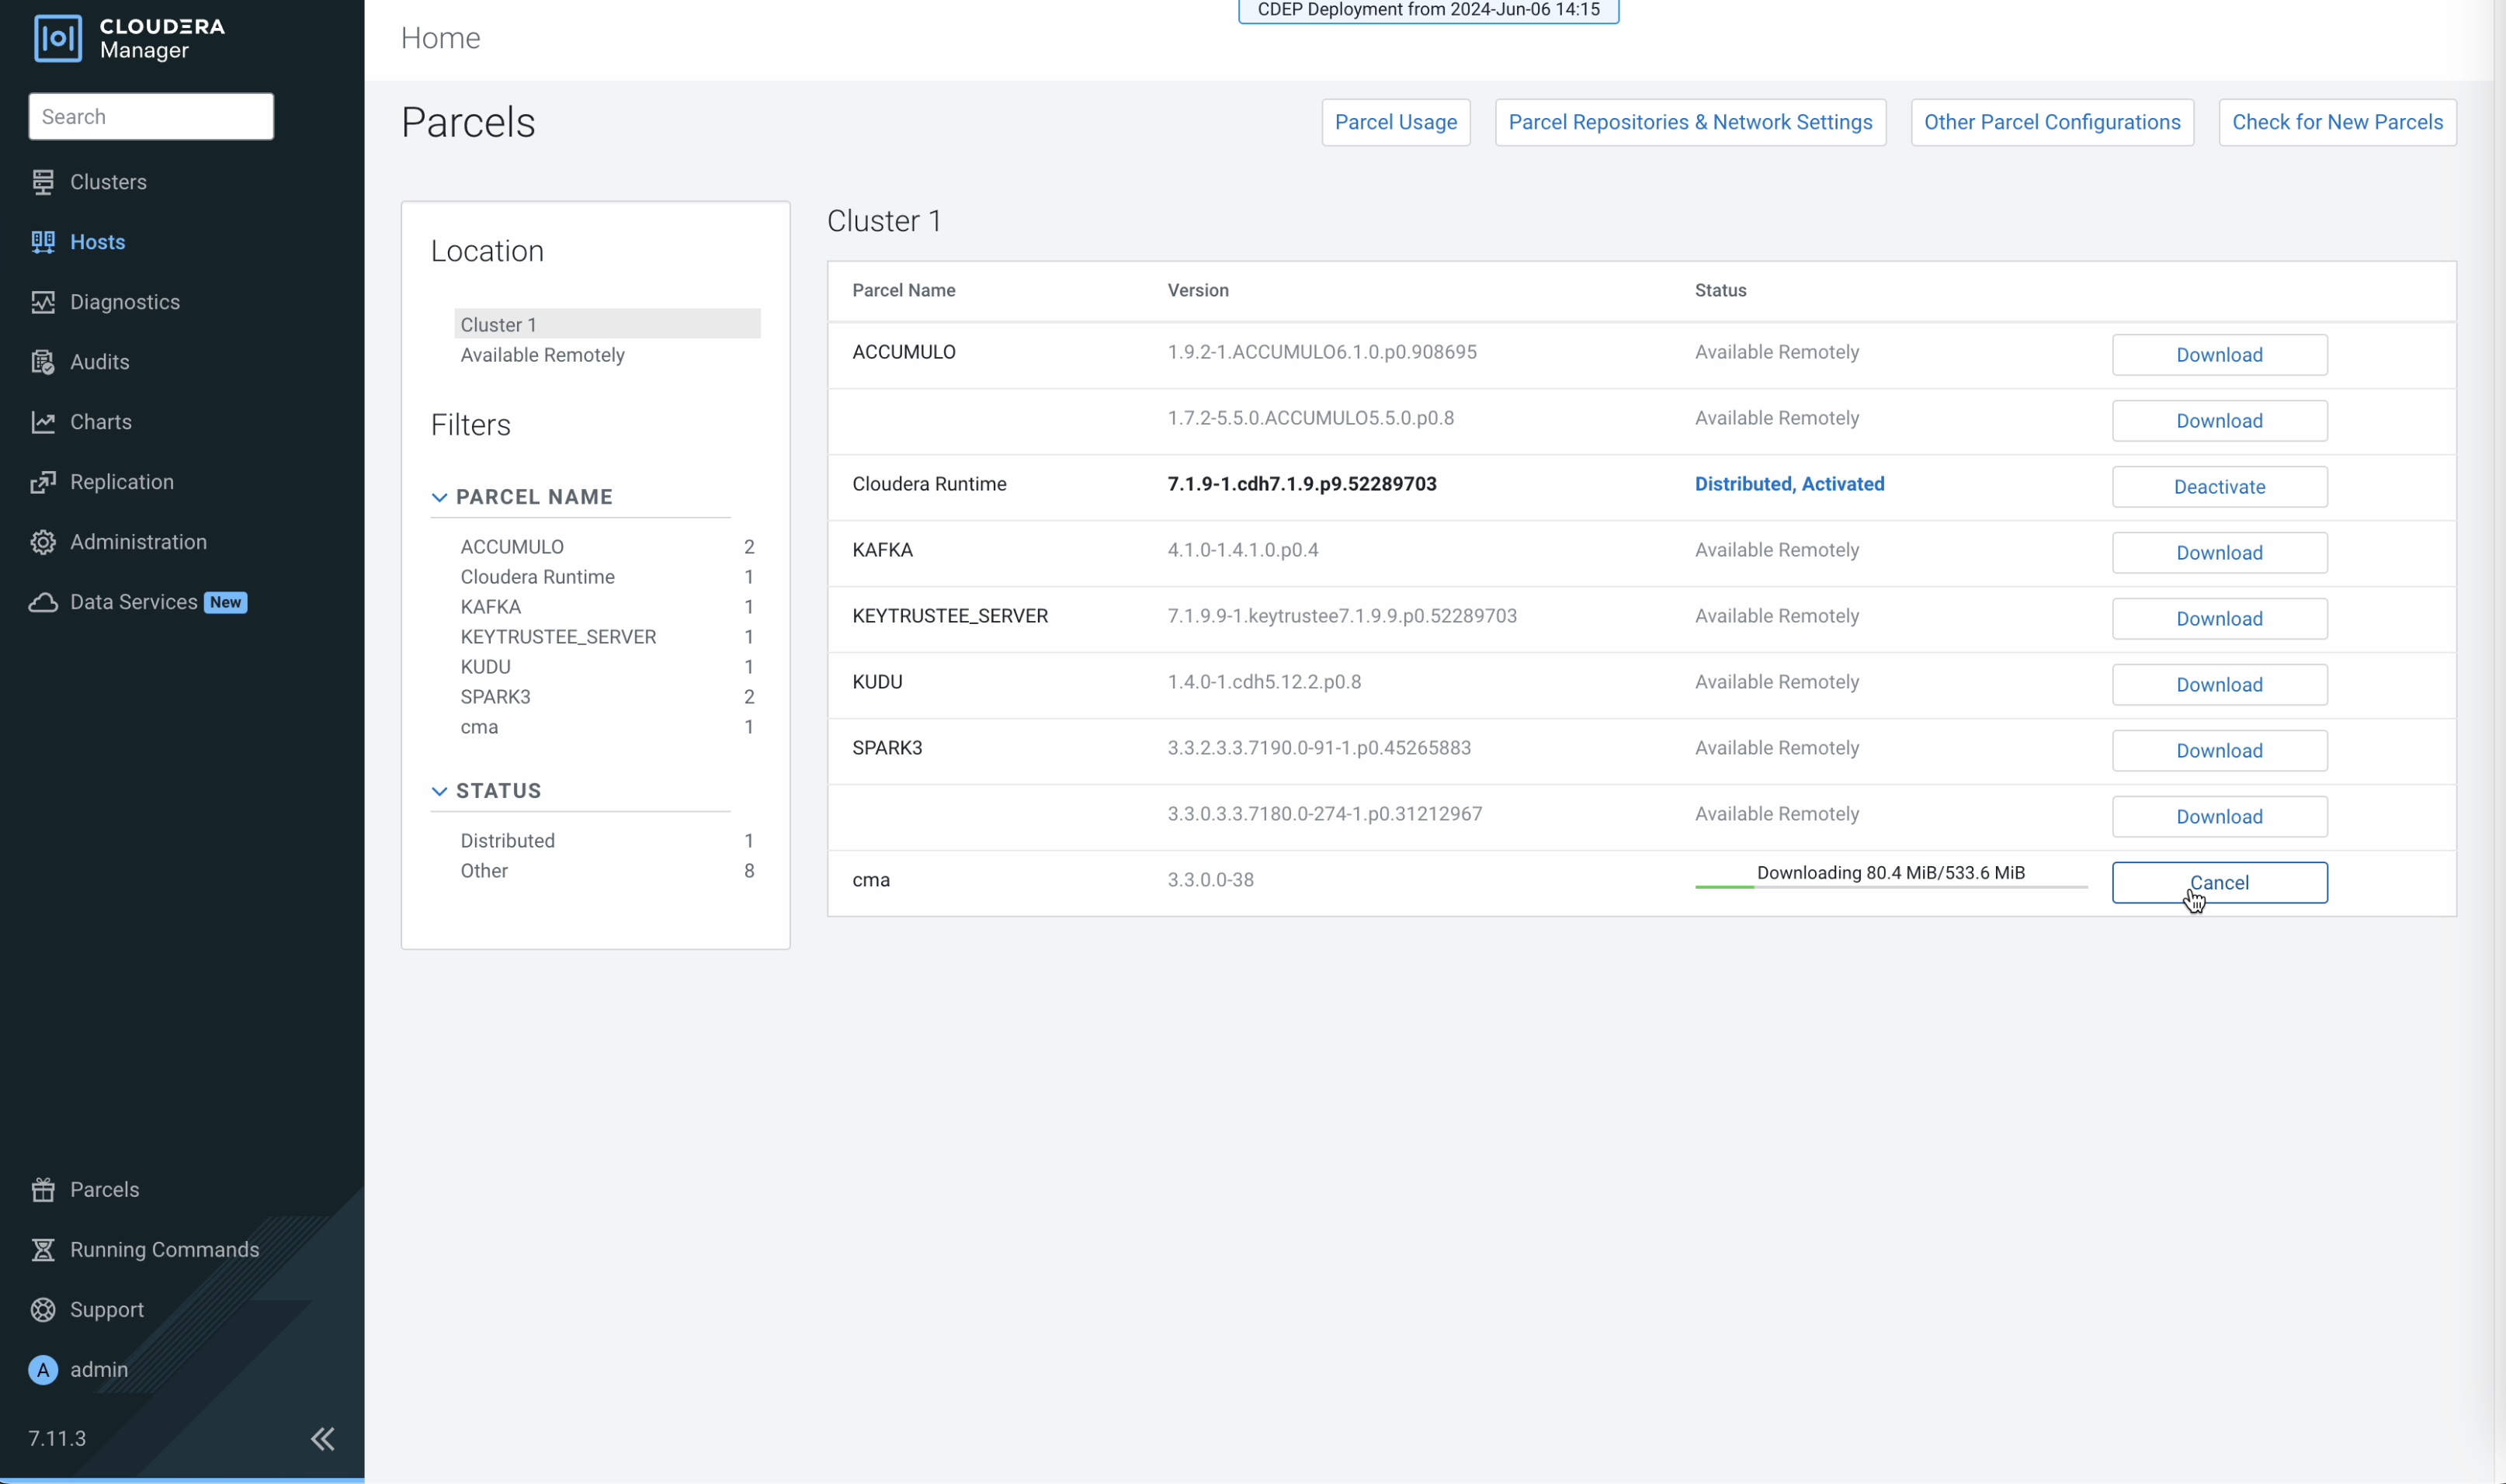
Search for Cloudera Migration Assistant, and click Download
to download the parcel to the local repository.
-
Access the Cloudera Migration Assistant User Interface (UI).
After going back to the homepage of your cluster, open the Cloudera Migration Assistant service page, and click on the CMA Server UI tab that opens the Cloudera Migration Assistant UI.