Getting started as an admin
Refer to this section if you are a Cloudera admin who is trying to get started in Cloudera.
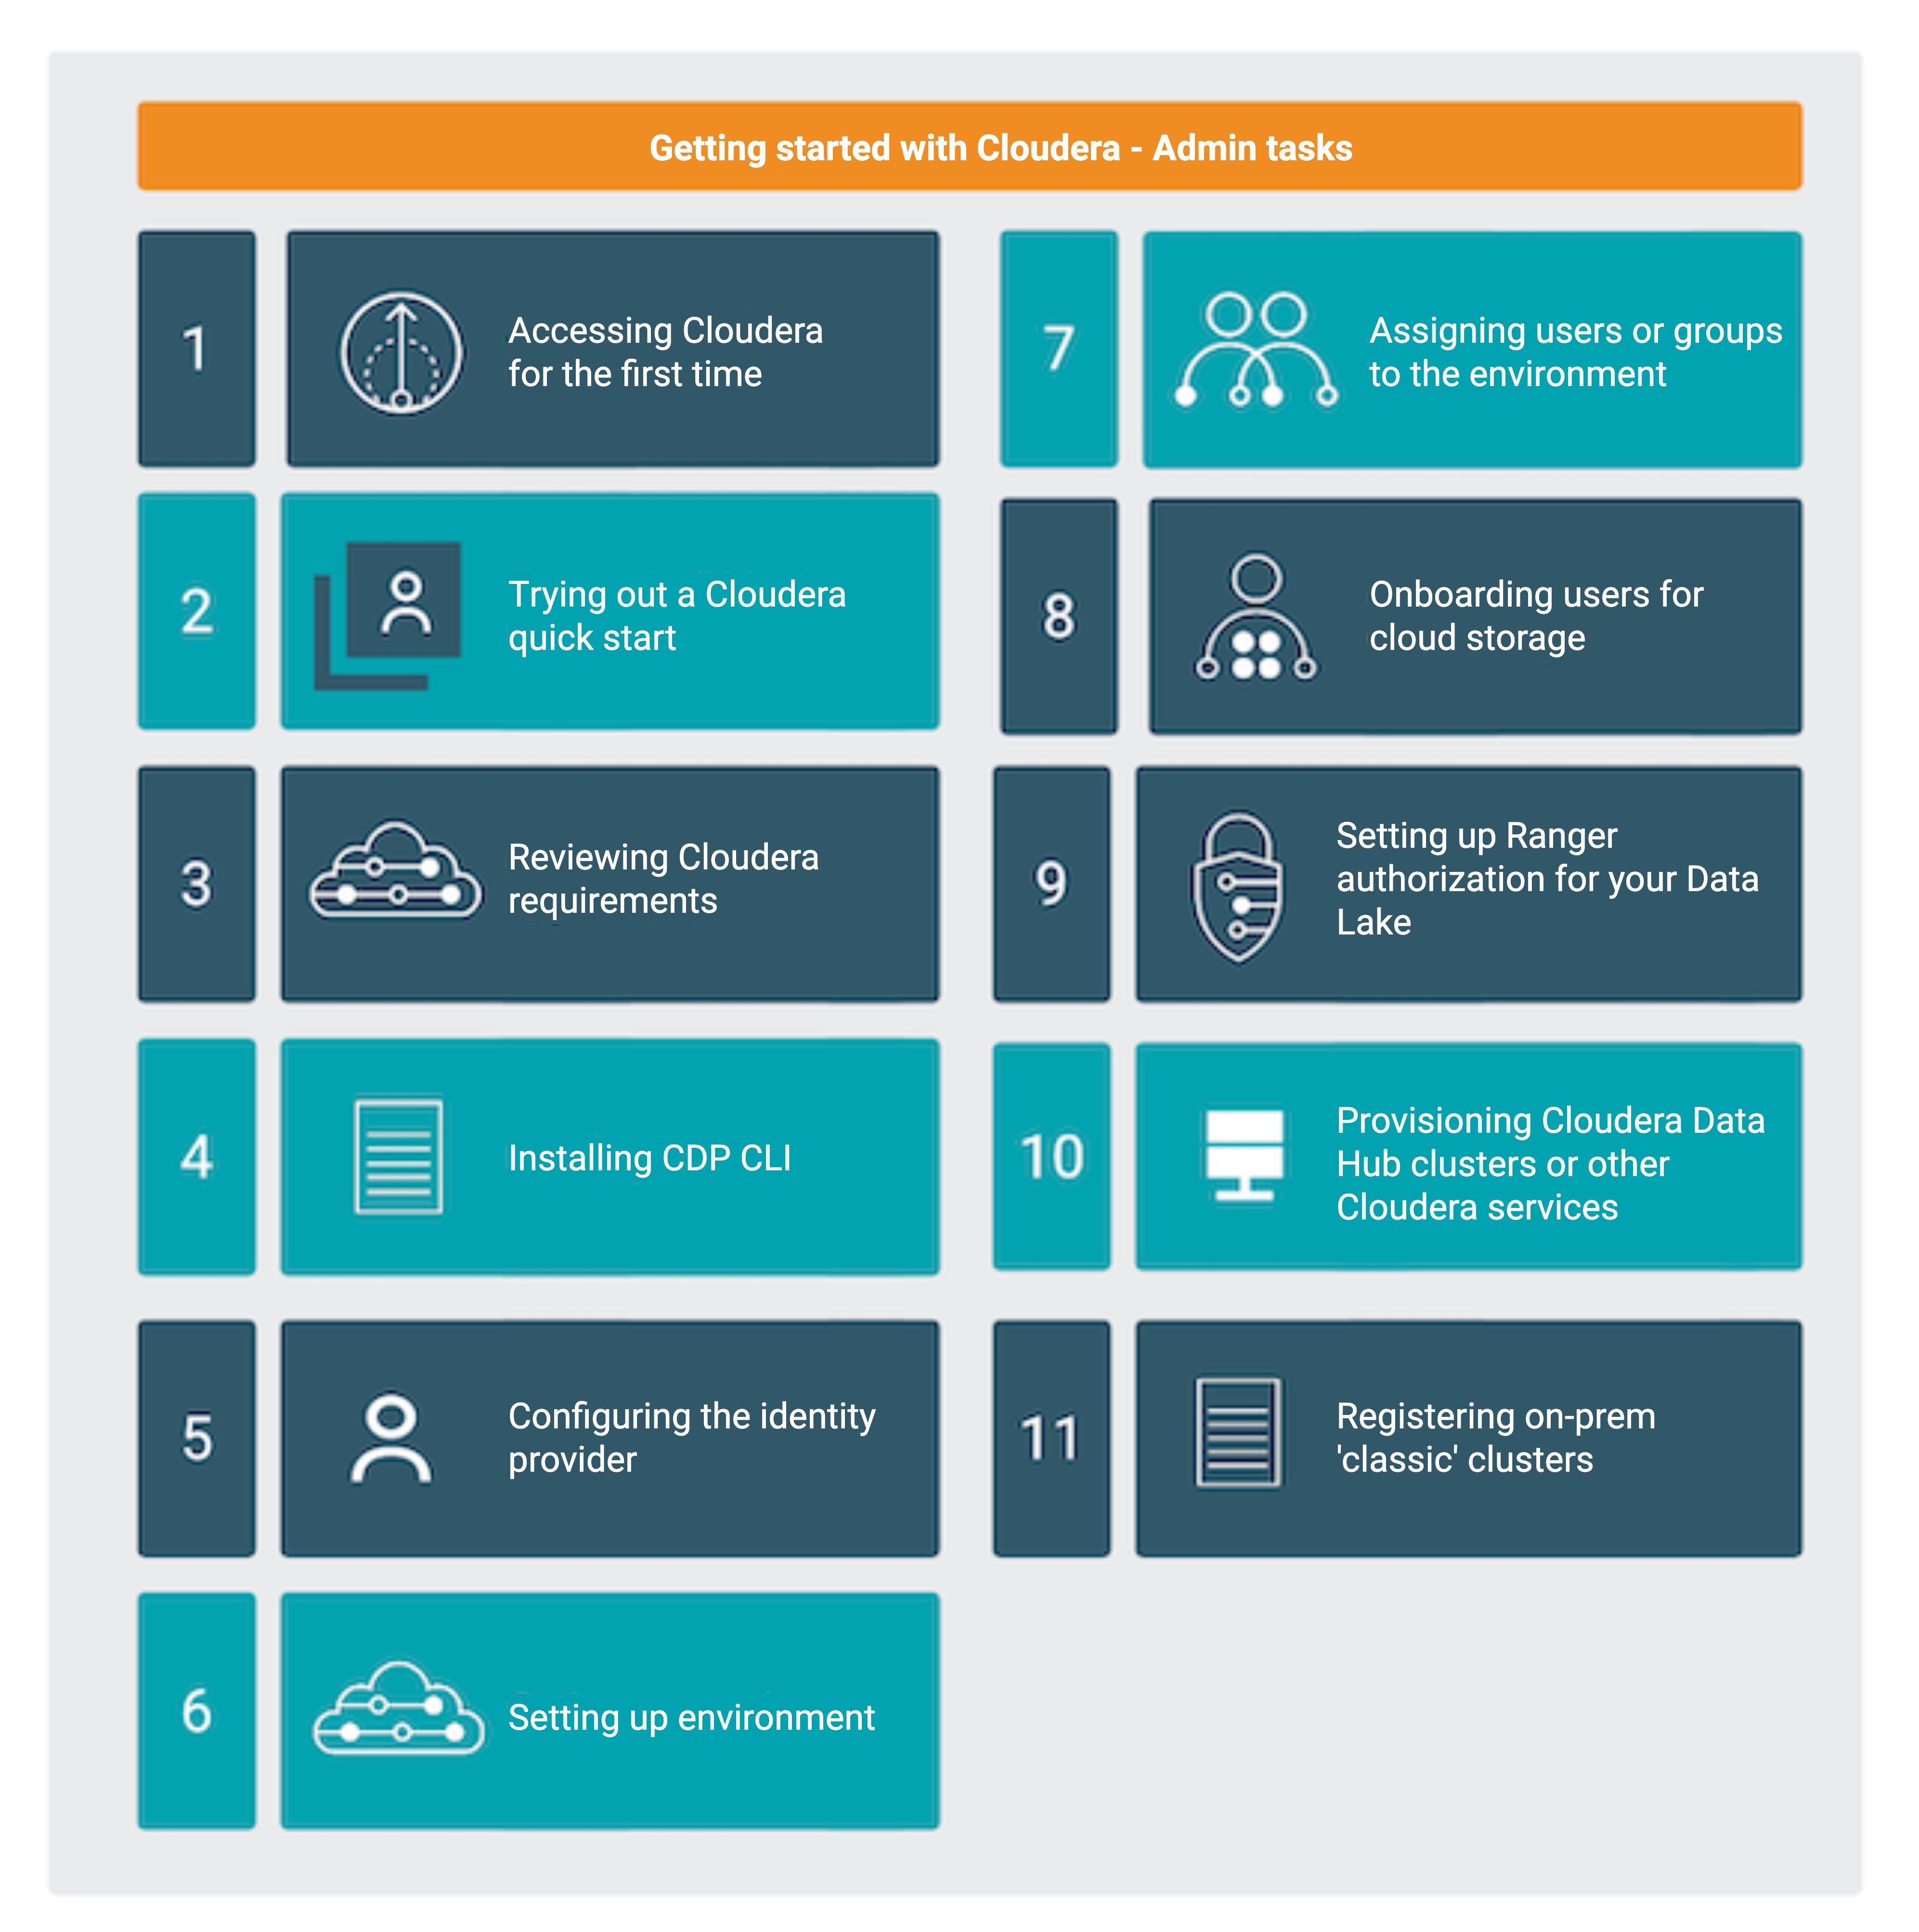
Accessing Cloudera for the first time
- Using direct link to the Cloudera platform
- Access the Cloudera web interface at https://console.cdp.cloudera.com (if your Cloudera account was created in the Cloudera Control Plane region us-west-1) or
https://
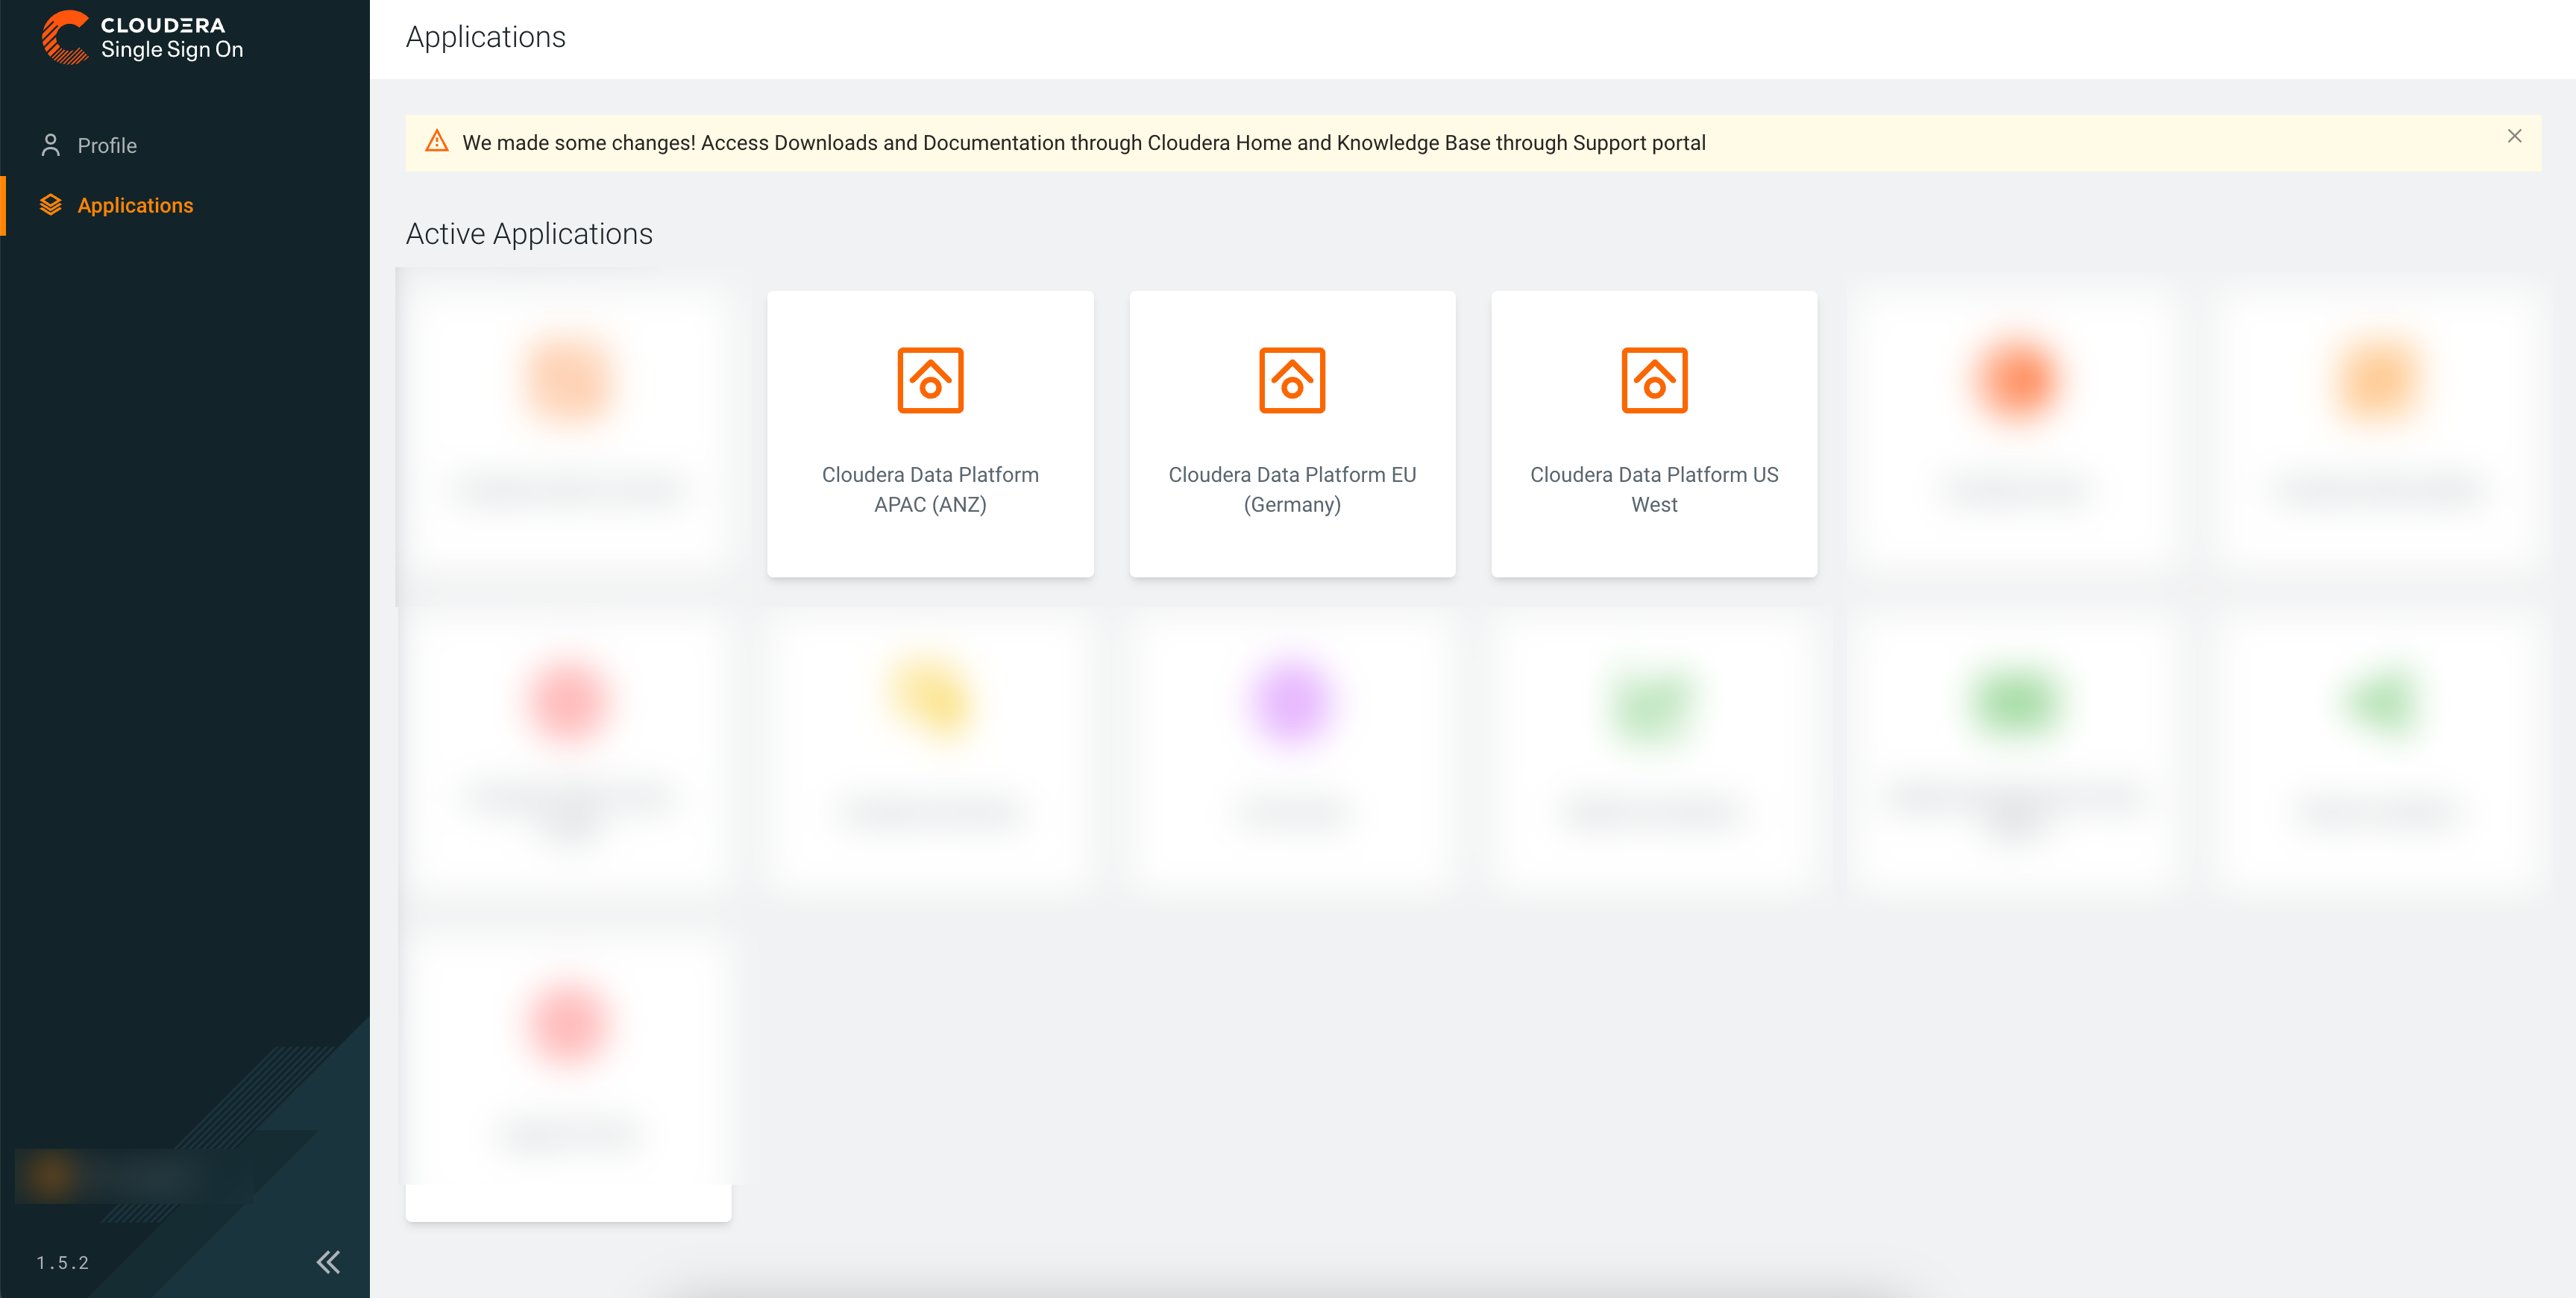
console.<control-plane-region>.cdp.cloudera.com(if your Cloudera account was created in any other Cloudera Control Plane region). When logging in for the first time, log in by using your MyCloudera credentials. - Accessing the Cloudera platform from Cloudera Single Sign On portal
- After logging in to the Cloudera Single Sign On portal with your Cloudera
credentials, you can access Cloudera platform through the
Applications page.
Trying out a Cloudera quick start
If you would like to quickly set up Cloudera for evaluation purposes, you can use our Deploy Cloudera using Terraform.
Reviewing cloud provider requirements
Installing CDP CLI
You can install and configure CDP CLI. See CLI client setup.
Setting up Identity provider
In order to add users from your organization to Cloudera, set up your identity provider. For instructions, refer to Onboarding users.
Registering an environment
Register an environment for your organization. An environment determines the specific cloud provider region and virtual network in which resources can be provisioned, and includes the credential that should be used to access the cloud provider account. For instructions, refer to AWS environments, Azure environments, or Google Cloud environments documentation.
Assigning users or groups to your environment
Once your environment is up and running, you should assign users or groups to the environment and then perform user sync. For instructions, refer to Enabling admin and user access to environments.
Onboarding users and groups for cloud storage
Setting up Ranger authorization for your Data Lake
Once your environment is up and running, you should log in to Ranger and create policies for access to specific tables and databases. You can either log in to Hive first and create resources and then create policies for them in Ranger, or you can create Ranger policies in advance.
For instructions on how to access your Data Lake cluster, refer to Accessing Data Lake services. For instructions on how to set up authorization in Ranger, refer to Using Ranger to provide authorization documentation.
Provisioning compute resources
After performing these steps, you are set to start provisioning compute resources (Cloudera Data Hub clusters, Cloudera Data Warehouse, and so on). For more information, refer to the following documentation:
Registering your existing clusters
You can optionally register your existing CDH and HDP clusters in Cloudera if you would like to generate a workload, data movement, and compute capacity plan and replicate your data. For instructions, refer to Managing classic clusters.