Cross-account access IAM role
To allow Cloudera to create resources in your AWS account, you create a cross-account access IAM role in your AWS account and grant Cloudera access to the role as a trusted principal by specifying a specific AWS account and an external ID.
IAM policy definitions
When creating an IAM policy for the provisioning credential, use the following IAM policy definitions.
You have two options:
| Option | Description | Policies |
|---|---|---|
| Default policy | This policy is appropriate for registering a Cloudera environment and provisioning all Cloudera services. This is the same IAM policy as the Default policy provided in the Cloudera Management Console web interface. | |
| Reduced access policies | Instead of the extensive default policy, you can use minimal reduced access policies. Note that the first policy is required for provisioning a Cloudera environment. The remaining policies are optional and are only needed if you would like to use the specific Cloudera services. |
|
Create a cross-account IAM role
In order to use role-based authentication, you must create an IAM role on AWS.
- In the Cloudera Management Console, navigate to :
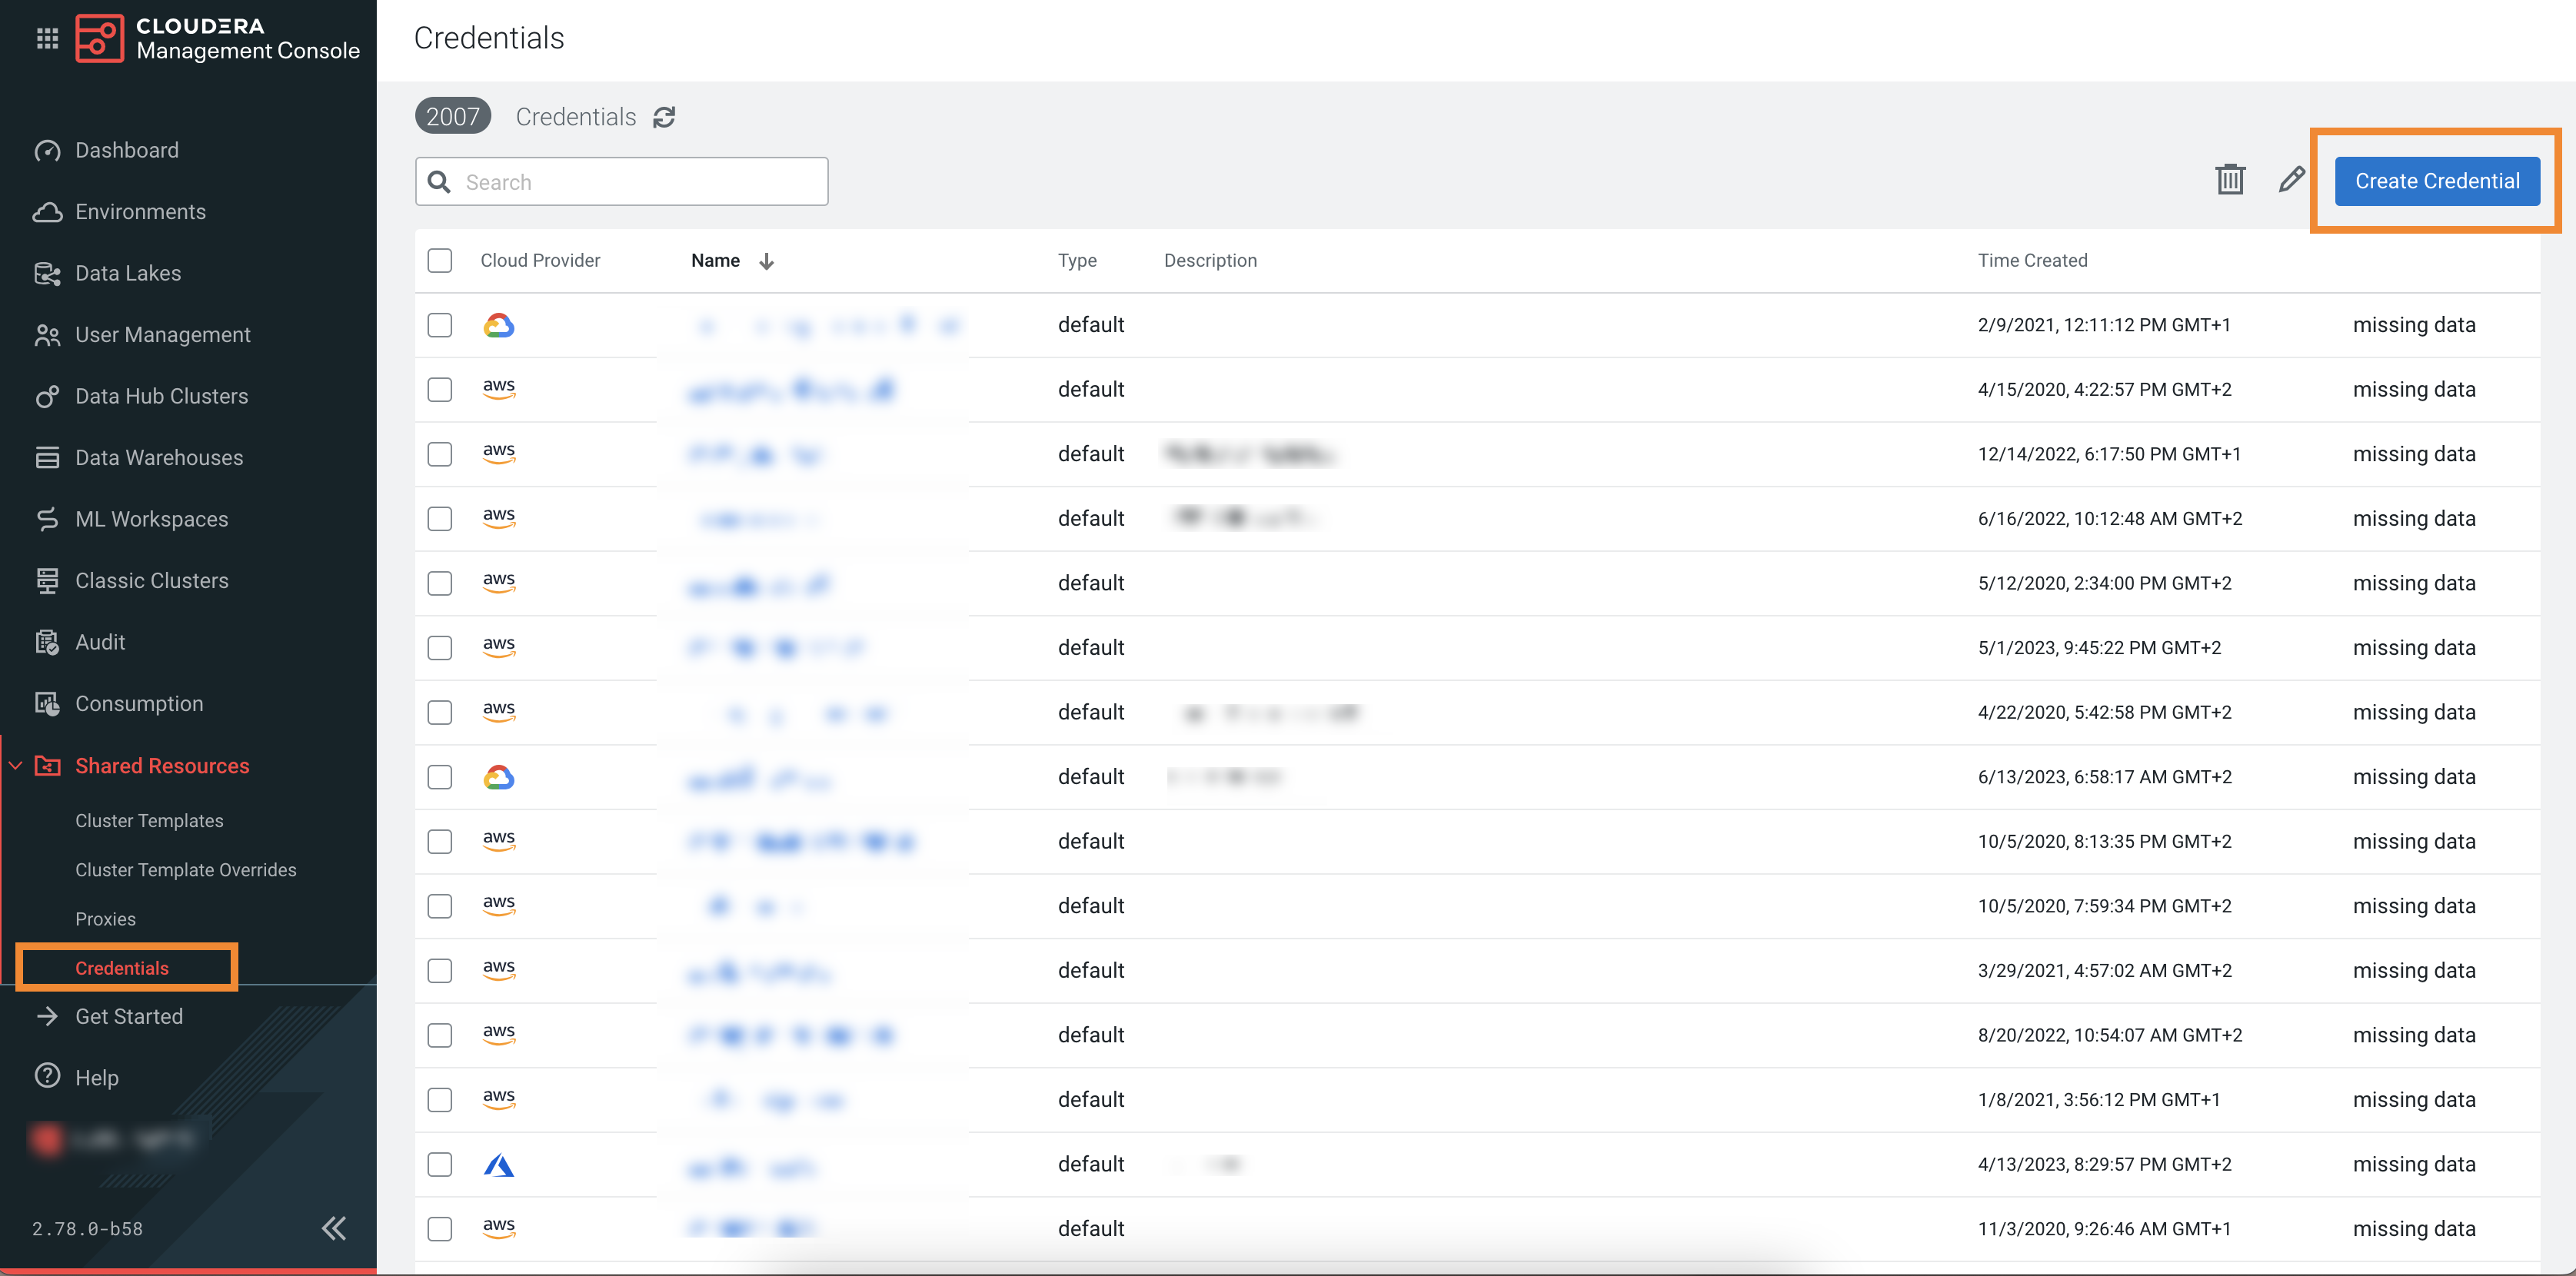
- Note or copy the Cross-account Access Policy,
Account ID, and External ID
listed in the UI:
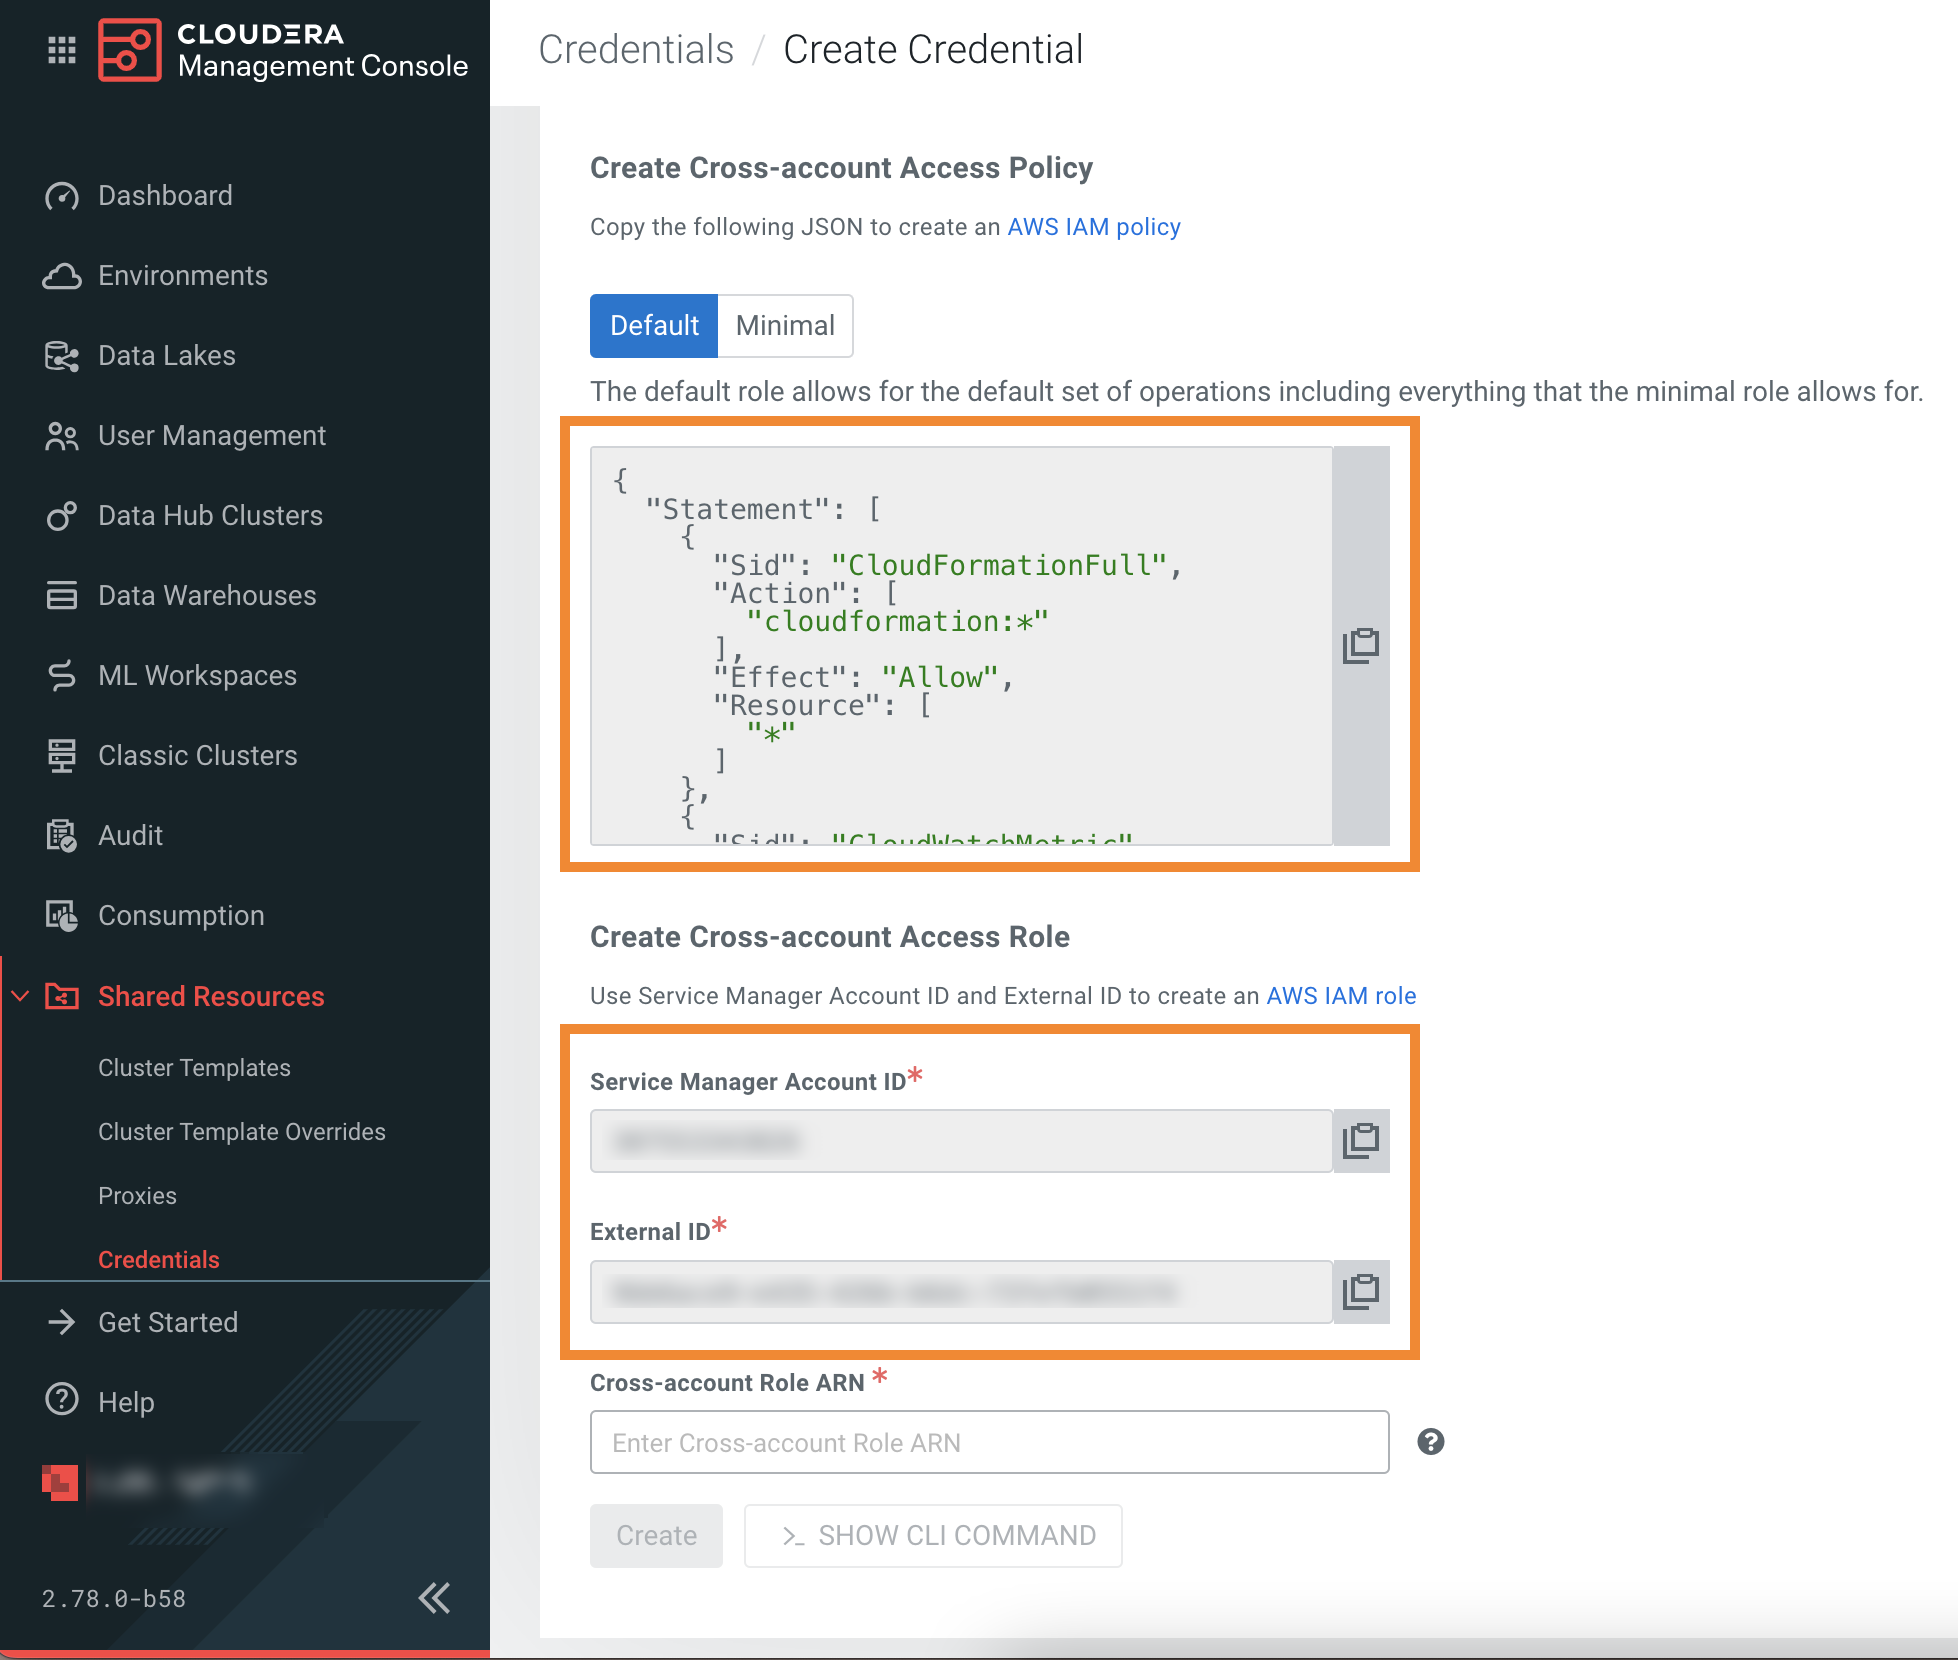
You will need them to complete the following steps.
-
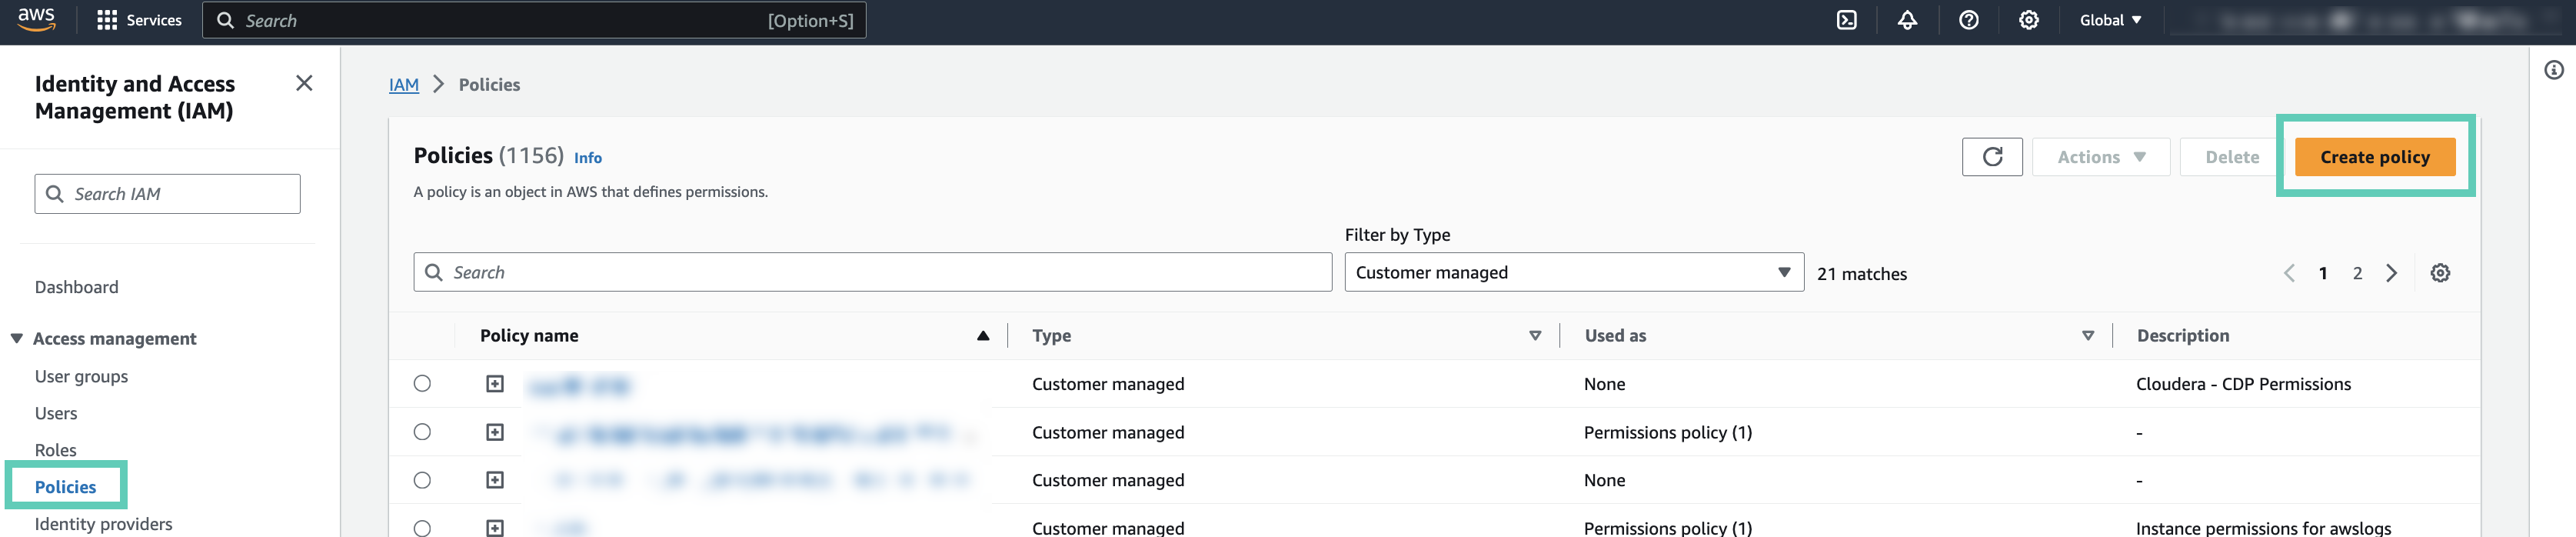
Navigate to the and click Create policy:
-
Select the JSON tab and paste the
Cross-account Access Policy to the
Policy editor.

-
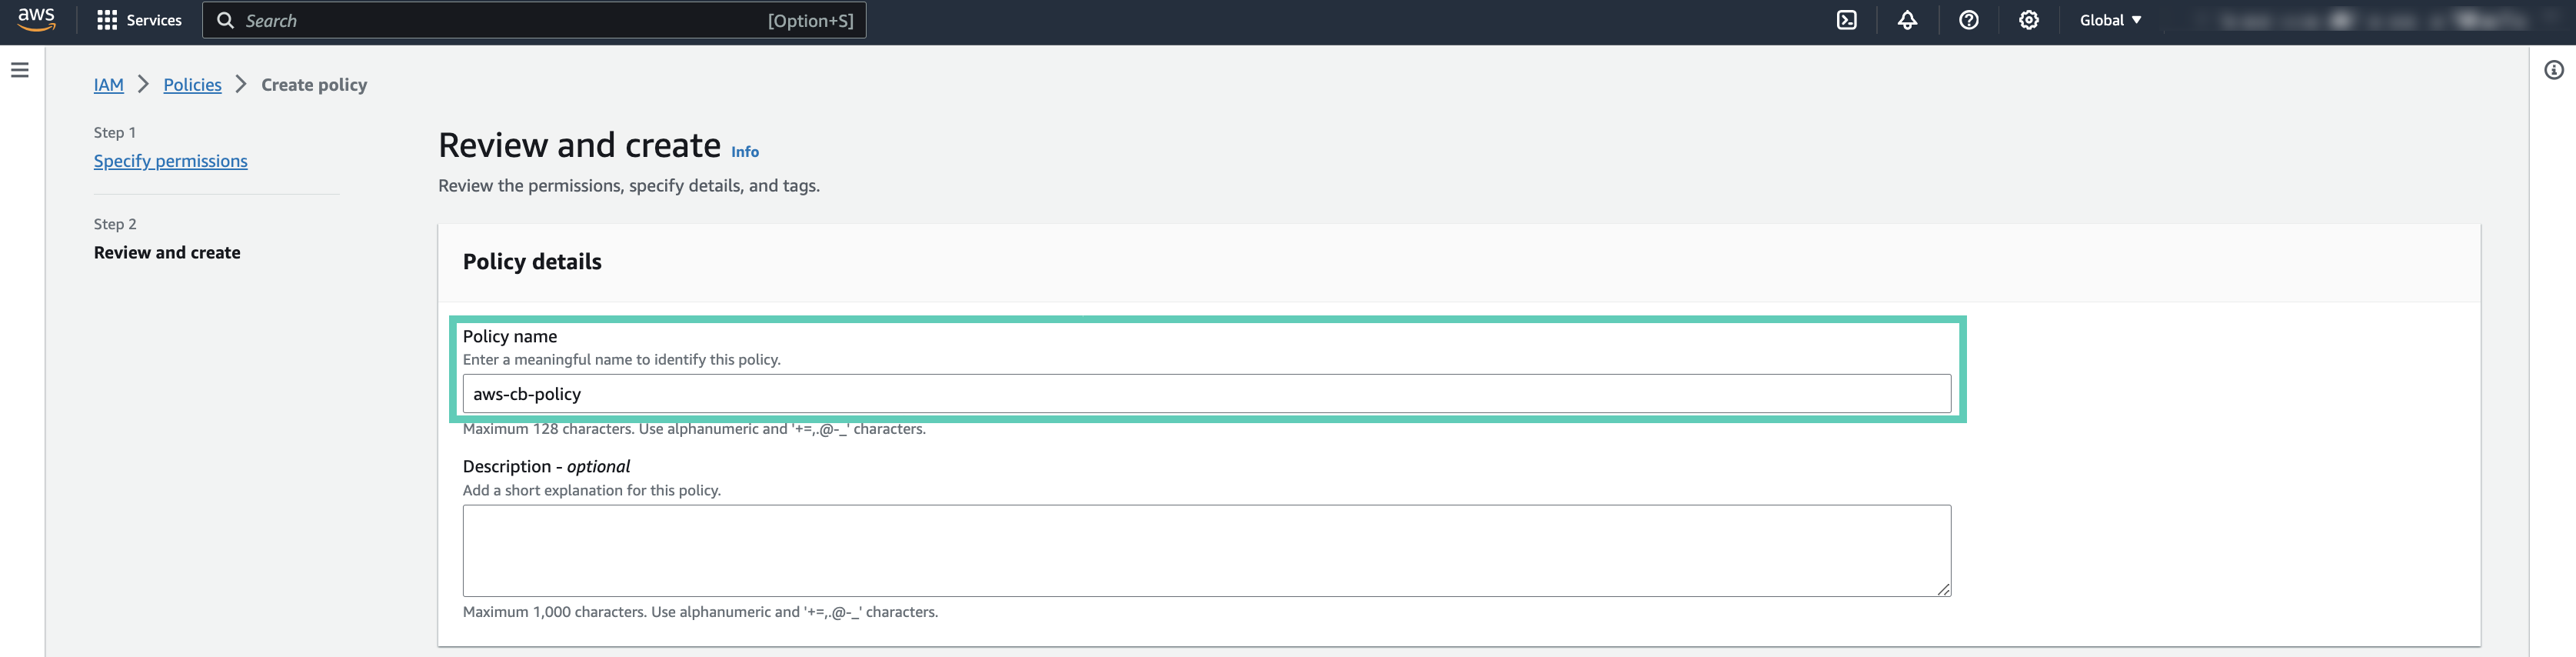
Enter a name for your policy in the Name field
of the Review policy page:
-
Select the JSON tab and paste the
Cross-account Access Policy to the
Policy editor.
-
Navigate to the and click Create role:

-
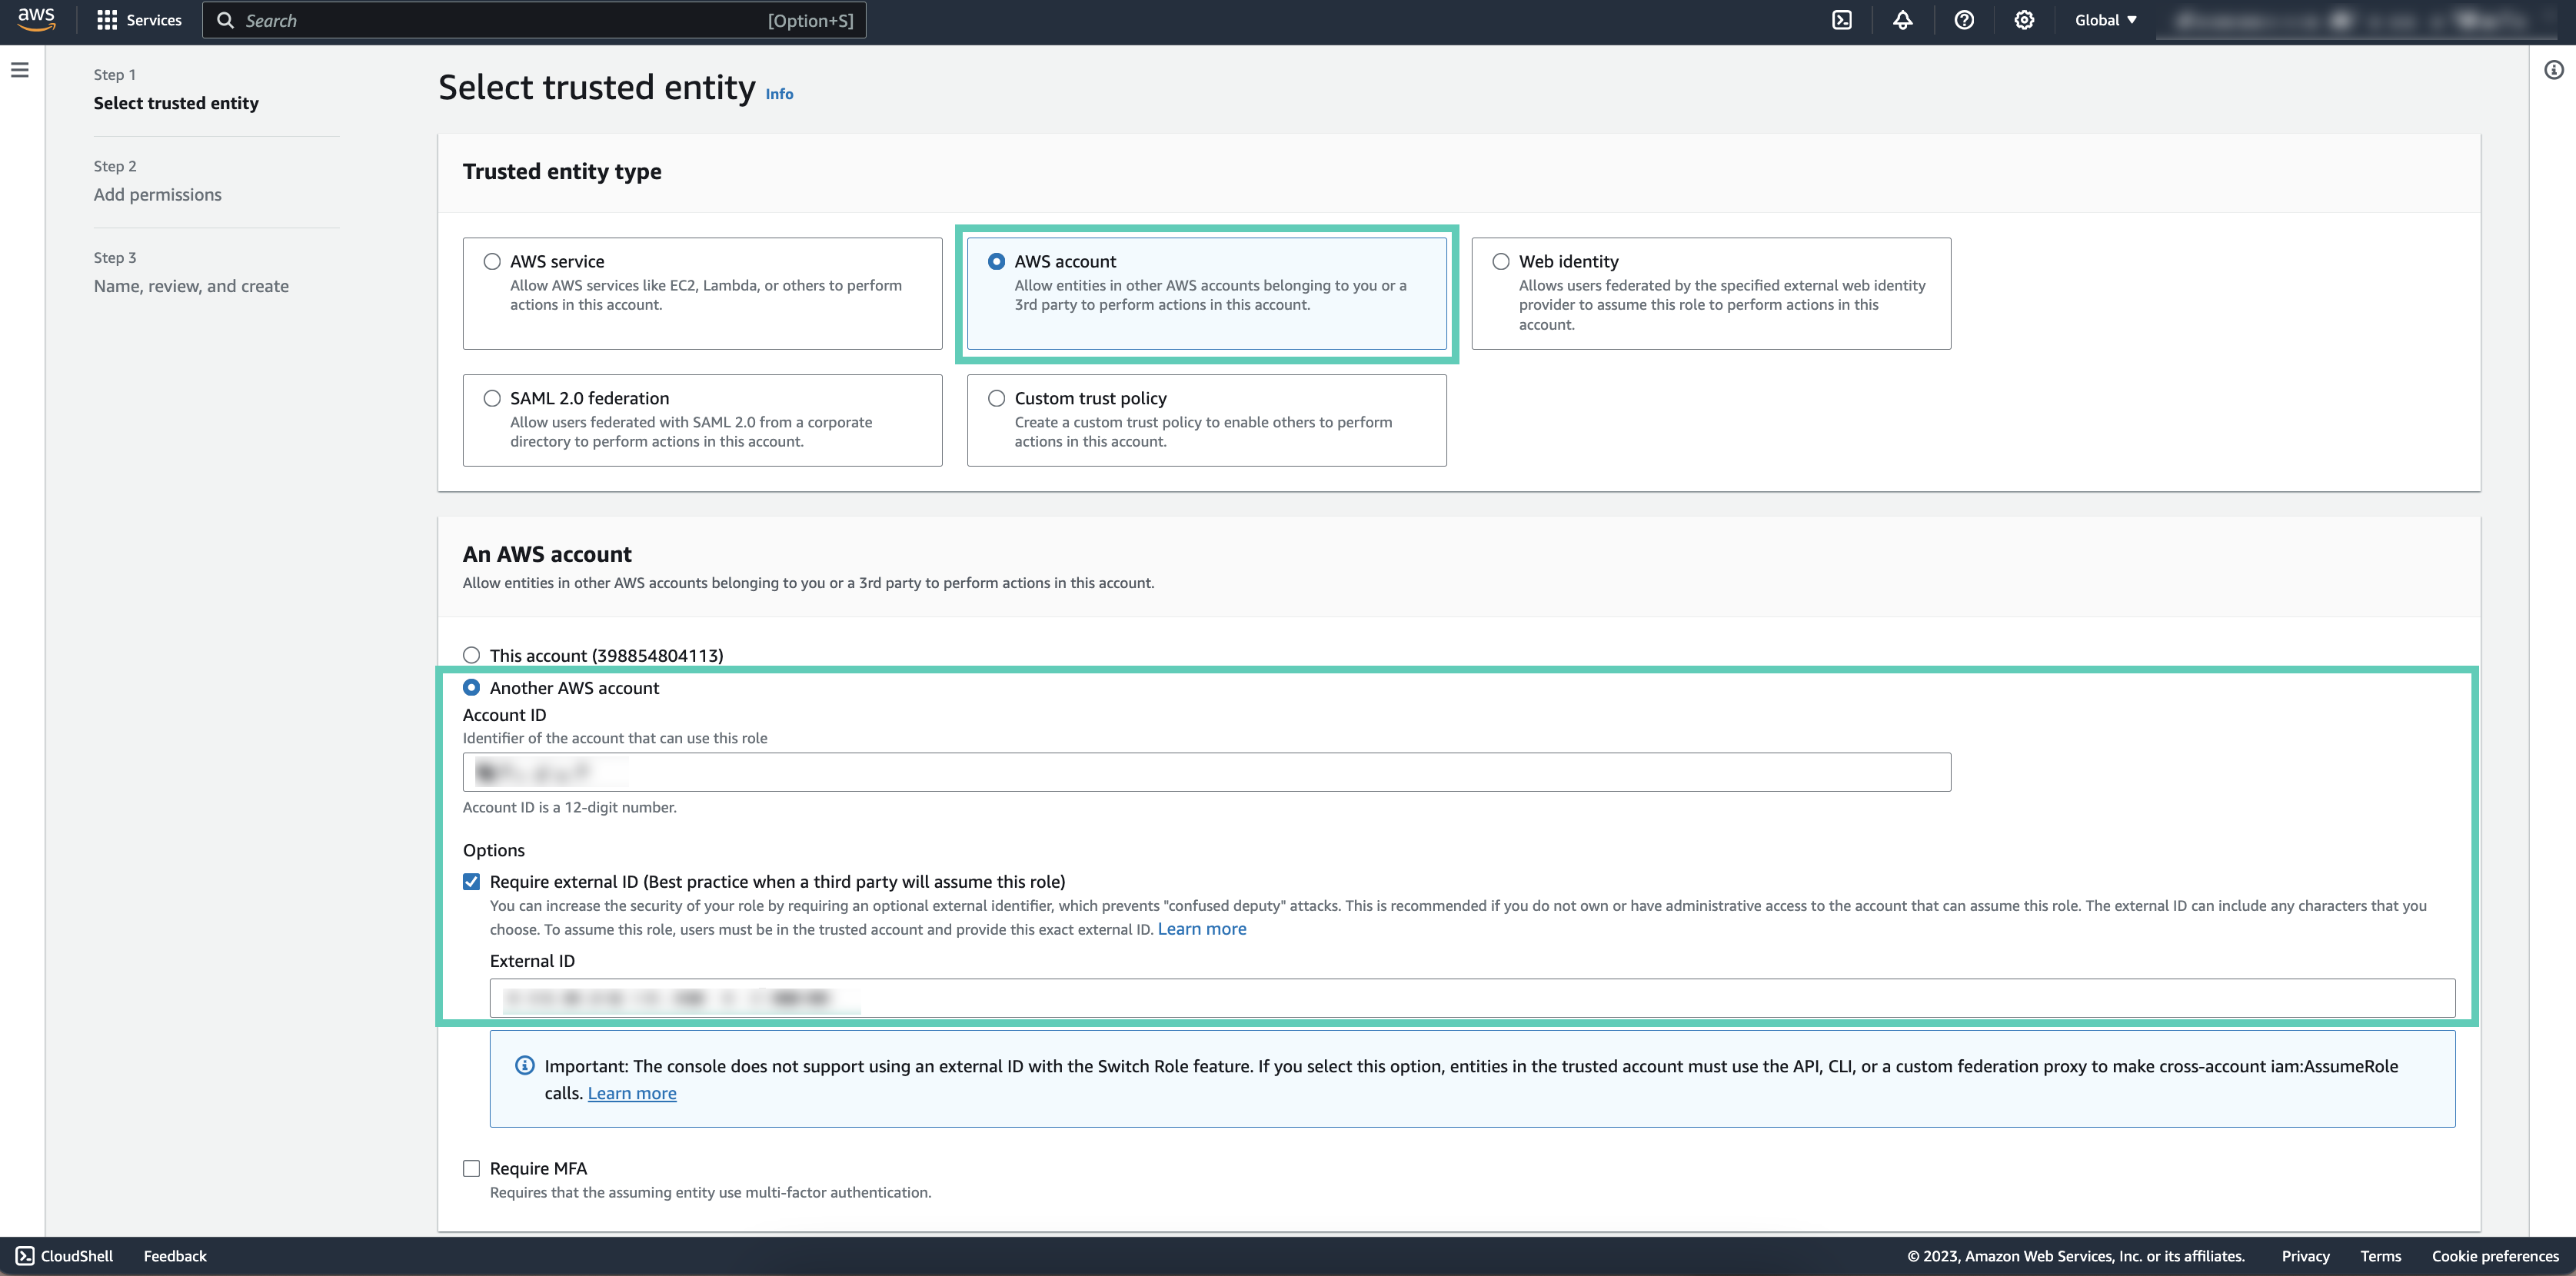
Check Another AWS account and provide the following
information:
- Copy and paste your Account ID provided in Cloudera to the Accound ID field.
- Check Require external ID under Options.
- Copy and paste the External ID from Cloudera to the External ID field.
-
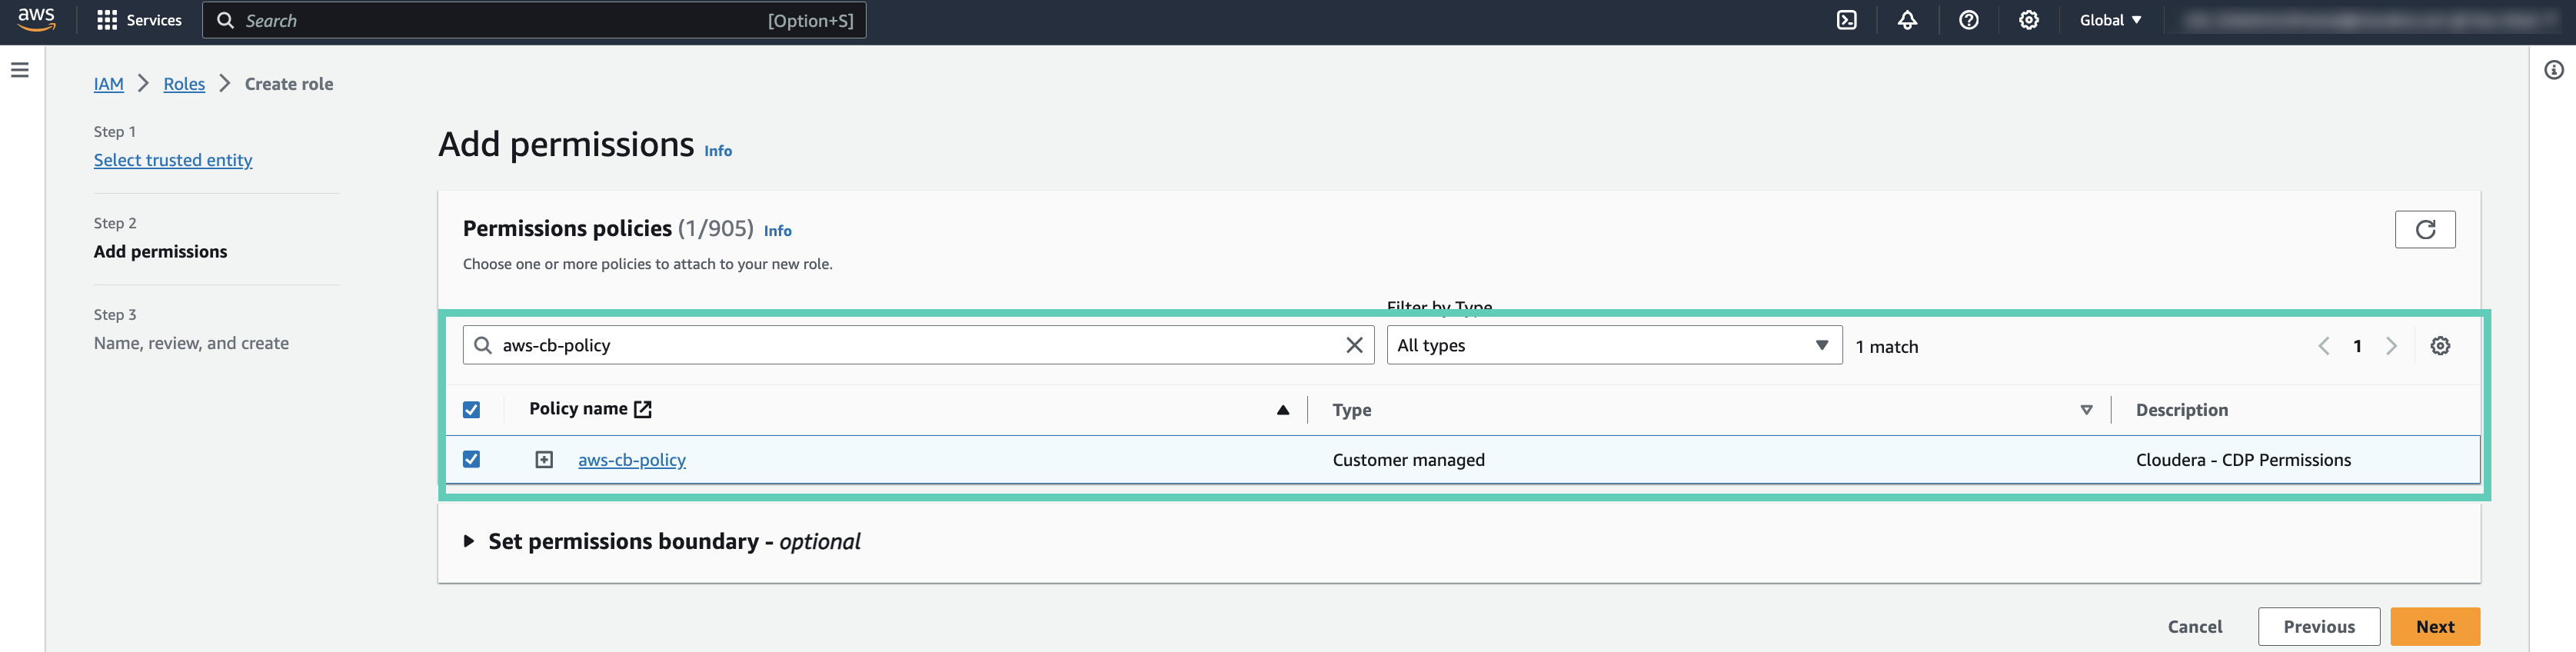
Search for the previously created policy, and add the permission to the role by
checking the box.
-
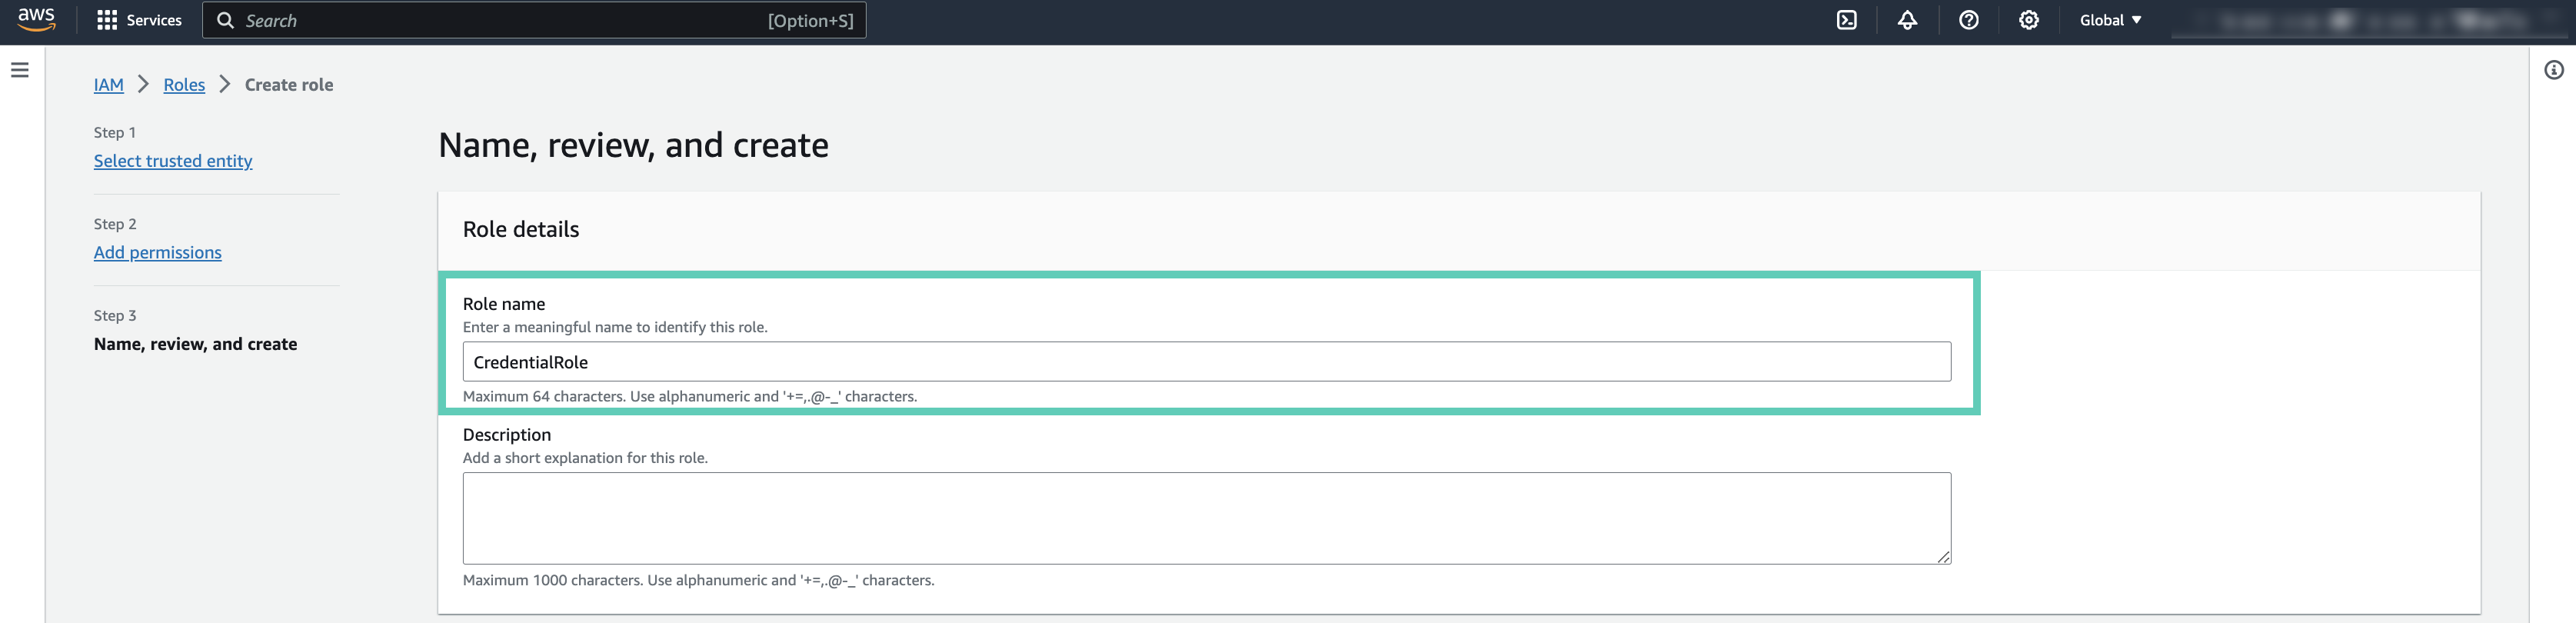
Enter a role name to the Role name field:
-
Search for the created role, and obtain the IAM Role
ARN. You will need it to create a role-based credential:

Once you are done creating the IAM role on AWS, create a role-based credential in Cloudera.
Reduced access policy definition
The following reduced policy definition can optionally be used to register a Cloudera environment and create Cloudera Data Hub clusters and Cloudera Operational Database databases in it.
The IAM role used for the provisioning credential can use the reduced access policy instead of the default policy.
You should:
-
Copy this policy.
-
Update it as described below.
- Once done, you can create the cross-account role using this policy.
Customize the scope of iam:PassRole
{
     "Effect": "Allow
      "Action": [
        "iam:PassRole"
      ],
      "Resource": "*"
}
However the scope can be reduced to just a few roles. To do this, you need to edit the following block and replace the “*” with the ARNs of the following roles used for the environment:
- IDBROKER_ROLE
- LOG_ROLE
- RANGER_AUDIT_ROLE
- DATALAKE_ADMIN_ROLE
You choose the name for these roles when you set up Cloudera as part of the Minimal Setup for Cloud Storage.
After updating according to the minimal setup for cloud storage, the iam:PassRole policy excerpt should like similar to the following:
{
      "Effect": "Allow
      "Action": [
        "iam:PassRole"
      ],
      "Resource": [
               "arn:aws:iam::$ACCOUNTID:role/IDBROKER_ROLE",
               "arn:aws:iam::$ACCOUNTID:role/LOG_ROLE",
               “arn:aws:iam::$ACCOUNTID:role/RANGER_AUDIT_ROLE",
               "arn:aws:iam::$ACCOUNTID:role/DATALAKE_ADMIN_ROLE"
           ]
}
If you have already created these roles and you don’t know the name of these roles, you can obtain them using the following steps:
IDBROKER_ROLE
- Log in to Cloudera web interface and navigate to the Cloudera Management Console service > Data Lakes.
- Scroll down to where you see Event History and select the Hardware tab.
- Locate the EC2 instance for the idbroker node (if you are running Medium
Duty Data Lake, you will see two IDBroker nodes, you can use either):
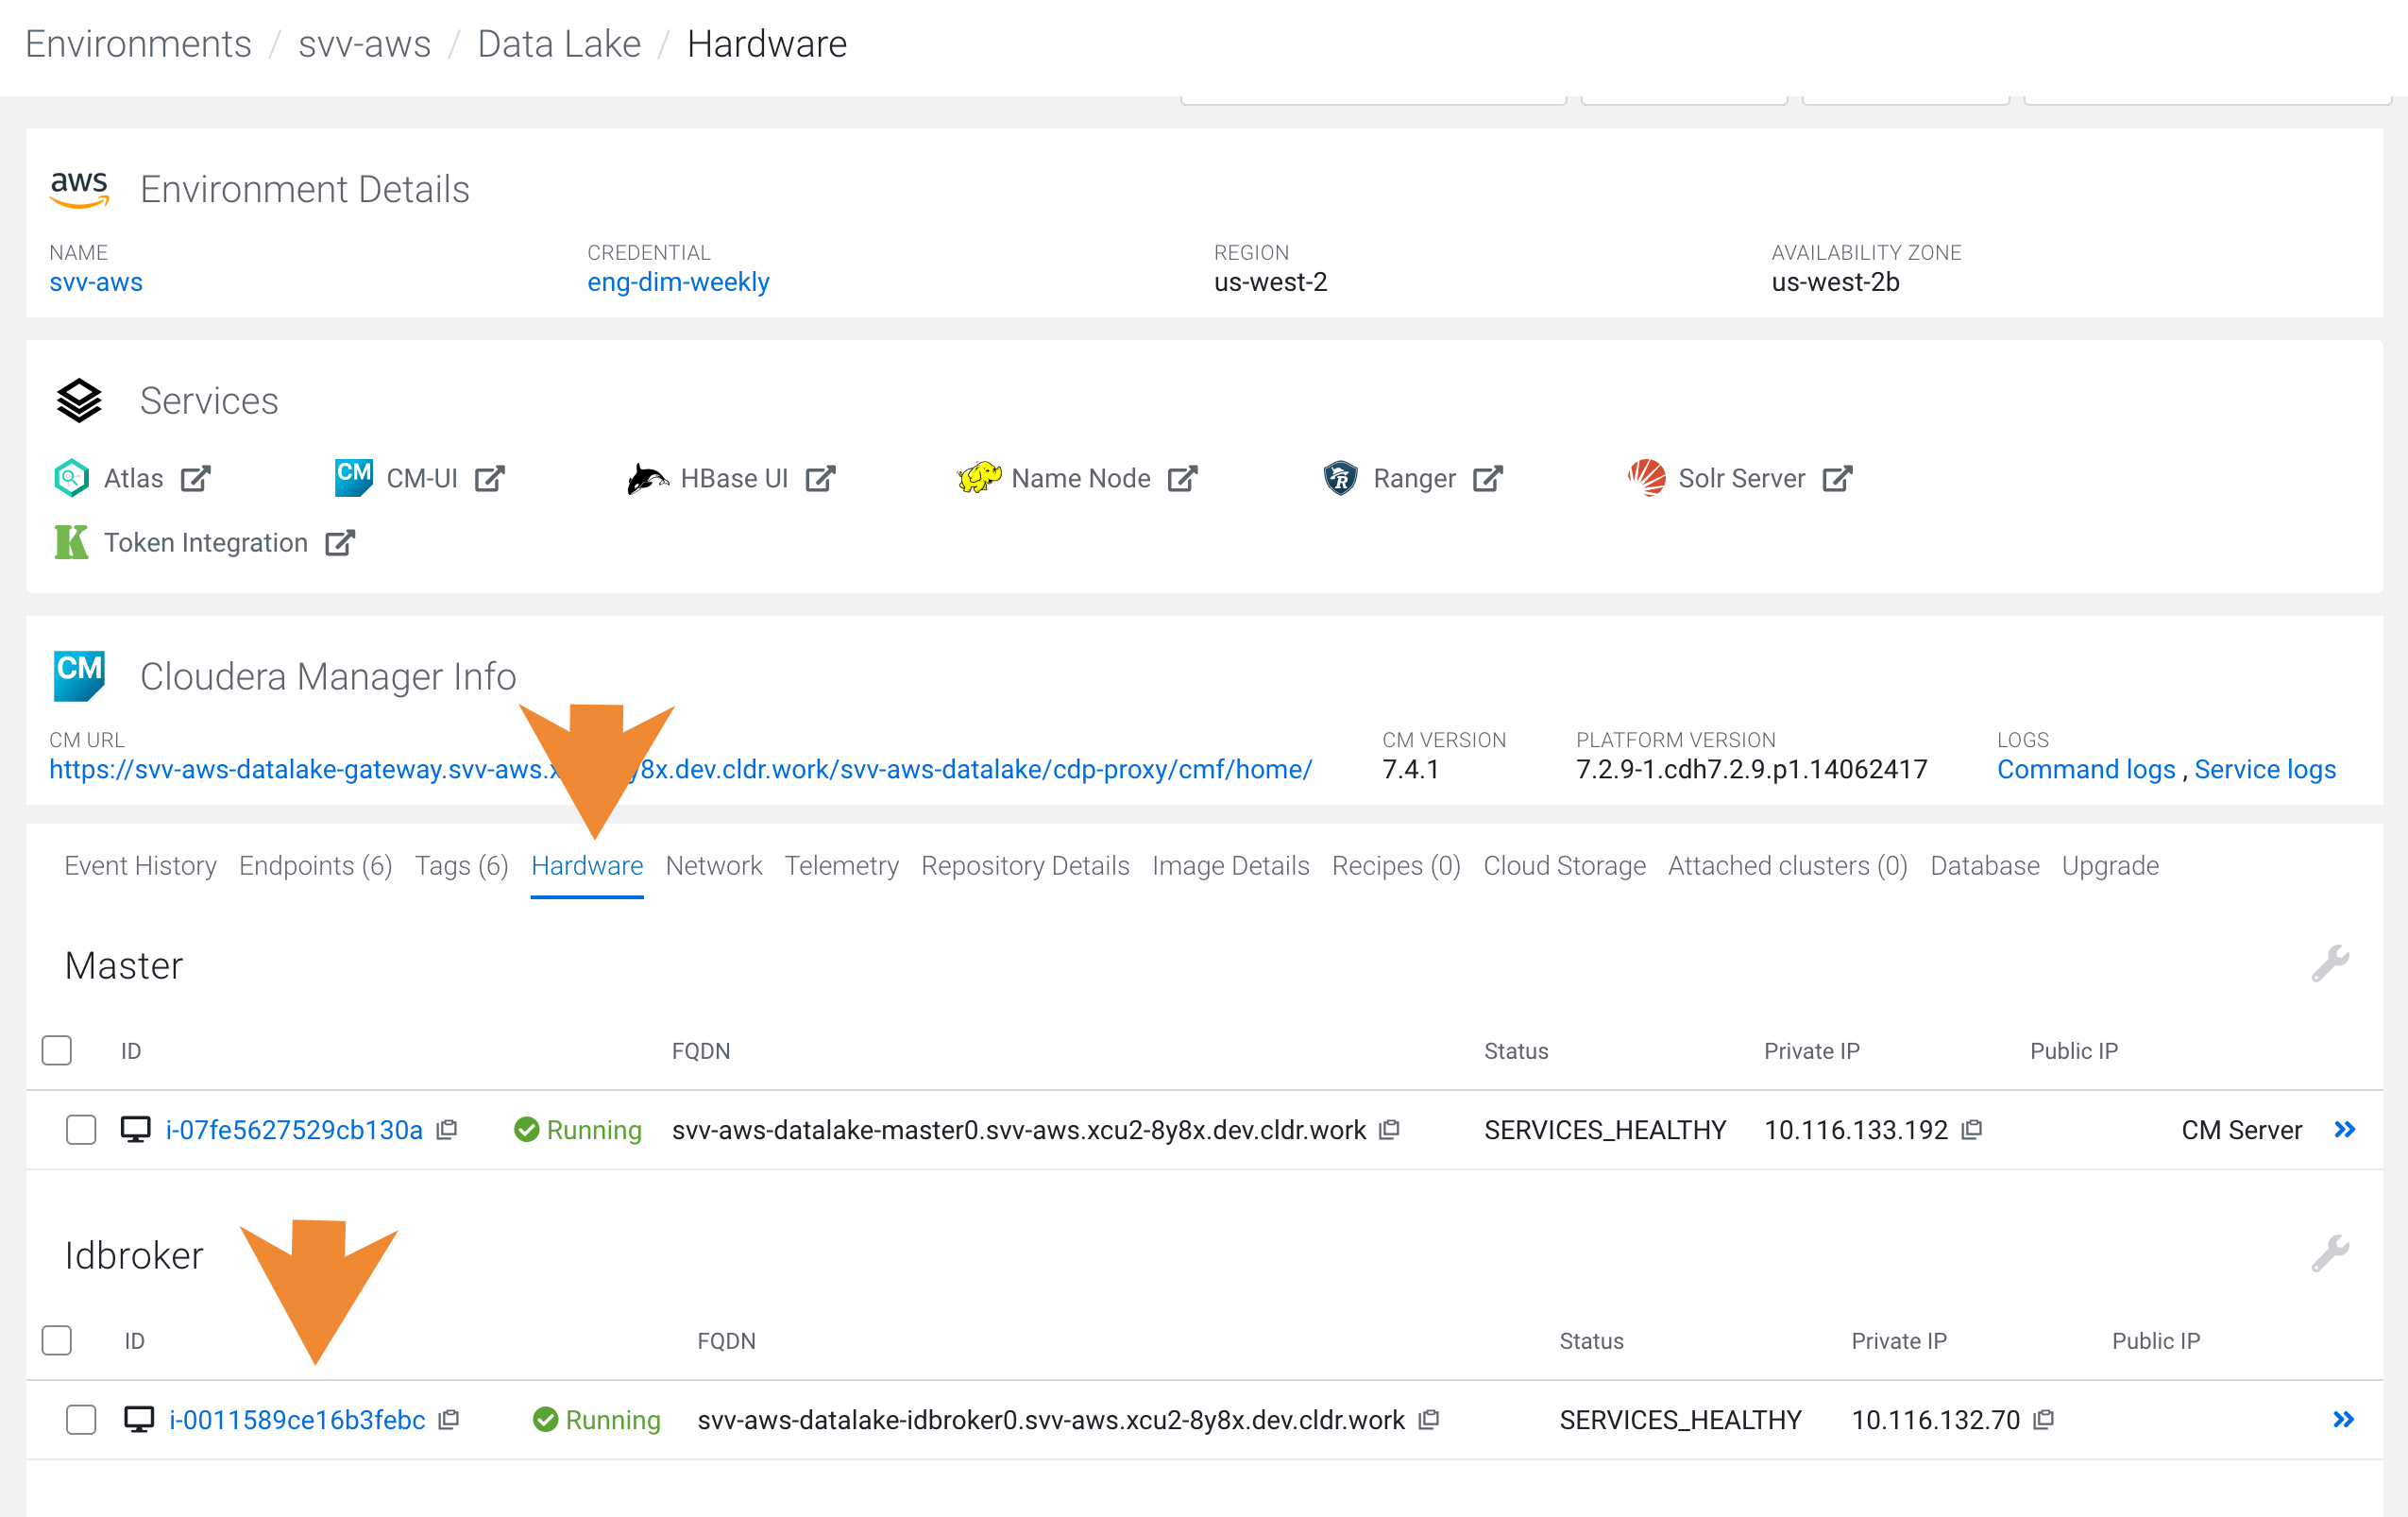
- Click on the instance id. You will be redirected to the EC2 console.
- In the Instance Details section for this node, you can see the name of the IAM role being used by this instance. Click on this role to get to the details.
- Copy the ARN of the instance profile. It follows the following naming convention:
arn:aws:iam::<12-digit-AWS-account-id>:instance-profile/<name-of-idbroker-role>
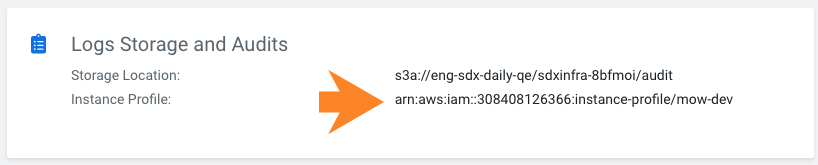
LOG_ROLE
- Navigate to Environments .
- Click on the existing environment
- Click on the Summary tab.
- Scroll to Logs Storage and Audits and you will see the Instance Profile entry.
- Copy the ARN of the Instance Profile:
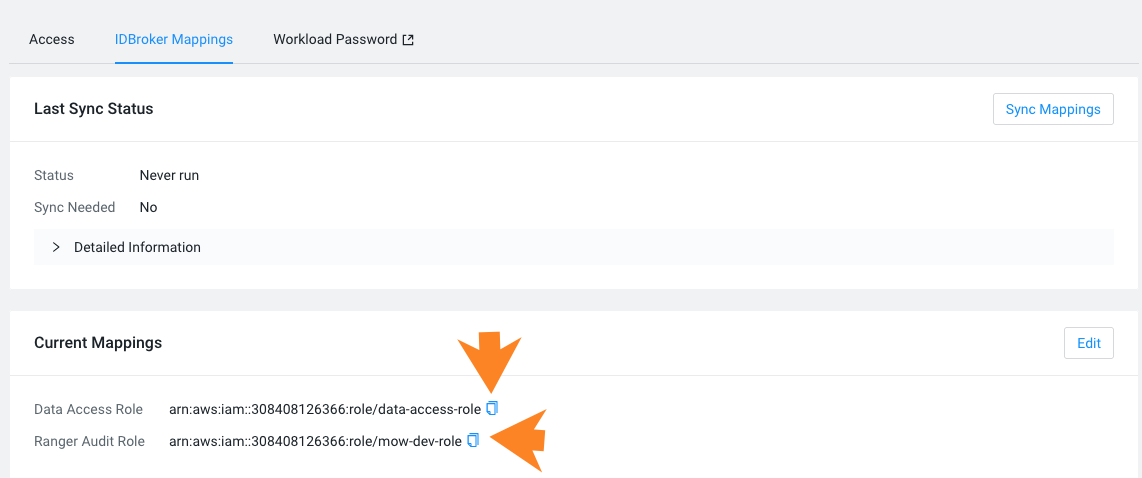
RANGER_AUDIT_ROLE and DATALAKE_ADMIN_ROLE
- Navigate to Environments.
- Click on the existing environment.
- From the Actions menu, select Manage Access.
- Click on the IDBroker Mappings tab.
- Under Current Mappings you will see the mappings for the Data Access Role and Ranger Audit Role.
- Copy the ARNs of the Data Access Role and Ranger Audit Role:
Further permissions reduction (Optional)
You can reduce these policies even further by pre-creating some resources:
- If you use your own security groups, then the following actions can be removed from the
policy:
ec2:CreateSecurityGroup ec2:AuthorizeSecurityGroupIngress ec2:RevokeSecurityGroupEgress ec2:AuthorizeSecurityGroupEgress - If you use private IPs or set up Cluster Connectivity Manager to communicate with
the Cloudera Control Plane, then the following actions can be removed from the
policy:
ec2:CreateSecurityGroup ec2:AuthorizeSecurityGroupIngress ec2:RevokeSecurityGroupEgress ec2:AuthorizeSecurityGroupEgress - If you use private IPs or set up Cluster Connectivity Manager to communicate with
the Cloudera Control Plane, then the following actions can be removed from the
policy:
ec2:AllocateAddress
ec2:ReleaseAddress