Accessing buckets using a custom key
If you want read/write access from Cloudera Data Warehouse on cloud on AWS to the external S3 bucket using your own custom encryption key, you must configure the encryption key.
Perform the steps described in this topic to use your own custom key.
Required role: DWAdmin
- Identify which environment you want to configure for access to an external bucket in another AWS account. In the Cloudera Data Warehouse UI, go to the Environments tab. This causes the Data Catalog and Virtual Warehouses that use this environment to be highlighted in the Cloudera Data Warehouse UI. Choose the environment that is activated for the Virtual Warehouses you want to use with the external AWS bucket.
- In the AWS Management Console for the different account, identify the external S3 bucket you want to configure access to.
-
On the Cloudera Data Warehouse UI Overview page, go to
the Environments tab and locate the environment for which you want
to configure access to an external AWS bucket, and then click
 > Details.
This loads the Environment Details page.
> Details.
This loads the Environment Details page. -
In the AWS Management Console for the account where the S3 bucket resides, navigate
to the Key Management Service, and select Customer Managed Keys
in the left navigation menu:
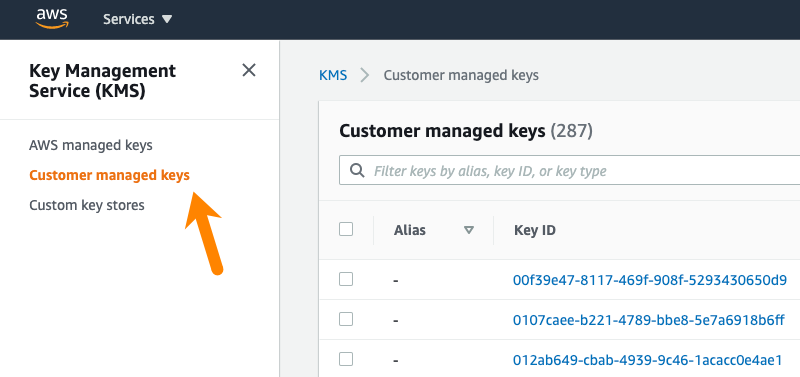
On the Customer managed keys page, select the key you want to use.
-
On the key details page, select the Key policy tab in the
center panel of the page:

This displays the key policy for the customer managed key.
-
In the Cloudera Data Warehouse Environment Details page, copy the Amazon
Resource Names (ARNs) associated with the environment that displays in the panel:

The actions listed in the above screen capture are the minimum set of actions needed by Cloudera Data Warehouse:
"Action:[
    "kms:Encrypt",
    "kms:Decrypt",
    "kms:ReEncrypt*",
    "kms:GenerateDataKey*",
    "kms:DescribeKey"
]
The key policy you use should allow at least these actions.
-
Return to the key details page in the AWS Management Console, click
Edit in the upper right corner of the Key
policy tab, paste the two ARNs to append them after the existing ARNs in
the key policy, and then click Save changes:

The key policy shown in the above screen capture lists
"kms:*"in the"Action"section of the policy. This indicates that all actions are allowed. At minimum, Cloudera Data Warehouse requires the"Encrypt","Decrypt","ReEncrypt","GenerateDataKey*", and the"DescribeKey"actions as shown on the screen capture in Step 7.If there is no Key Policy tab of the key details page, copy and paste the entire key policy in the AWS Management Console from the Cloudera Data Warehouse UI.
-
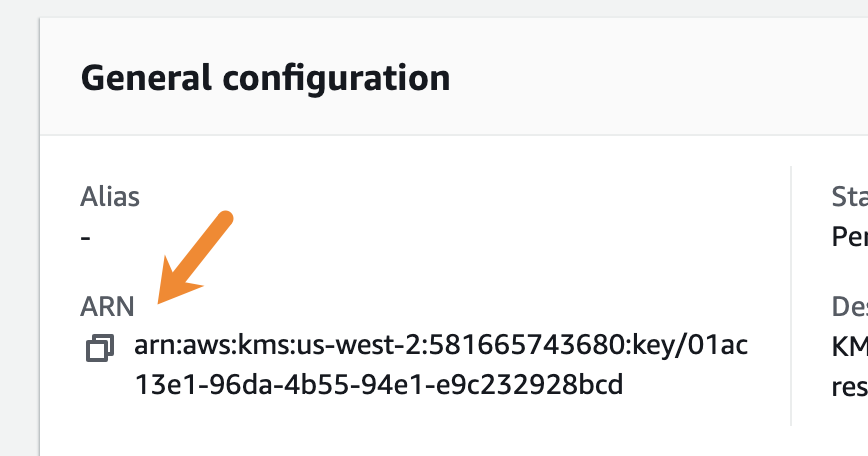
After you save the changes to the key policy in the AWS Management Console, copy
the ARN from the General configuration section of the key
details page:
-
In the Cloudera Data Warehouse Environment Details page, add the ARN you
copied in Step 9 to the ENCRYPTION SETTINGS text box:
