Migrating with the inbuilt CDSW to Cloudera AI migration tool
Learn about how to migrate Cloudera Data Science Workbench (CDSW) 1.10.0 and higher versions on premises to Cloudera AI. The migration process is streamlined using a UI-driven migration tool, which automatically transfers your workload from the deployed CDSW instance installed on the same cluster as Cloudera AI.
You can automatically migrate CDSW 1.10.0 or a later cluster to Cloudera AI on premises 1.5.4 or higher versions. You can expect some downtime, which is proportional to the volume of the workloads you have to migrate.
-
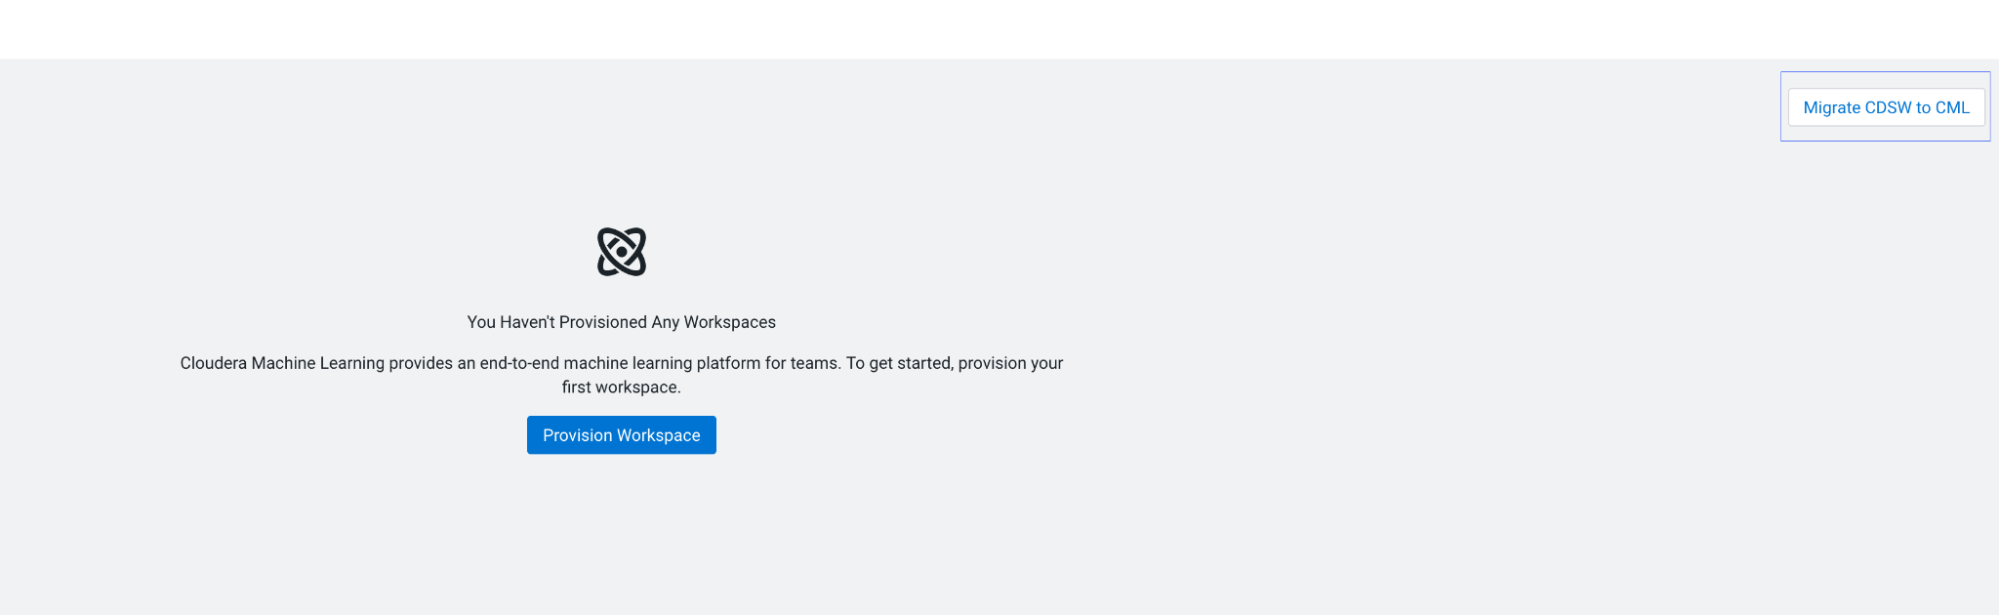
Log into Cloudera on premises, and navigate to .
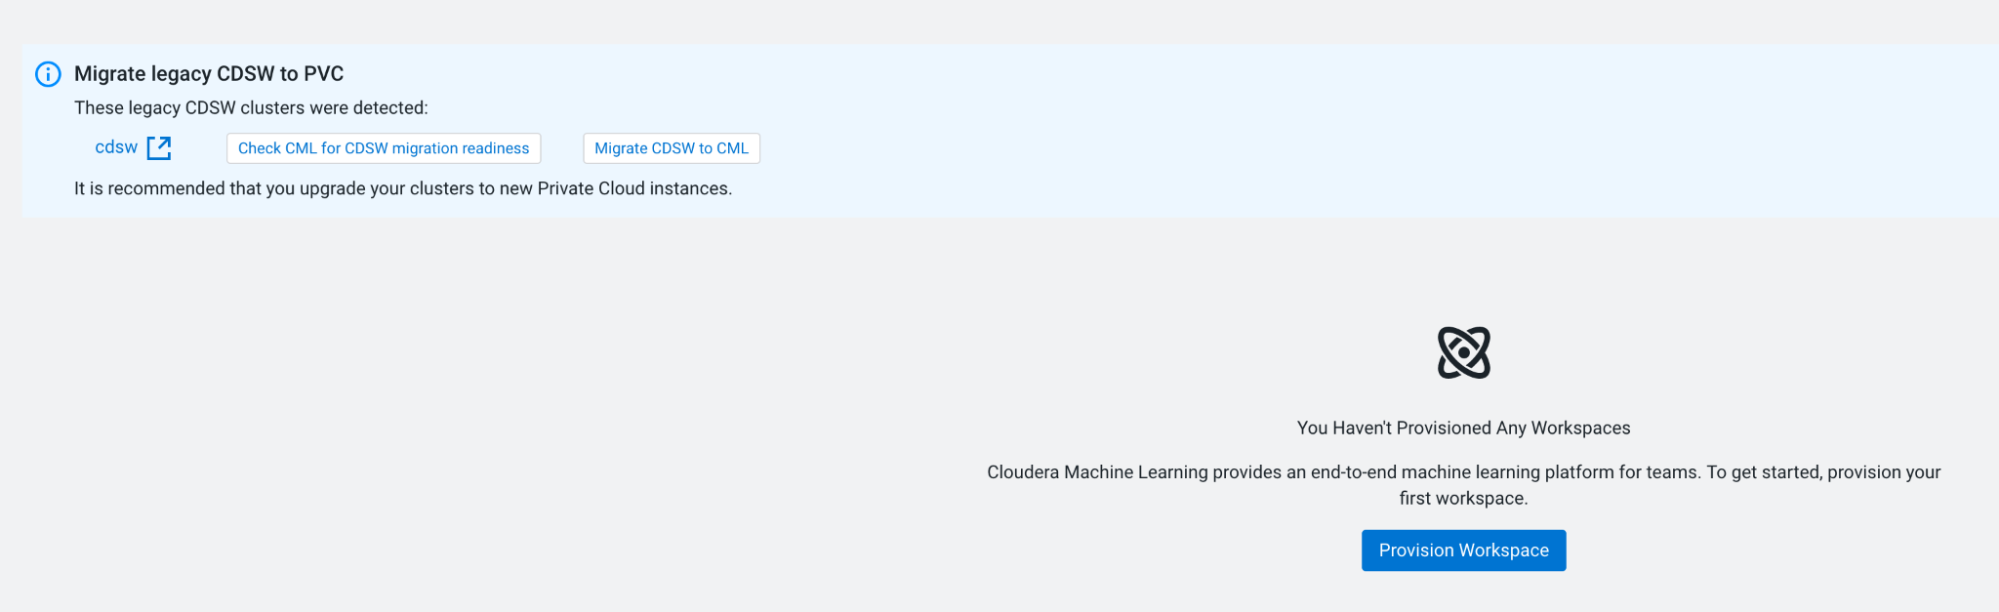
The system detects the presence of your legacy CDSW installation and provides the Migrate CDSW to Cloudera AI button.
-
Click the Migrate CDSW to Cloudera AI button.
The Migration tool provides an option to Validate Cloudera AI for CDSW migration readiness or just continue with the migration.
-
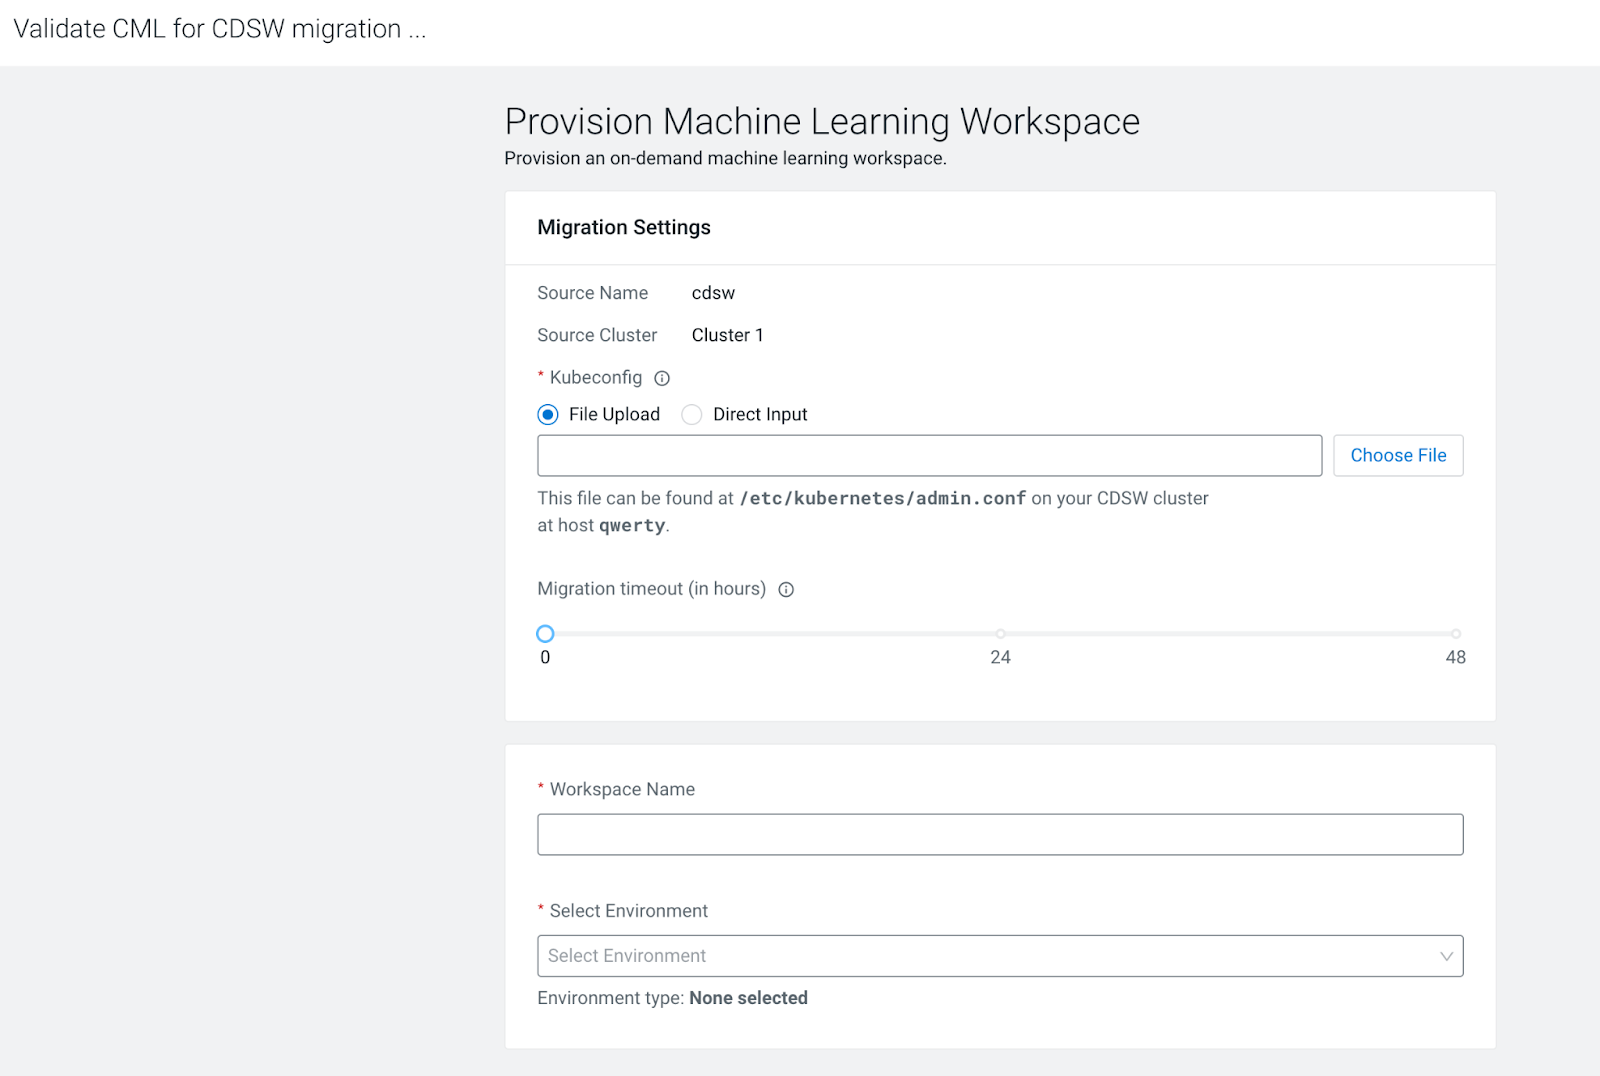
If you choose the Validate Cloudera AI
for CDSW migration readiness option, the Migration tool displays
the validation page.
-
In the Select Environment field, select your Cloudera environment.
After the readiness validation has completed, the Migration tool displays a status. You can see the readiness validation summary in the Workbench Details page.
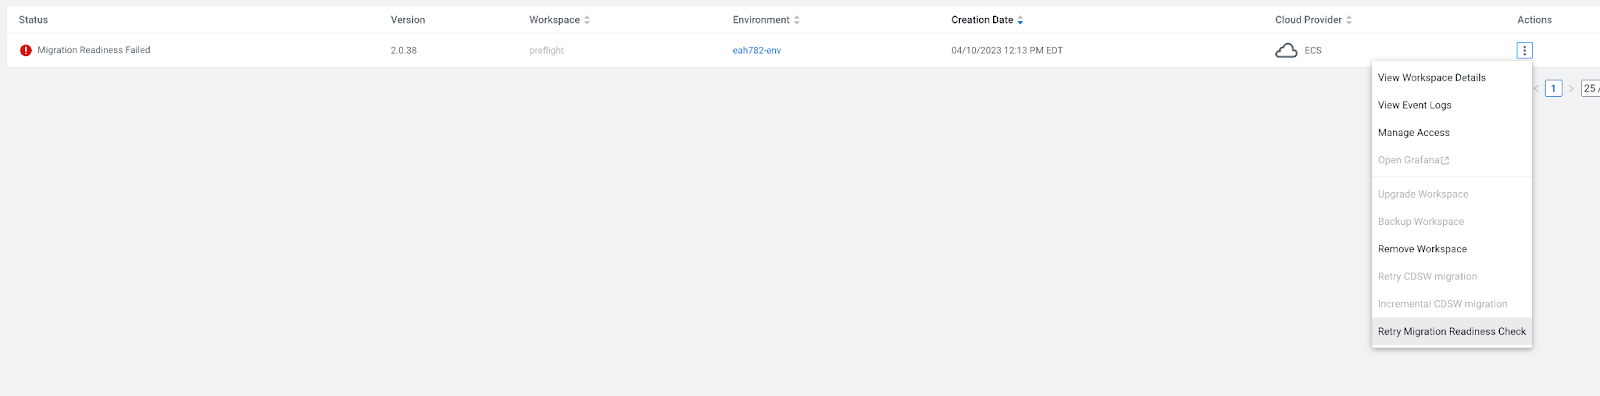
- If the readiness validation fails, you can obtain additional
information about the failure on the Workbench Details page.

- After you have addressed the issue resulting in the failed
readiness validation, you can retry the readiness validation by
choosing the Retry Migration Readiness
Check option from the
Actions drop-down list.
- If the readiness validation fails, you can obtain additional
information about the failure on the Workbench Details page.
-
In the Select Environment field, select your Cloudera environment.
-
Check the Migration Settings window.
When you proceed with the CDSW to Cloudera AI migration, the Migration tool displays the Migrations Settings window.
-
Check the status of the migration.
When the initial migration is complete, the state changes to Validate Migration Started.

-
Check the status of the migration.
-
At this point, you can choose to perform multiple incremental migrations or a
single, final migration.
- To perform incremental migrations, select the Incremental
CDSW Migration option from the
Actions menu.
CDSW is not stopped during incremental migrations.
- To perform a single, final migration, select the Incremental
CDSW Migration option from the
Actions menu, select the Perform
final migration checkbox, then click the
OK button.
During the final migration, CDSW will be stopped and will not be restarted. After the final migration, only the Cloudera AI Workbench will be active.
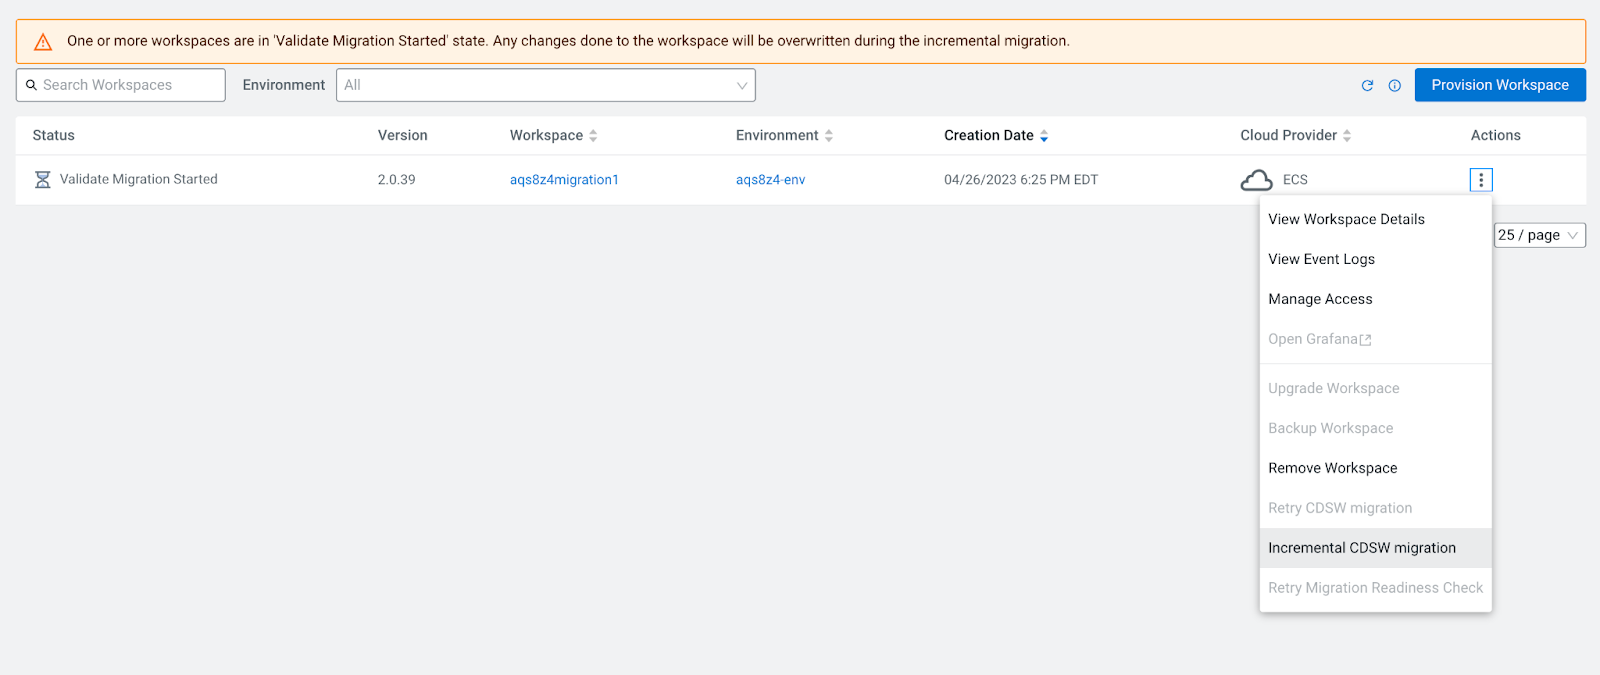 The Migration tool displays the Incremental CDSW migration dialog box.
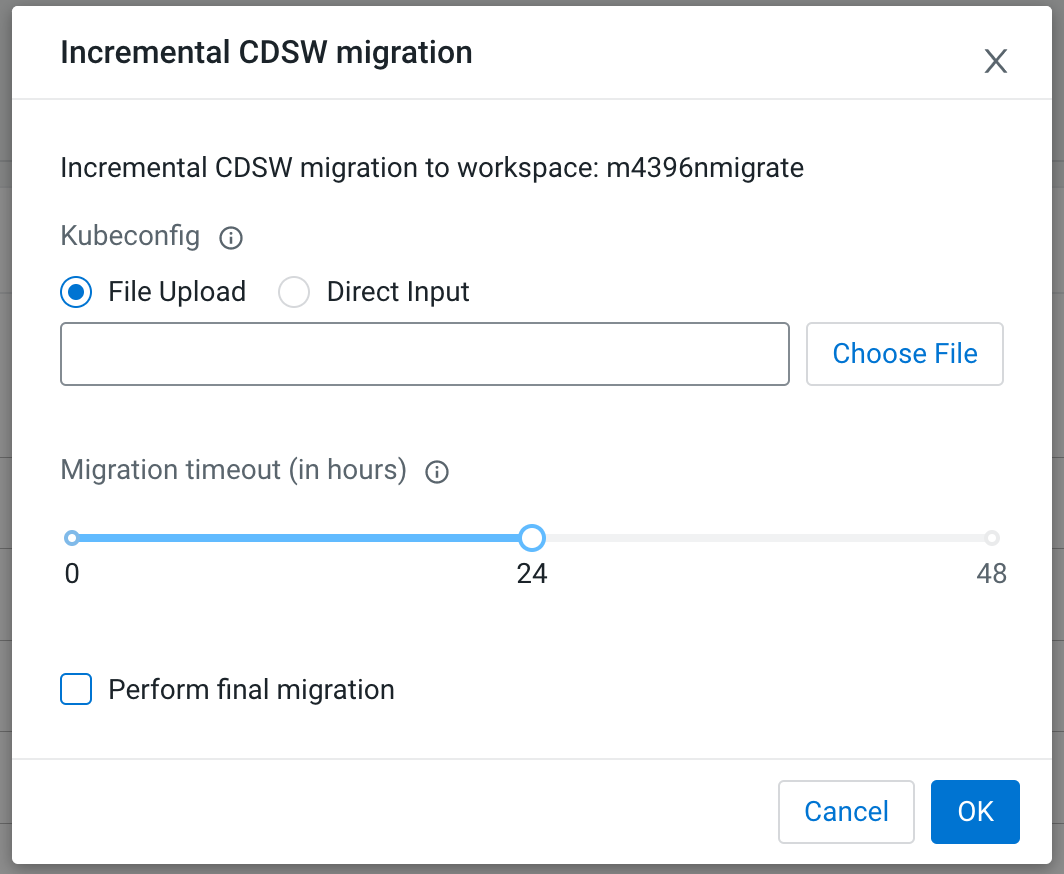
- To perform incremental migrations, select the Incremental
CDSW Migration option from the
Actions menu.
-
If you choose to perform incremental migrations, when the Cloudera AI validation is complete and all workloads
work as expected. Select the Perform final migration
checkbox and choose the appropriate option.
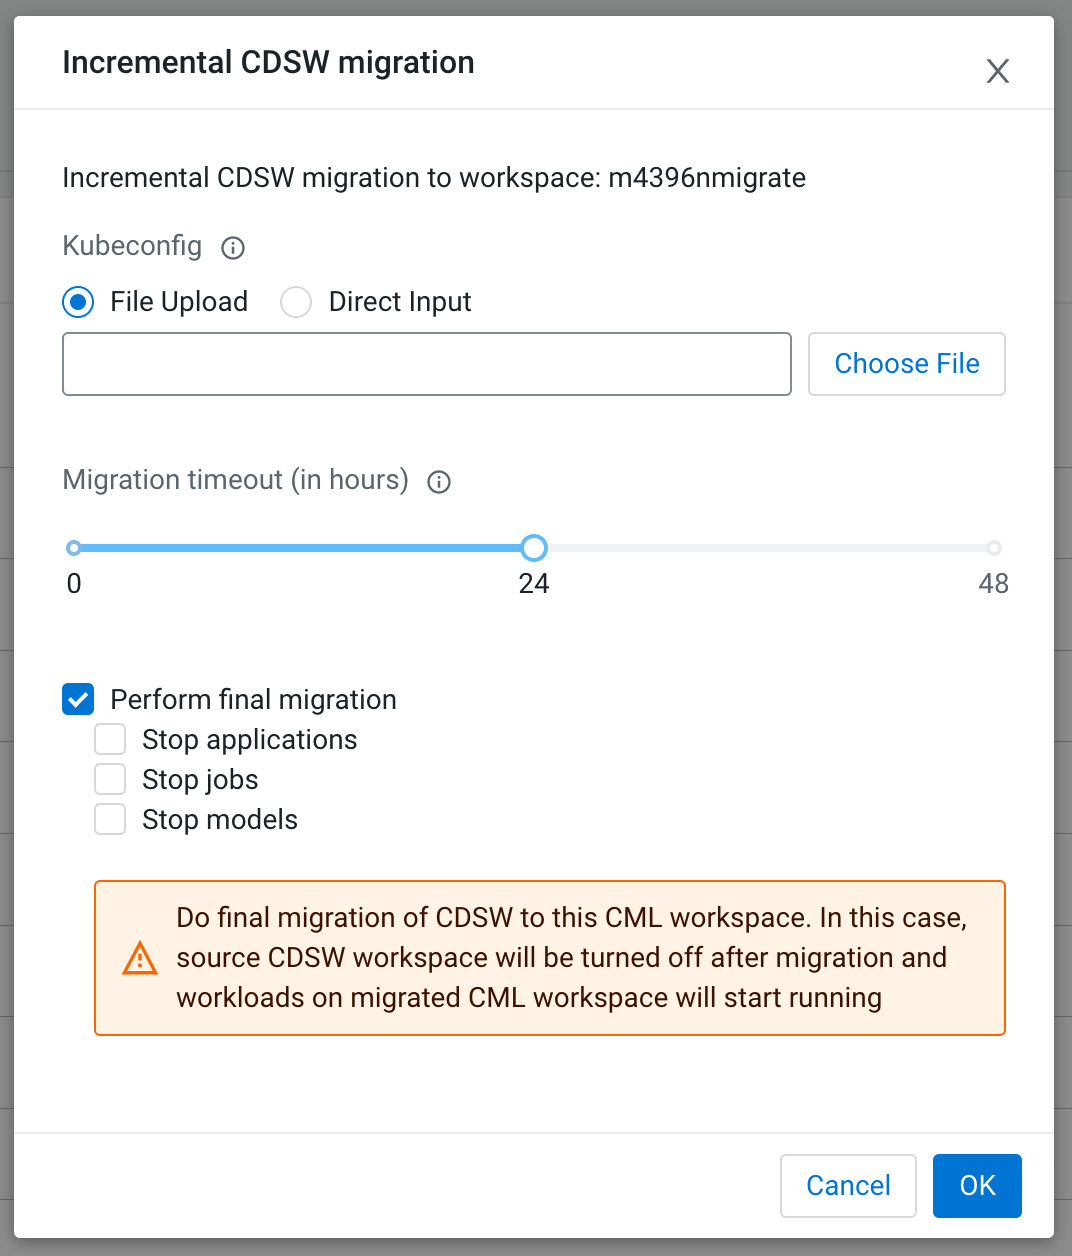 After you perform the final migration, CDSW will be in a
stoppedstate.You can choose any of the following options for the Perform final migration checkbox:
-
- Stop applications
- If you select the Stop
applications option, the applications in
the Cloudera AI will be in the
stoppedstate after the migration. You must start each application manually after the final migration. - Stop jobs
- If you select the Stop jobs
option, the recurring jobs in the Cloudera AI will be in the
pausedstate after the migration. You must restart each job manually after the final migration. - Stop models
- If you select the Stop models
option, the models in the Cloudera AI will be in the
stoppedstate after the migration. You must start each model manually after the final migration.
-
-
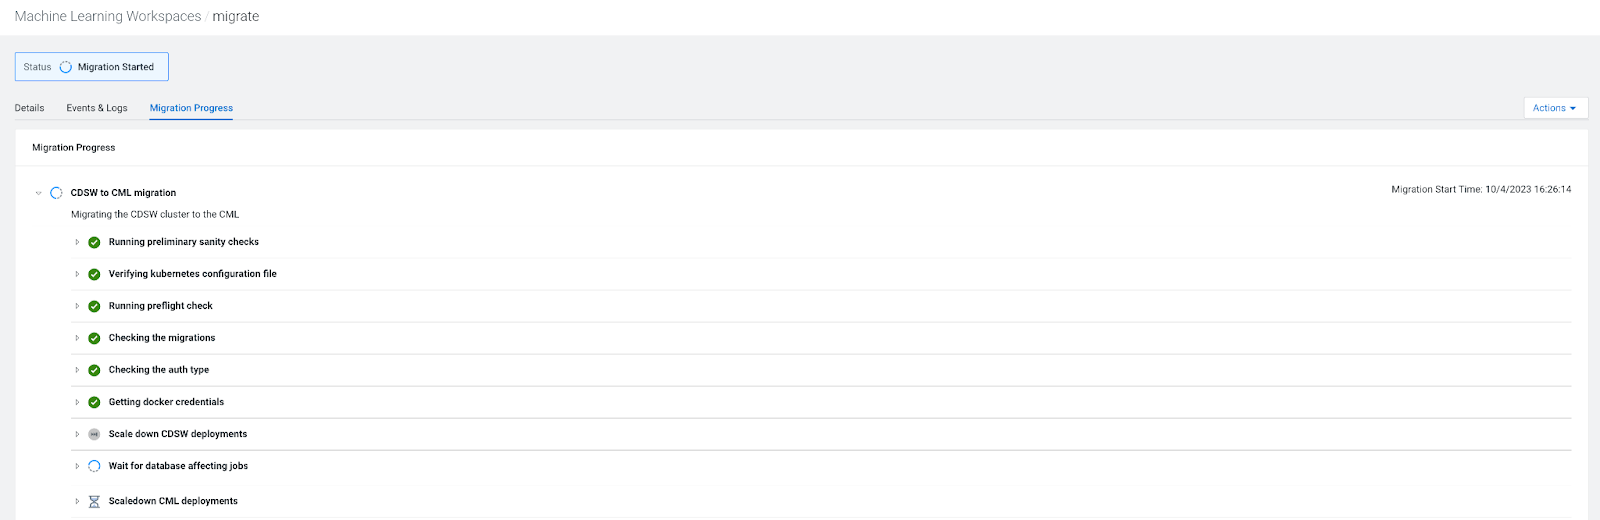
To display the progress of the migration including events and logs while the
workbench is in migration mode, navigate to the
Workbench Details
page and click the Migration Progress tab.
You can also view the details of the migration, events and logs by clicking the appropriate tabs.