Transitioning Navigator data using customized scripts
You can run the customized scripts generated by the Cloudera Manager wizard to configure the Apache Atlas installation and start the Navigator-to-Atlas data migration process when you step into the Cloudera upgrade wizard. You can also run the migration scripts independently from the Cloudera upgrade.
The transition has three phases: extraction, transformation, and import. If you haven't already, estimate the time and resource requirements for the migration steps as described in Assumptions and prerequisites.
Run the extraction
You can run the extraction in the background as soon as the Cloudera Runtime parcel is deployed. To customize and run the extraction command:
- Go back to the editor where you saved the extraction commands, from the Copy the extraction command text substep from the step "Click Add Atlas Service."
- Open a terminal window or command prompt where you have access to the cluster.
- Using the provided command, SSH into the Atlas host.
- Make sure the
JAVA_HOMEvariable is set; if it isn't, run the export command pointing to the location of the JDK. - Customize the extraction command to include the Navigator admin user and password.
- Run the extraction command.
When the extraction is complete, you'll see a status message in the command output.
cnav script needs the
following credential information: - Truststore path
- Truststore password
- Keystore path
- Keystore password
cnav script: export KEYSTORE_PATH=<keystore-path>;
export KEYSTORE_PASSWORD=<keystore-password>;
export TRUSTSTORE_PATH=<truststore-path>;
export TRUSTSTORE_PASSWORD=<truststore-password>
export KEYSTORE_PATH=/opt/cloudera/CMCA/trust-store/acme_truststore.jks;
export
KEYSTORE_PASSWORD=Q01FAeH53dn1HLY74D68Kk1yMAQVGtOI_cLznArccid48DDzS0VXY-DWnzpz0Ug10BvikGMoovYaZT2EEEdBGgLPiDCRKHyzFExE3OITRGazjKPtZxAaXOUzgKMMmQQgJKw-5JW9I6WgLGBhCpKfBa7vP3z6PFtm6XfYB-o3R6qmcdzZLwslDIQ18mowuFV1ouQIzA;
export TRUSTSTORE_PATH=/var/lib/cloudera-scm-agent/agent-cert/cm-auto-host_keystore.jks;
export TRUSTSTORE_PASSWORD=123420978alngdfdfjliaiu;
/opt/cloudera/cm-agent/service/navigator/cnav.sh -n https://acme-finance-1.acme-finance:7187 -u admin -p adminpass -c "Cluster 2" -o /tmp/nav2atlas/nav2altas_nav_export.zip
Run the transformation
You can run the transformation in the background as soon as the extraction completes. To customize and run the transformation command:
- Go back to the editor where you saved the transformation commands, from the "Copy the transformation command text" substep from the step "Click Add Atlas Service."
- If needed, open a terminal window or command prompt where you have access to the cluster.
- If needed, SSH into the Atlas host.
- If needed, make sure the
JAVA_HOMEvariable is set; if it isn't, run the export command pointing to the location of the JDK. - Run the transformation command.
When the transformation is complete, you'll see a status message in the command output.
Run the import
When Atlas starts up, it checks the output file location for a completed file from the transformation phase. When Atlas finds the completed file, it begins importing entities automatically. To see the progress of the import:
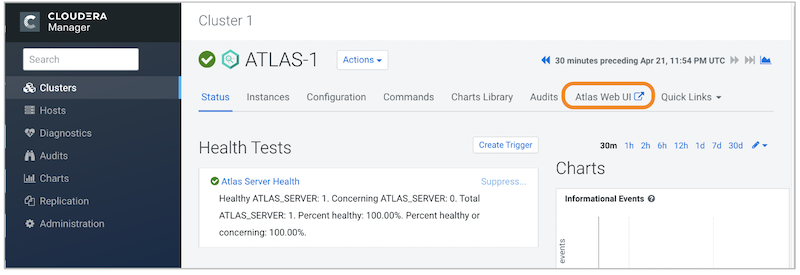
- Open the Atlas UI.You can open Atlas from the Atlas service page in Cloudera Manager.
- Review transition progress in the Statistics page.
The normal Atlas UI does not appear in migration mode; instead you'll see the Statistics page, which shows a real-time report of the number of entities, classifications, and other metadata that have been created in Atlas.
Validate the transition
To give yourself confidence that the transition was successful, use the Statistics page in Atlas to compare to the metadata in Navigator. See the "How many Navigator entities are transitioned?" section in Assumptions and prerequisites for instructions on how to lookup counts in Navigator.
- Count of migrated entities. Does the total number of imported entities match what you expect from Navigator? Remember that not all Navigator entities are not migrated: HDFS entities are only migrated if they are referenced in Hive, Impala, or Spark operations that are included in the transition.
- Count of managed metadata that became business metadata in Atlas.
- Count of managed metadata assignments. Consider reproducing searches on commonly used business metadata to validate that you see the same results in each system.
Move Atlas out of migration mode
After installation, Atlas runs in migration mode:
- Atlas does not collect metadata from services running on the cluster. The metadata remains in Kafka topics and will be collected later.
- Atlas starts importing metadata when it finds a final transformation file in the location you specified in step "Confirm the output file location" from the step "Click Add Atlas Service."
To move Atlas from migration mode into normal operation:
- Open Cloudera Manager to the Atlas service.
- Go to the Configuration tab.
- Filter the list of properties by typing "Safety" in the filter field.
- Remove the migration-specific entries from the Atlas Server Advanced
Configuration Snippet (Safety Valve) for conf/atlas-application.properties.
Remove the following properties:
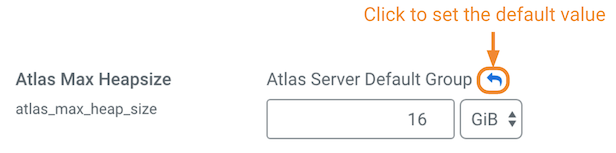
atlas.migration.data.filename atlas.migration.mode.batch.size atlas.migration.mode.workers - Reset the Atlas Max Heapsize property back to the default value.
- Click Save Changes.
- Restart Atlas.
Choose .