How the migration process works
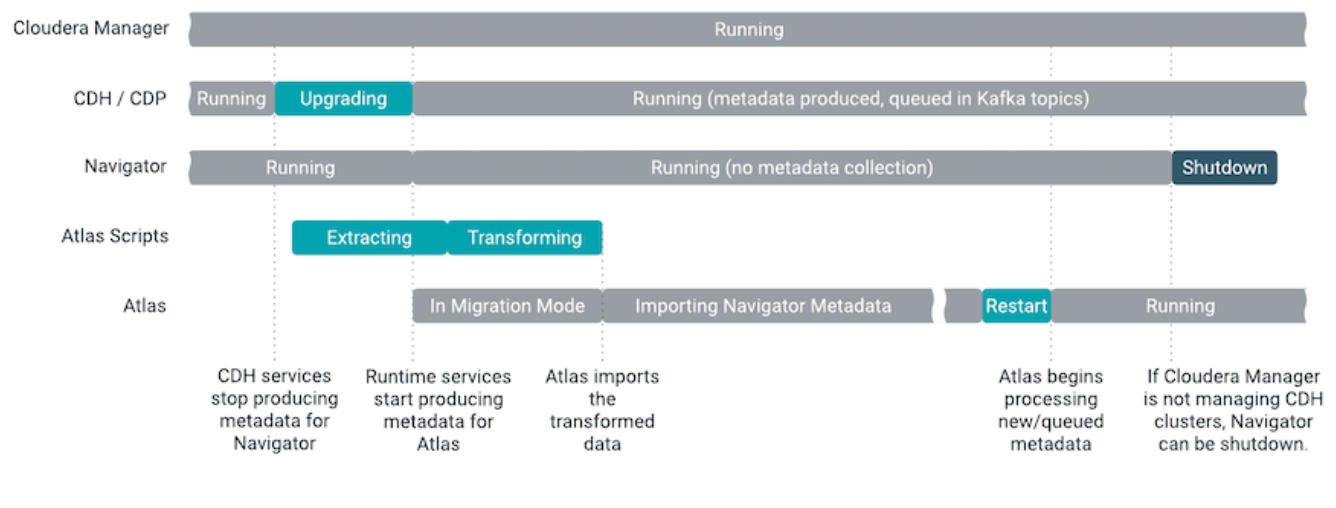
Before migrating from Navigator to Apache Atlas, review the migration paths. You must extract, transform, and import the content from Navigator to Apache Atlas. After the migration is completed, services start producing metadata for Atlas and audit information for Apache Ranger.
There are two main paths that describe a Navigator-to-Atlas migration scenario:
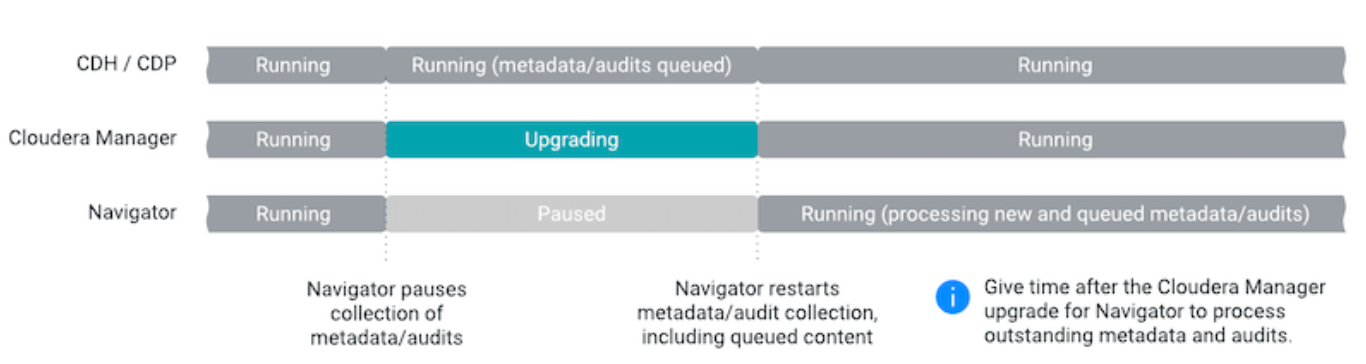
In both the scenarios, you shall complete the upgrade of Cloudera Manager first. While Cloudera Manager is being upgraded, Navigator pauses collection of metadata and audit information from cluster activities. After the upgrade is complete, Navigator processes the queued metadata and audit information.
In the timeline diagrams that follow, the blue color indicates steps and because you trigger the steps manually, you can control their timing.
The migration of Navigator content to Atlas occurs during the upgrade from CDH to CDP. The migration involves three phases:
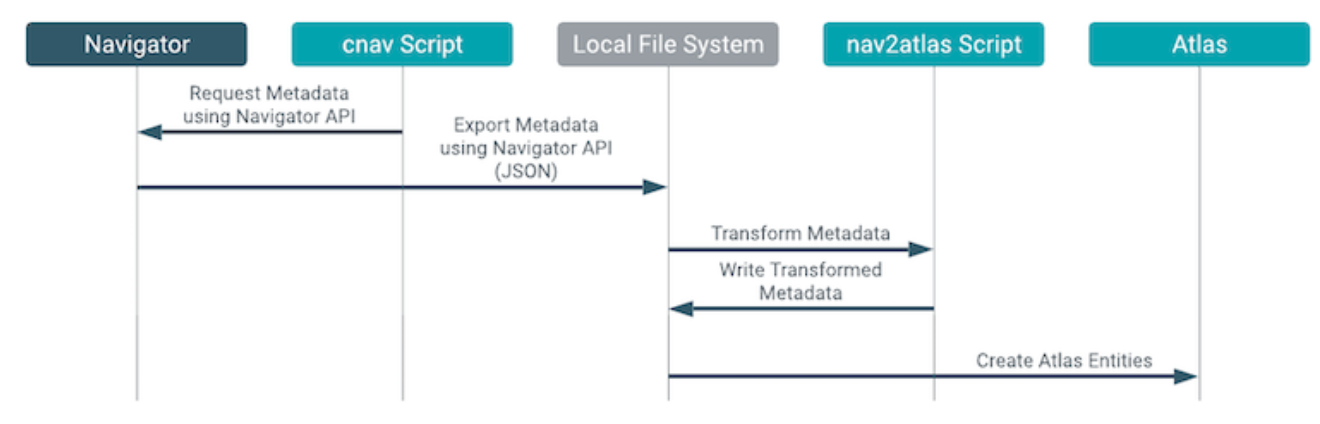
- Extracting metadata from Navigator
The Atlas installation includes a script (cnav.sh) that calls Navigator APIs to extract all technical and business metadata from Navigator. The process takes about 4 minutes per one million Navigator entities. The script compresses the result and writes it to the local file system on the host where the Atlas server is installed. Plan for about 100 MB for every one million Navigator entities; lower requirements for larger numbers of entities.
- Transforming the Navigator metadata into a form that Atlas can consume. Including time and resources. The Atlas installation includes a script (nav2atlas.sh) that converts the extracted content and again compresses it and writes it to the local file system. This process takes about 1.5 minutes per million Navigator entities. The script compresses the results and writes it to the local file system on the host where the Atlas server is installed. Plan for about 100 to 150 MB for every million Navigator entities; higher end of the range for larger numbers of entities.
- Importing the transformed metadata into Atlas.
After the Cloudera upgrade completes, Atlas starts in "migration mode," where it waits to find the transformed data file and does not collect metadata from cluster services. When the transformation is complete, Atlas begins importing the content, creating equivalent Atlas entities for each Navigator entity. This process takes about 35 minutes for a million Navigator entities, counting only the entities that are migrated into Atlas.
To make sure you do not miss metadata for cluster operations, provide time after the Cloudera Manager upgrade and before the CDH upgrade for Navigator, to process all the metadata produced by CDH service operations. See Navigator Extraction Timing for more information.
You can start extracting metadata from Navigator as soon as the CDP parcel is deployed on the cluster. After CDP is started, Navigator no longer collects metadata or audit information from the services on that cluster; instead services produce metadata for Atlas and audit information for Ranger.