Set ACLs for Impala

To allow Impala to write to the Hive Warehouse Directory you must set ACLs for Impala.

The location of existing tables after a CDH to CDP upgrade does not change. In CDP, there are separate HDFS directories for managed and external tables.
  • The data files for managed tables are located in warehouse location specified by the Cloudera Manager configuration setting, Hive Warehouse Directory.
  • The data files for external tables are located in warehouse location specified by the Cloudera Manager configuration setting, Hive Warehouse External Directory.

During the upgrade from CDH to CDP, the ACL settings are taken care automatically for the default warehouse directories. If you decide to change the default warehouse directories after upgrading to CDP then you must run the commands shown in Step 3.

After upgrading, the (hive.metastore.warehouse.dir) is set to /warehouse/tablespace/managed/hive where the Impala managed tables are located.

You can change the location of the warehouse using the Hive Metastore Action menu in Cloudera Manager.

Hive Warehouse Directory

Complete the initial configurations in the free-form fields on the Hive/Impala Configuration pages in Cloudera Manager to allow Impala to write to the Hive Warehouse Directory.

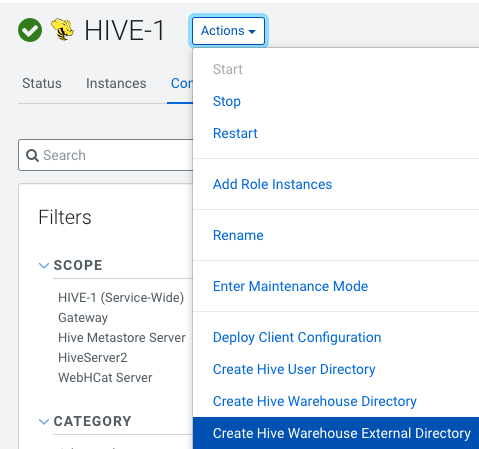
  1. Create Hive Directories using the Hive Configuration page
    1. Hive > Action Menu > Create Hive User Directory
    2. Hive > Action Menu > Create Hive Warehouse Directory
    3. Hive > Action Menu > Create Hive Warehouse External Directory
      Create Hive Warehouse Directory
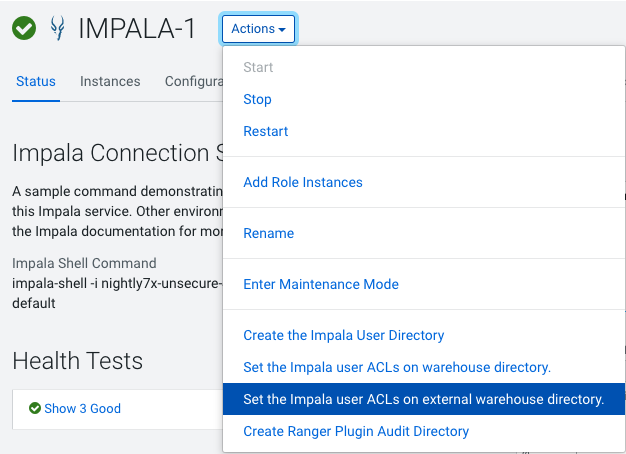
  2. Set Up Impala User ACLs using the Impala Configuration page
    1. Impala > Action Menu > Set the Impala user ACLs on warehouse directory
    2. Impala > Action Menu > Set the Impala user ACLs on external warehouse directory
      Set impala user acls
  3. Cloudera Manager sets the ACL for the user "Impala" however before starting the Impala service, verify permissions and ACLs set on the individual database directories using the sub-commands getfacl and setfacl.
    1. Verify the ACLs of HDFS directories for managed and external tables using getfacl.
      Example:
      $ hdfs dfs -getfacl hdfs:///warehouse/tablespace/managed/hive
      # file: hdfs:///warehouse/tablespace/managed/hive
      # owner: hive
      # group: hive
      user::rwx
      group::rwx
      other::---
      default:user::rwx
      default:user:impala:rwx
      default:group::rwx
      default:mask::rwx
      default:other::---
      $ hdfs dfs -getfacl hdfs:///warehouse/tablespace/external/hive
      # file: hdfs:///warehouse/tablespace/external/hive
      # owner: hive
      # group: hive
      # flags: --t
      user::rwx
      group::rwx
      other::rwx
      default:user::rwx
      default:user:impala:rwx
      default:group::rwx
      default:mask::rwx
      default:other::--x
    2. If necessary, set the ACLs of HDFS directories using setfacl
      Example:
      $ hdfs dfs -setfacl hdfs:///warehouse/tablespace/managed/hive
      $ hdfs dfs -setfacl hdfs:///warehouse/tablespace/external/hive
      For more information on using the sub-commands getfacl and setfacl, see Using CLI commands to create and list ACLs.
    3. The above examples show the user Impala as part of the Hive group. If in your setup, the user Impala does not belong to the group Hive then ensure that the Group user Impala belongs to has WRITE privileges assigned on the directory.
      To view the Group user Impala belongs to:
      $ id -Gn impala
      uid=973(impala) gid=971(impala) groups=971(impala),972(hive)