
App Designer
Cloudera Data Visualization App Designer is an intuitive and highly configurable interface for building applications. You can use it to build applications, customize the tabs of the apps, populate the tabs with relevant dashboards. You can also style your apps with custom logos, colors, and text.
The App Designer page has the following parts in the main area:
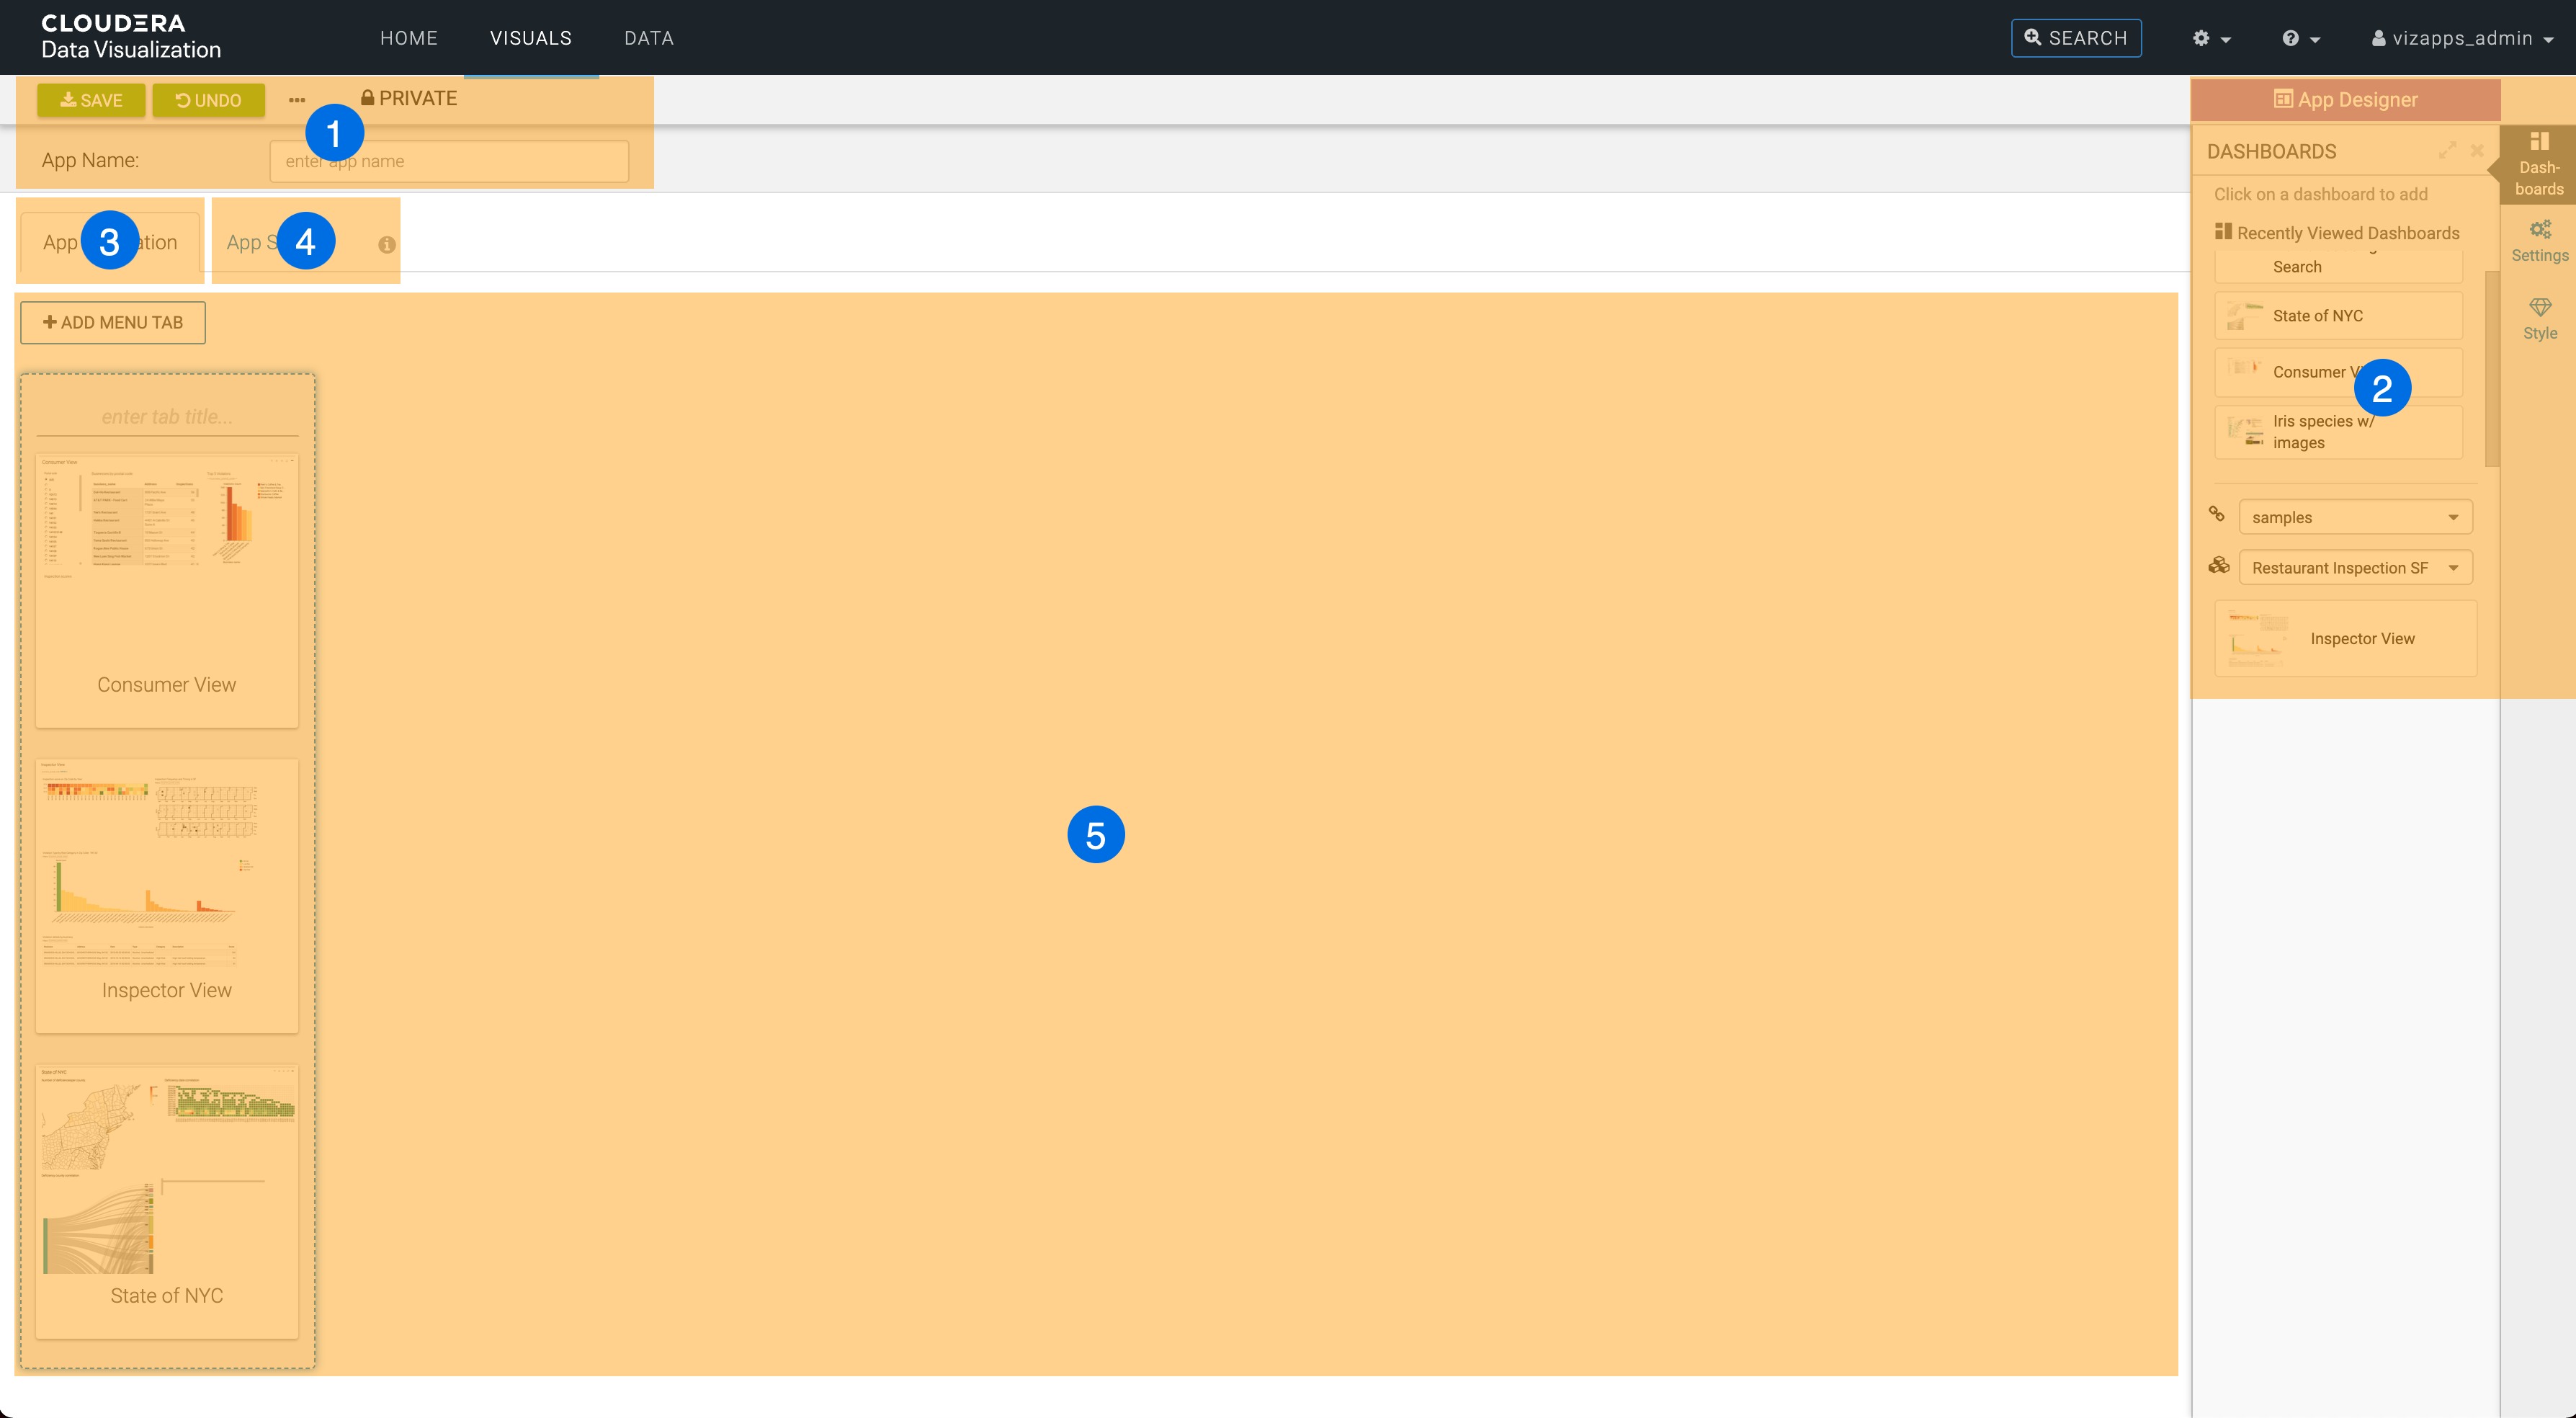
- App Designer top menu bar
- App Designer side menu bar
- App Navigation tab
- App Style tab
- Preview area
App Designer top menu bar

- The SAVE button saves all changes to the application.
- The UNDO button reverts all changes back to the last save operation.
- The Supplemental menu provides access to additional functions:
- The Clone App option lets you clone the current application.
- The New Dashboard option opens the Dashboard Designer interface so you can create a new dashboard.
- The New App option opens on a fresh/blank view of App Designer, so you can create a new application.
- The Delete App option lets you delete the current application.
- The workspace selector lets you assign the application to a Private, Public, or Custom workspace. For more information on workspaces, see Workspaces in Cloudera Data Visualization.
- The App Name text box lets you specify the name of the application. You can change this name at any time.
App Designer sidebar
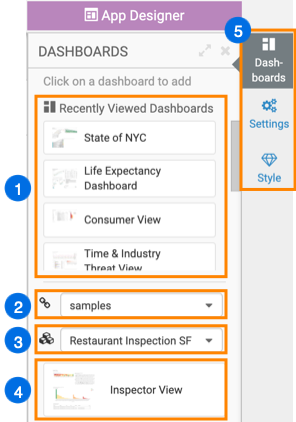
- Recently Viewed Dashboards appear at the top of the Dashboards menu.
- The Connection drop-down list lets you select an alternate connection.
- The Dataset drop-down list lets you select an alternate dataset.
- Dashboards available in the specified dataset appear under the Dataset drop-down list.
- The menu selector enables you to choose between Dashboards, Settings, and Style menus. The Dashboards menu is usually used for configuring the navigation of the application, and the other two menus for styling the application.
App Navigation tab
The App Navigation view exposes all elements necessary to configuring the structure of the app: the tabs and their order, and the dashboards that appear in each tab. You can use the elements of the Dashboards menu to find the relevant dashboards for your app.
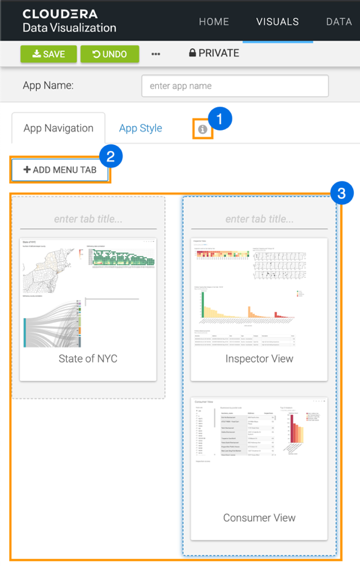
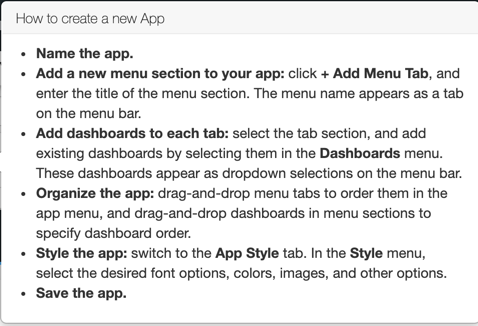
- The information icon provides in-browser instructions on how to use the App
Designer. If you hover over the icon, the following tooltip appears:
- The ADD MENU TAB button enables you to add additional tabs to your application.
- The preview area shows the tabs of your application as tiles.
You can specify the name of each tab, add dashboards to the tabs, change the order of dashboards in one tab, or move the dashboards between the tabs. You can also move the tiles around to change the order of the tabs, or remove a tab from the application by clicking the delete icon at the top of the tile.
You can click a dashboard to open it in a new browser tab, in View mode if you want to make changes to it.
App Style tab
The App Style view focuses on how to style an application.
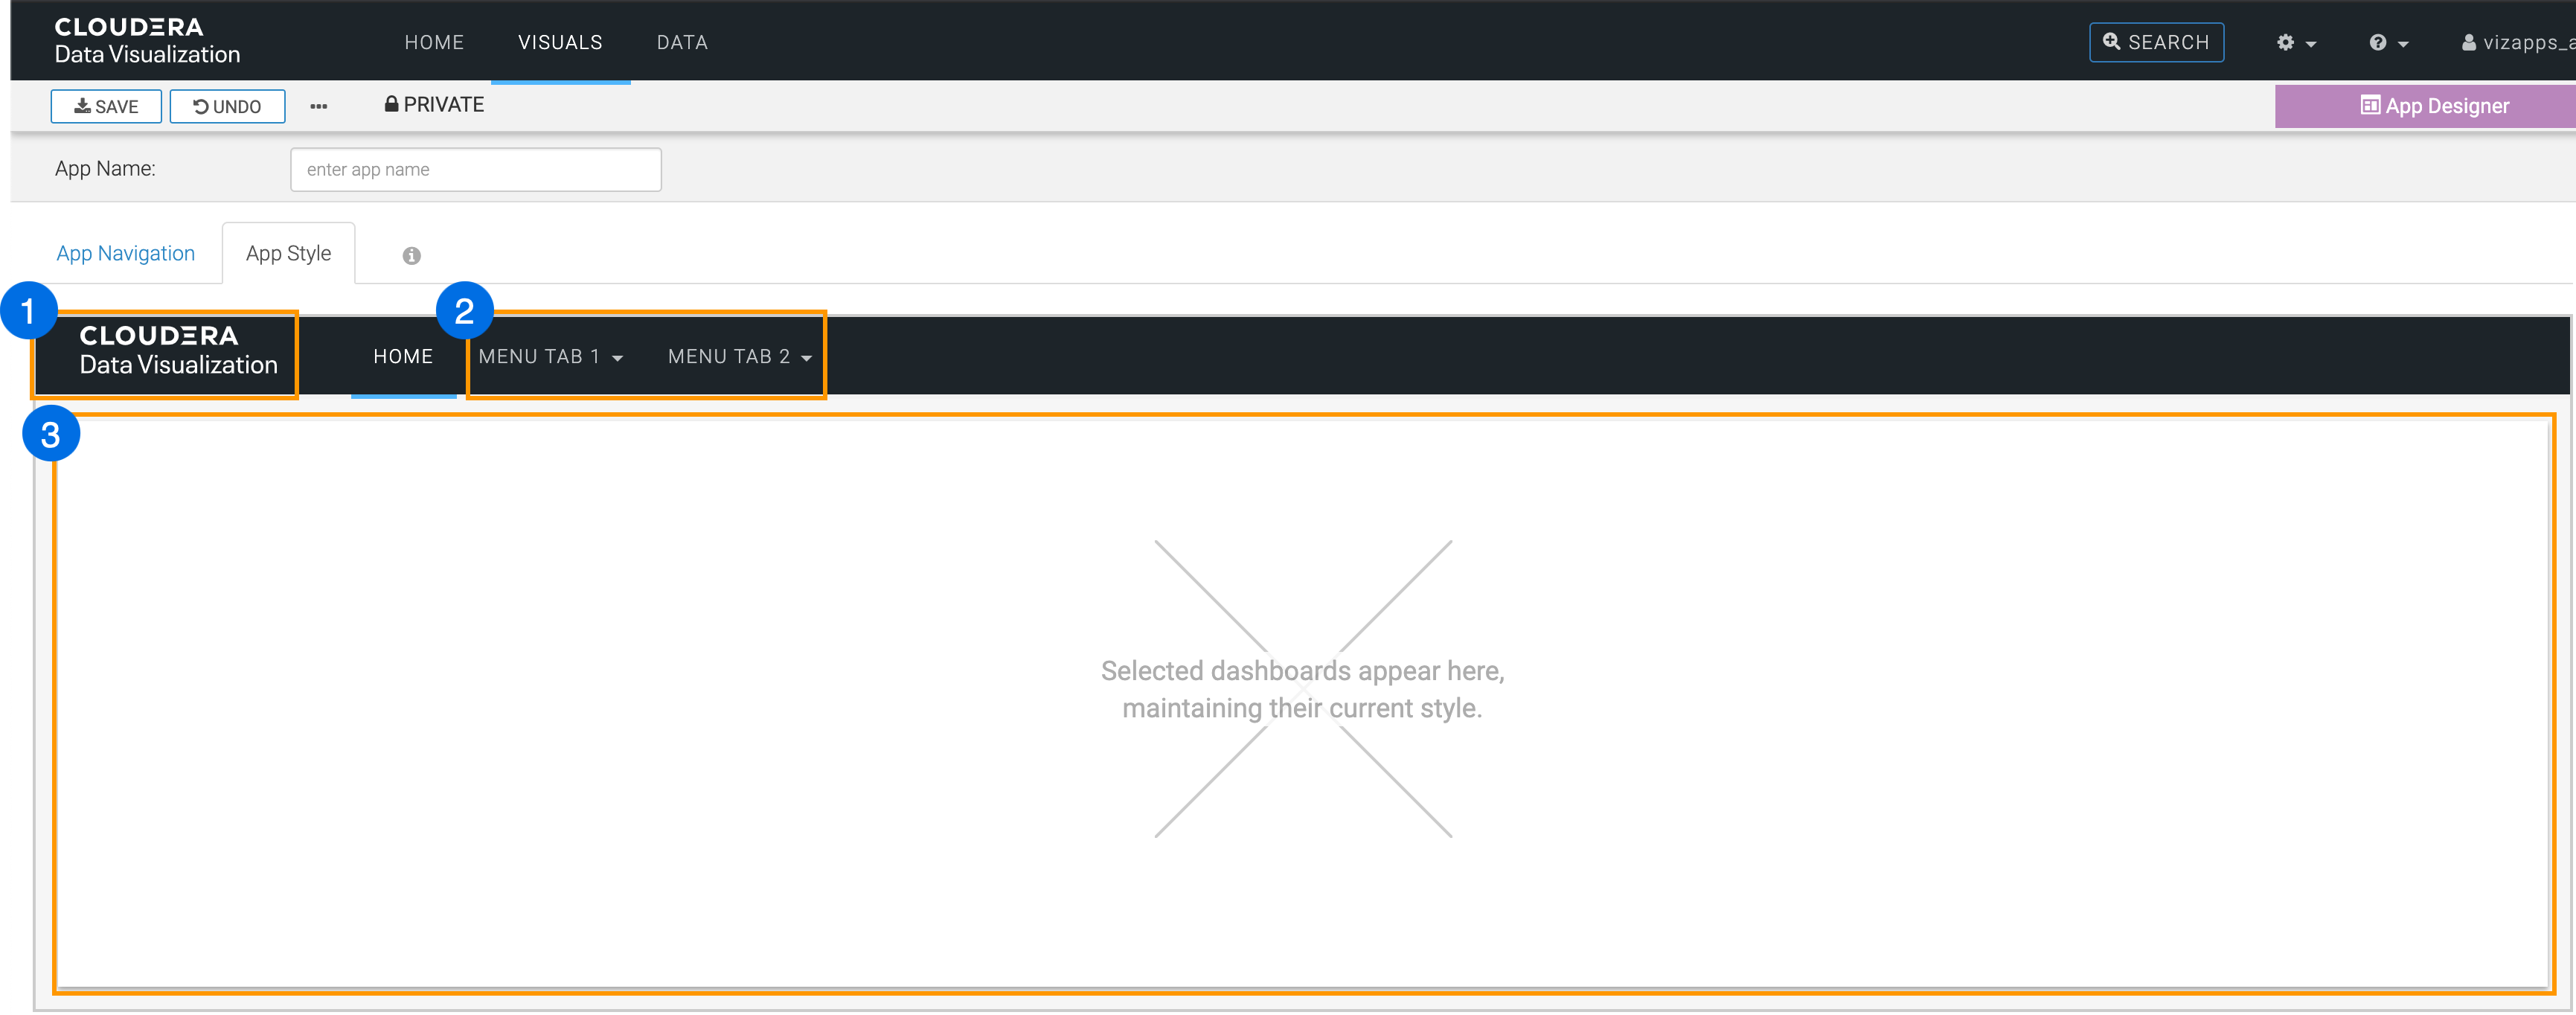
- The logo of the application. You can set a custom logo from the Style menu in the sidebar.
- The application tabs added in the App Navigation tab appear here. If more than one dashboard is added to a tab a dropdown menu will let you choose between them.
- The preview area of the view. The selected dashboards are added here with their current style.
