Selecting a range of dates on filter shelves
For selecting a range of dates in a filter shelf, let's use a visual built in Creating joins.
-
Create a new cross tabulation visual on the dataset Flight Delays with
the following configuration:
- On the X shelf, add the dimension
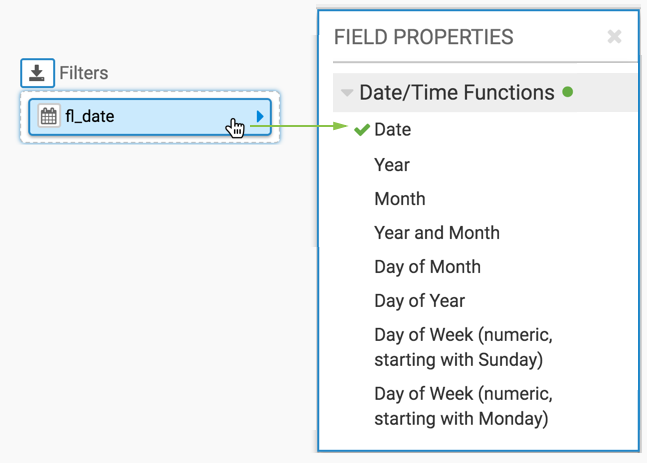
unique_carrier. Alias the field asAirline. - On the Y shelf, add the dimension
fl_date.Click the filed name, and under the Field Properties, change the Date/Time Functions to Date.
- On the Measures shelf, add the measure
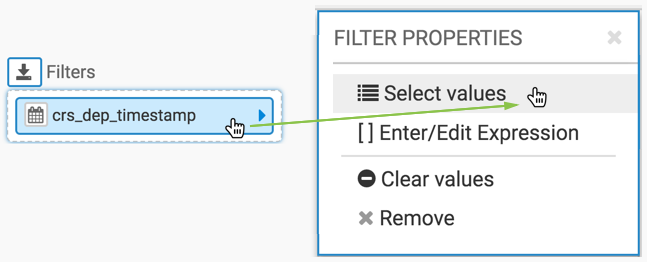
dep_delay, and ensure that it uses theavg(dep_delay)aggregate. Alias the field asDelay. - On the Filters shelf, add
crs_dep_timestamp.
- On the X shelf, add the dimension
-
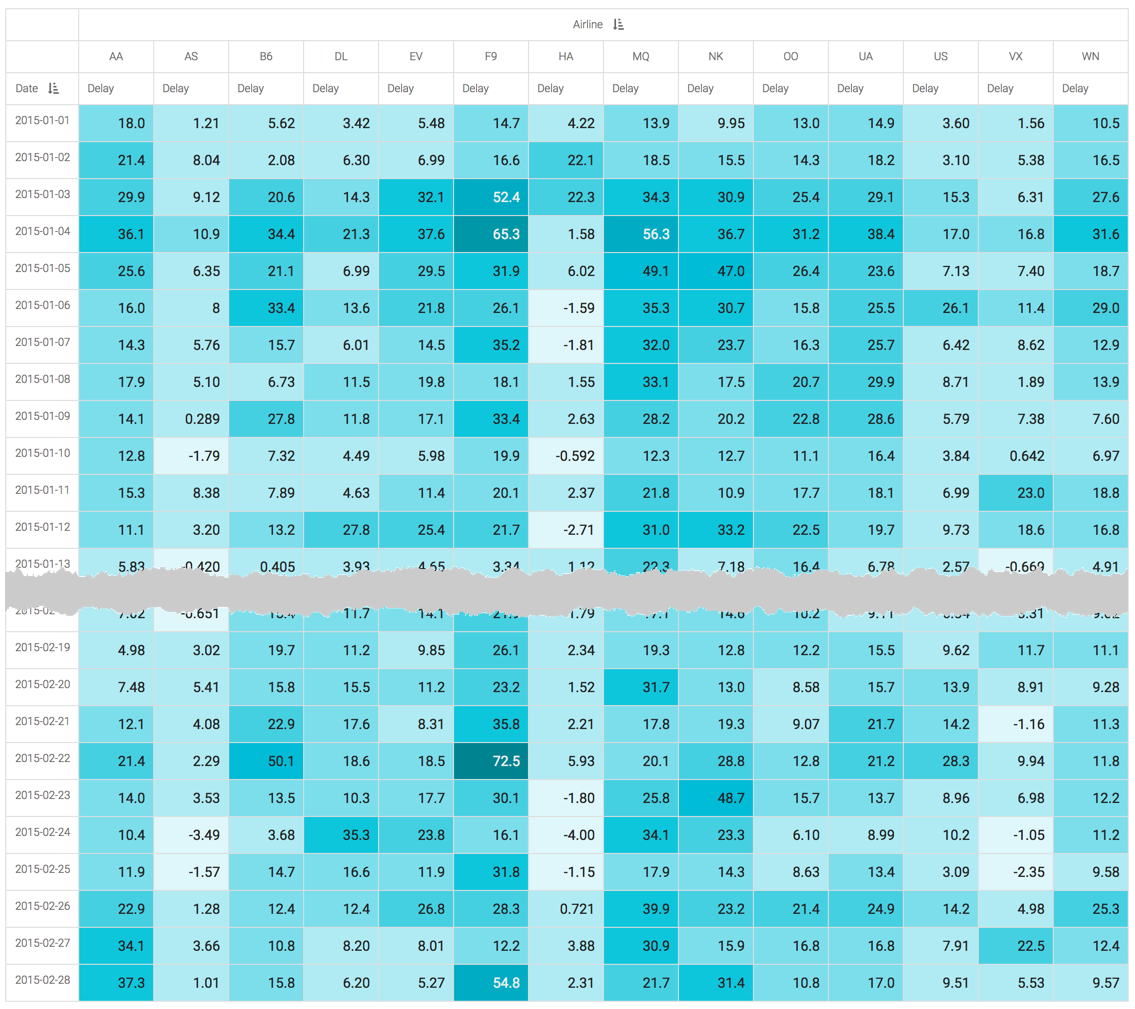
Click Refresh Visual. Note that all the date values in
the dataset, starting with 2015-01-01 and ending with 2015-02-28.
-
Click Select values.
-
Click to select range.
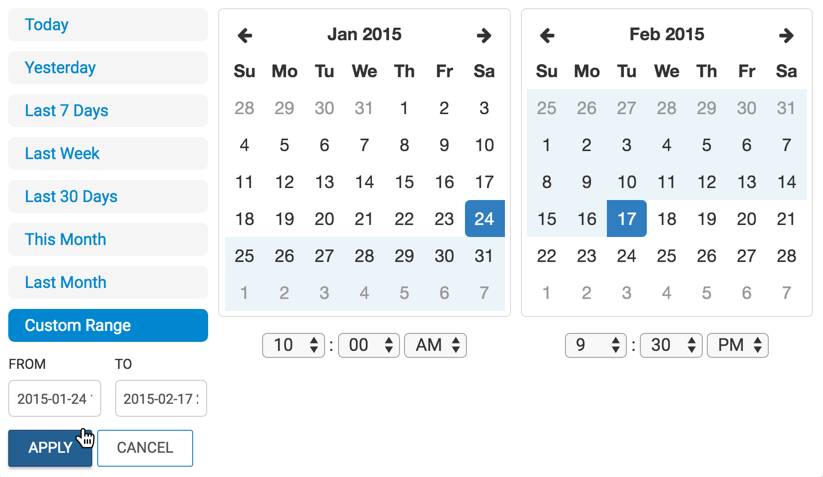
Note the selection options in date range/calendar interface:
- Pre-set ranges, such as Today, Yesterday, Last 7 Days, Last Week, Last 30 Days, This Month, and Last Month.
- Custom Range, that can be configured either through the FROM and TO entry boxes, or by manipulating the calendar widgets
- Time of Day control for beginning and end of the time period.

-
Click Apply.
-
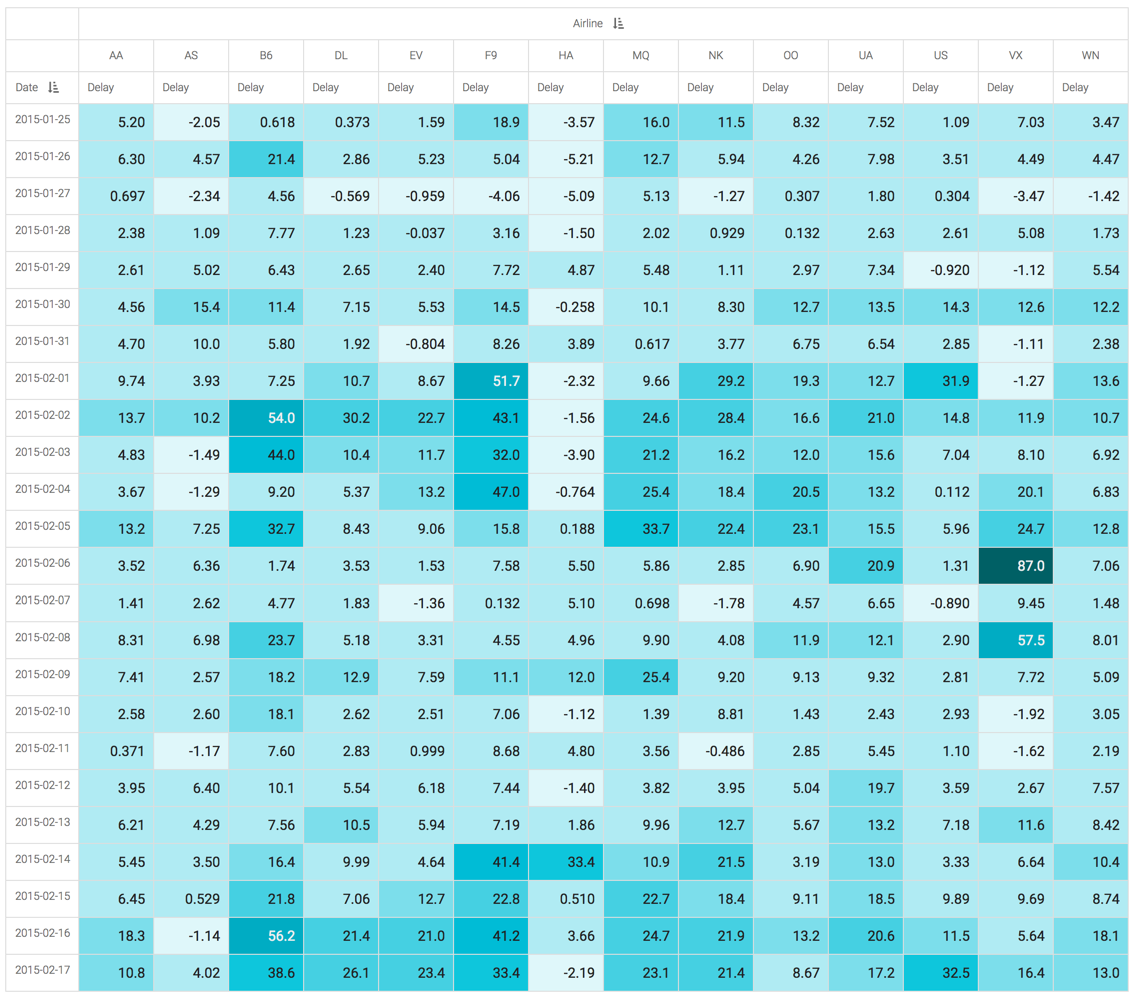
After clicking Refresh Visual, the updated visual
appears. Note the range of dates we specified in the previous step.