Creating a workspace
In addition to the standard public workspace that is shared by all users, and the single private workspace that each user has, you can create custom workspaces in Cloudera Data Visualization. Custom workspaces can provide you a designated area to collaborate and organize visual elements. Workspaces can be tailored to specific user groups or business lines for efficient dashboard development and viewing.
Workspaces may be shared with specific users and user groups to develop and view dashboards that are inherently useful to their line of business. Within each of these workspaces, each user has a defined access level: View Only, Edit, or Manage.
For information about the different types of workspaces, see Workspaces in Cloudera Data Visualization.
-
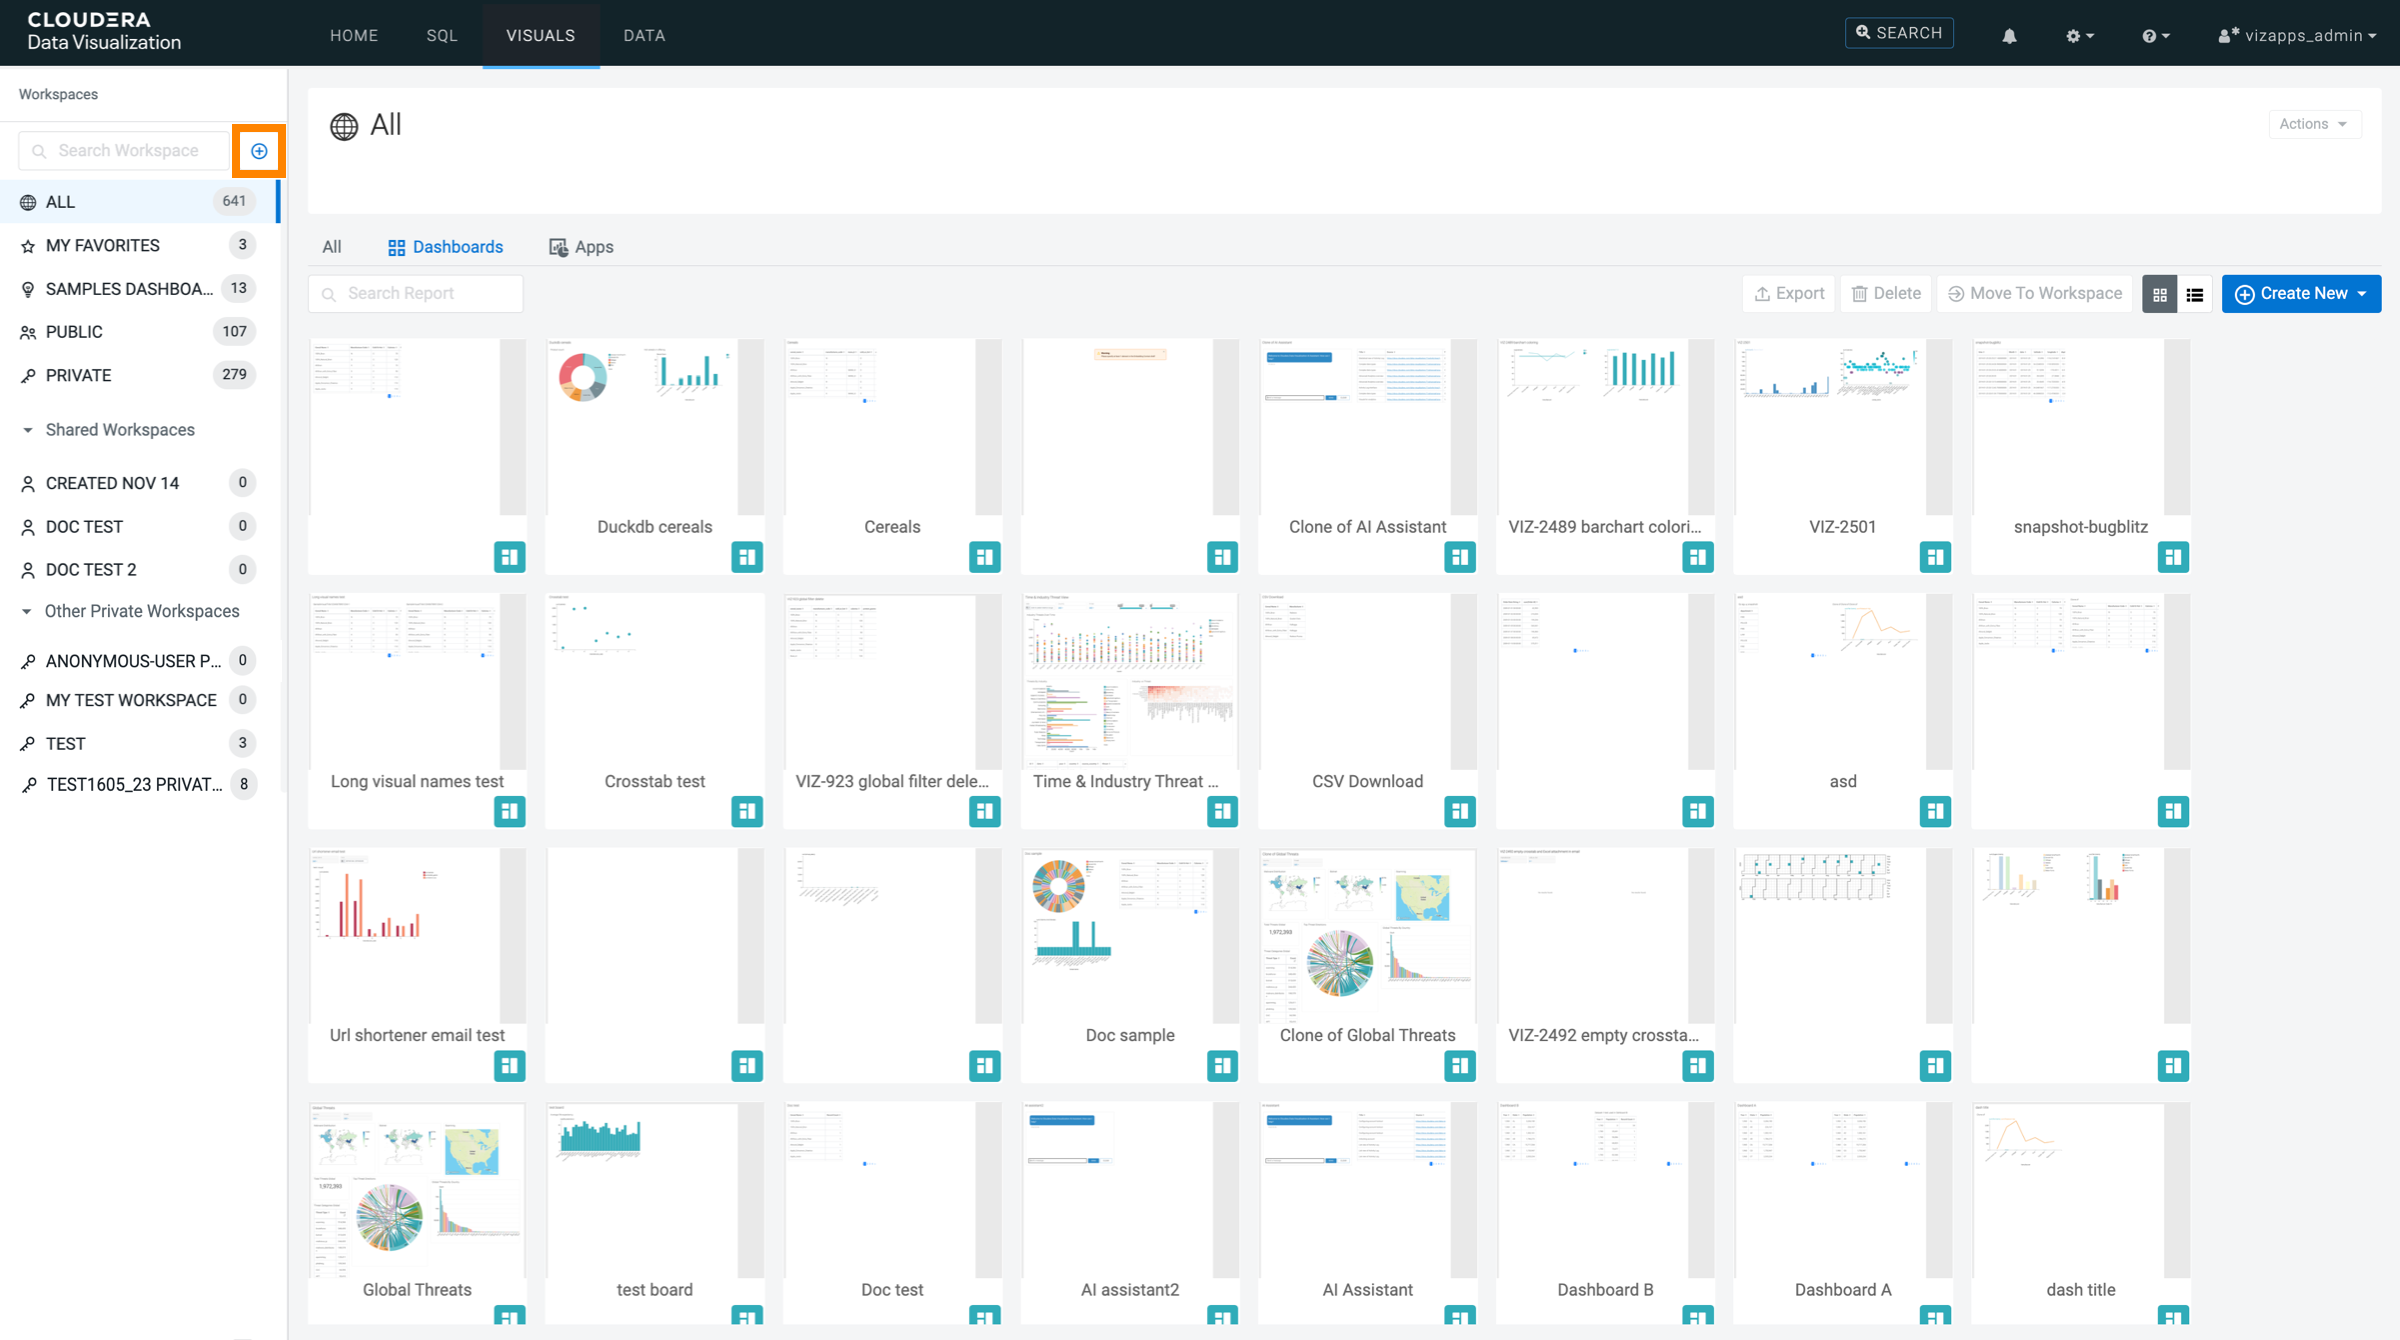
On the left-side menu, click the Plus icon next to the
Search Workspace box.
-
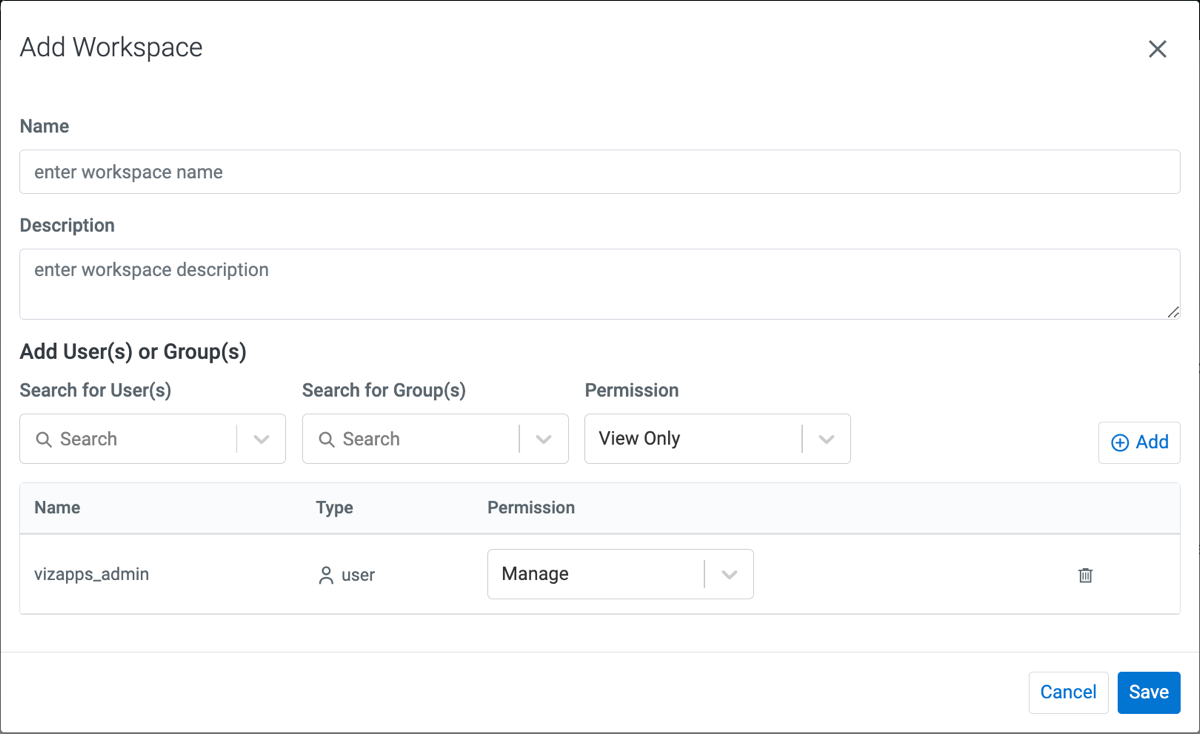
In the Add Workspace modal window, enter the name of the new
workspace.
Optionally, you can also provide a short description for the workspace.