
Setting connection privileges
Connection privileges are integral components of the Role-Based Access Control (RBAC) system in Cloudera Data Visualizationn. These privileges can be configured uniformly across multiple connections or customized for each connection, based on specific business requirements.
Follow the below steps to add connection-level privileges to a role, using "Test Role 1" as an example.
-
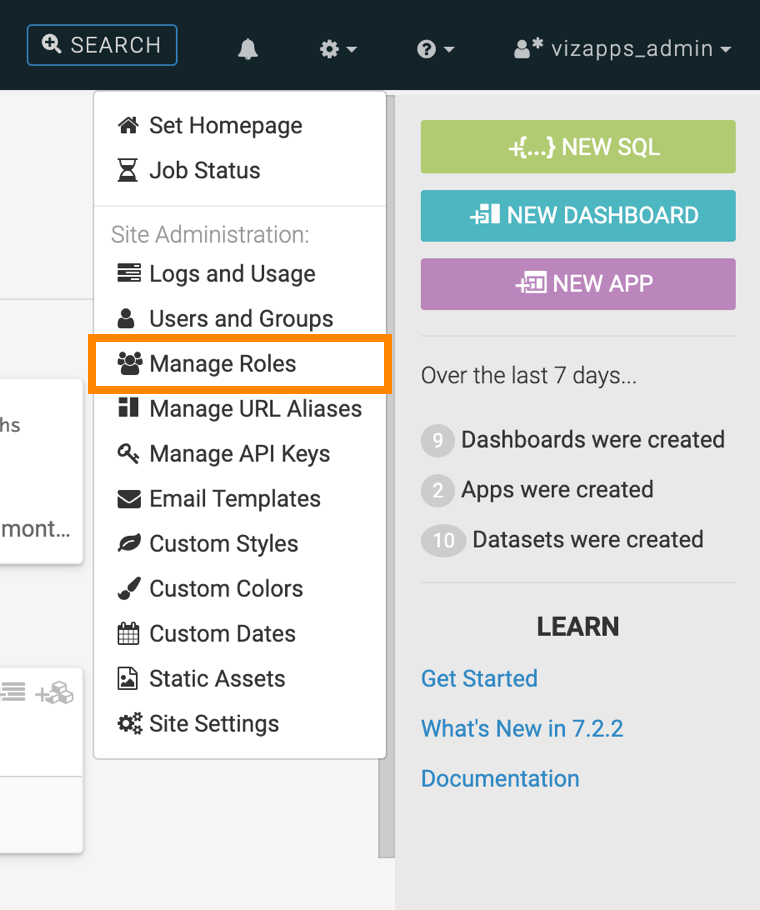
In the drop-down menu, click Manage Roles.
-
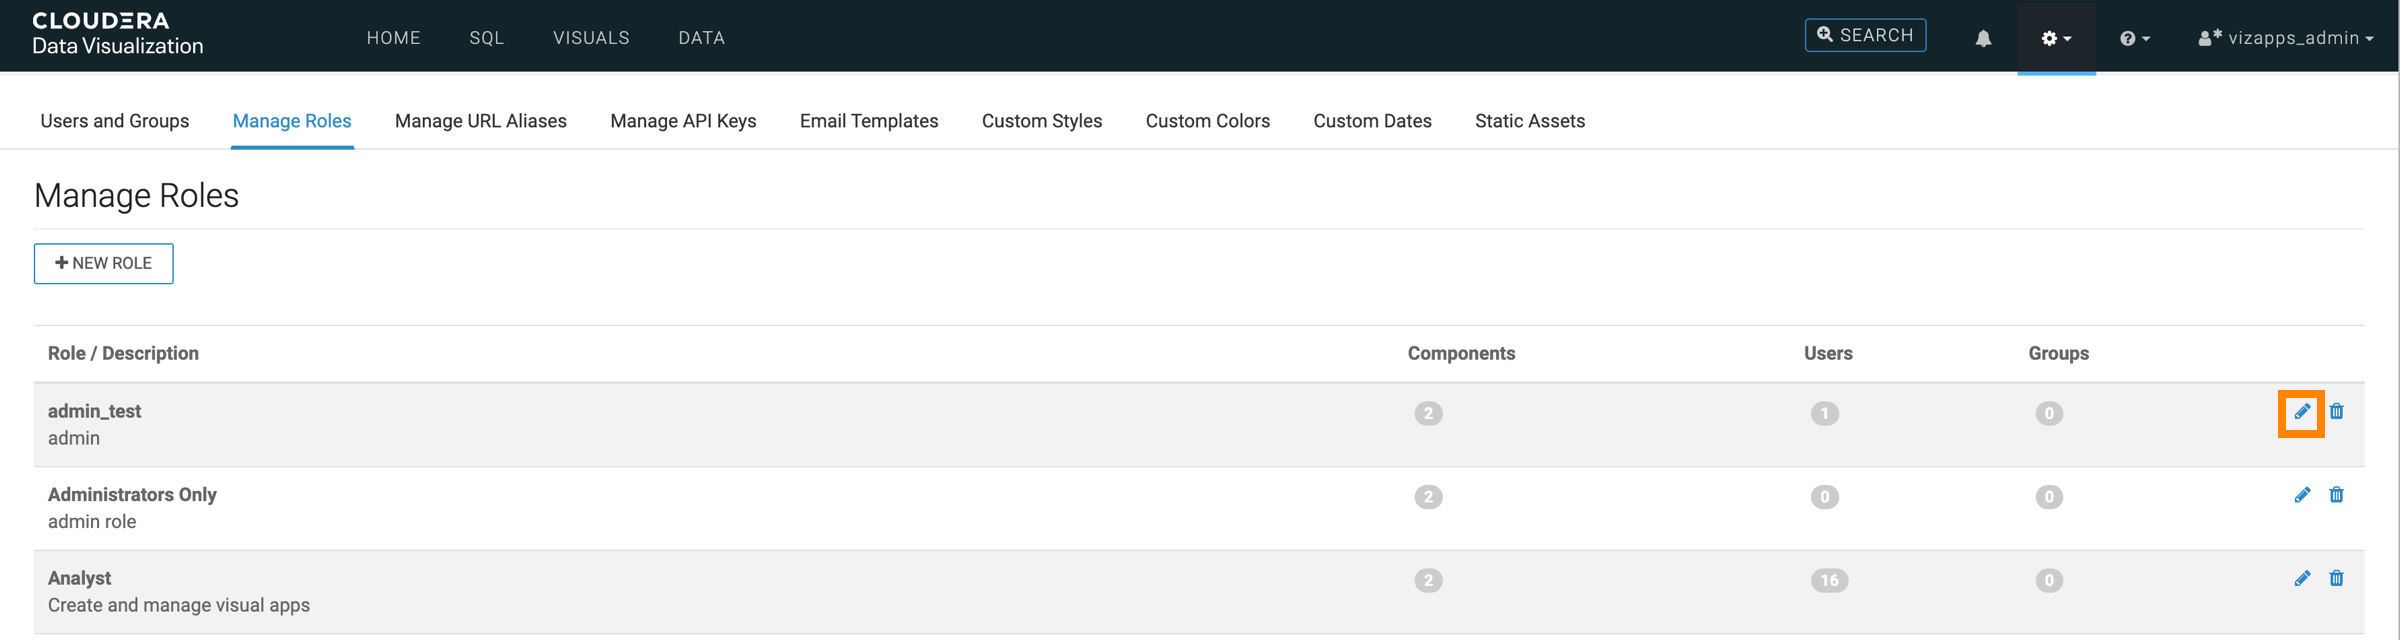
In the Manage Roles interface, find the role you wish to edit
and click the (edit) icon next to the respective role.
You can use the Search Role box to find the role you want to edit.
The Role Detail interface is displayed.
-
Add a new connection by clicking ADD CONNECTIONS.
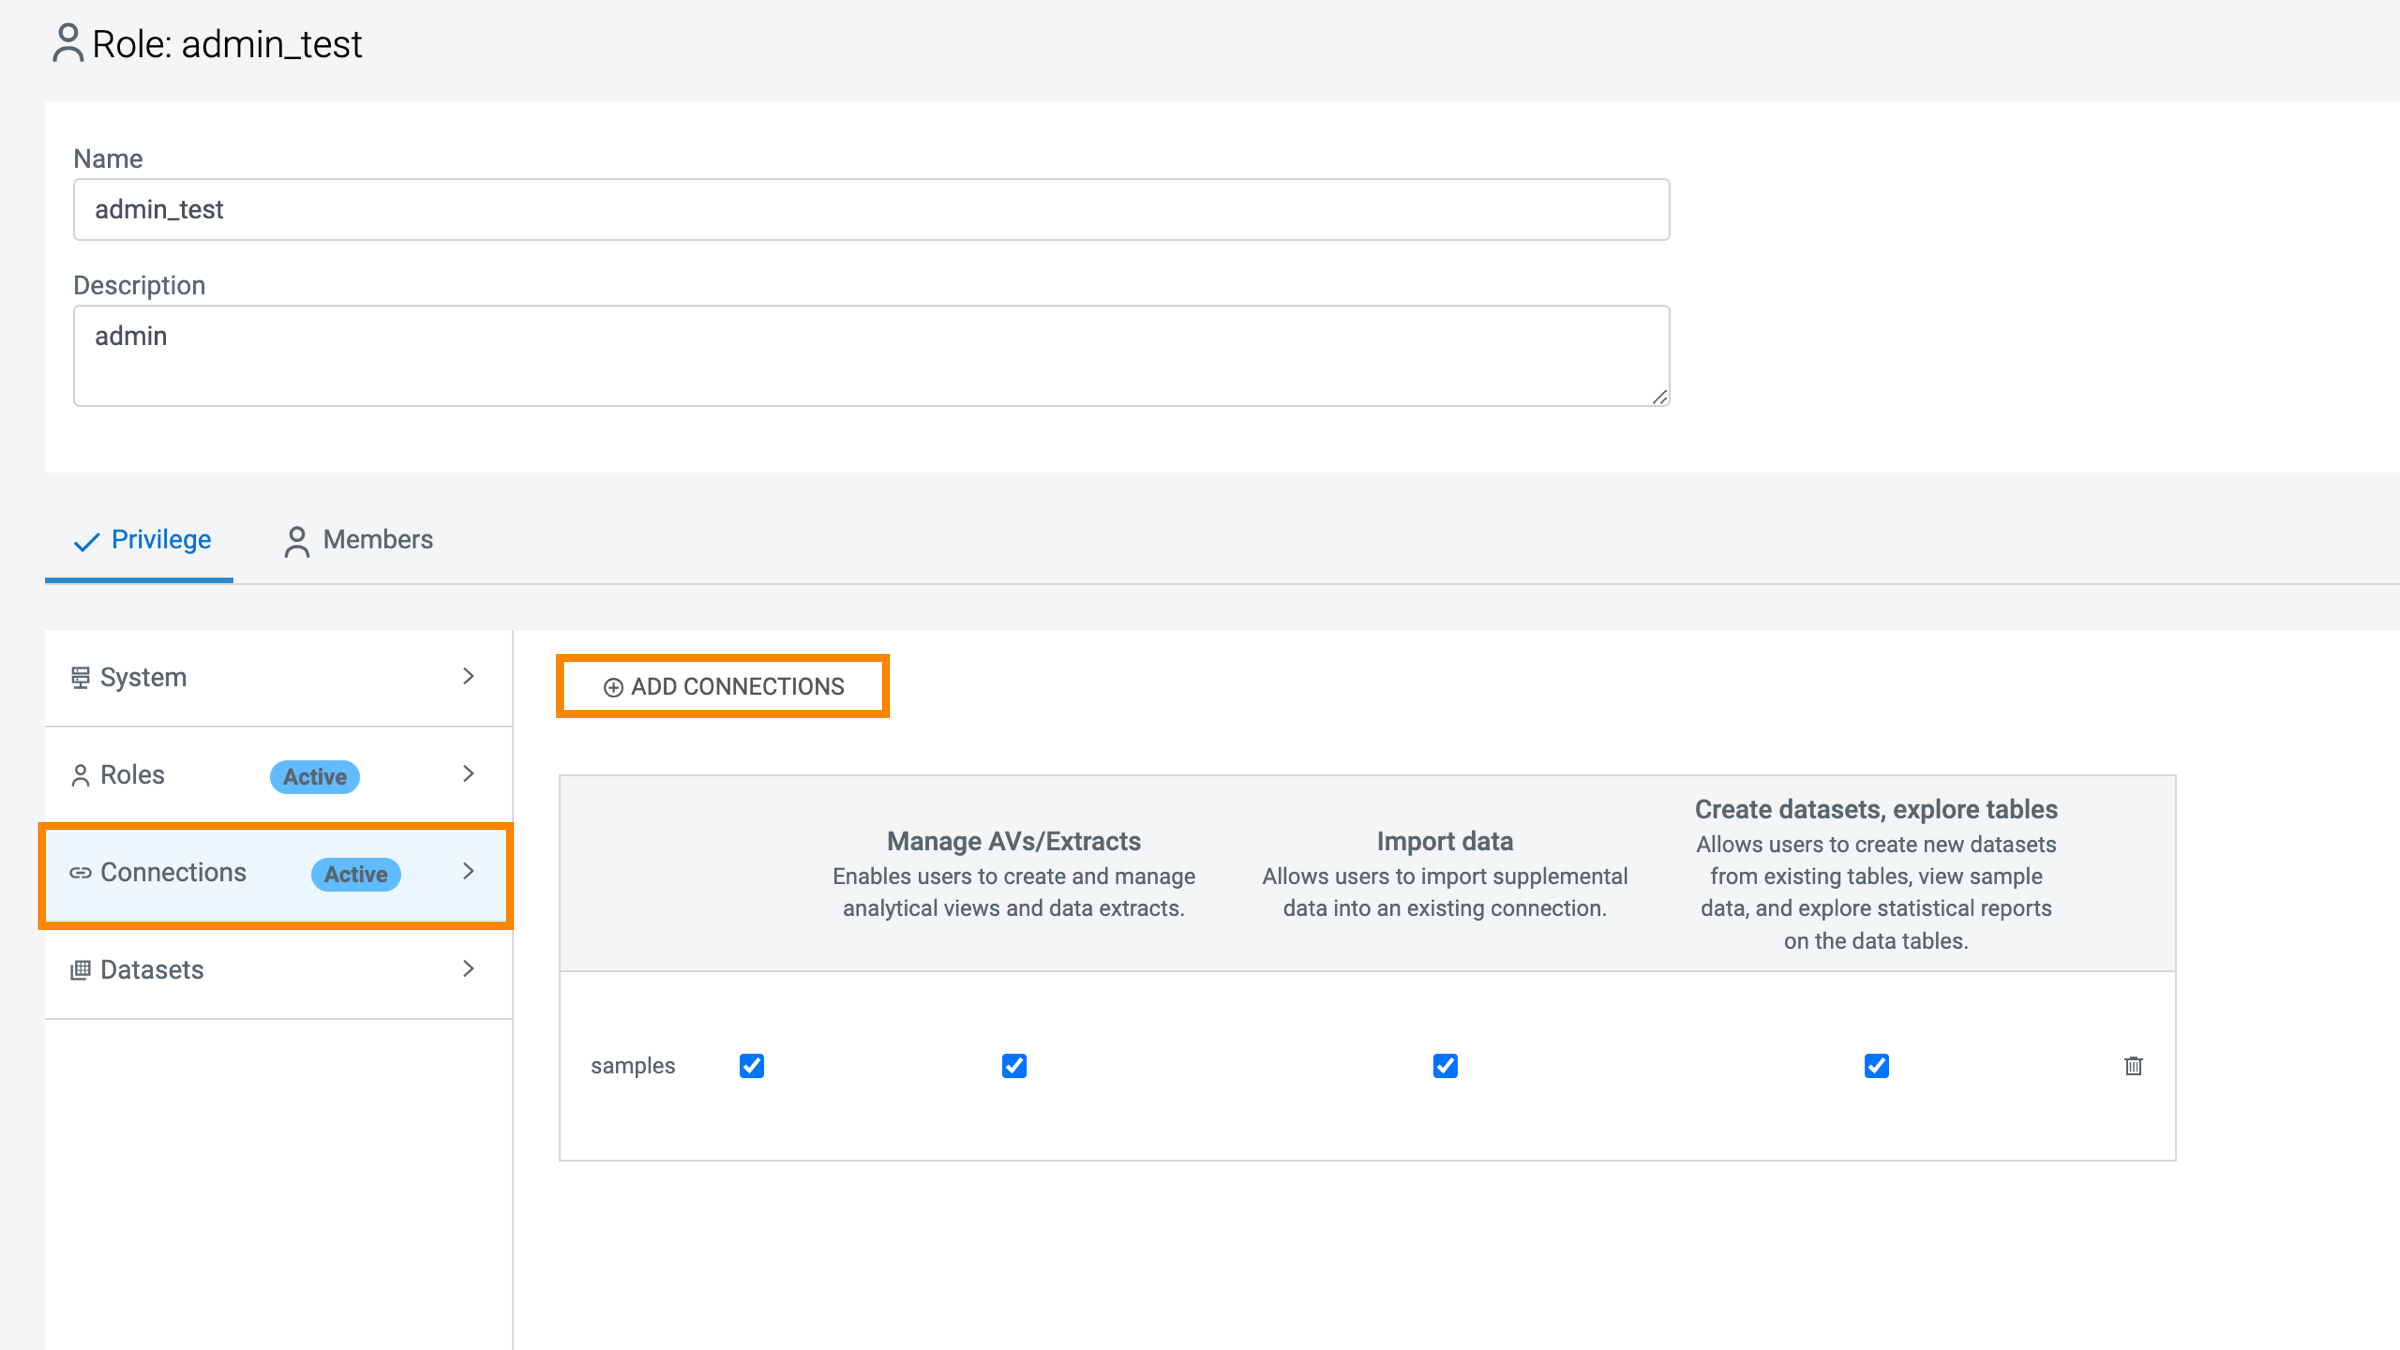
The Add Data connection Privilege modal window appears.
-
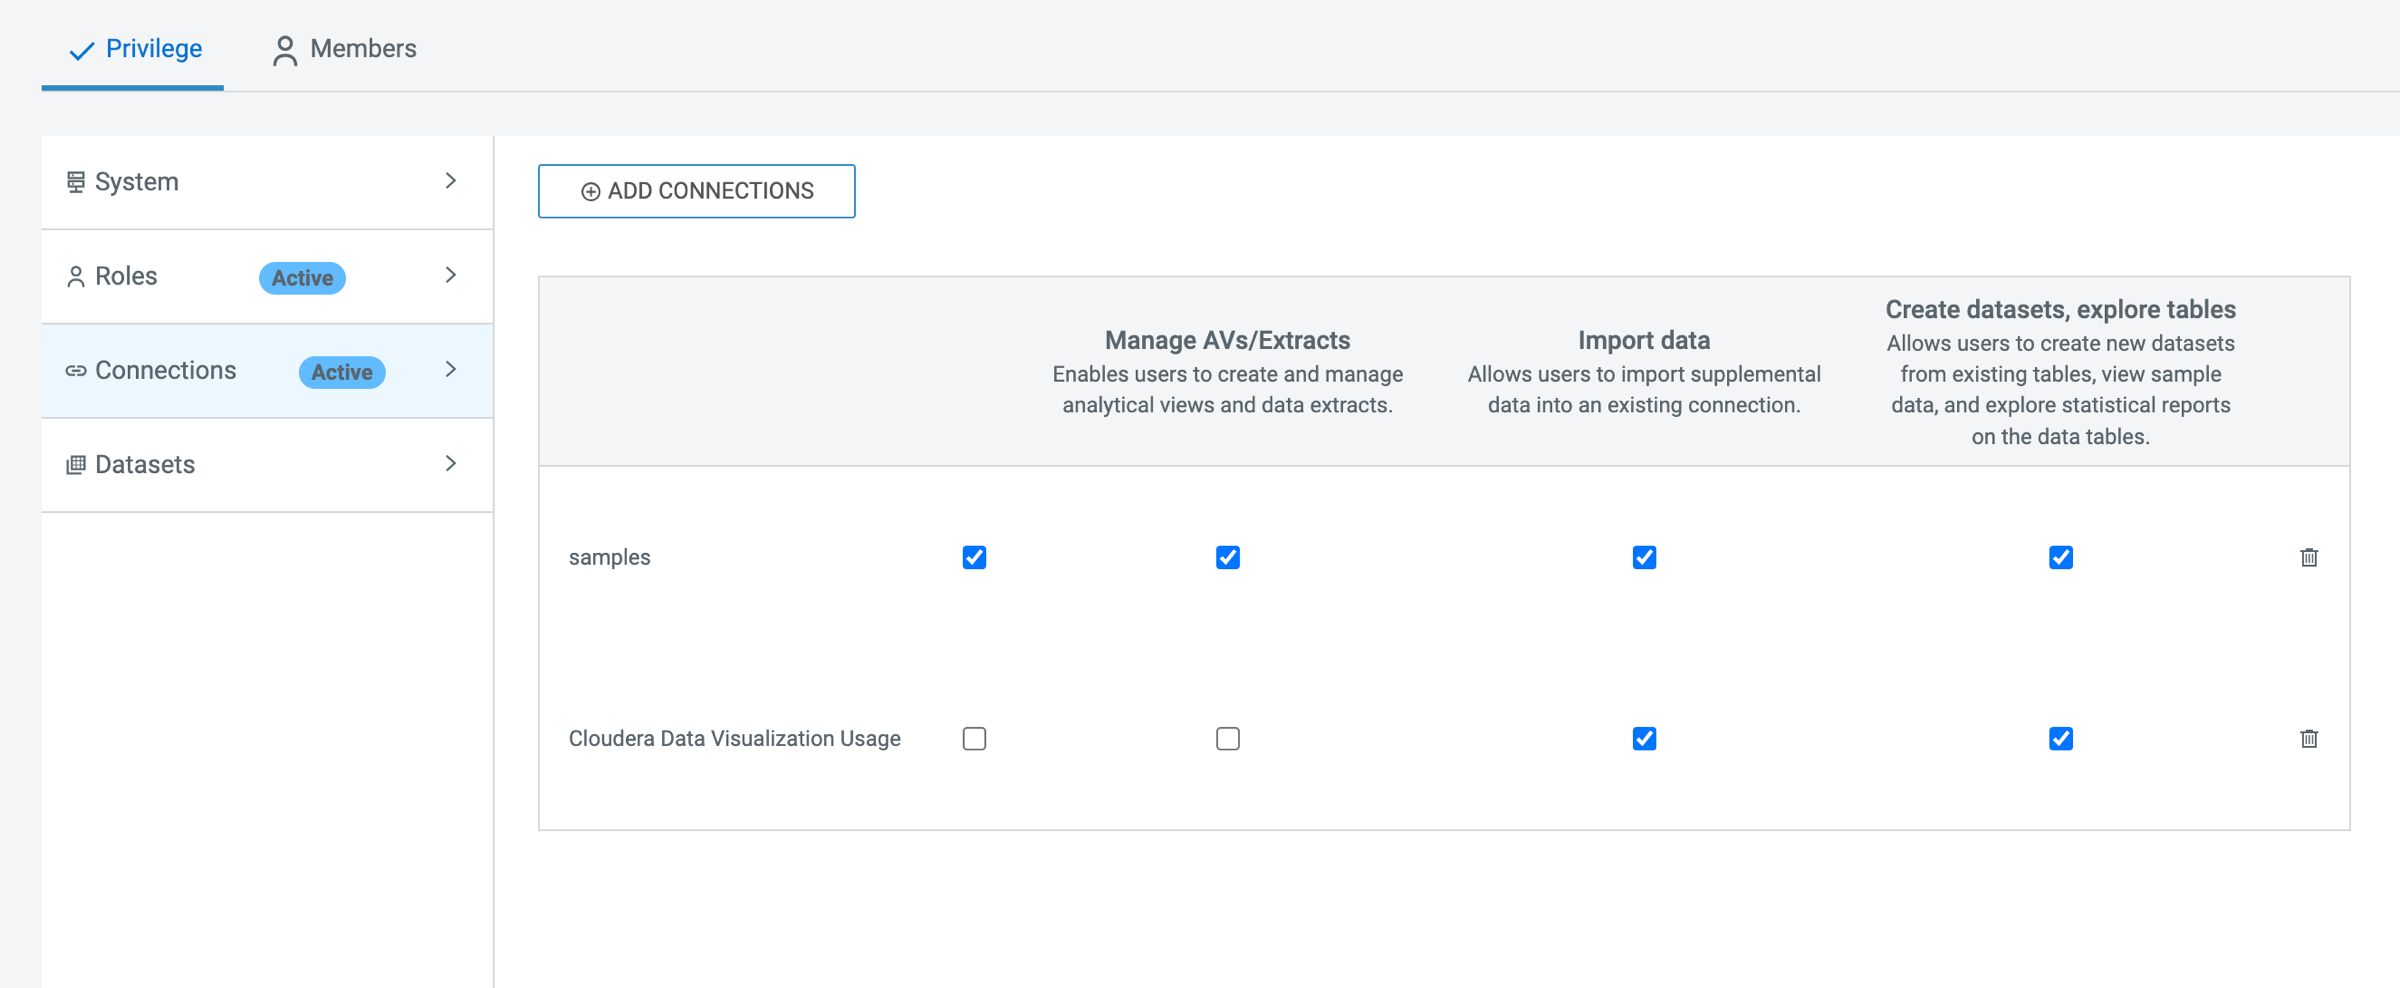
After adding roles and selecting the appropriate role privileges, click
APPLY CHANGES.
For more information on possible permissions, see RBAC permissions.
