Admin API demo examples
Cloudera Data Visualization's URL-based Admin API provides a straightforward way to display the data format for each item type.
The demo has a tab for each enabled item type, and supports all the API functions: Fetch (one), Fetch All, Create, Update, and Delete.
The following examples demonstrate some of the functions available through the demo.
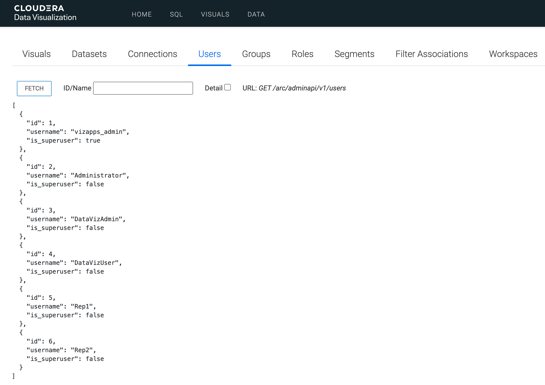
Fetching all user information
To get information on all users, click Fetch. Cloudera Data Visualization returns the list of registered users, as shown in the following screenshot.
Fetching single user information, with detail
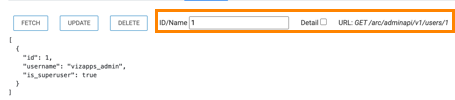
To extract information on a single item using its ID or name, follow these steps:
- Under the Users tab, enter the ID.
- Select the Detail option to get the full data for that item, in this case user ID 1.
- Click Fetch.
Cloning an item
When you clone an item, the resulting screen shows a duplicate of the item but clears the ID. field. For more information, see Creating a new item.
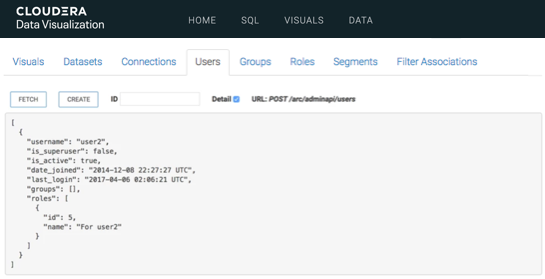
Creating a new item
If you click CREATE immediately after cloning an item, Cloudera Data Visualization returns an error because a user with this name already exists.
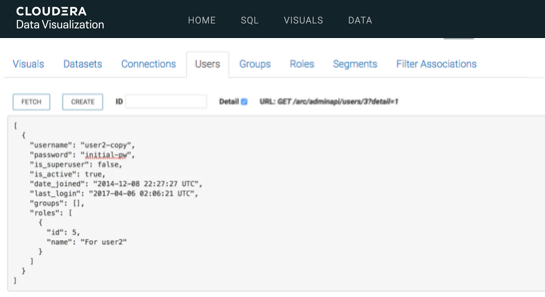
To create a new user, change the username and provide an initial
password. Here is an example in which a new user was created by
changing the username and adding an extra line that
specifies the password:
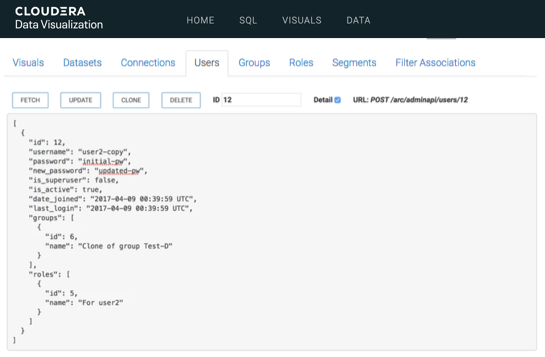
"username": "user2-copy",
"password": "initial-pw",
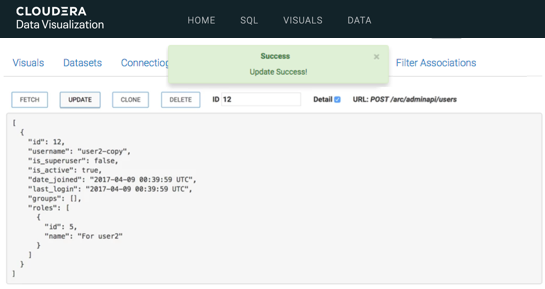
Click Create again. Cloudera Data Visualization notifies you that the update is successful and refreshes the interface to show the results, consistent with fetching detailed information for a specific user, as described in Fetching single user information, with detail.
Changing passwords
To change a user's password, you must supply both the current password
(password) and the new password
(new_password).
Edit the user detail by adding the following lines of code and click UPDATE.
"password": "initial-pw",
"new_password": "updated-pw",