Assigning users to groups

Depending on your installation/migration scenario and security configuration, you may already have the required users, and they may already be assigned to the correct groups.

To continue our example, you can see how to create new users and assign them to the groups. Appropriate group membership automatically endows the user with the required role.

The following steps demonstrate how to create the necessary users and assign them to user groups in Cloudera Data Visualization.

  1. On the main navigation bar, click Gear the icon.
  2. Select Users & Groups
  3. In the Manage Users & Groups interface, click New User.
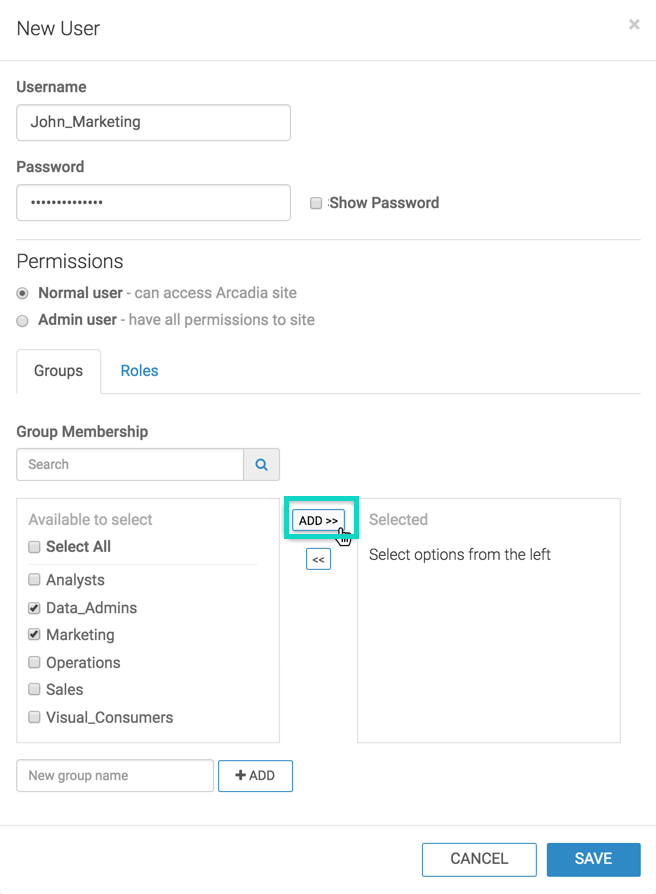
  4. In the New User modal window, enter the following information:
    • Name: John_Marketing
    • Password: password of your choice.
    • Permissions: Select Normal user.
    • Under Groups tab, select Data Admin and Marketing.
  5. Click ADD to move these groups to the right column, and then click SAVE.

    In this process, you will not assign users to roles directly, but through the group membership only.

  6. Repeat the previous steps to create new users and assign groups to them, according to the following information. This is a minimal set of users that 'populates' each role. You can have multiple users assigned to the same groups.
    Table 1. Users and their group assignments
    Role Name Assigned groups
    John_Marketing
    • Data_Admins
    • Marketing
    Kate_Marketing
    • Analysts
    • Marketing
    Lauren_Marketing
    • Visual_Consumers
    • Marketing
    Adele_Sales
    • Data_Admins
    • Sales
    Beyonce_Sales
    • Analysts
    • Sales
    Cher_Sales
    • Visual_Consumers
    • Sales
    Xuong_Operations
    • Data_Admins
    • Operations
    Yoneda_Operations
    • Analysts
    • Operations
    Zariski_Operations
    • Visual_Consumers
    • Operations

After completing these steps, review the list of users to verify the assigned roles.