Creating a Cloudera AI data connection to Impala
Learn how to connect natively to data stored in Impala when using Cloudera Data Visualization in Cloudera AI.
Before you start using data modeling and visualization functions, you must connect to your data. The following steps show you how to create a new Cloudera AI data connection in Cloudera Data Visualization to an Impala data warehouse.
When you create a connection, you automatically get privileges to create and manage the associated datasets. You can also build dashboards and visuals within these datasets.
- For more information on the Manage data connections privilege, see RBAC permissions.
- For instructions on how to define privileges for a specific role, see Setting role privileges.
- For instructions on how to assign the administrator role to a user, see Promoting a user to administrator.
If you are using a Cloudera Private Cloud Base cluster running Impala with Kerberos for authentication, make sure that Kerberos credentials are configured in Cloudera AI before creating a Cloudera AI data connection to the Impala data warehouse. This ensures seamless integration and authentication between Cloudera Data Visualization and the Impala cluster. If you add Kerberos credentials after launching the Cloudera Data Visualization app, you need to restart the app for the changes to take effect.
For more information on using Kerberos for authentication in Cloudera AI, see Hadoop Authentication for AI Workspaces.
-
On the main navigation bar, click DATA.
The DATA interface opens, displaying the Datasets tab.

-
On the side menu bar, click NEW CONNECTION.
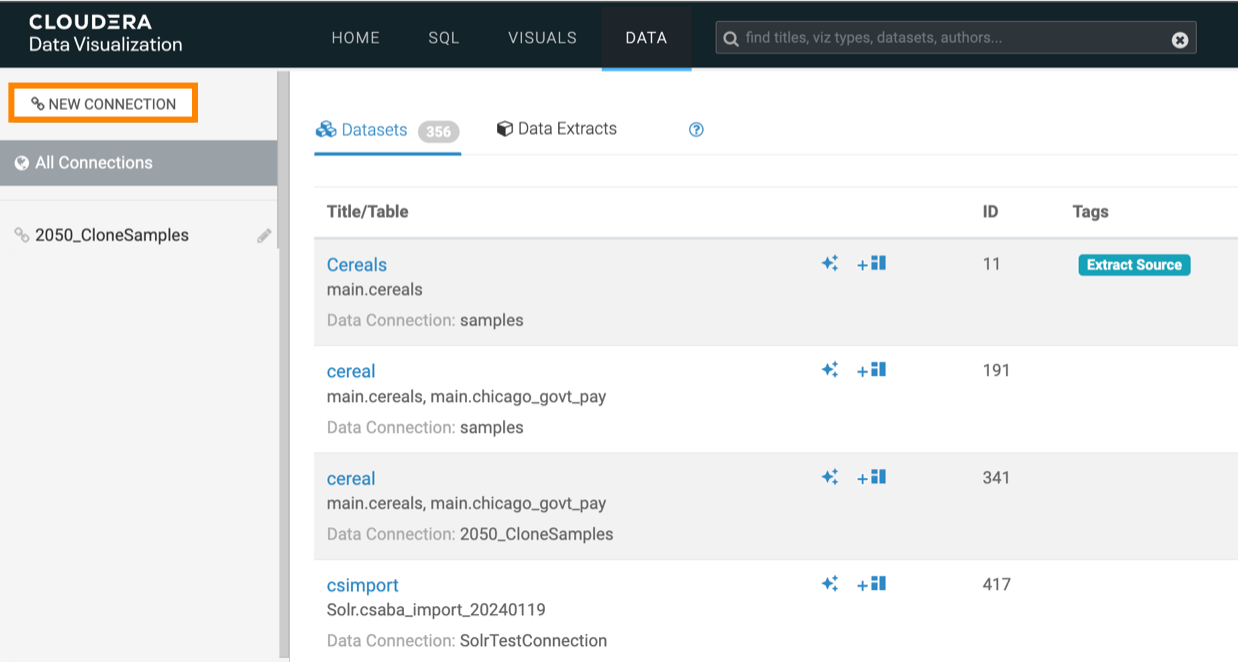
The Create New Data Connection modal window appears.
-
Choose Impala from the Connection type drop-down list and
assign a name to your connection.
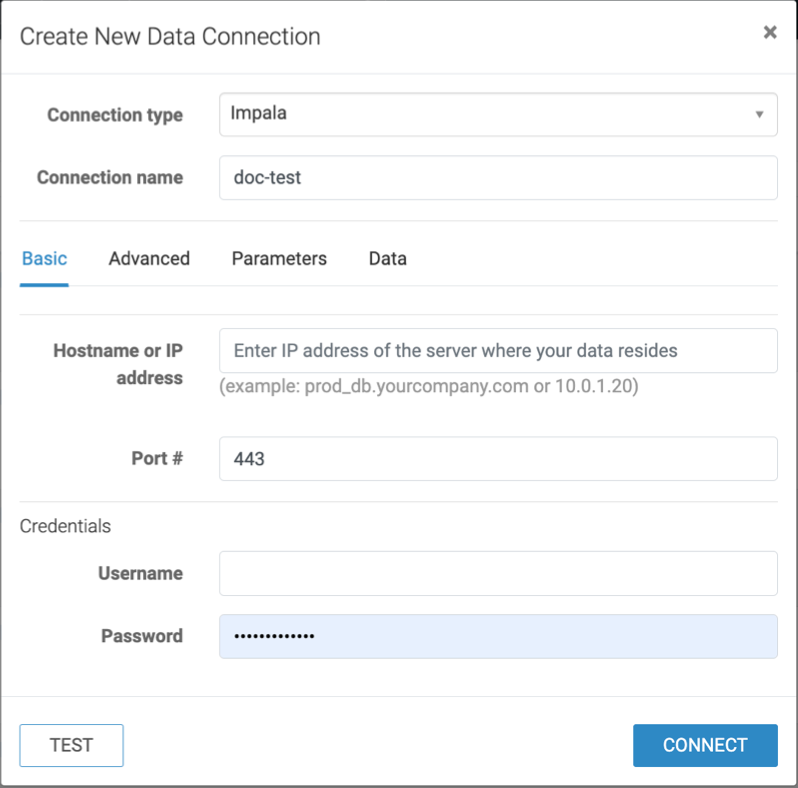
In this example, the Impala connection is made through Knox. Knox always uses TLS encryption and port 443 is the default HTTPS port.
-
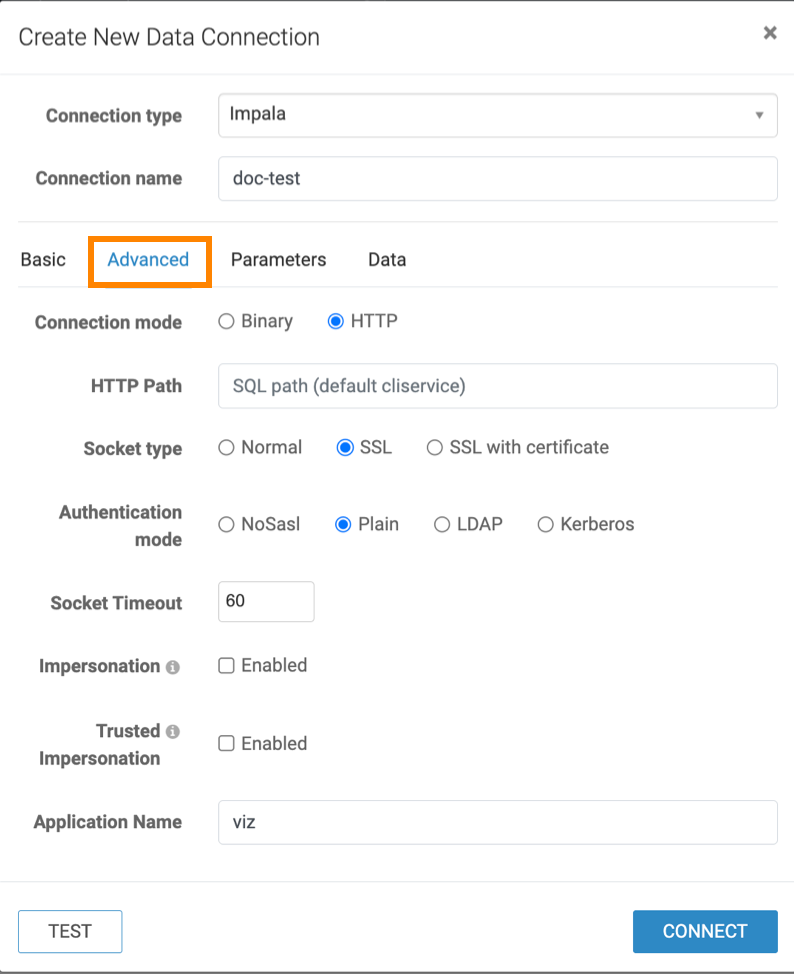
Click the Advanced tab to configure additional details.
-
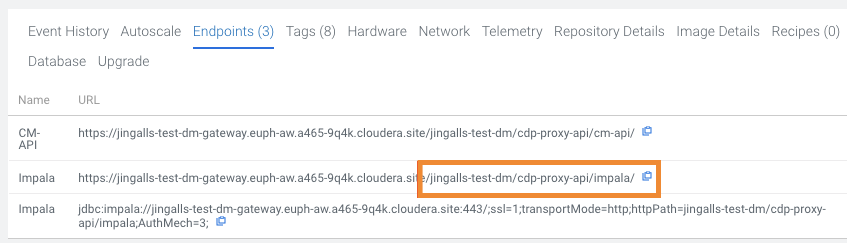
For HTTP connection mode, locate the Impala Endpoint for the Data Hub.
-
For HTTP connection mode, locate the Impala Endpoint for the Data Hub.
-
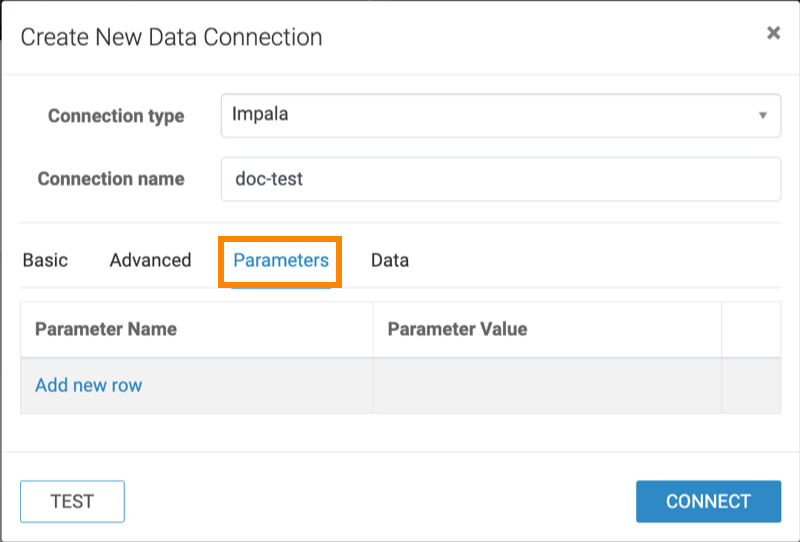
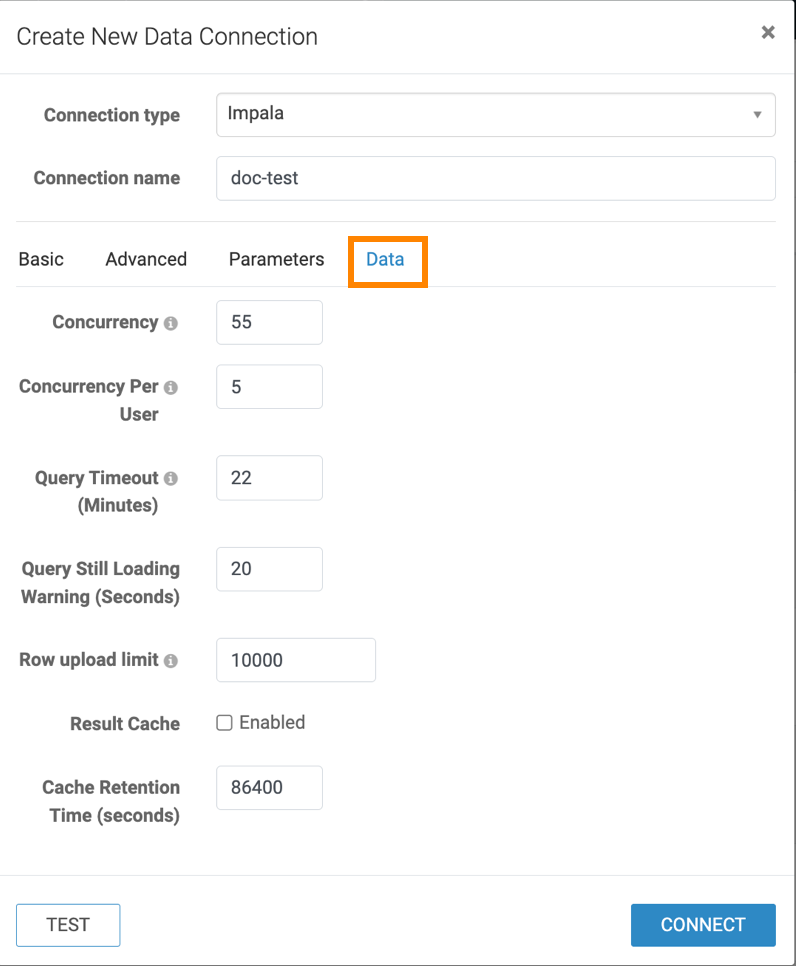
Check the Parameters and Data tabs for
more configuration options.