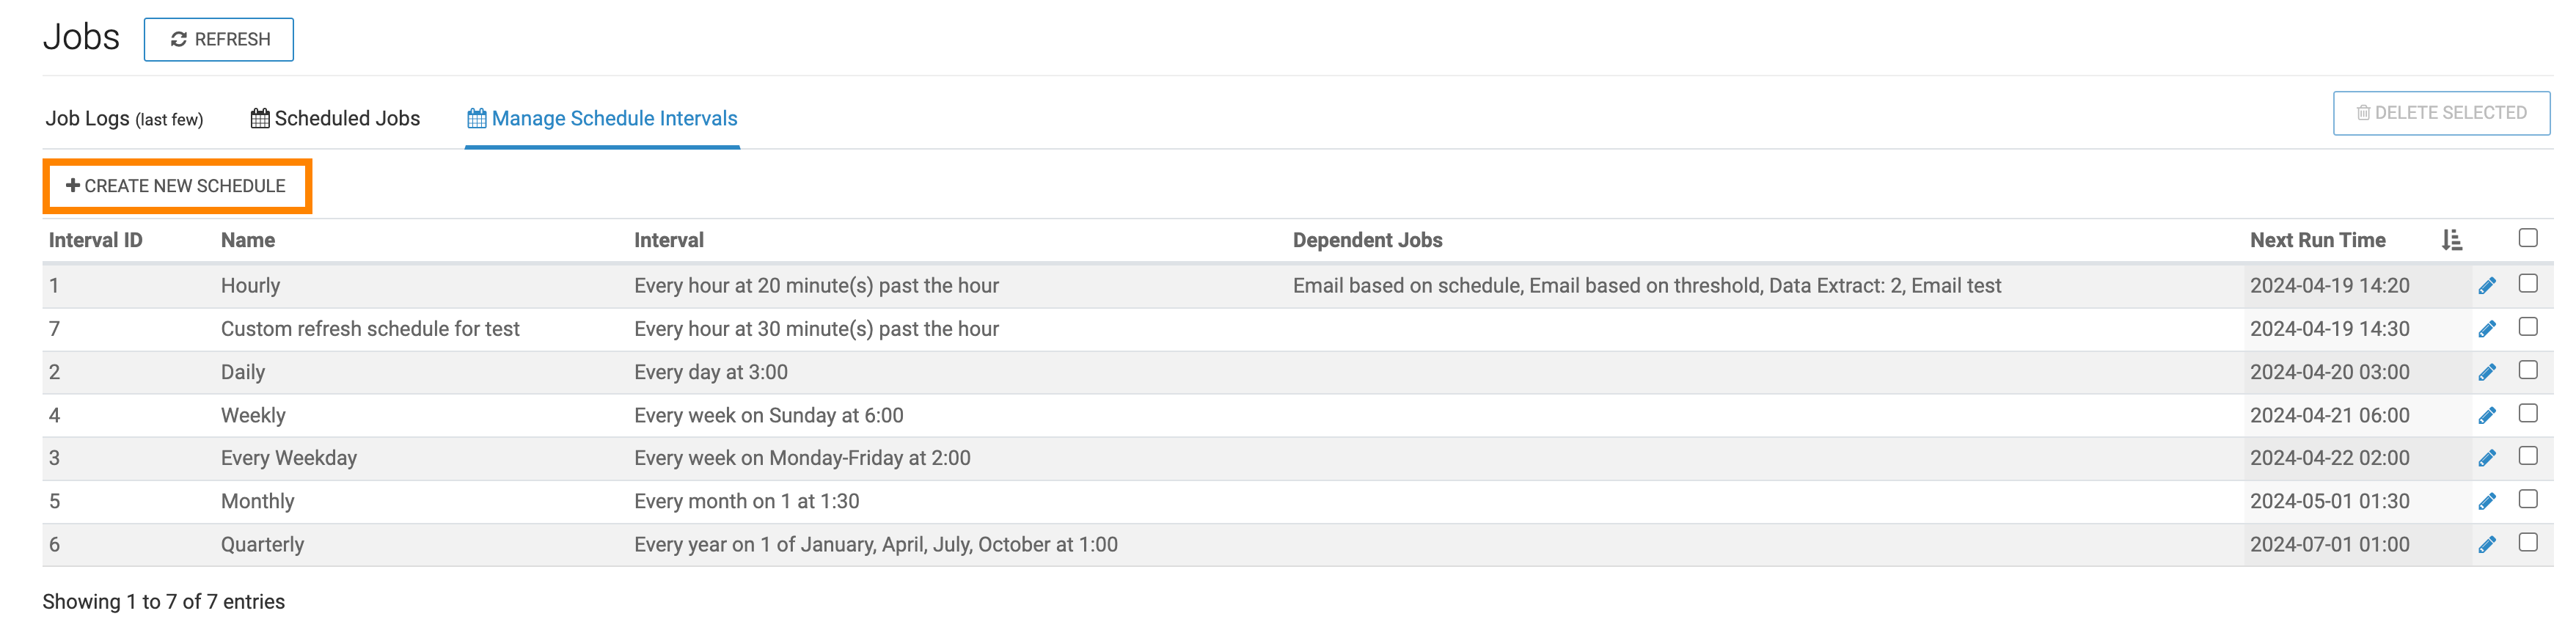
Creating new schedule intervals
Cloudera Data Visualization allows you to create custom schedules for your scheduled jobs.
To create a new schedule that can be used by one or more scheduled jobs, follow the below steps.
You can also create custom schedule intervals when configuring a new scheduled email. These intervals are accessible on the Intervals page, and can be reused for other jobs as well.
-
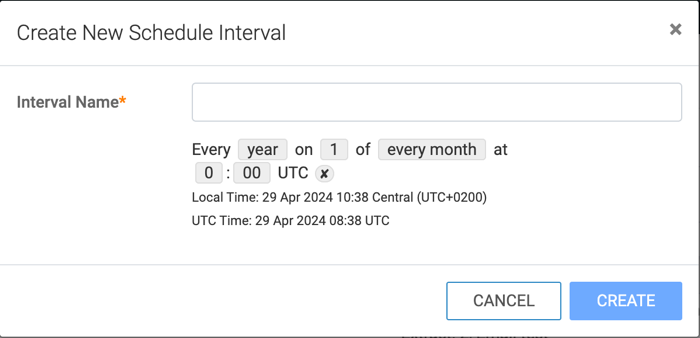
Click Create Schedule Group.
The Create Interval modal appears.