Using fixed dates (date range picker) mode
In Cloudera Data Visualization, using fixed dates in a date filter enables you to select a subset range of dates for visualizing your data.
The following steps show you how to use the date range picker option of a date and time filter. The instructions use a calendar heatmap visual as an example.
- You have created a calendar heat map visual using the SFPD Incidents dataset. For more information on this visual type, see Calendar heatmaps.
- You have added this visual to a dashboard.
-
Under Dimensions, click the
datefield.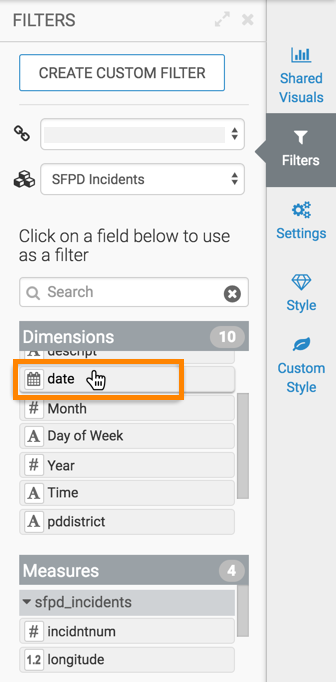
This adds a filter to the dashboard. This filter is based directly on the
datefield and has a timestamp type.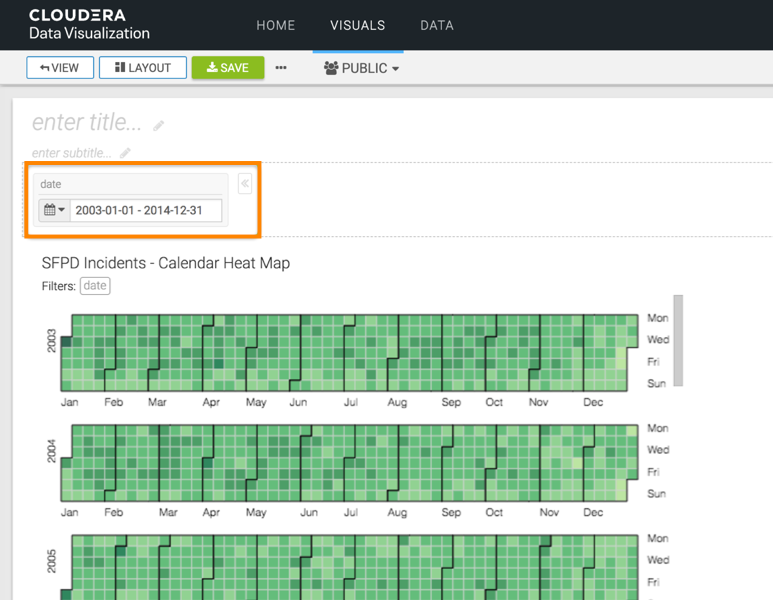
The dashboard filter contains the date range for the entire dataset; in this case, it is from 2003-01-01 through 2014-12-31.
-
To use the date range picker interface, click the Calendar icon
on the filter, and select Fixed Dates from the menu.
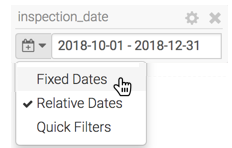
You can also click the date field of the dashboard filter to see the date range picker interface.
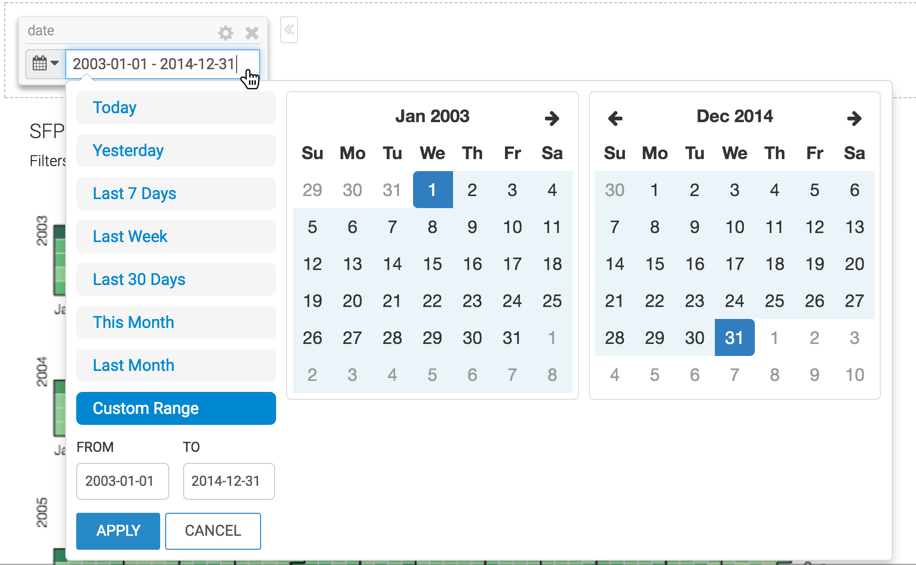
You can change the date range in various ways:
- By selecting the default options:
- Today
- Yesterday
- Last 7 Days
- Last Week
- Last 30 Days
- This Month
- Last Month
- By changing the date entries for FROM and TO fields
- By picking the start and end dates directly on the calendar interface
- By selecting the default options:
-
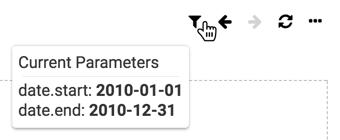
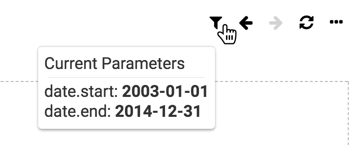
Change the date range to 2010-01-01 through 2010-12-31, and click
APPLY.
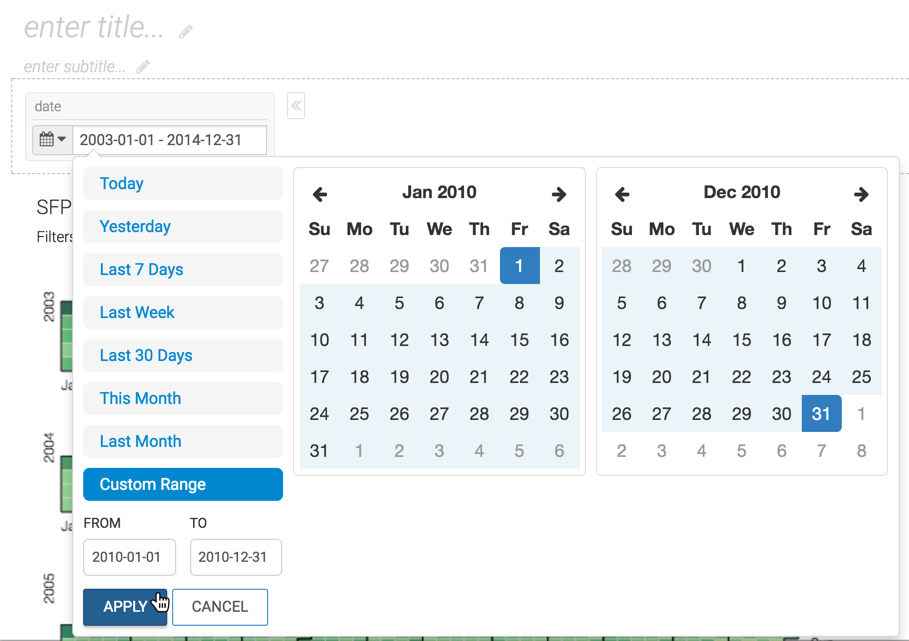
The visual output is now limited to the 2010 calendar year and the application filter shows this new date range.