Creating a join
Learn how you can create new data joins in a dataset in Cloudera Data Visualization.
This example shows you how to create new data joins using the Flight Delays dataset.
-
On the main navigation bar, click DATA.
The Data view opens, displaying the Datasets tab.

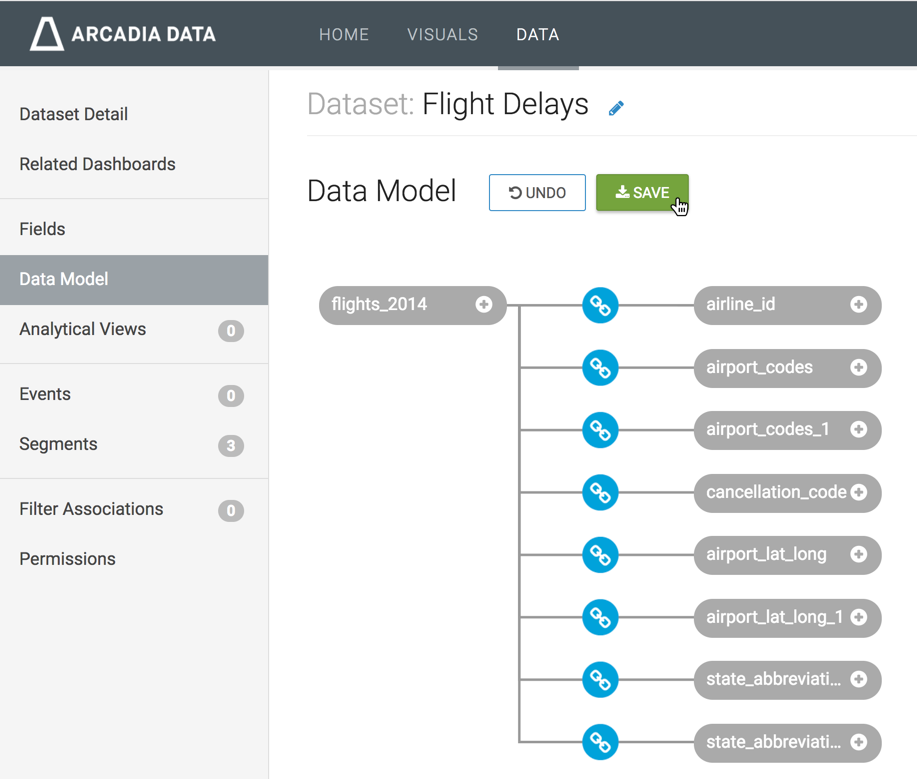
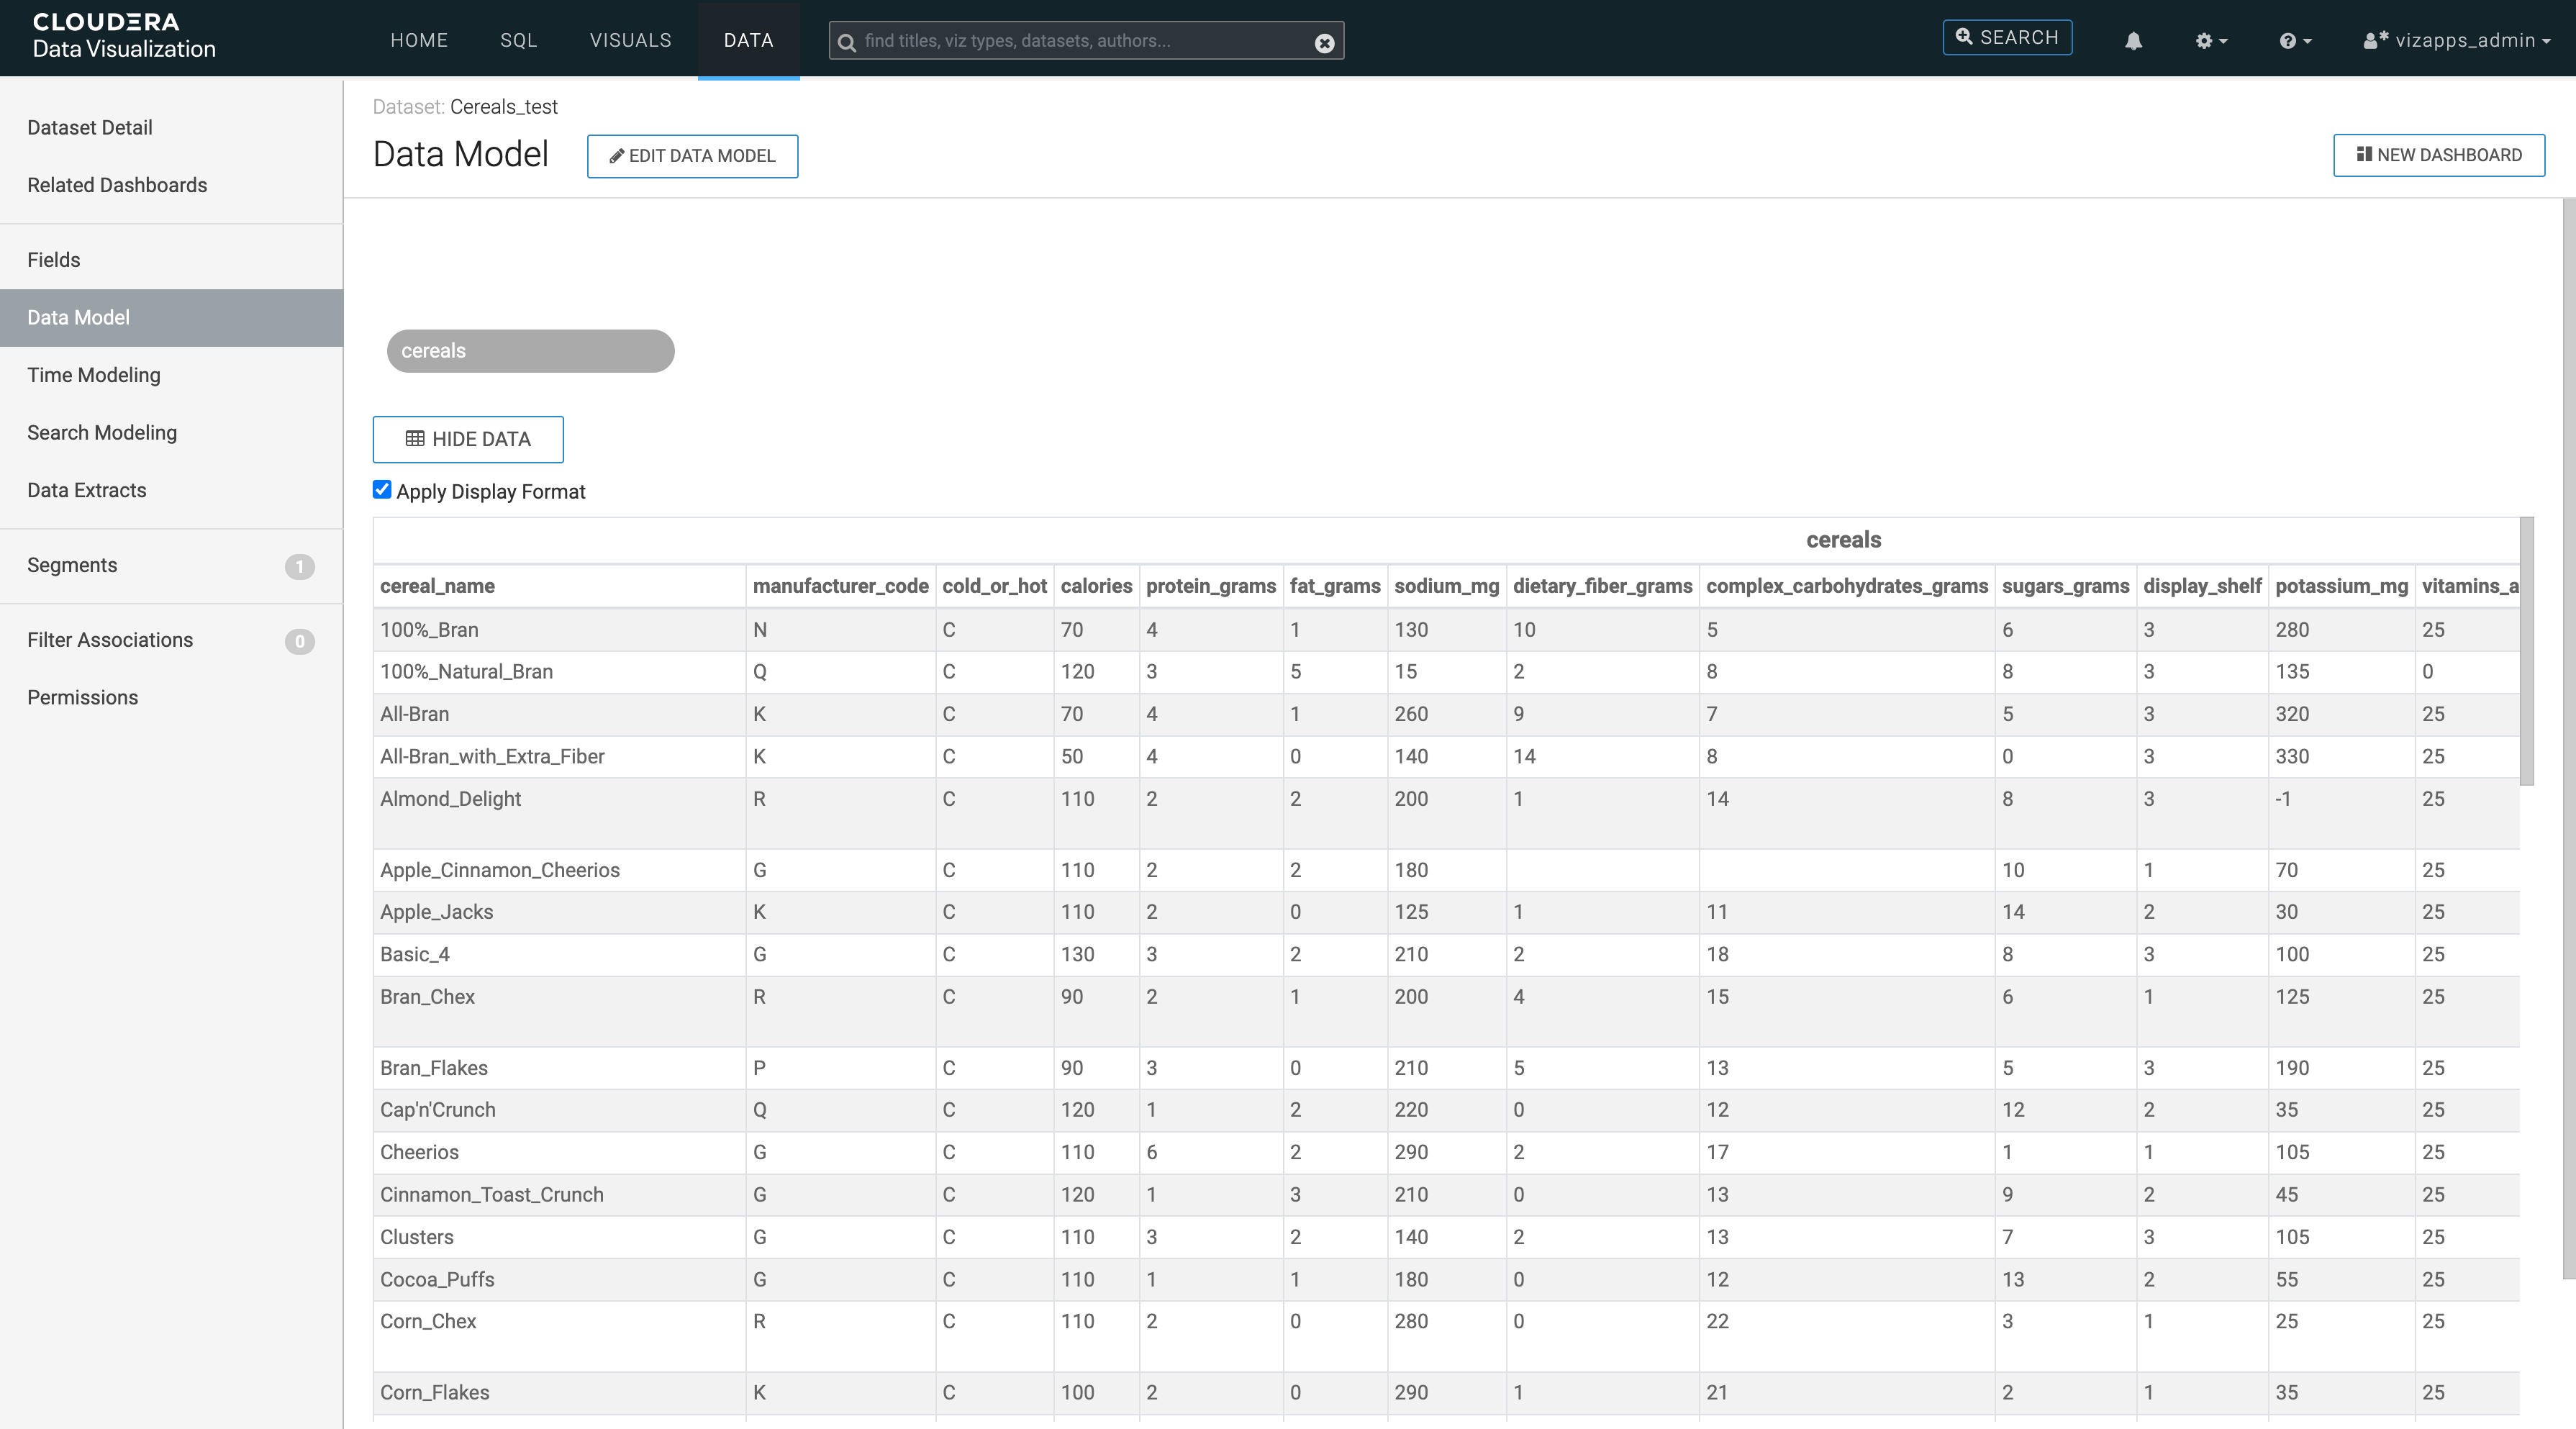
- In the side navigation menu, click Data Model.The Data Model view appears, and shows the name of the only table in the dataset. You may click SHOW DATA to display the data of that table.
-
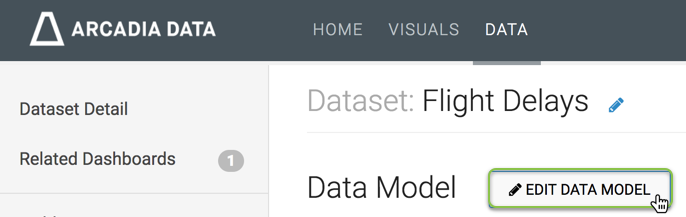
Click EDIT DATA MODEL.
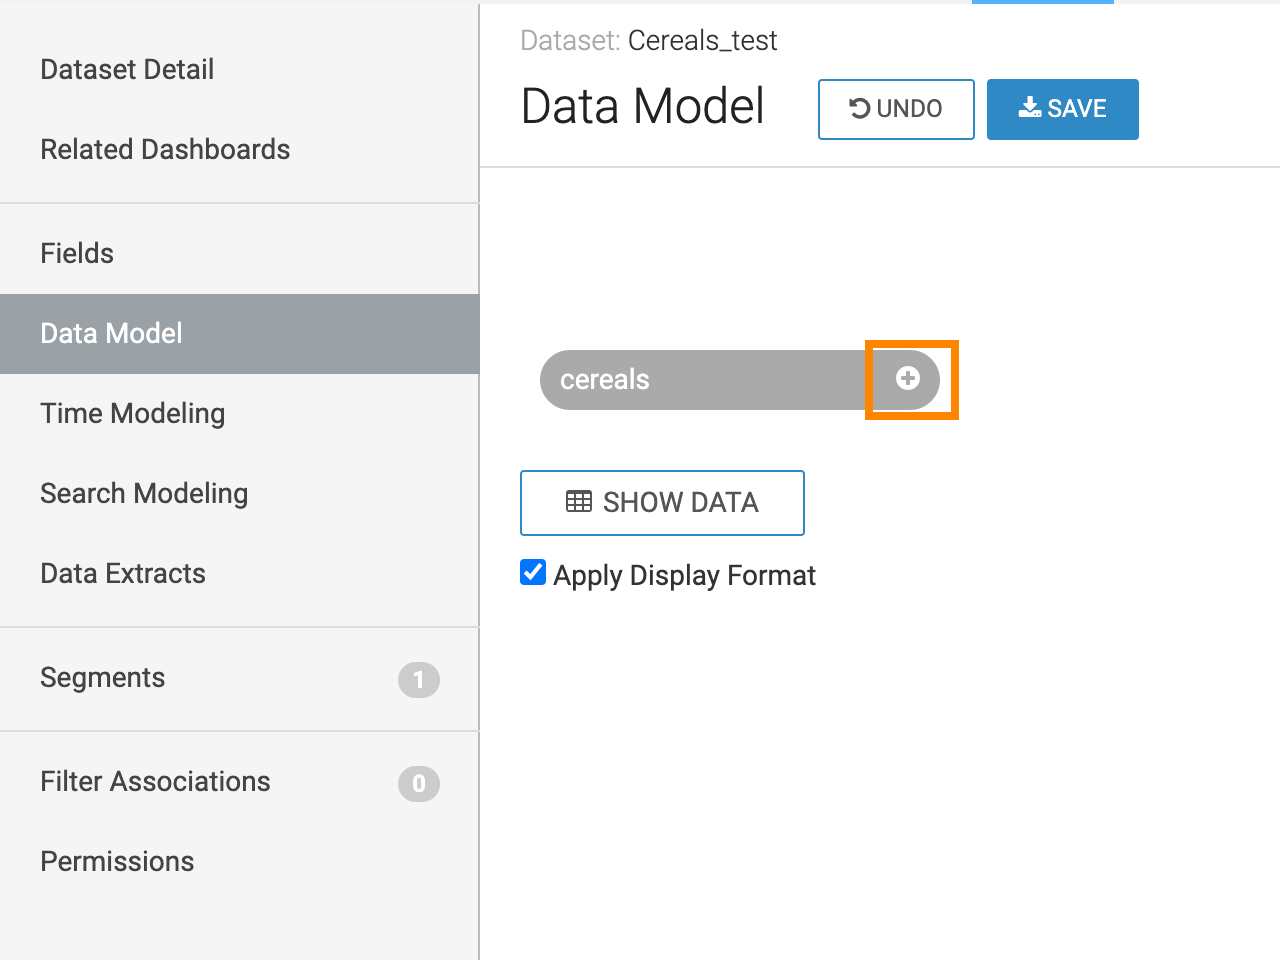
- Click the plus sign on the table representation.
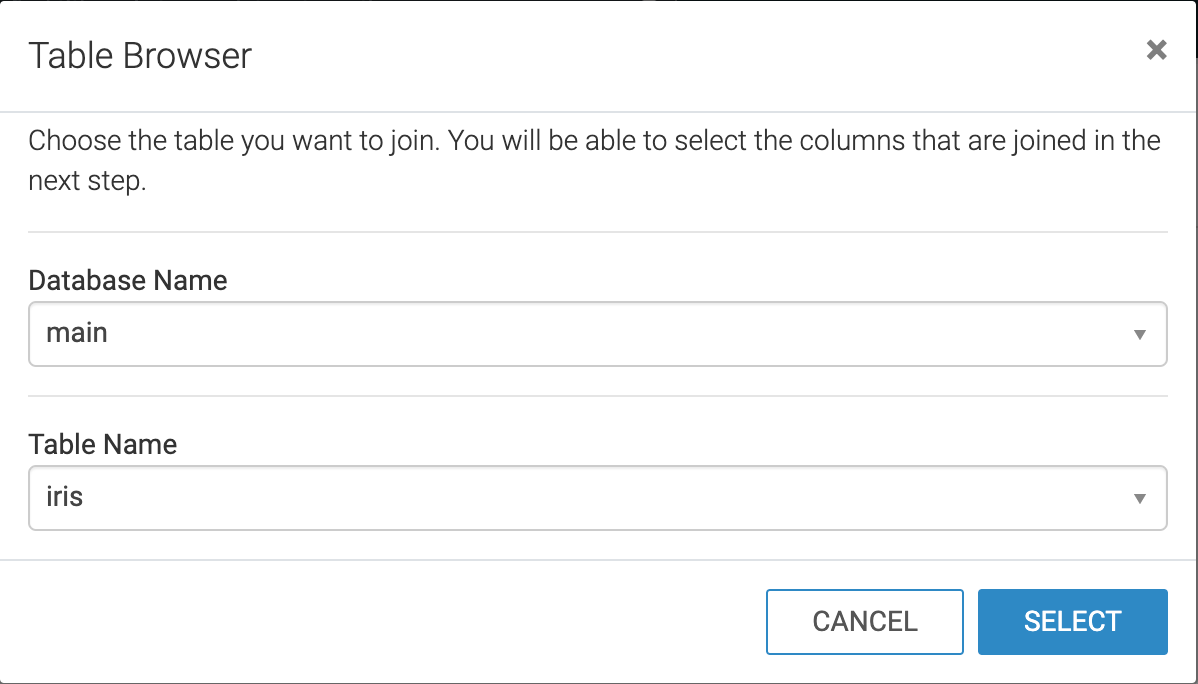
The Table Browser modal window opens.
- In the Table Browser modal window, make the following
selections:
-
In the Database Name selector, choose the database documentation.
-
In the Table Name selector, choose the table name
airline_id.This value is pre-populated to match the existing table of the dataset, but it may be changed.
- Click SELECT.
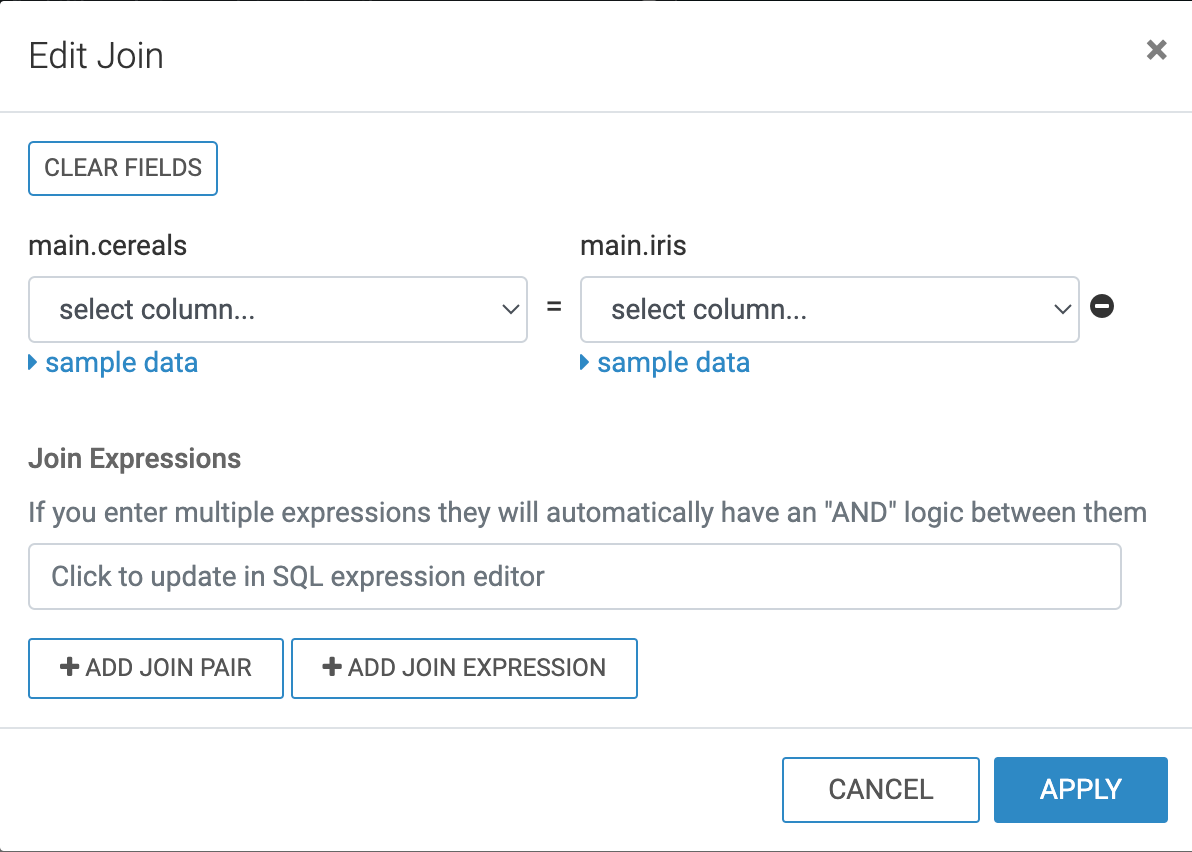
The Edit Join modal window opens.
-
- In the Edit Join modal window, the following options are
available:
- [Optional] Click Clear Fields to clear all already defined joins between the two tables.
- [Optional] Click sample data to preview the data. Click again to hide sample data.
- [Optional] Click Add Join Pair to add another column connection between the same two tables.
- [Optional] Click Add Join Expression to add a join between the two tables based on a custom SQL expression.
- [Optional] Click icon (minus) to remove an existing join pair or an existing join expression.
- [Optional] Under Join Expressions, click the text box to open the Join Expression interface and specify or update a custom SQL expression that defines the join conditions.
- Click APPLY to save the changes.
-
Click SAVE.