Learn how to add data to Cloudera Data Visualization from flat CSV
files.
You can use comma-delimited files or files with other delimiting characters. If you want to
import data stored in Excel format, see Preparing Excel files for data
import.
This feature is available on the following connections:
Enabled by default:
Disabled by default:
SQLite
Hive
Impala
Snowflake [Technical Preview]
Solr [Technical Preview]
Spark SQL
DuckDB
MS SQL
Teradata
On the main navigation bar, click DATA.
The Data view appears, showing the
Datasets tab.
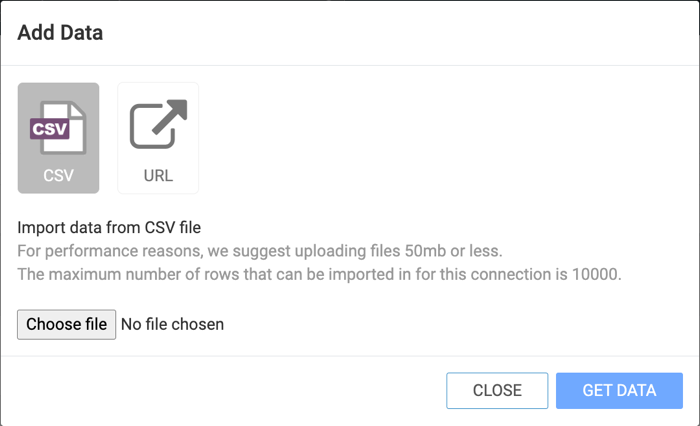
Click ADD DATA.
The Add Data modal window appears.
Add the CSV file that contains the data you want to import.
Select the CSV option and click Choose file.
Using your computer's file browser, locate and select the data file.
Click GET DATA.
In the Imported File modal window, ensure that the data you are
adding is configured correctly.
Verify the name of the file.
Under Database, select which database you want to add data
to.
Under Table Name, specify a table. The system usually
assigns a numerical suffix, which you can remove.
Under Upon Import, select whether you only want to import
data or create a dataset, or create a dataset and a dashboard based on the data.
If you select Create Dataset, you are directed to the
Detail page of the dataset you have created after the
import is completed.
If you select Create Dataset and Dashboard, you are
directed to the newly created dashboard when the import is completed.
For Column Delimiter, define the delimiter used in the
source file. It can be Comma, Tab, Space, Semicolon,
Colon, Pipe, Control A, or Other.
Under Locale Setting, you can select one of the common
locales: United States, United Kingdom, Sweden, Norway. Or
you can select Other to add a separate field next to the locale setting, where
you can specify the supported locale. For more information, see Changing the
locale setting of an imported file.
Under Options, select the data clean-up tasks that Cloudera Data Visualization provides prior to data import. These include
Create "EXTERNAL" table, File contains headers, Fill missing
columns, Skip malformed rows, and Use '\' as escape
character.
In the Data Table preview, each column of the table appears
with its data type and name.
The data types available are Boolean, Integer, Real,
String, and Timestamp.
Cloudera Data Visualization detects
the data type automatically, but you can modify them as needed (for example store
numerical categories as strings).
You can change the name of the table column
before importing.
Click APPLY CHANGES to save the adjustments you have
made.
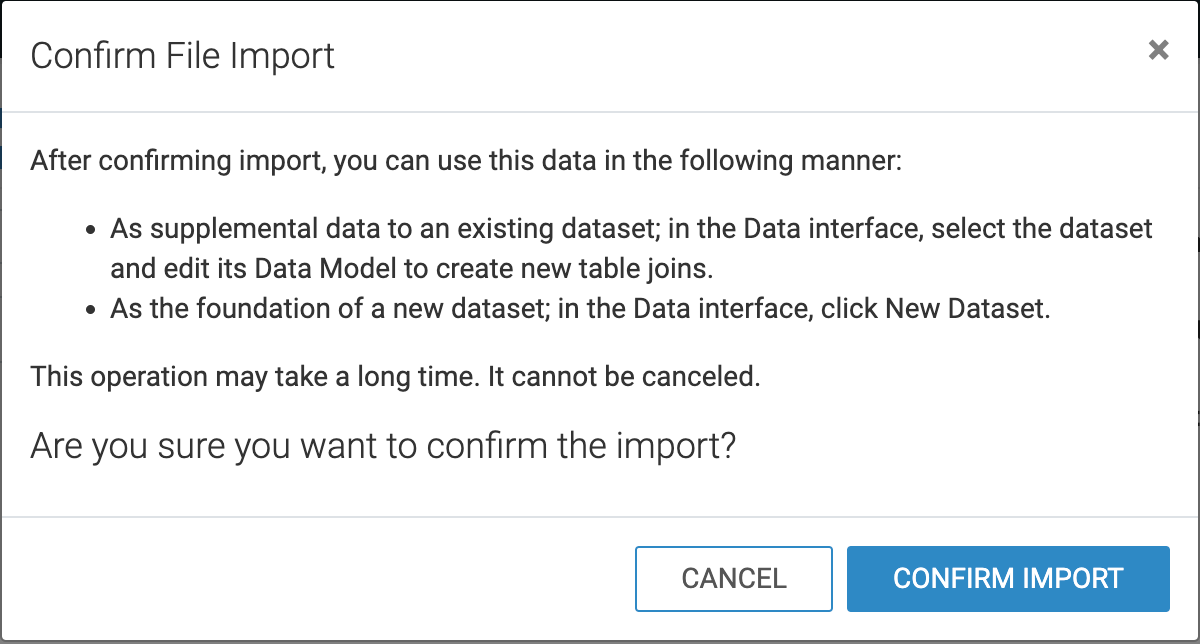
Click CONFIRM IMPORT.
The Confirm File Import modal window appears, where you have to
click CONFIRM IMPORT again to finalize the import.
To verify that the data has been imported correctly into your system, check the
Connection Explorer interface.